Skip to content
  • English
    • French
    • Italian
    • Spanish
    • German
    • Dutch
    • Portuguese (Portugal)
    • Greek
    • Polish
  • English
    • French
    • Italian
    • Spanish
    • German
    • Dutch
    • Portuguese (Portugal)
    • Greek
    • Polish
Logo Avidsen
  • Products
    • Products
    • Avidsen Brand
    • Extel Brand
    • Philips Brand
    • Thomson Brand
  • Support
    • Tutorials on repair and use
    • Avidsen Technical Support
    • Extel brand technical support
    • Philips technical support
    • Thomson Technical Support
  • The Group
    • The Group
    • Contact
  • Ethic Company
  • Where to buy ?
\

Replacing a drive shaft for OREA 500 +.

  1. Home
  2. Replacing a drive shaft for OREA 500 +.

Replacing a drive shaft for OREA 500 +.

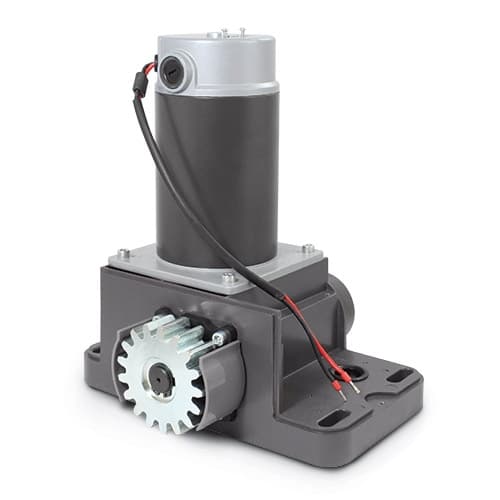
Follow this tutorial to replace the transmission shaft of an OREA 500+ motor

This tutorial is applicable for:

Avidsen - 114457 - Orea 500 Plus / Avidsen - 114460 - Orea 550 / Avidsen - 114461 - Orea Connect / Thomson - 510064 - Swip 500
Difficulté : Good handyman
Temps nécessaire : 30 minutes
Nombre d’étapes : 15
Mise à jour : February 2025

Materials needed:

Circlip pliers, small flathead screwdriver, large flathead screwdriver, Phillips screwdriver, 5 mm BTR wrench, Extractor

Tutorial steps:

Step 1: Remove the clip

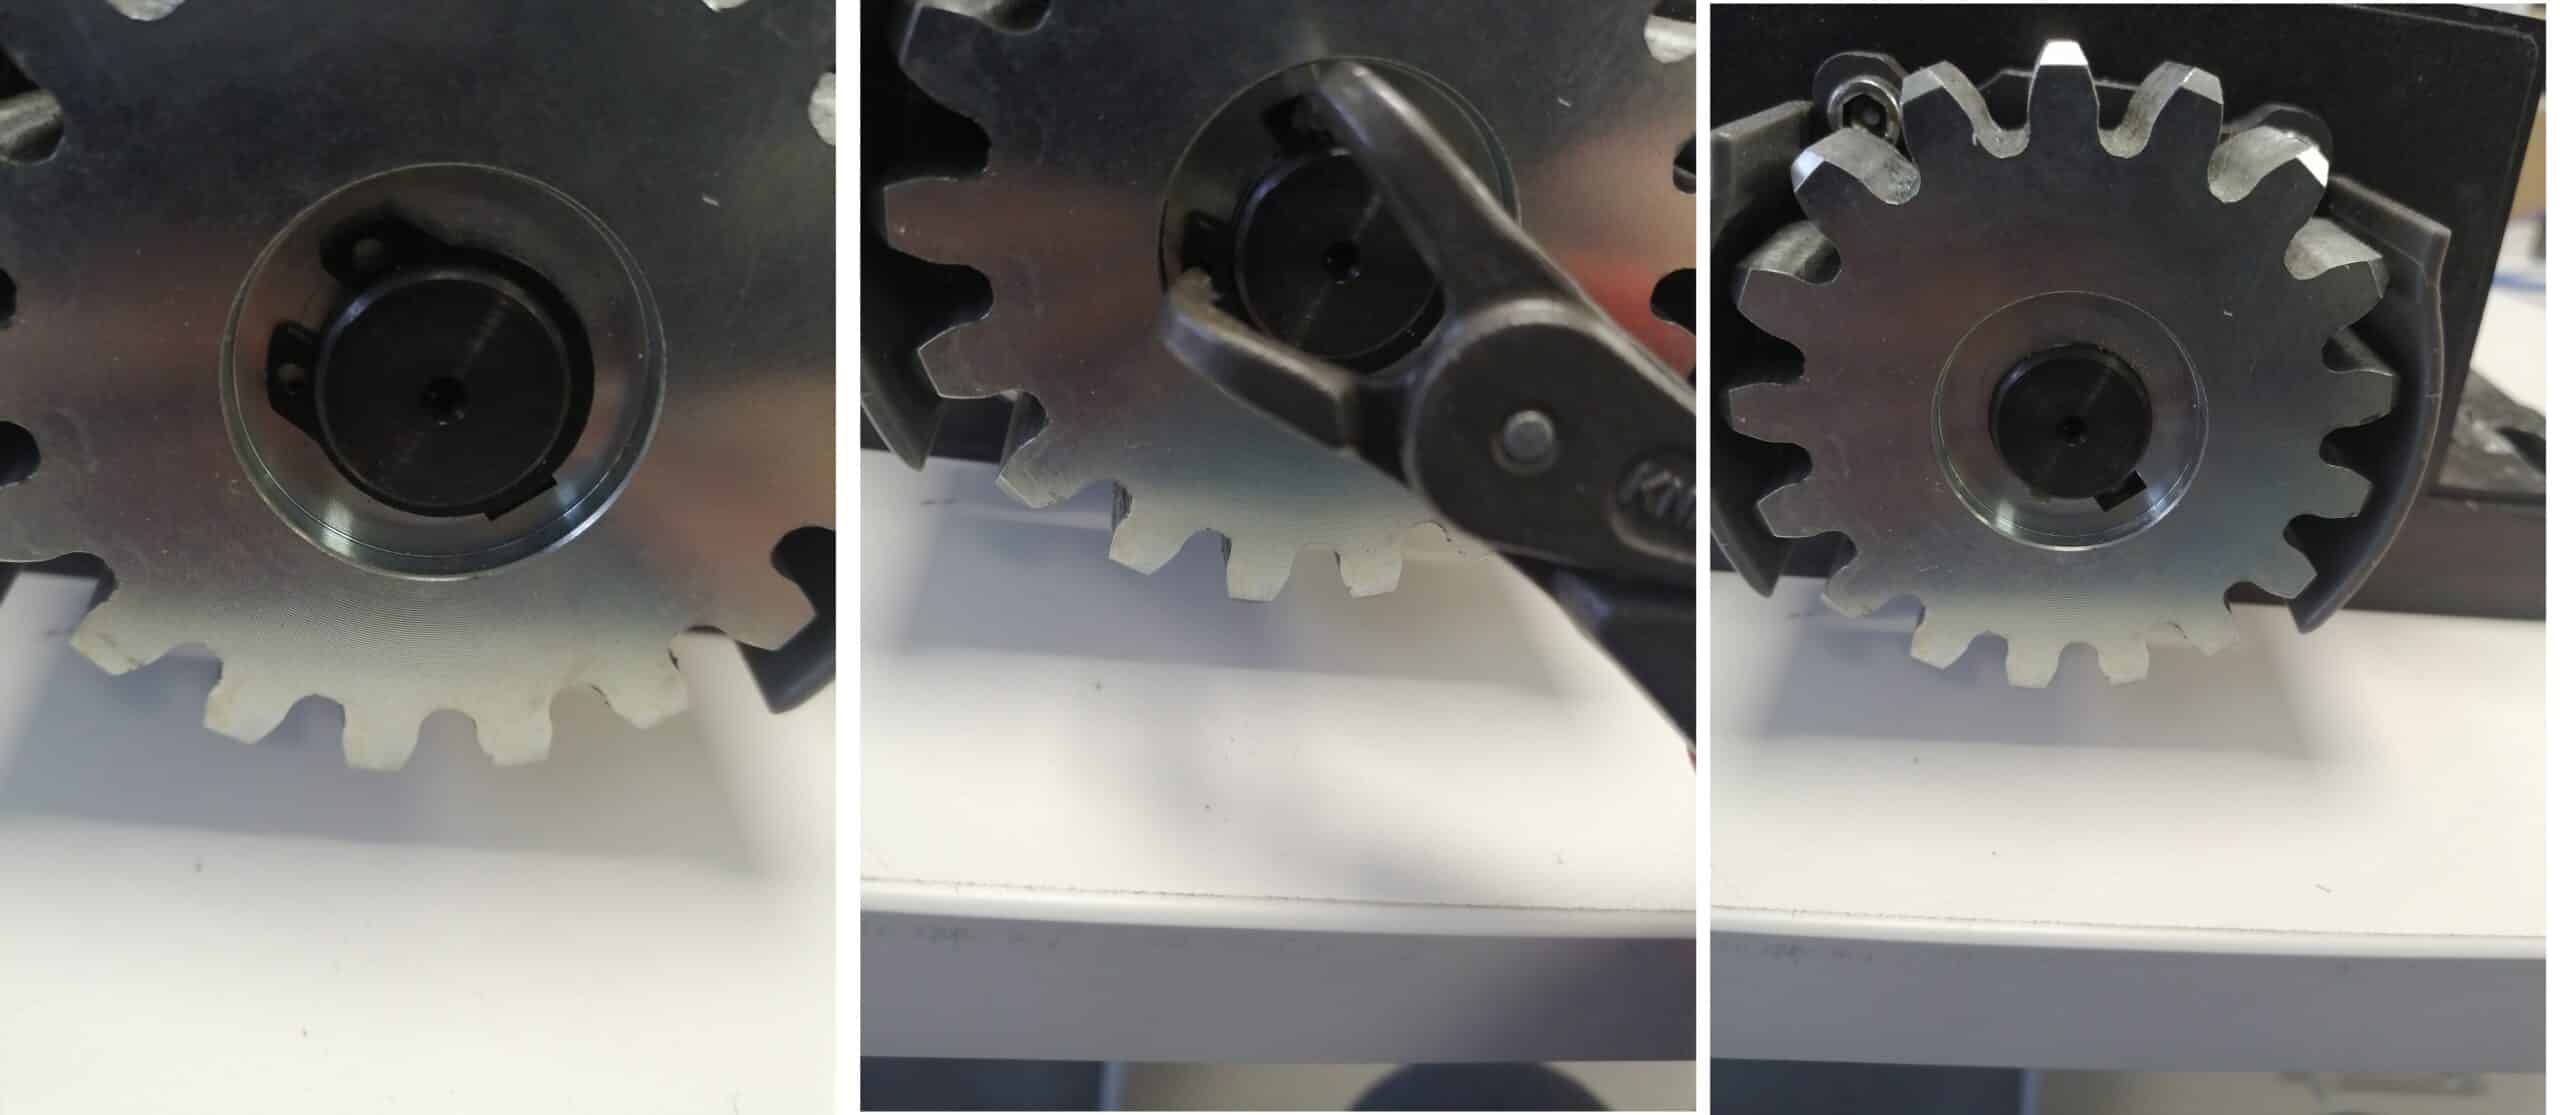
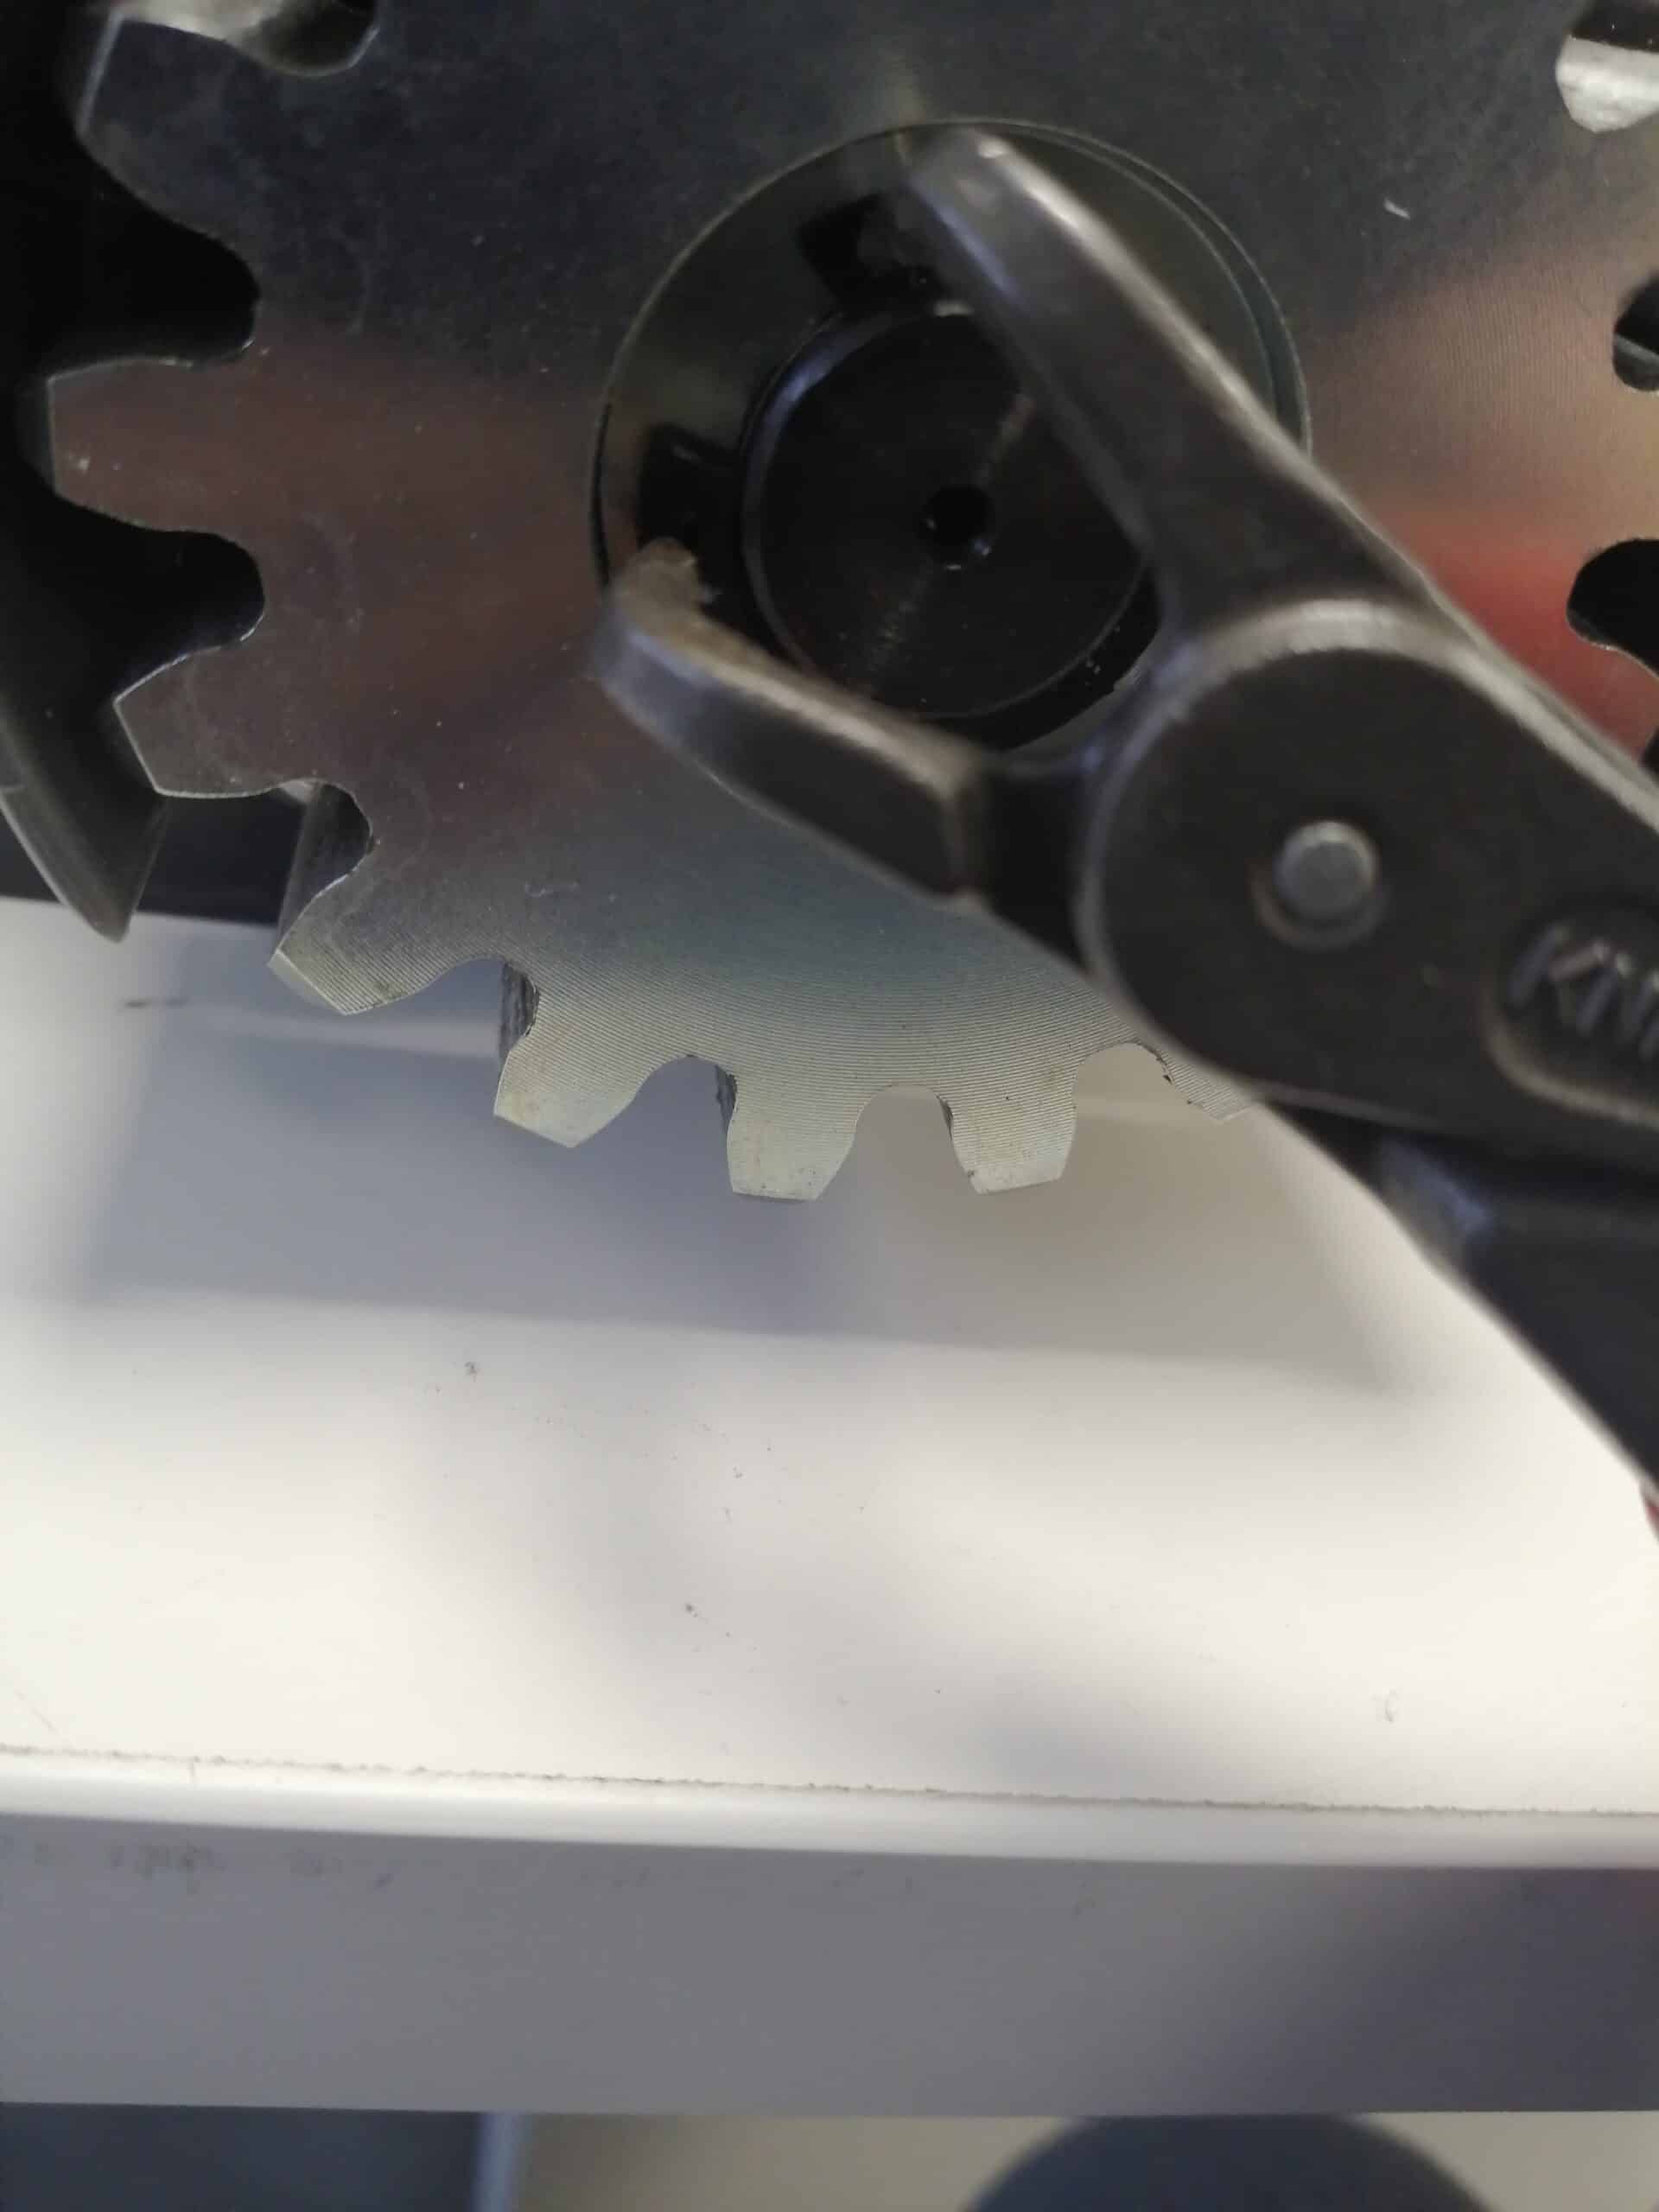
Using circlip pliers, remove the retaining circlip from the gearwheel.

Step 2: Remove the gearwheel

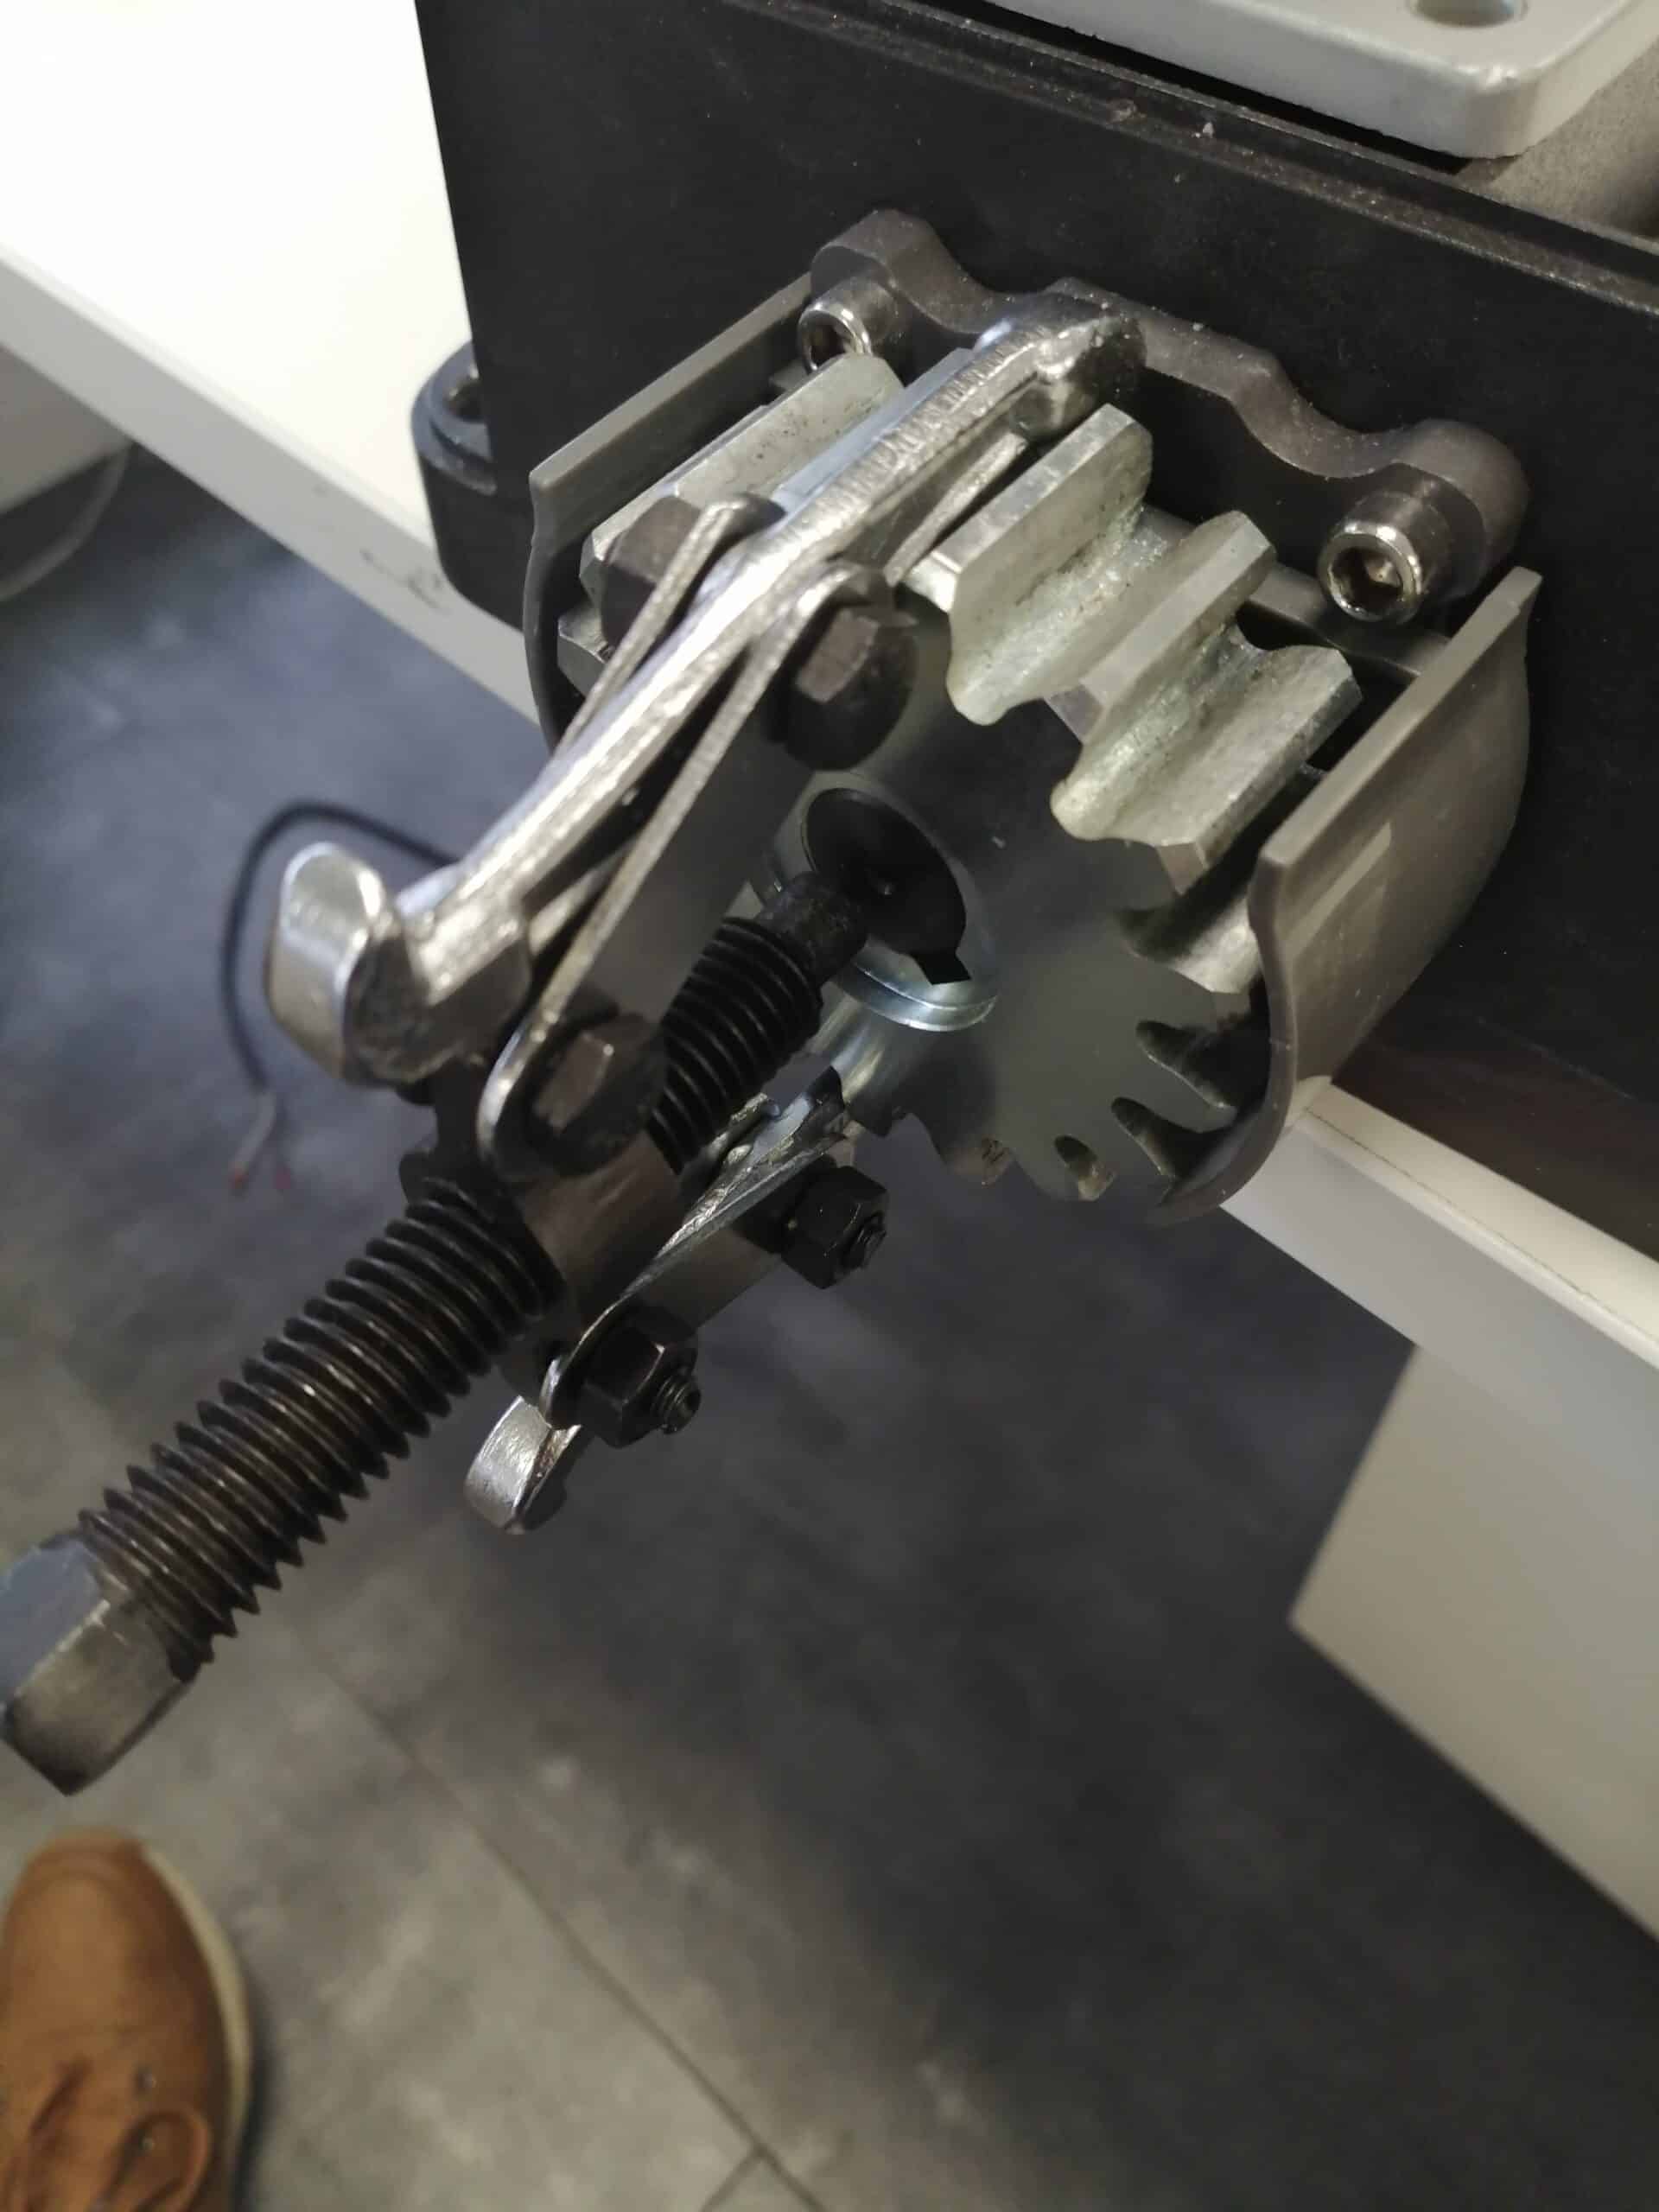
Remove the gearwheel from the axle. If you are unable to remove the gearwheel, use an extractor.

WARNING!

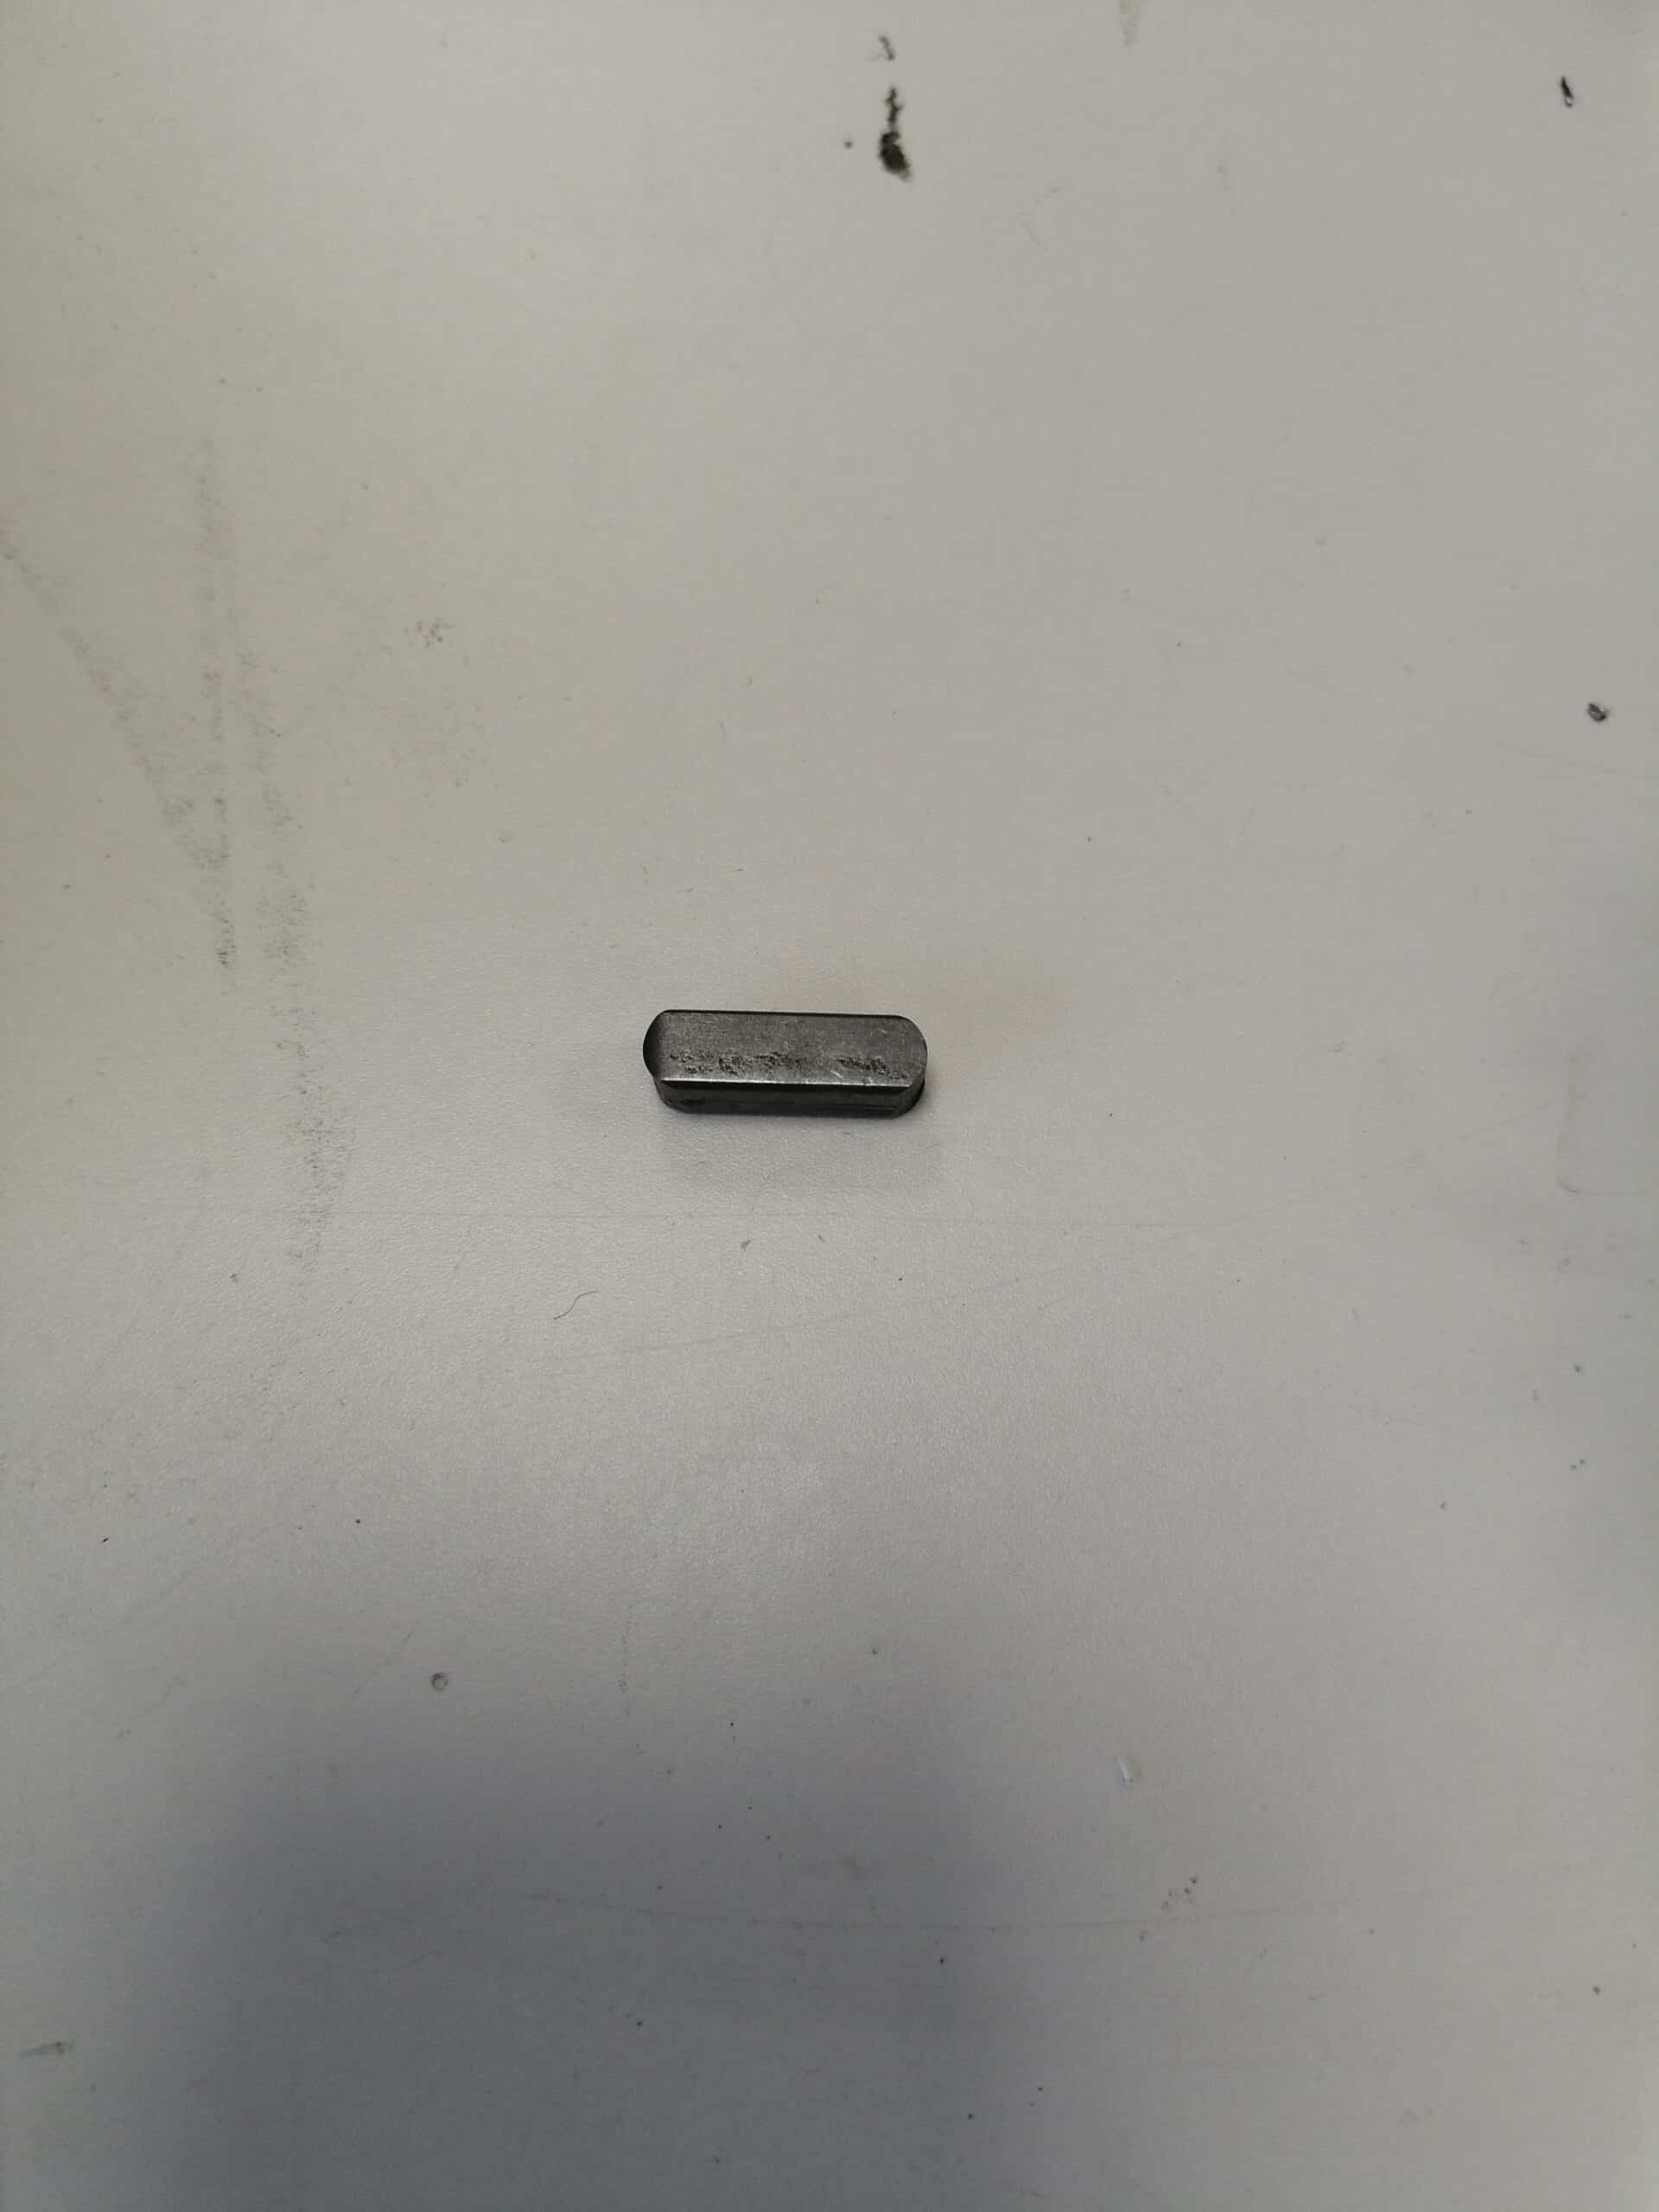
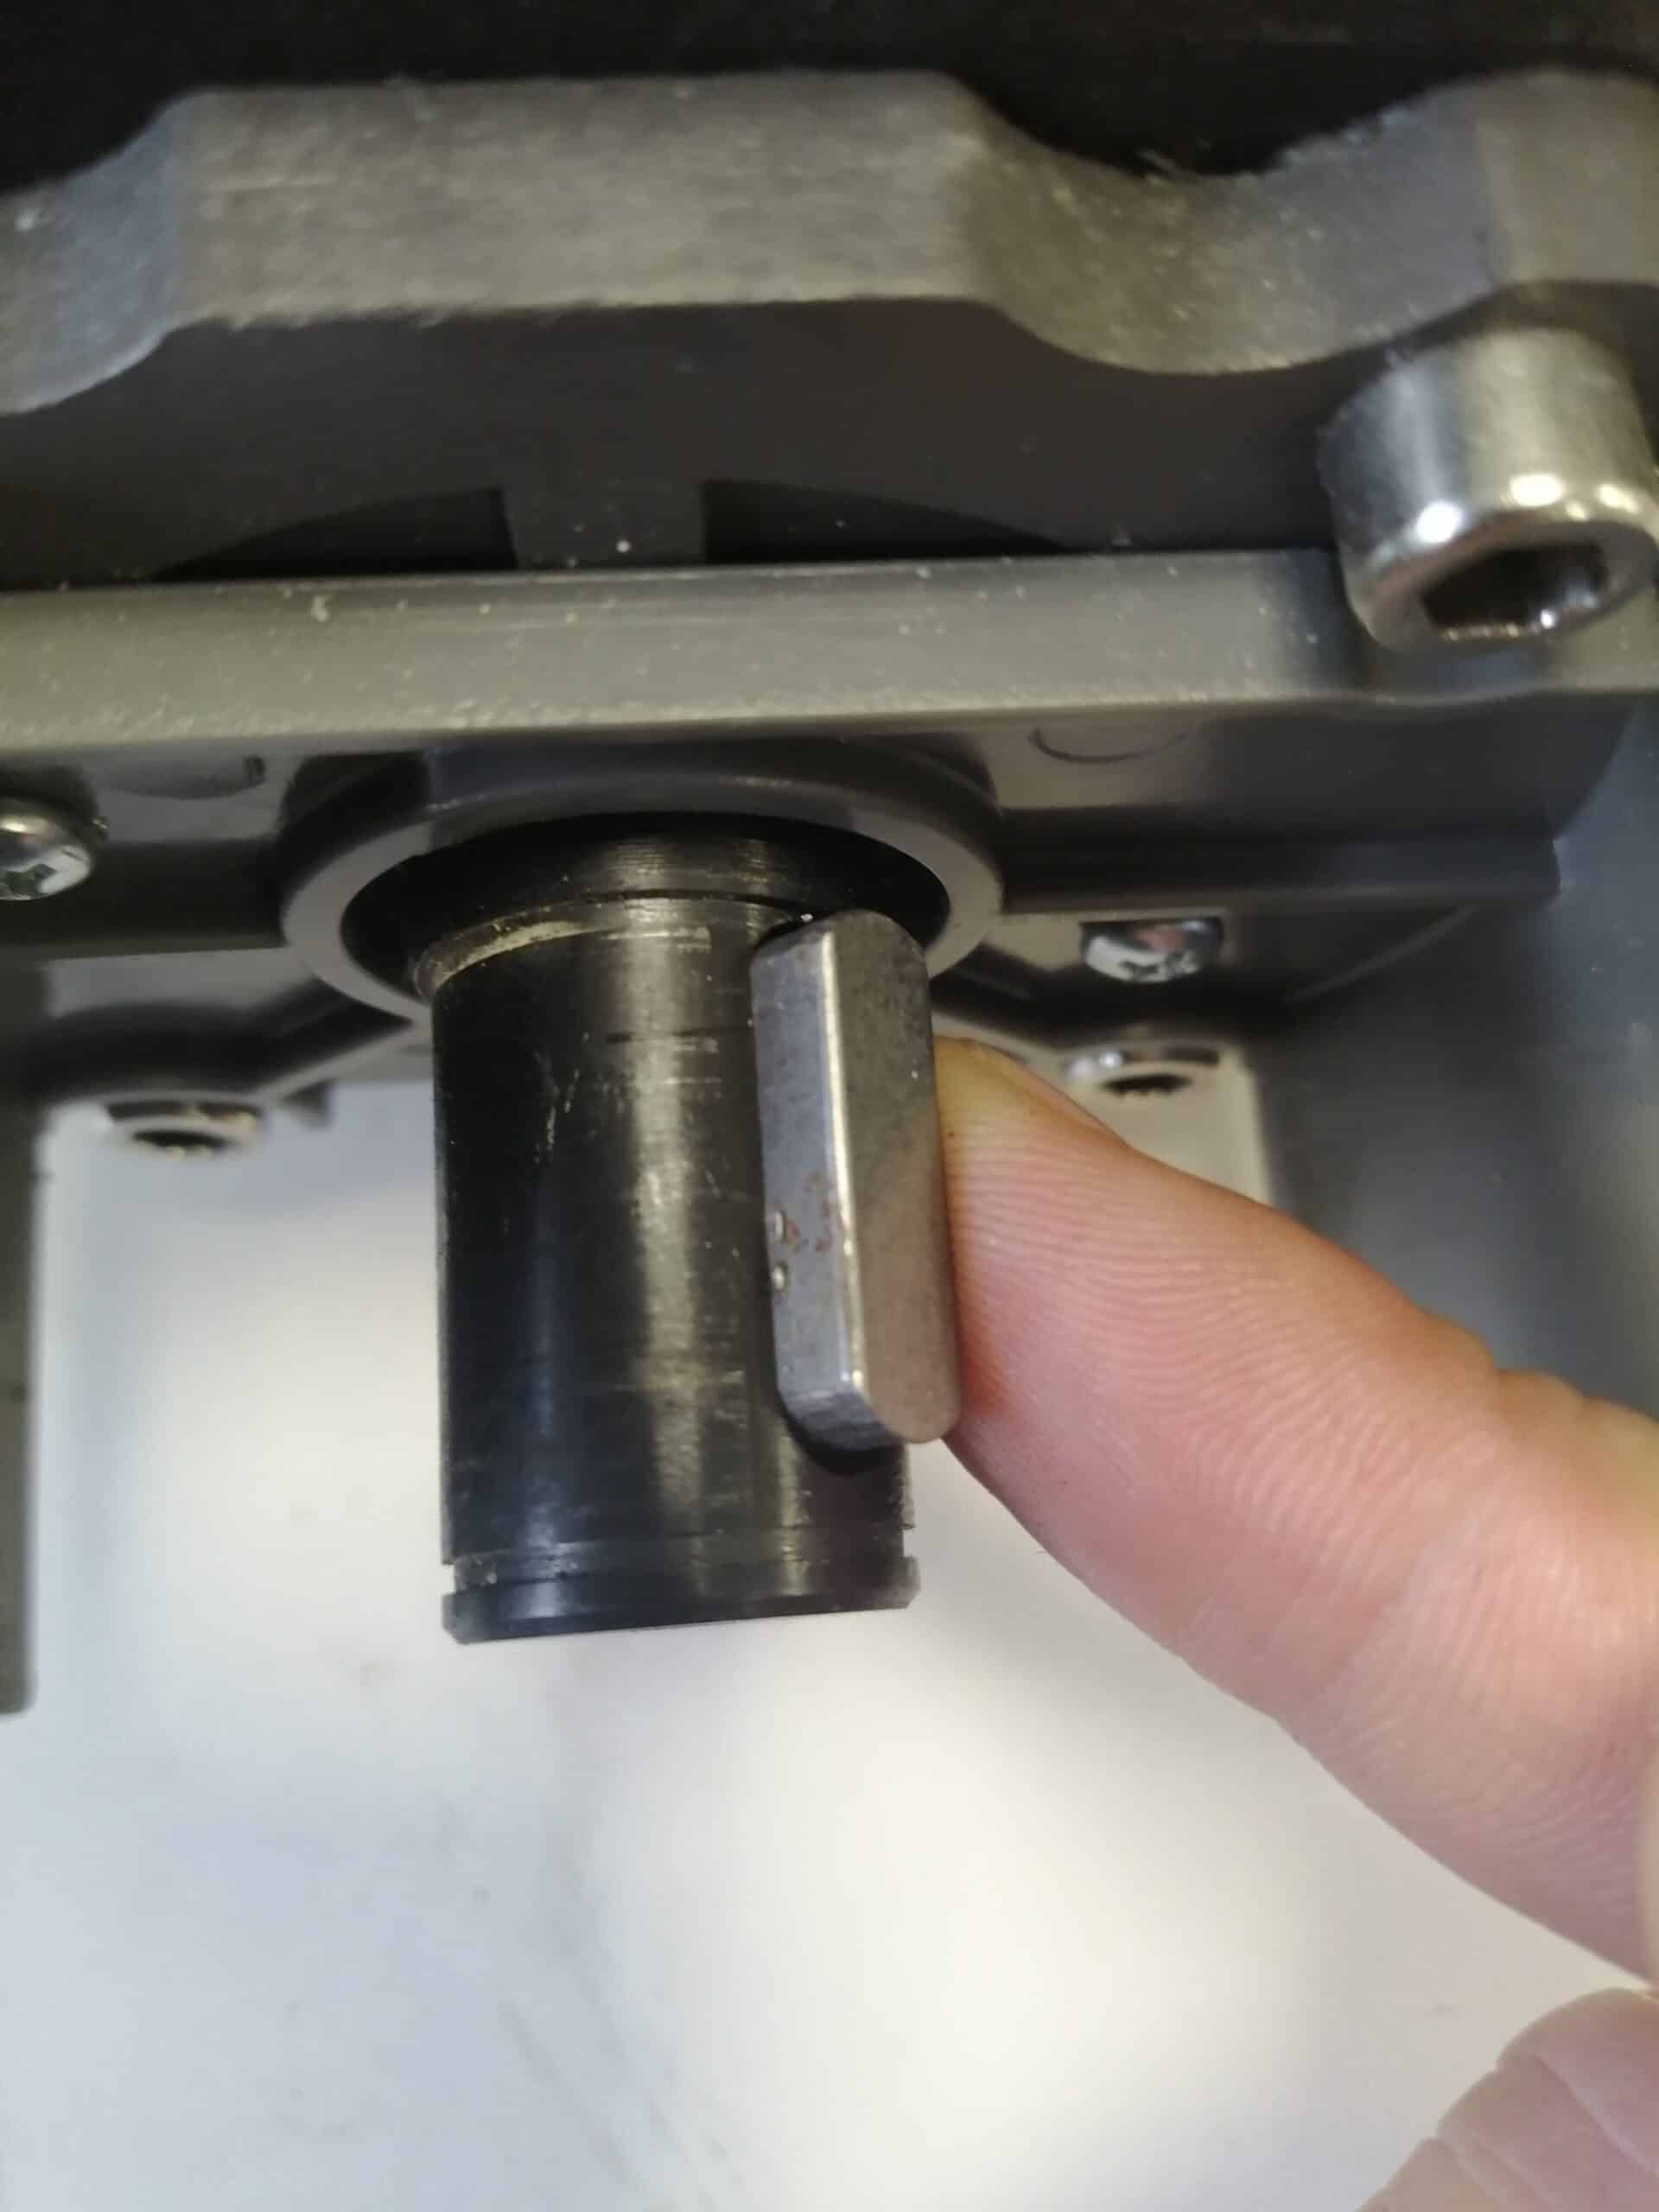
Don’t lose this little metal bar which links the gearwheel to the drive shaft.

It may fall off when the gearwheel is removed, or remain on the notch in the drive shaft.

Step 3: Remove the wheel guard

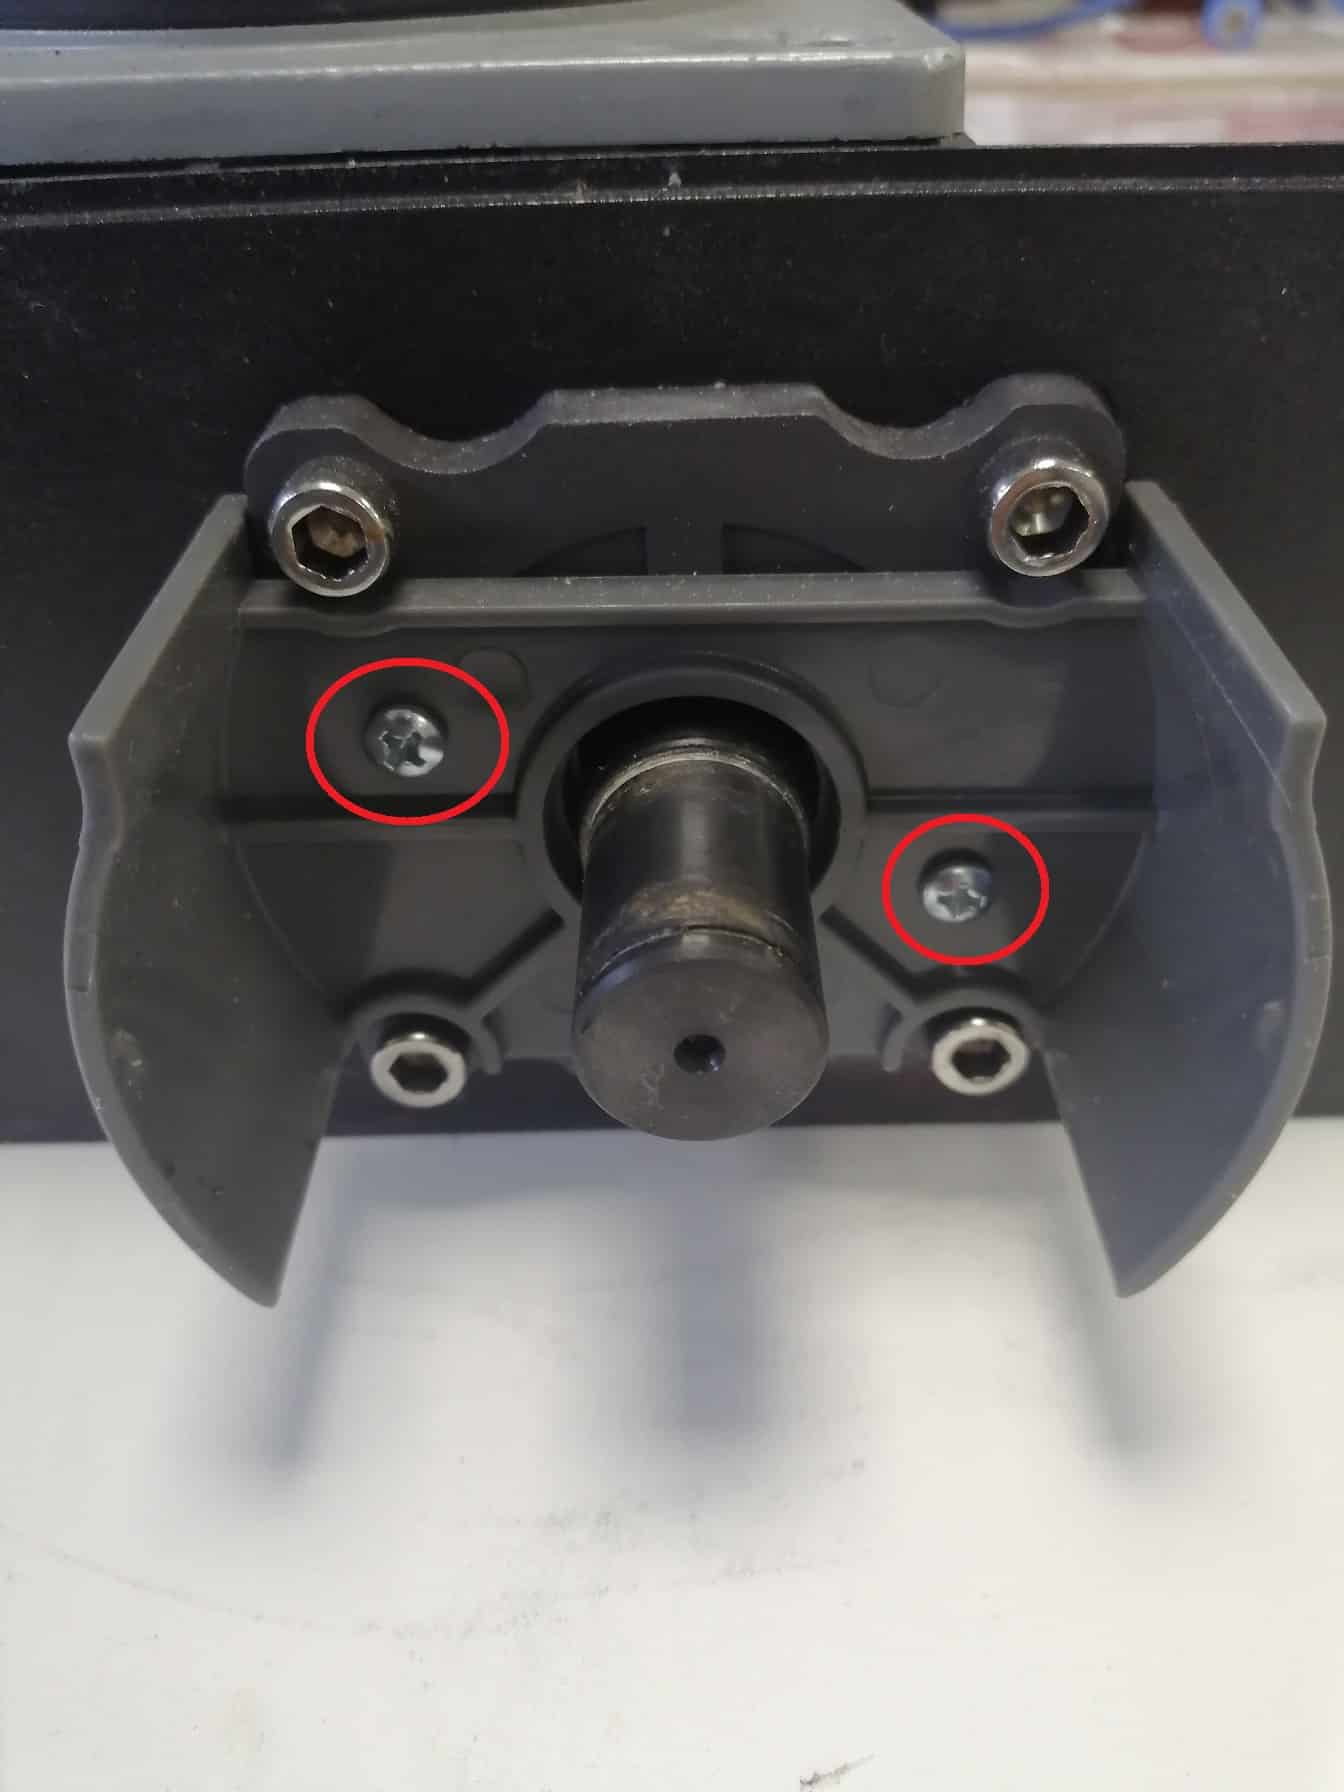
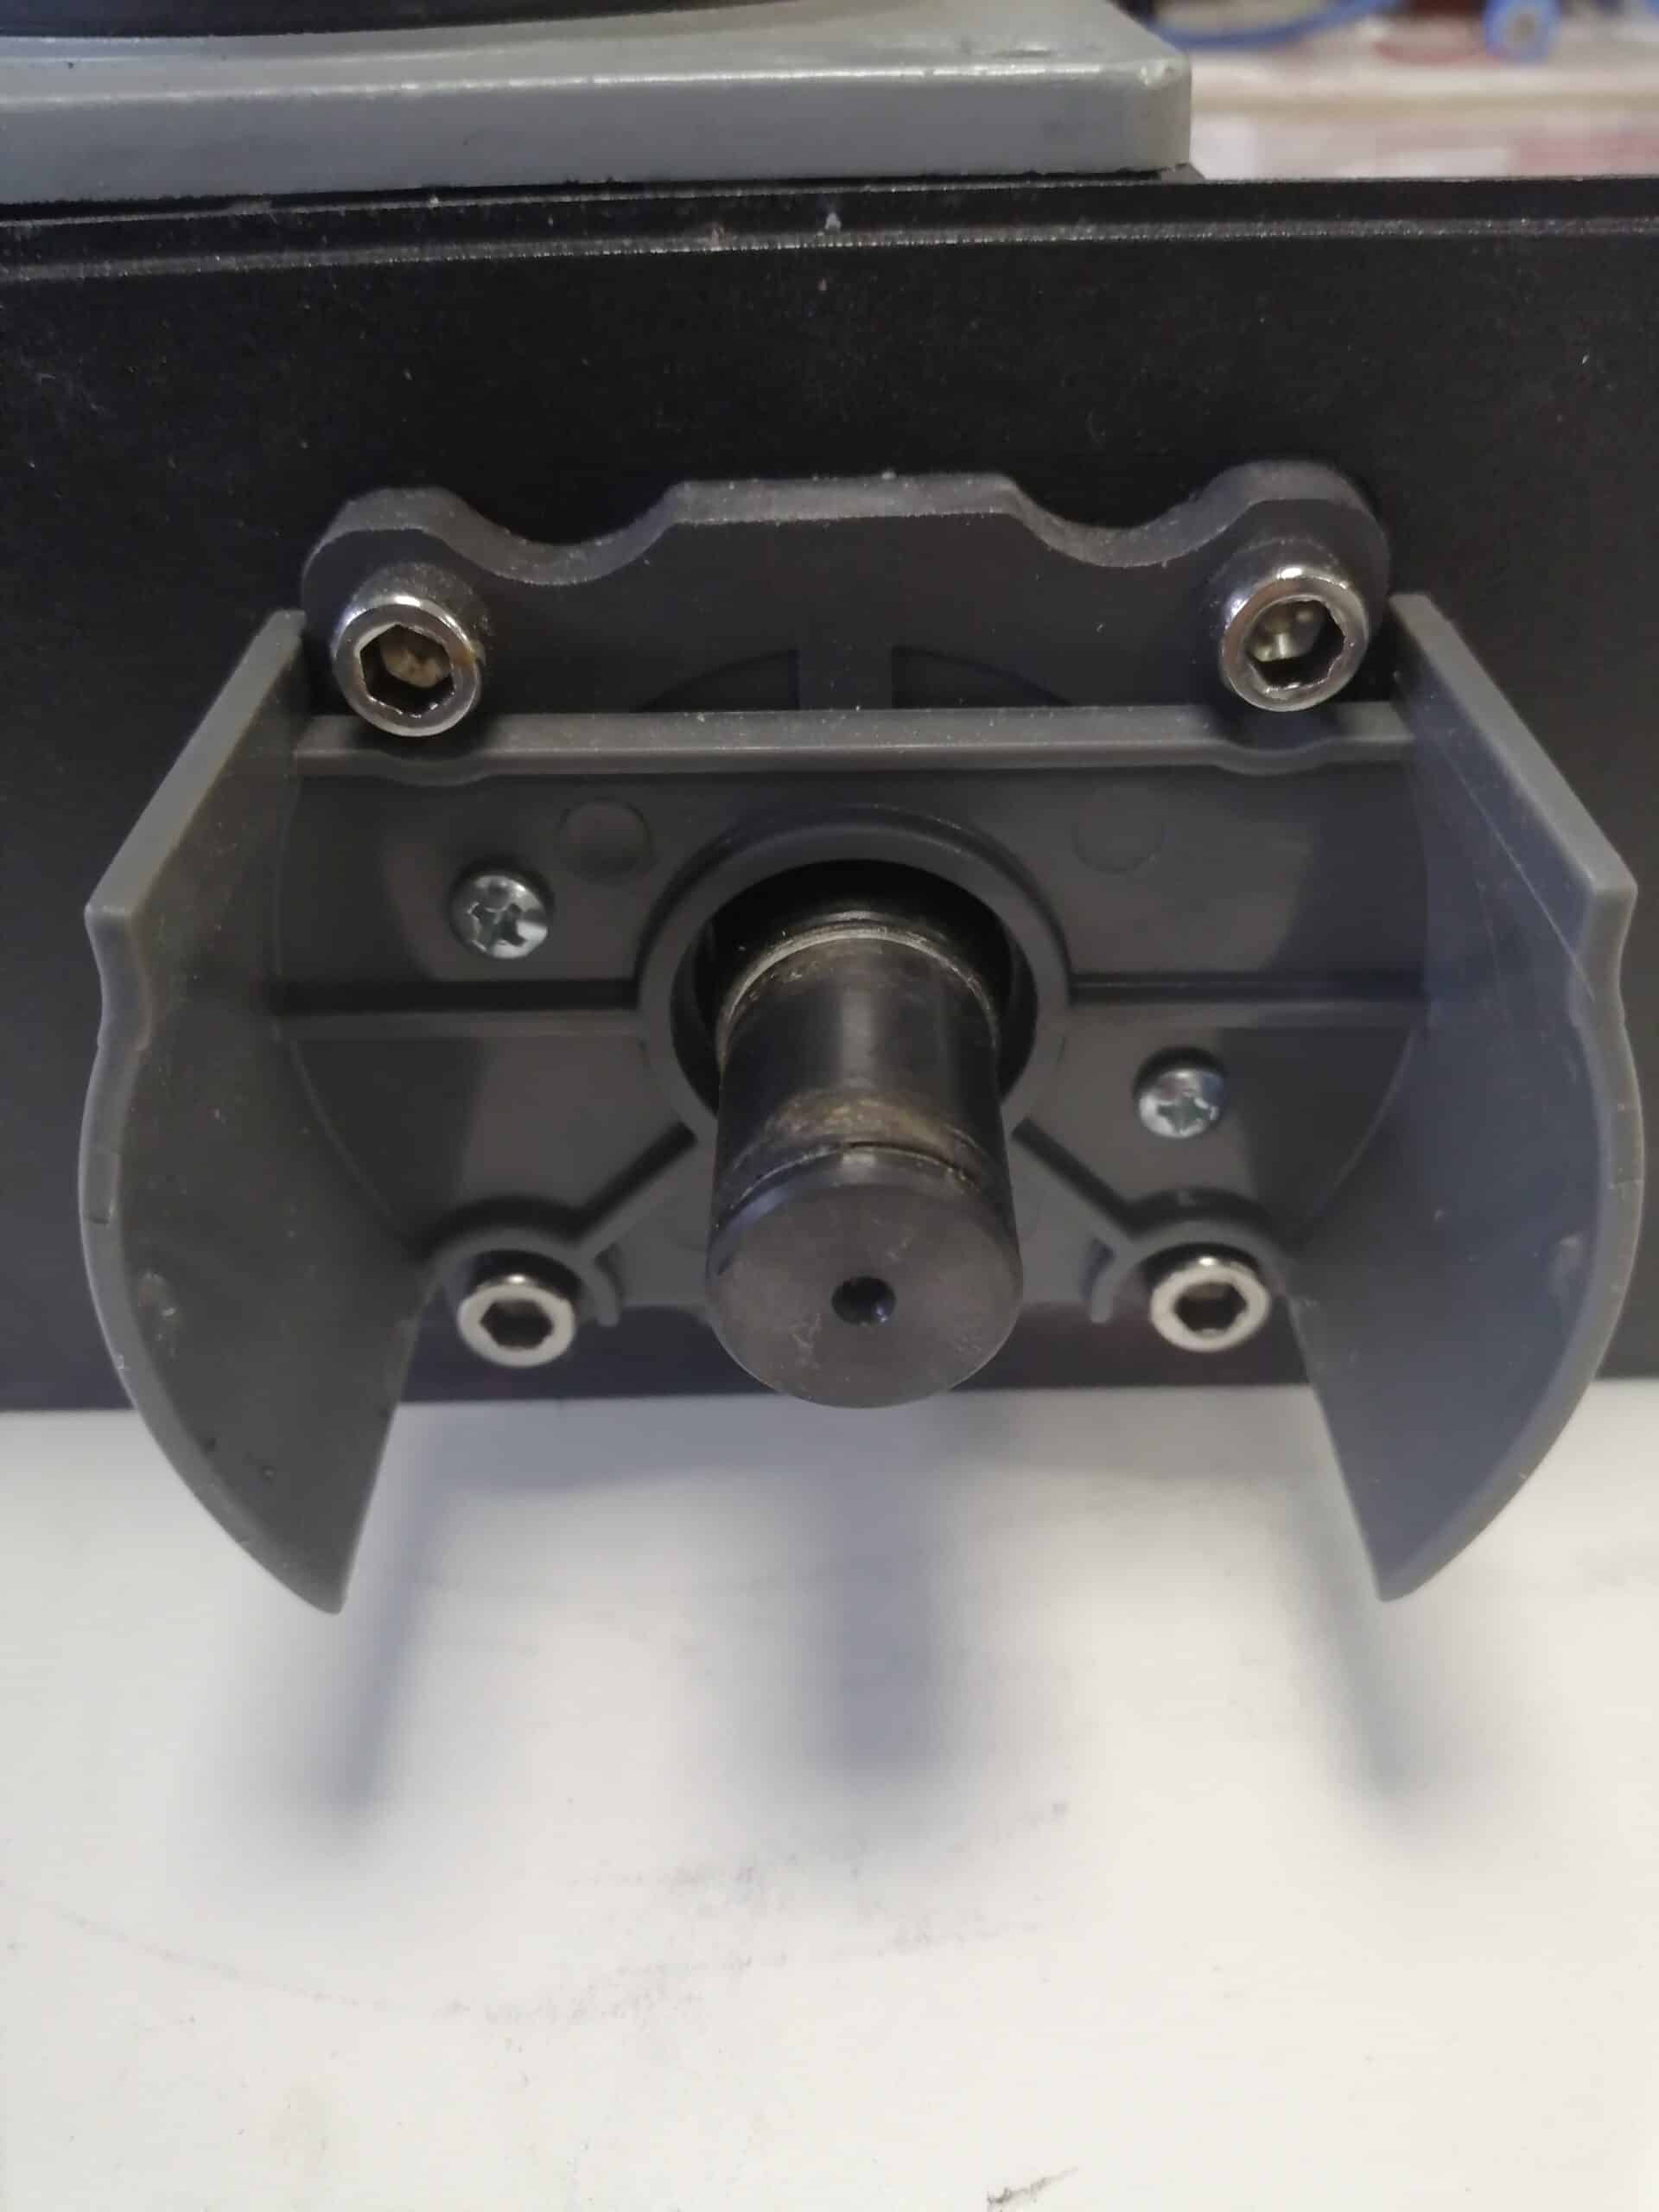
Using a Phillips screwdriver, unscrew the two screws holding the wheel guard in place.

Remove the wheel guard.

Step 4: Remove the axle protection screws

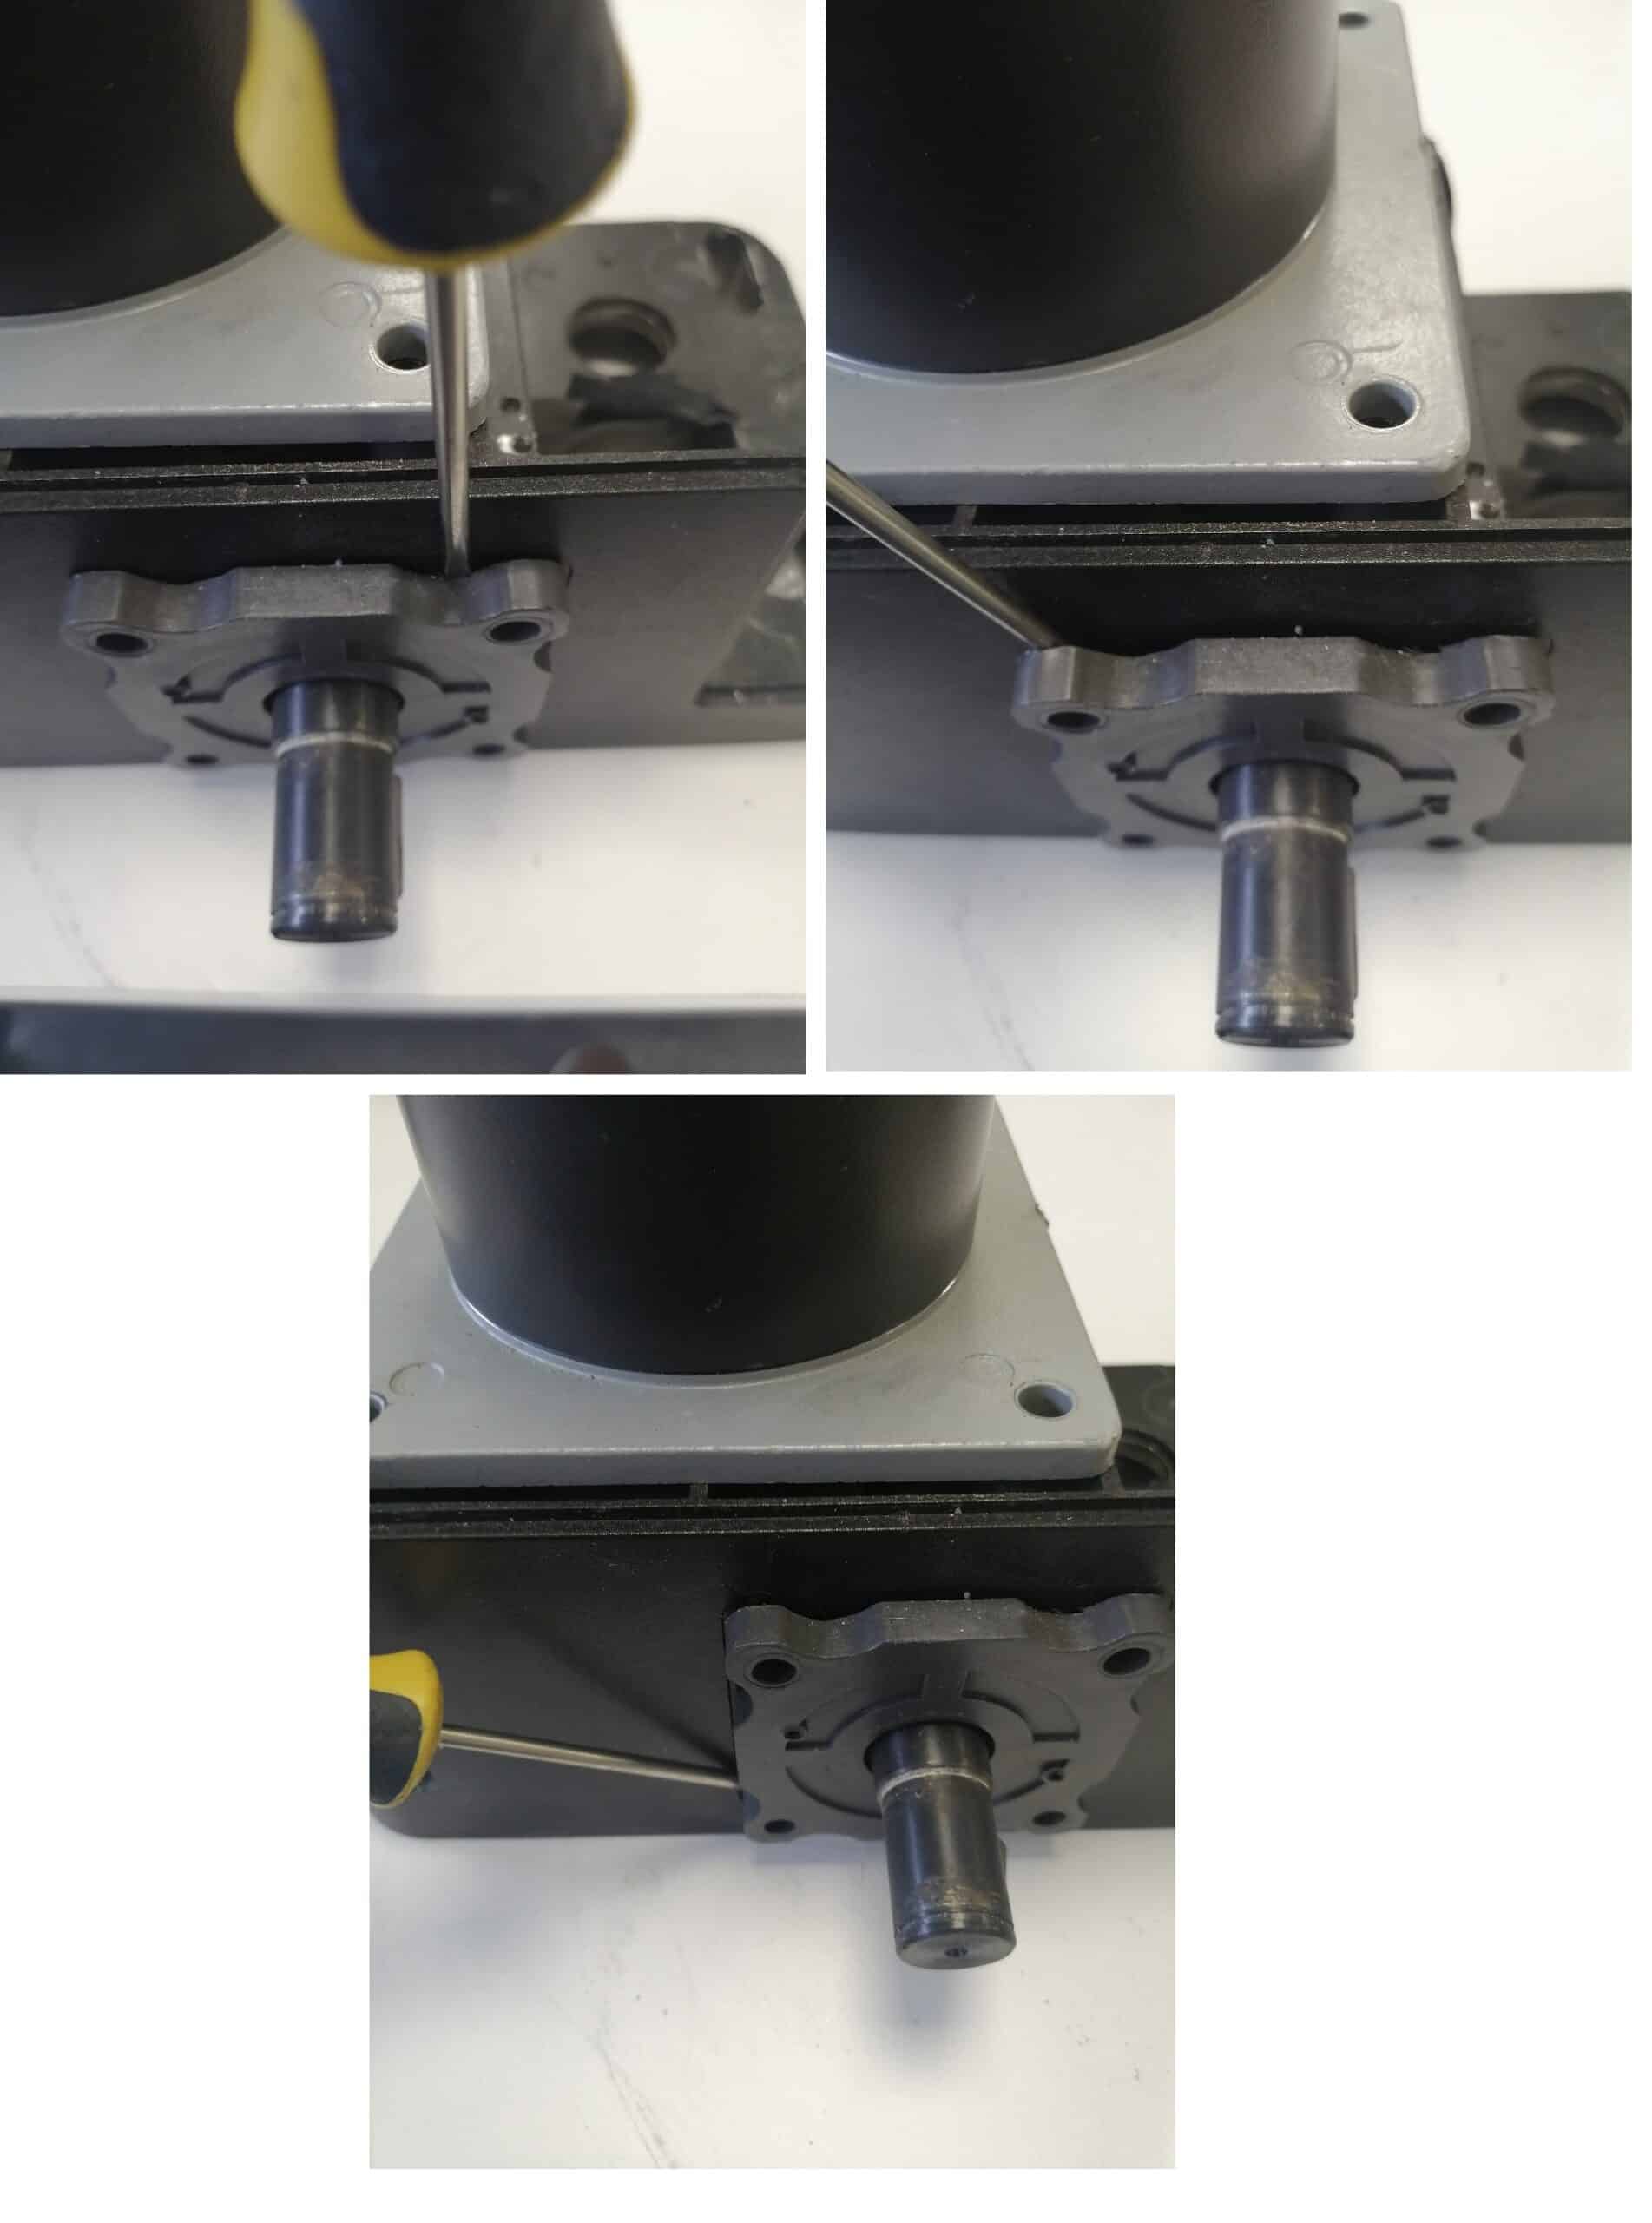
Using a 5 mm Allen key, unscrew the 4 screws securing the axle protection.


Step 5: Preparing the axle protection exit

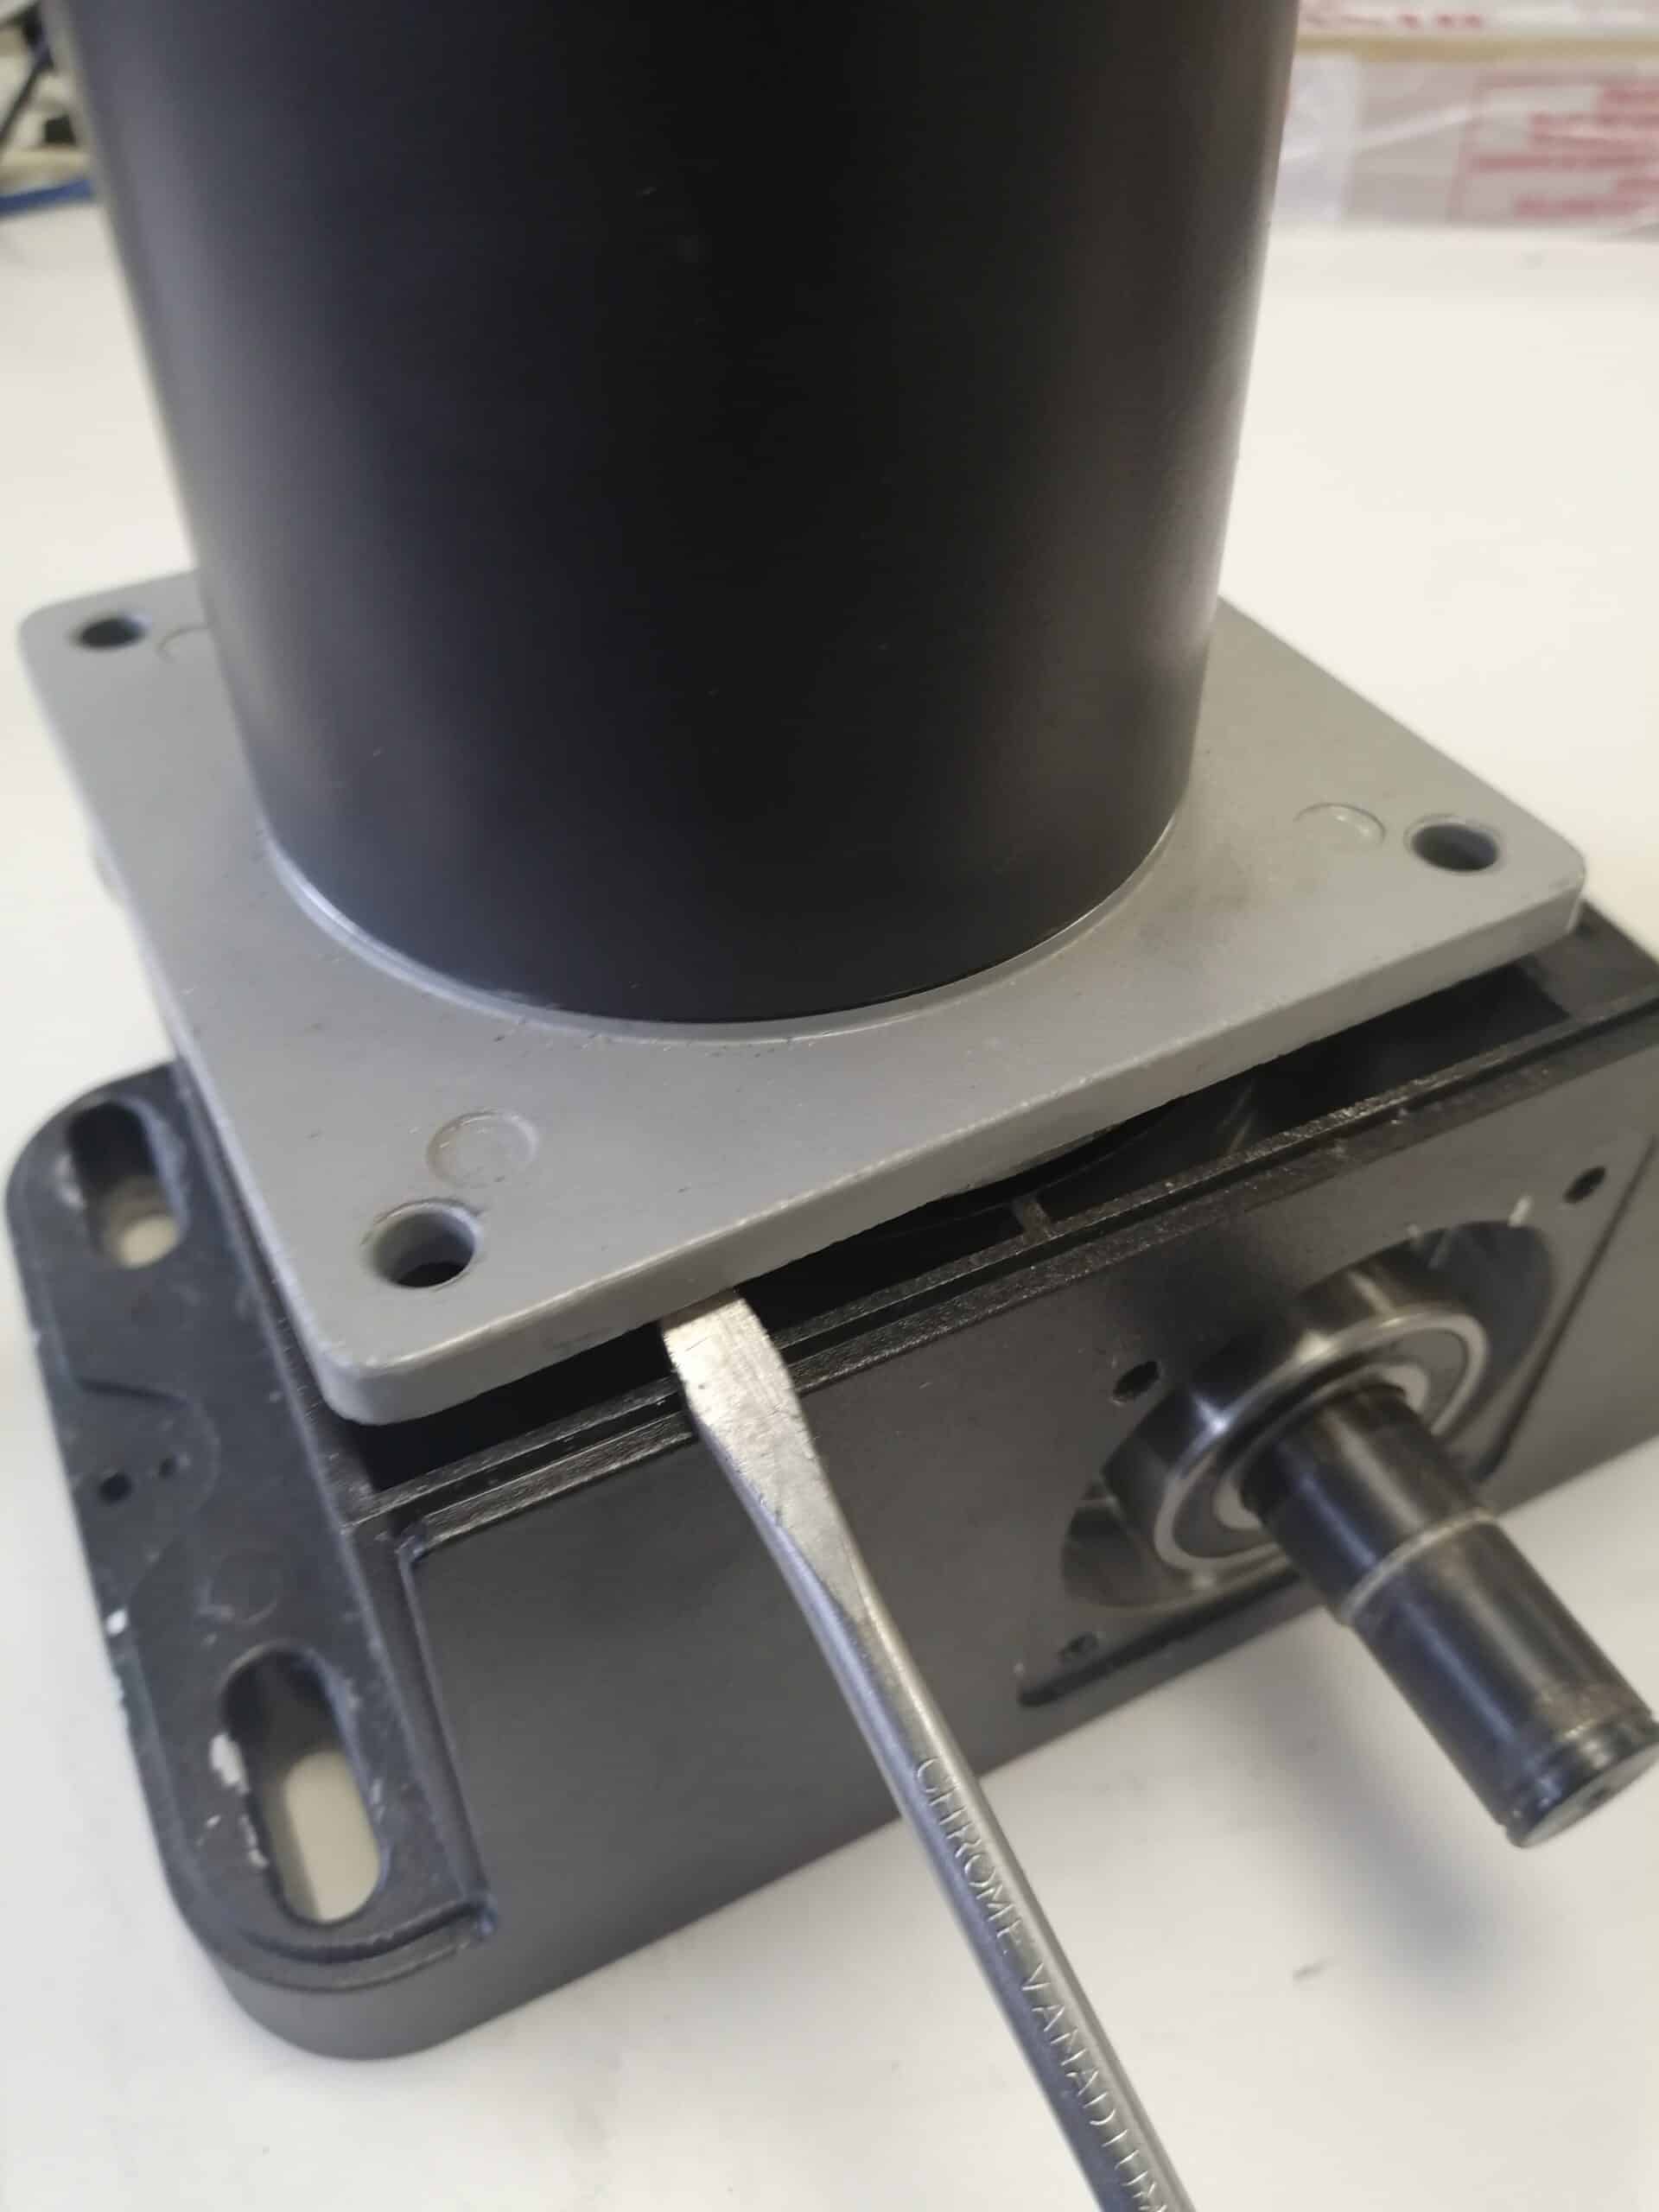
To remove the shaft protector, insert a small flathead screwdriver between the motor block and the shaft protector.

Tap the screwdriver lightly to help it pass between the components. Repeat for each corner of the cover.

Step 6: Remove the guard from the axle

Once a gap has been created, do the same with a larger flathead screwdriver. Use the motor block as a lever to remove the cover.

Step 7: Remove the drive shaft

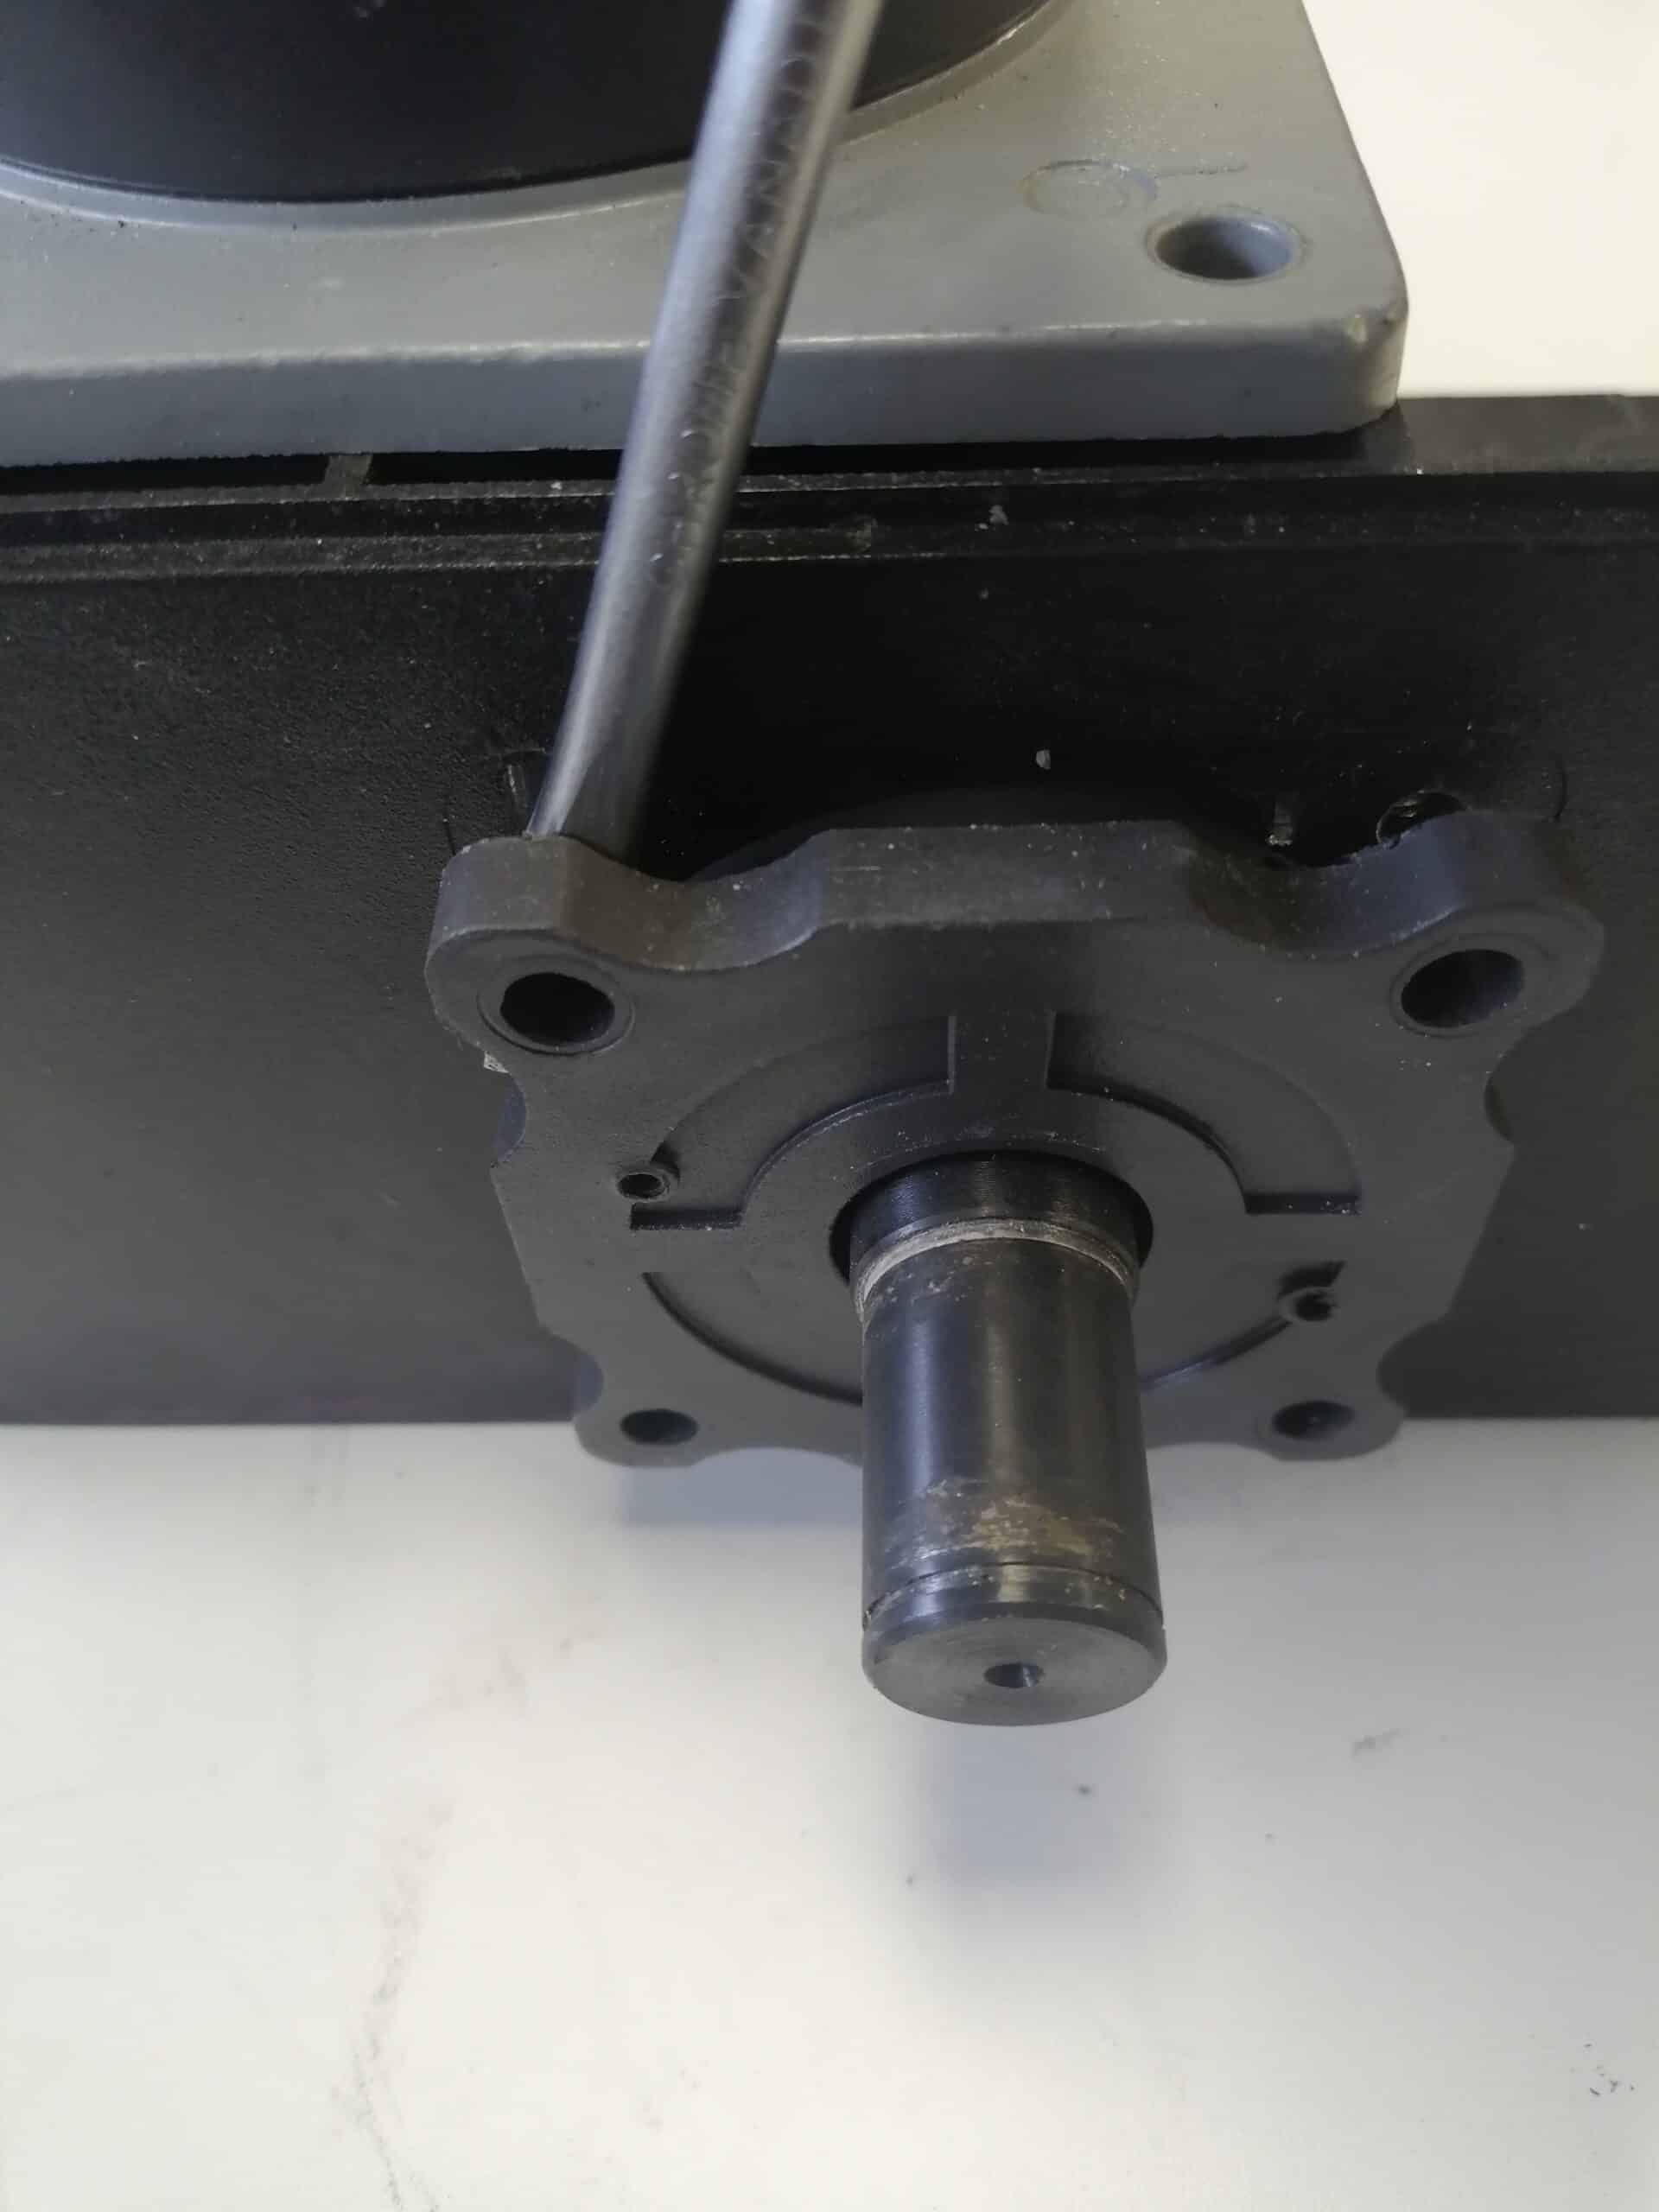
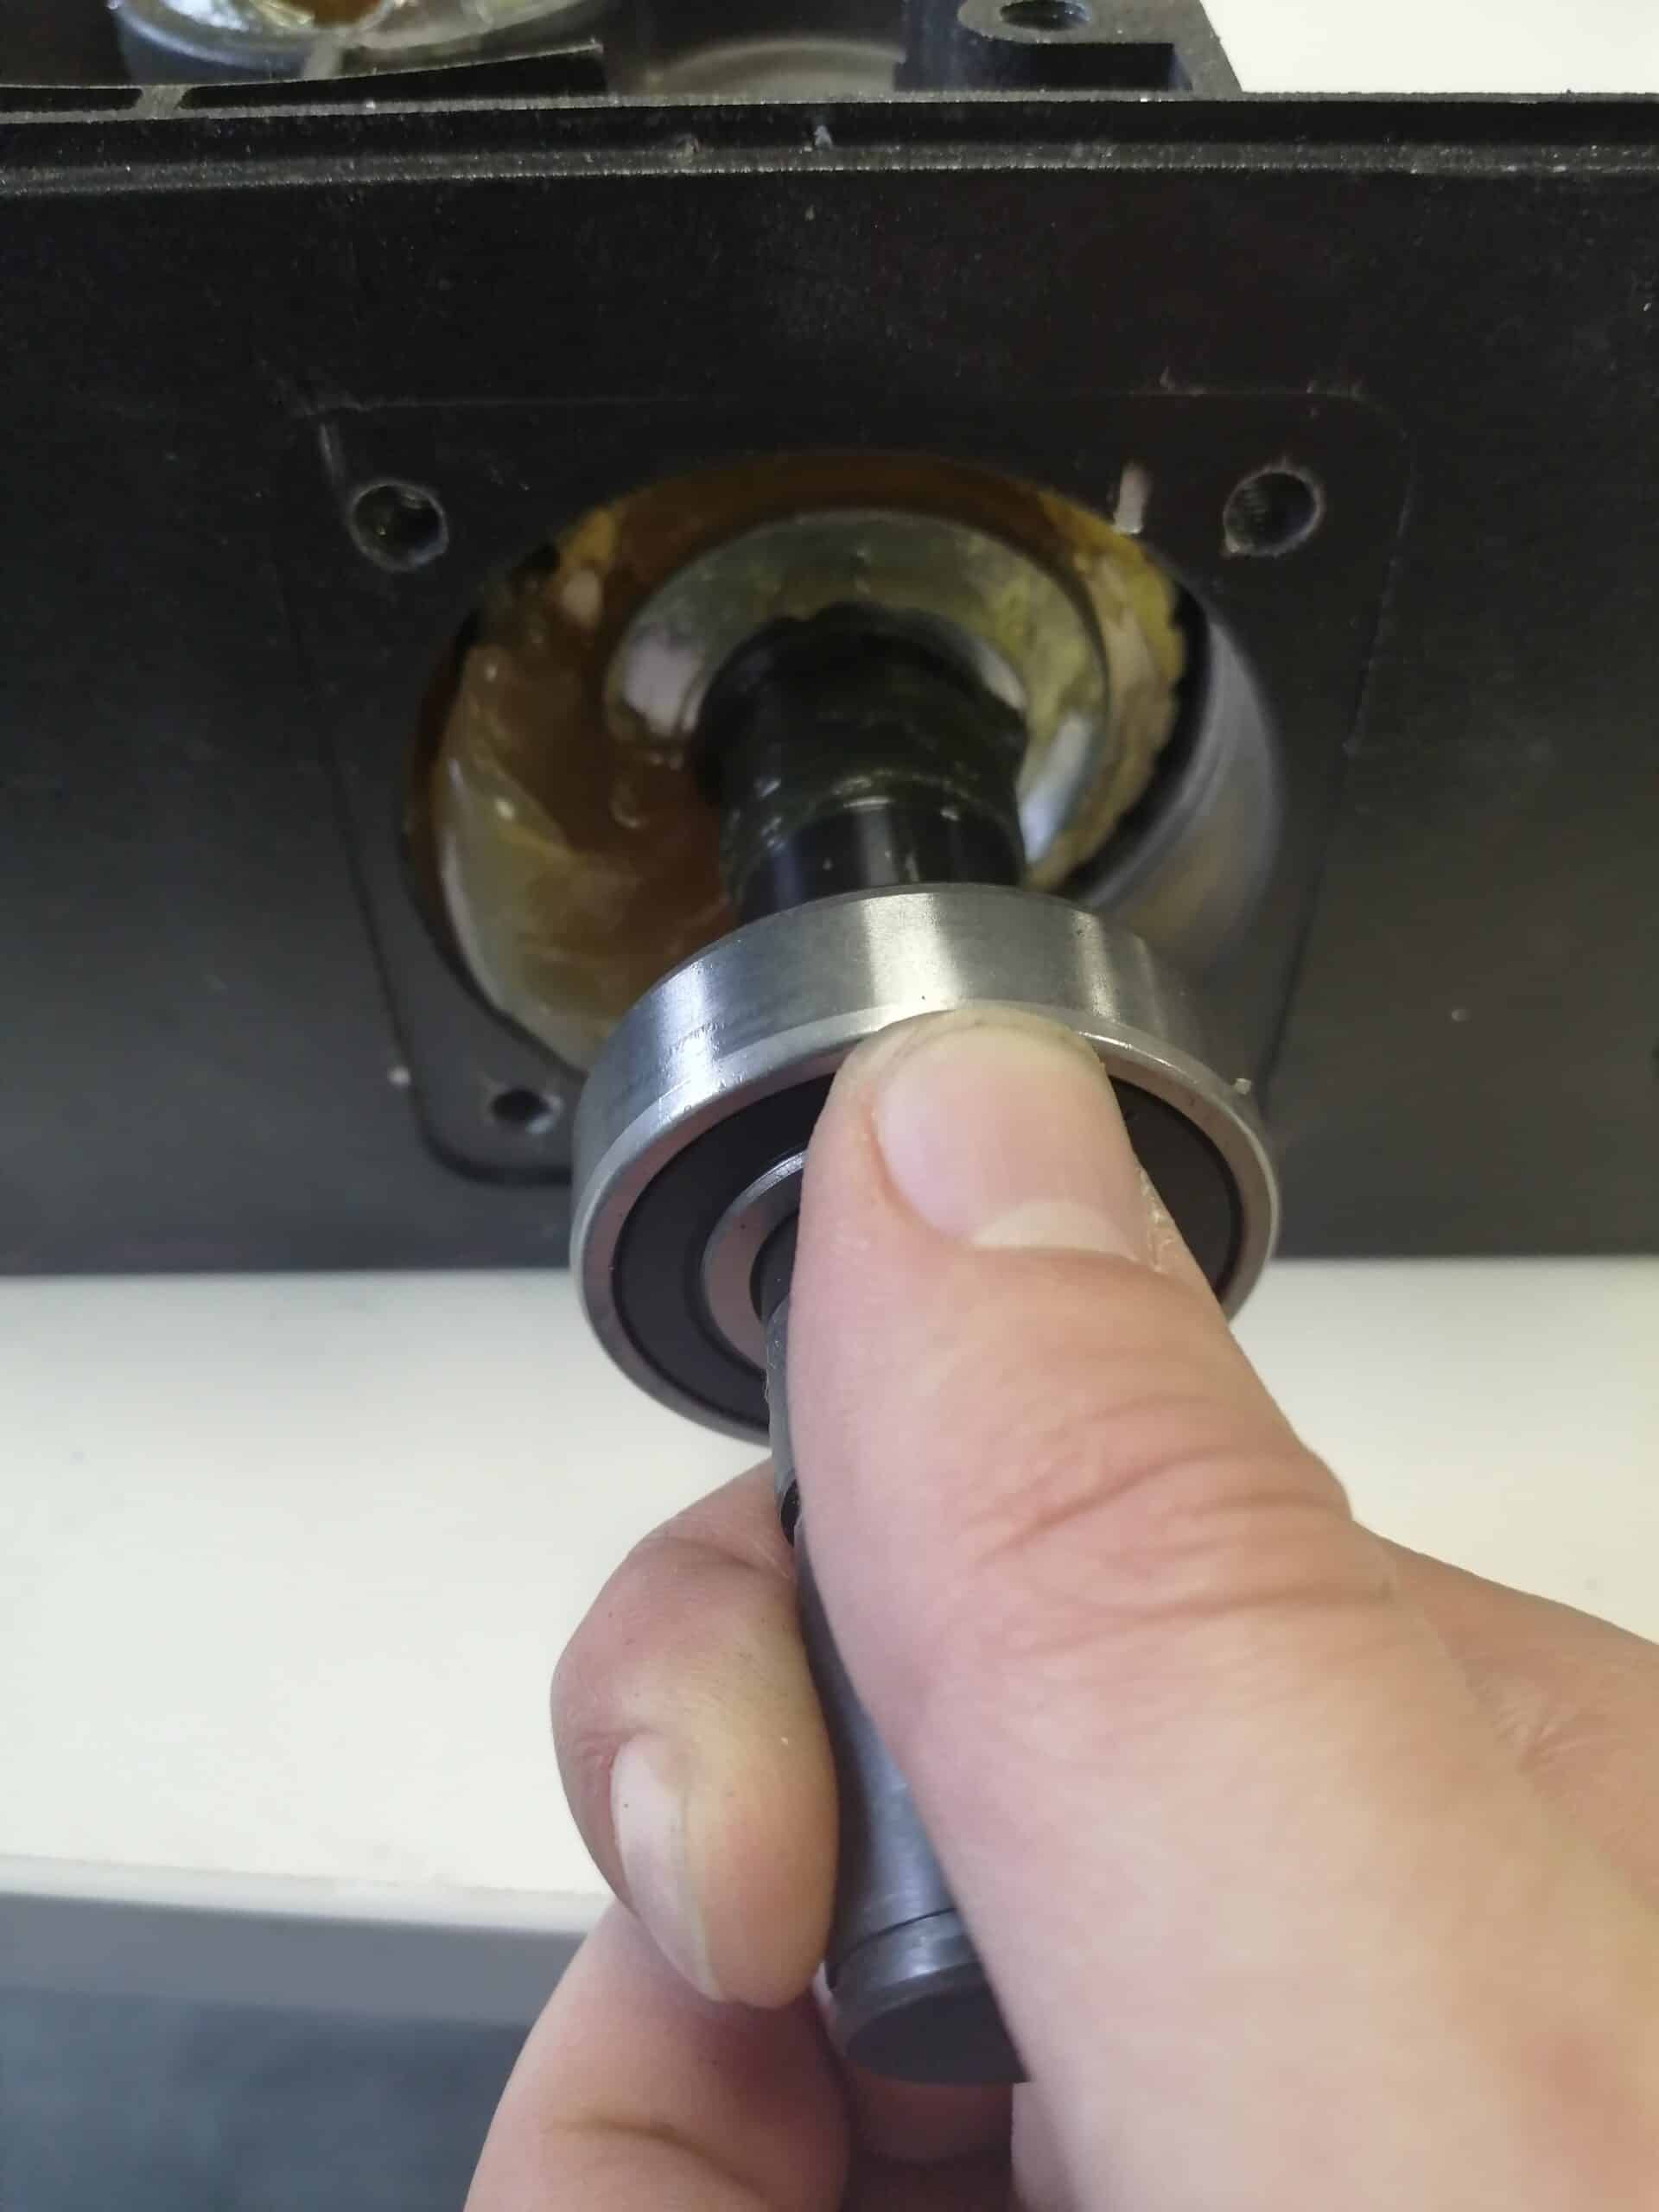
The drive shaft can be extracted.

Advice:

If the drive shaft is hard to pull out, unscrew the 4 screws holding the electric motor in place and lift it slightly to separate it from the shaft.

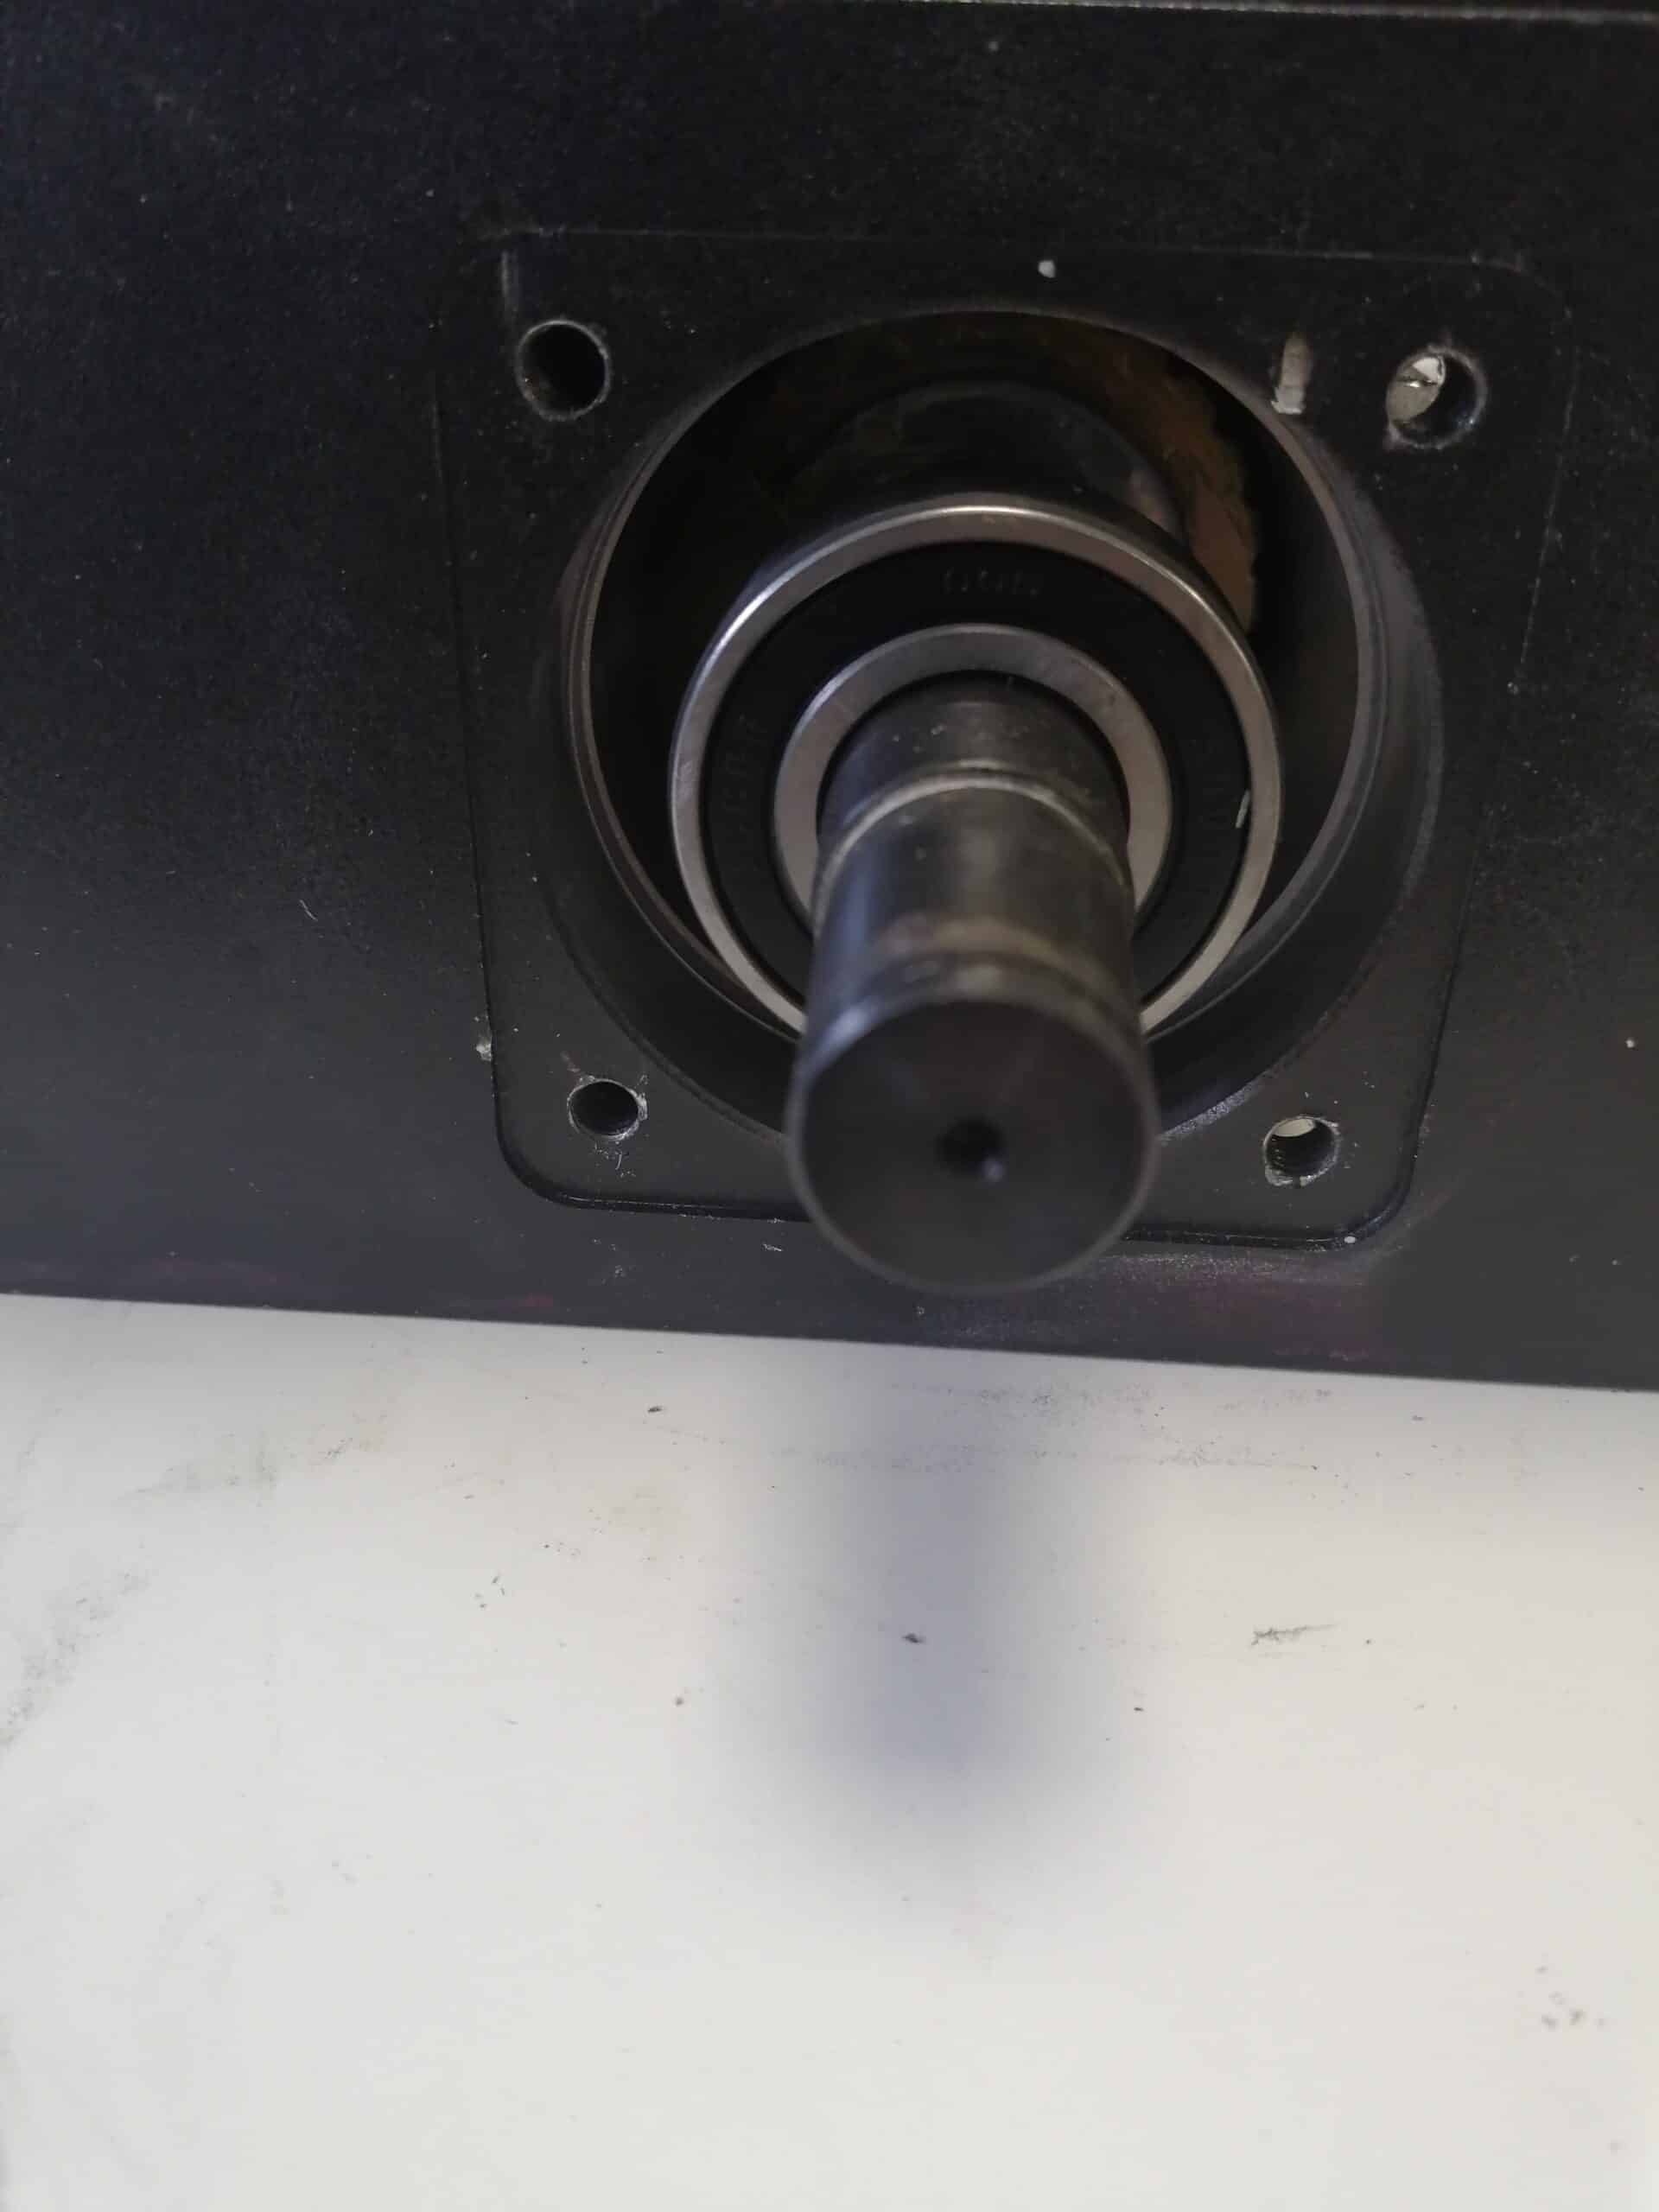
If necessary, you can remove the electric motor completely from the block.
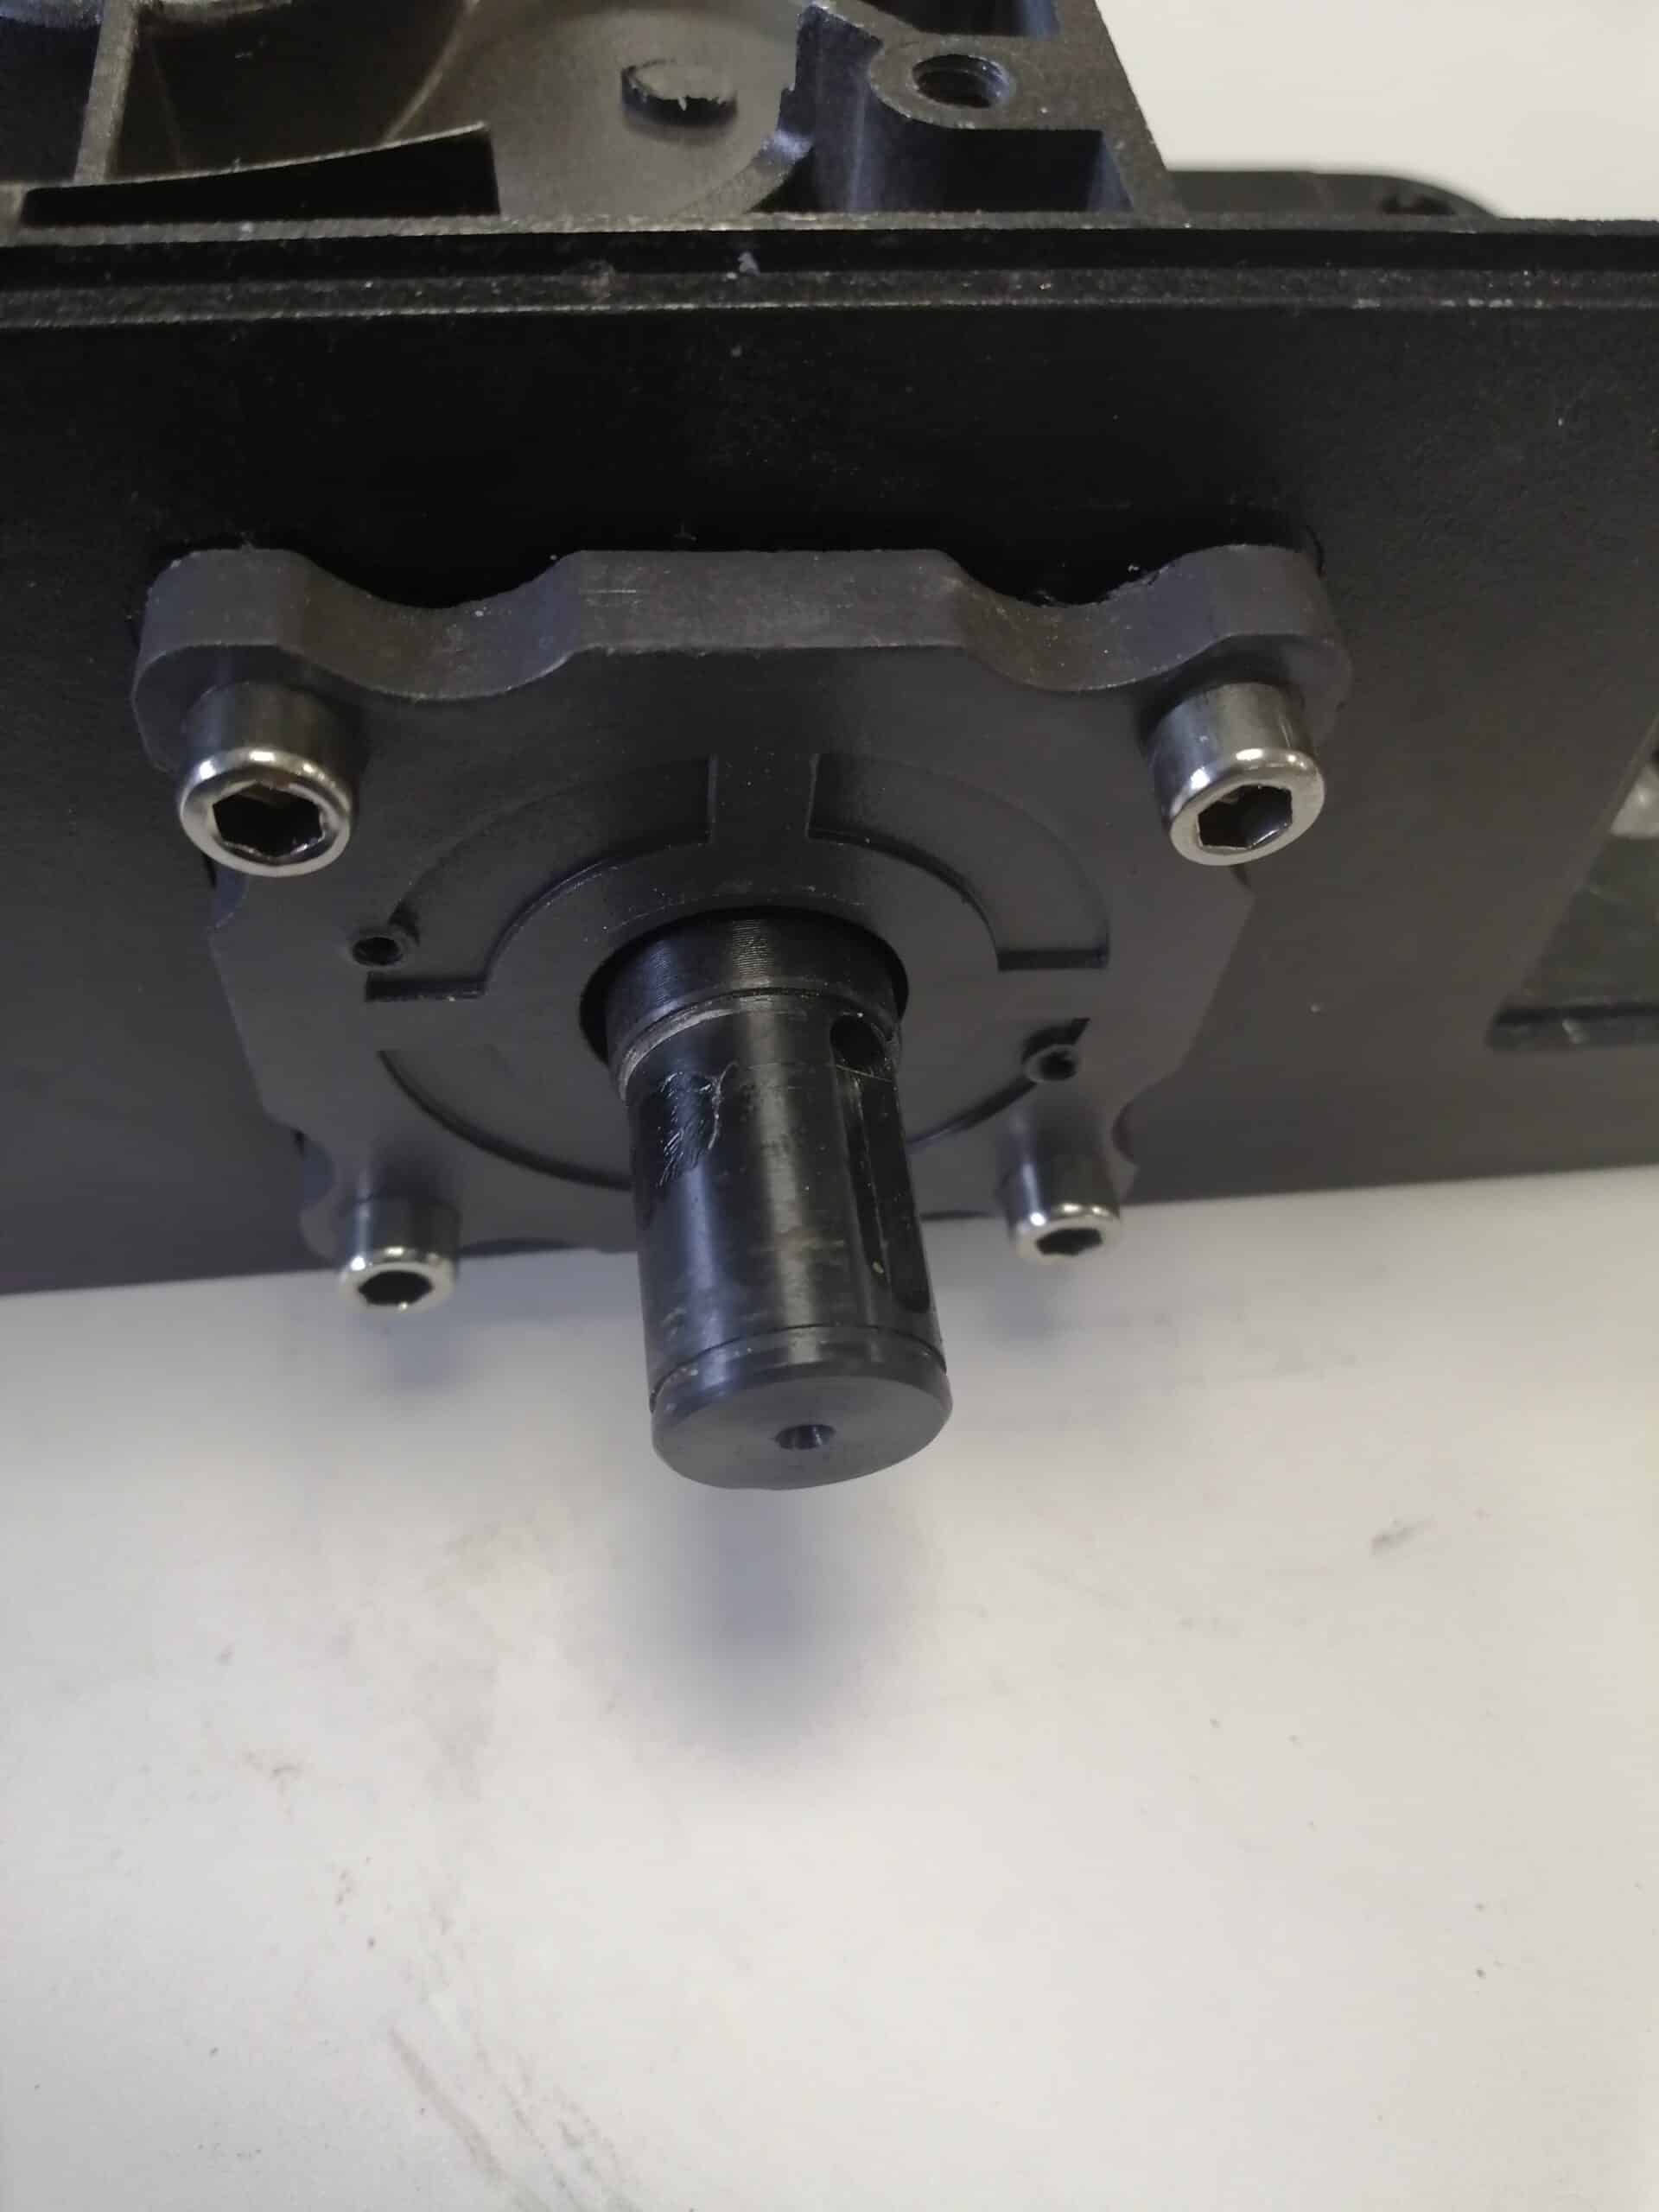
Step 8: Remove the drive shaft

Remove the axle.

Step 9: Insert the new axis

Insert the new motor shaft, pushing it all the way into the motor. The bearing must be flush with the motor block.

Step 10: Replace the plastic cover

Replace the plastic cover on the axle.

Make sure that one of the fixing holes for the sprocket cover is at the top left of the plastic cover.


Step 11: Attach the plastic cover

Screw the guard back onto the motor unit.

Lightly tighten the screws on the bracket in turn, so as to insert the guard evenly and centrally.

Step 12: Replace the gear cover

Replace and secure the sprocket guard.

Step 13: Replace the metal bar

Replace the metal bar in the axle notch.

Step 14: Replace the gearwheel

Replace the gearwheel on the motor shaft. Present it with the recess facing you.

Push the gear wheel as far as it will go towards the motor block so that you can see the circlip groove.

Step 15: Attach the gearwheel

Replace the circlip on the axle.

END

You can now replace the electric motor if you had to remove it. You can then reinstall the motor unit on the gate.

Keep in touch
Youtube Linkedin

Follow us on social networks

About Avidsen
  • Who are we?
  • Contact
  • Who are we?
  • Contact
Support
  • Avidsen Technical Support
  • Extel brand technical support
  • Philips technical support
  • Thomson Technical Support
  • Avidsen Technical Support
  • Extel brand technical support
  • Philips technical support
  • Thomson Technical Support
Avidsen group brand
  • Avidsen Brand
  • Extel Brand
  • Philips Brand
  • Thomson Brand
  • Avidsen Brand
  • Extel Brand
  • Philips Brand
  • Thomson Brand
Copyright 2025 © All rights reserved Avidsen
  • Legal Notice
  • Personal data protection policy
  • Terms and Conditions of Use
  • Legal Notice
  • Personal data protection policy
  • Terms and Conditions of Use
Thank you for your rating!
Thank you for your rating and comment!
This page was translated from: French
Please rate this translation:
Your rating:
Change
Please give some examples of errors and how would you improve them: