Skip to content
  • English
    • French
    • Italian
    • Spanish
    • German
    • Dutch
    • Portuguese (Portugal)
    • Greek
    • Polish
  • English
    • French
    • Italian
    • Spanish
    • German
    • Dutch
    • Portuguese (Portugal)
    • Greek
    • Polish
Logo Avidsen
  • Products
    • Products
    • Avidsen Brand
    • Extel Brand
    • Philips Brand
    • Thomson Brand
  • Support
    • Tutorials on repair and use
    • Avidsen Technical Support
    • Extel brand technical support
    • Philips technical support
    • Thomson Technical Support
  • The Group
    • The Group
    • Contact
  • Ethic Company
  • Where to buy ?
\

Programming a keypad 114255

  1. Home
  2. Programming a keypad 114255

Programming a keypad 114255

You can't program an access code on the keypad, or you can't operate your motorization when you enter your code on the keypad. Follow this step-by-step tutorial to find out.

This tutorial is applicable for:

Avidsen - 114255 - Keypad / Digicode
Difficulté : Easy
Temps nécessaire : 5 minutes
Nombre d’étapes : 8
Mise à jour : February 2025

Tutorial steps:

WARNING!

Before starting this tutorial, please note that the keypad will go into standby mode, and thus exit programming mode, after 5s of inactivity.

Prepare the codes you wish to program in advance and memorize the steps to be carried out before you start programming.


WARNING!

This keypad, which looks exactly like the 114255, is not one of our keypads. It differs from our keypad in that its keys have no A or B labels (* and # instead).

We cannot guarantee compatibility with our electronic boards, nor that their access code setting process is the same as ours.


Step 1: Enter master code

Press B, then press 9 6 times

The keypad makes a long beep and lights up its green LED during the beep.

This applies to a keypad whose master code has never been changed. If your keypad emits 10 rapid beeps when you enter the last digit of the master code, the code is incorrect.

Go to Step 9 for the keyboard reset procedure.


Step 2: Enter access code settings

Press key 2 and then B

The keypad makes a long beep and lights up its green LED during the beep.

Step 3: Setting the access code

Enter your access code (the code you want to use to control your motorization) and press B.

The keypad beeps and its green LED flashes twice.

Enter your access code a second time and press B.

The keypad beeps twice and its green LED lights up during the beeps.

Step 4: Verify access code

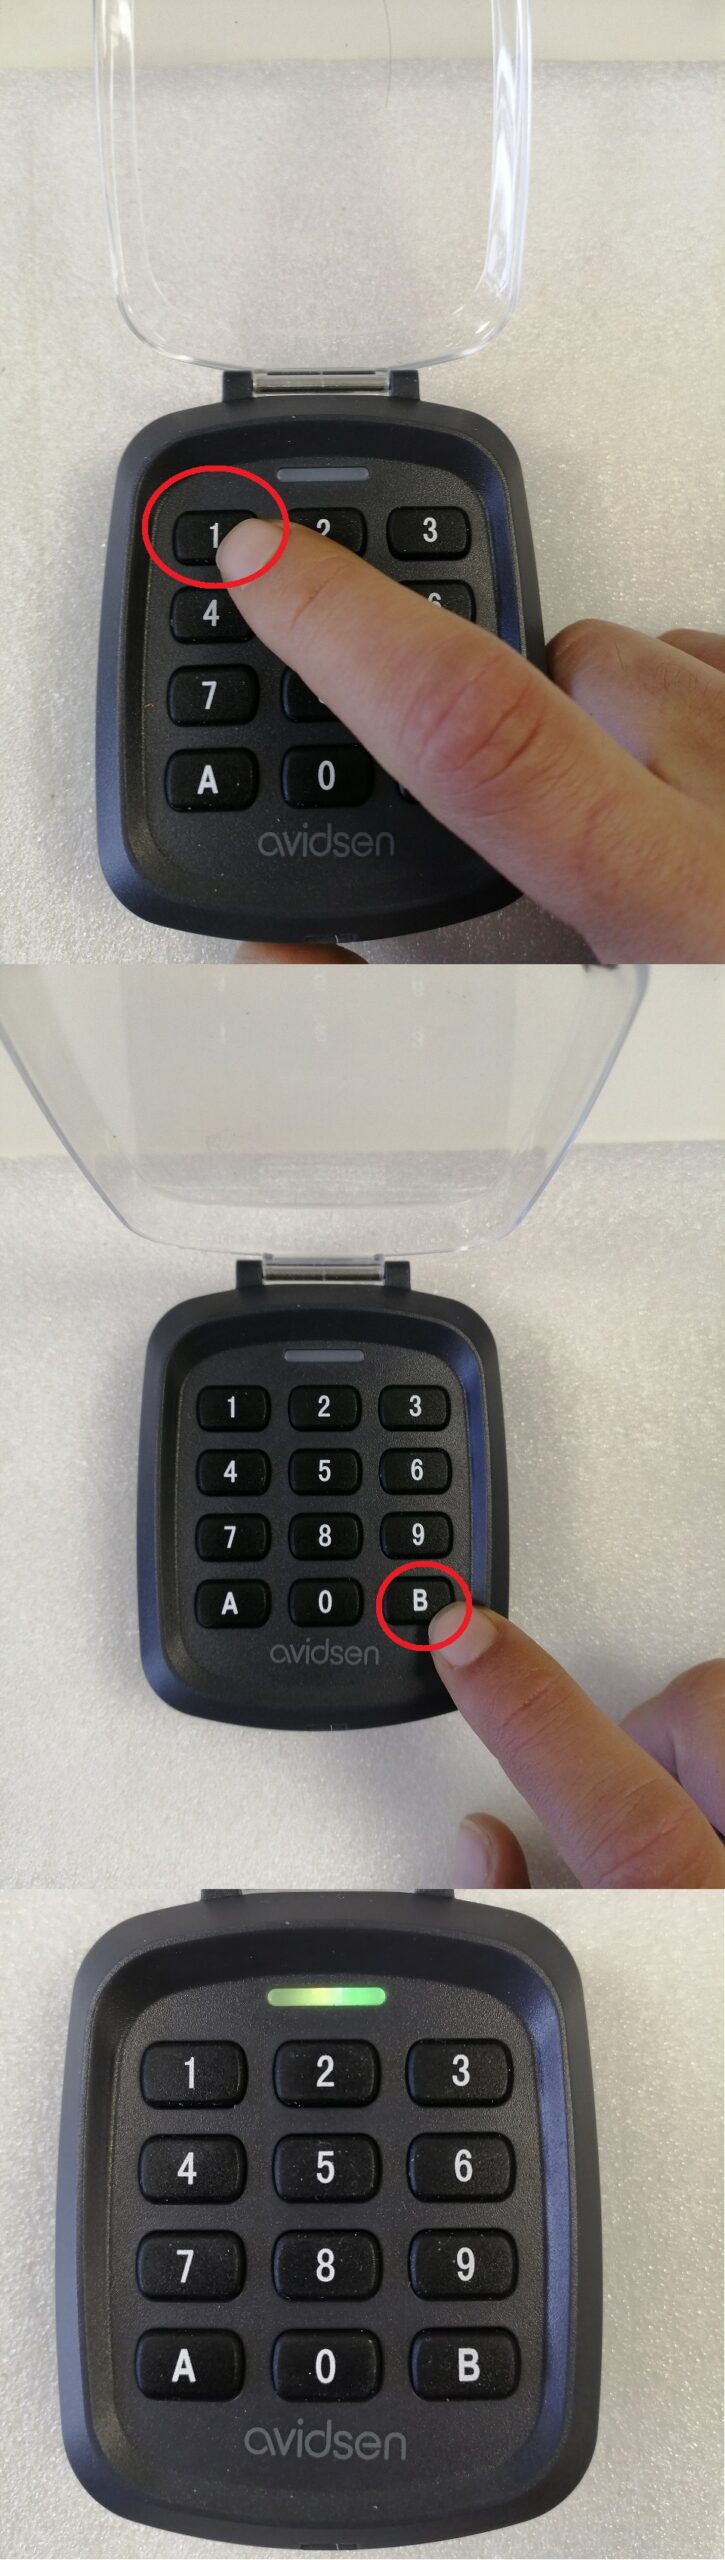
Your access code is now programmed.

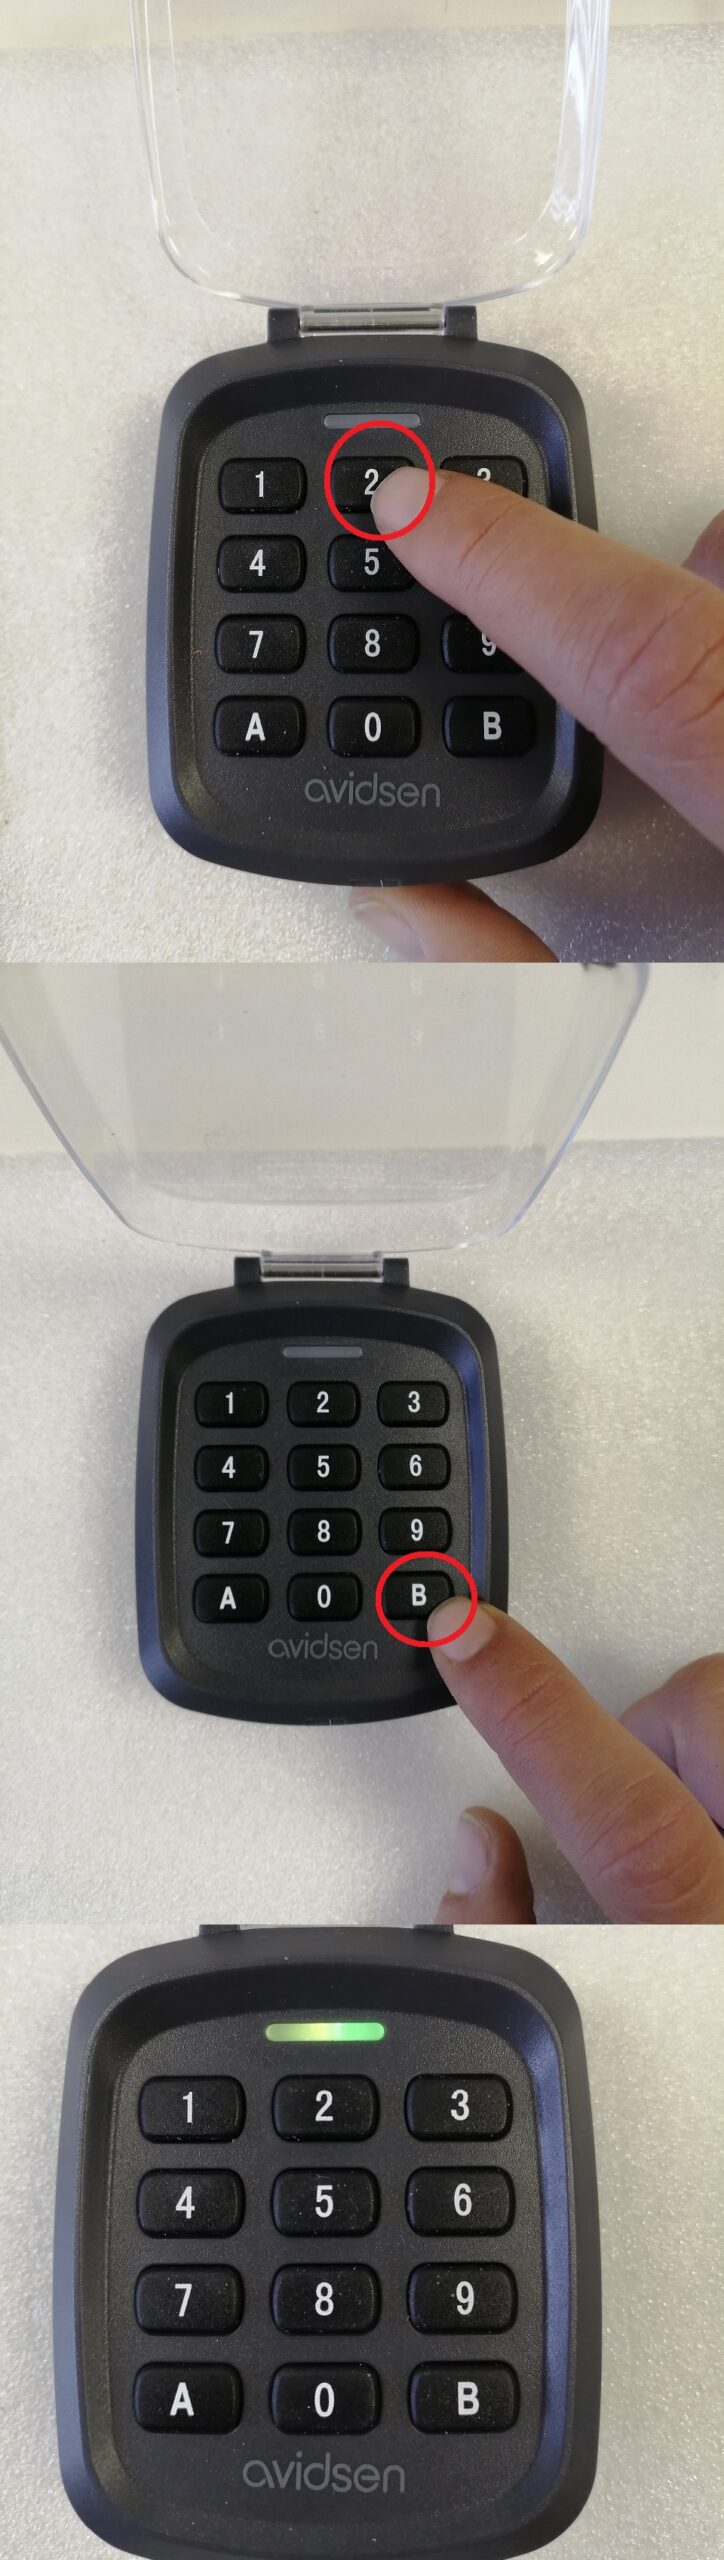
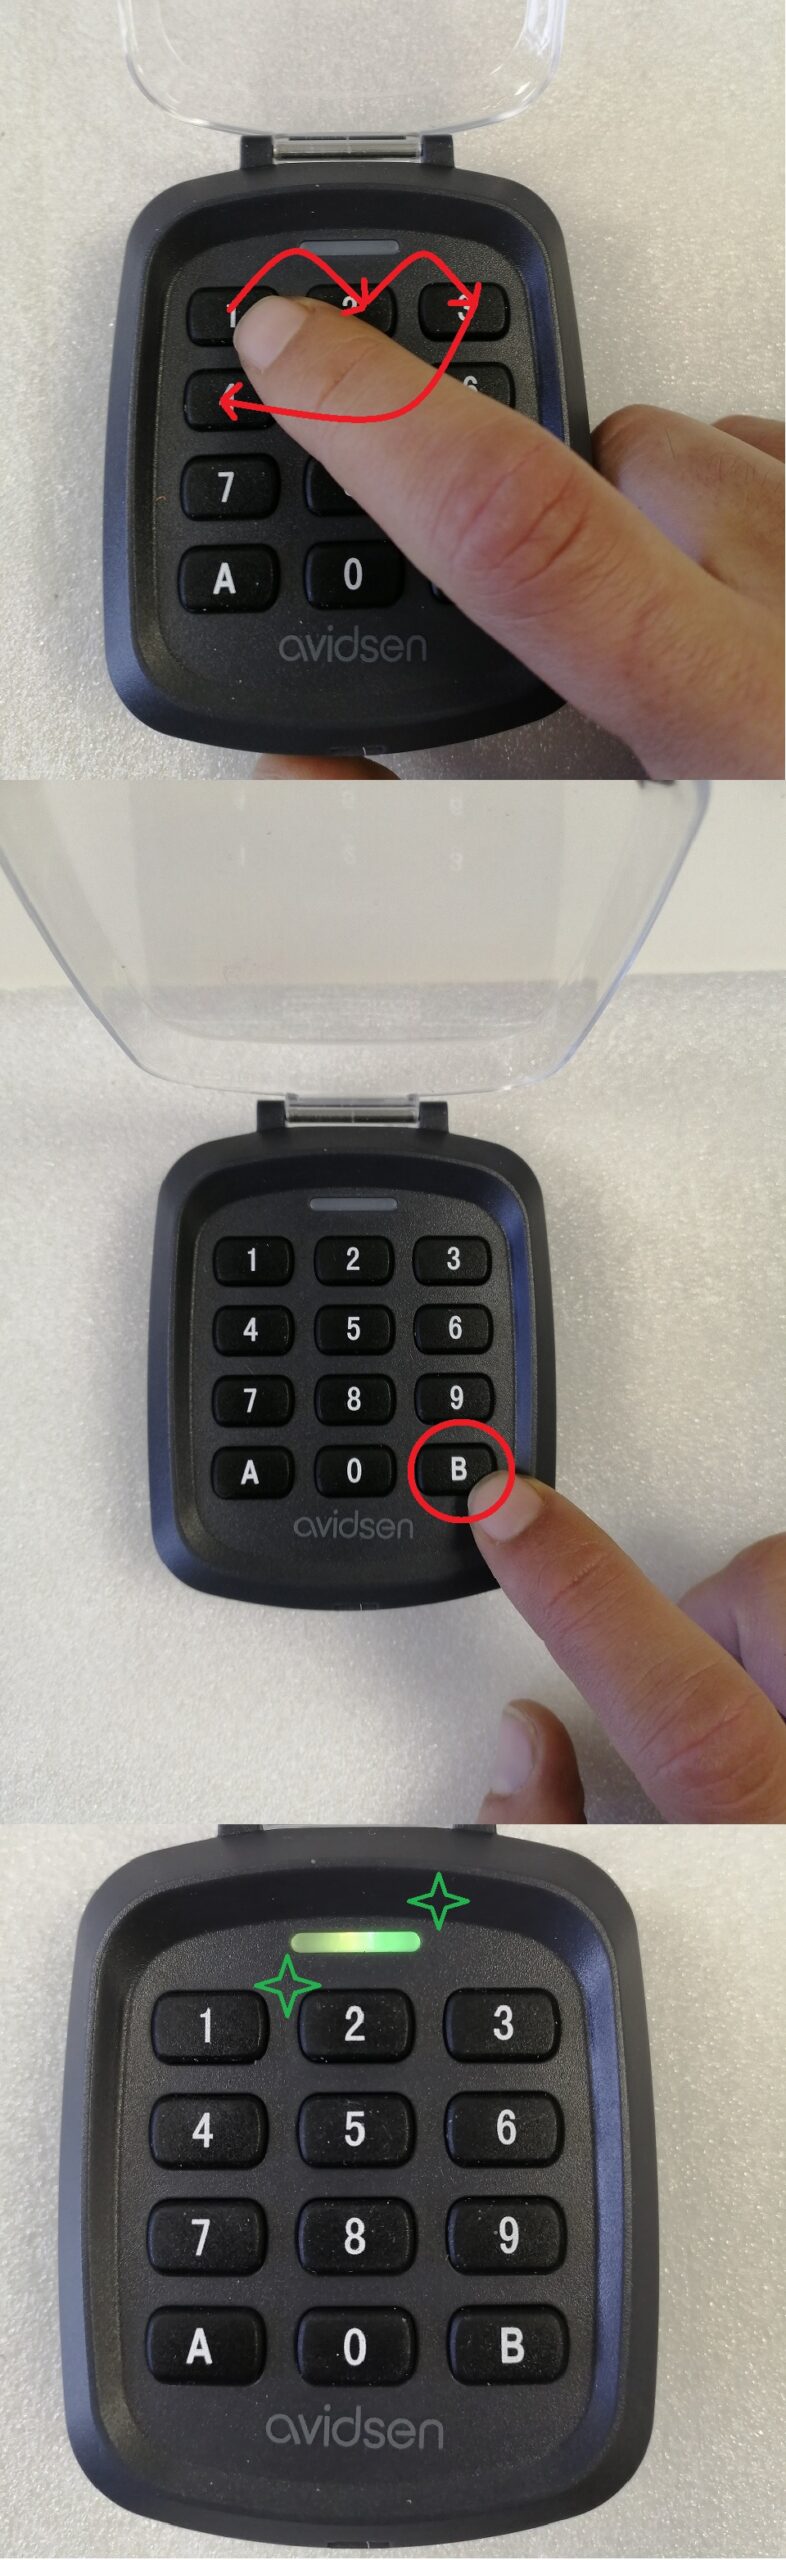
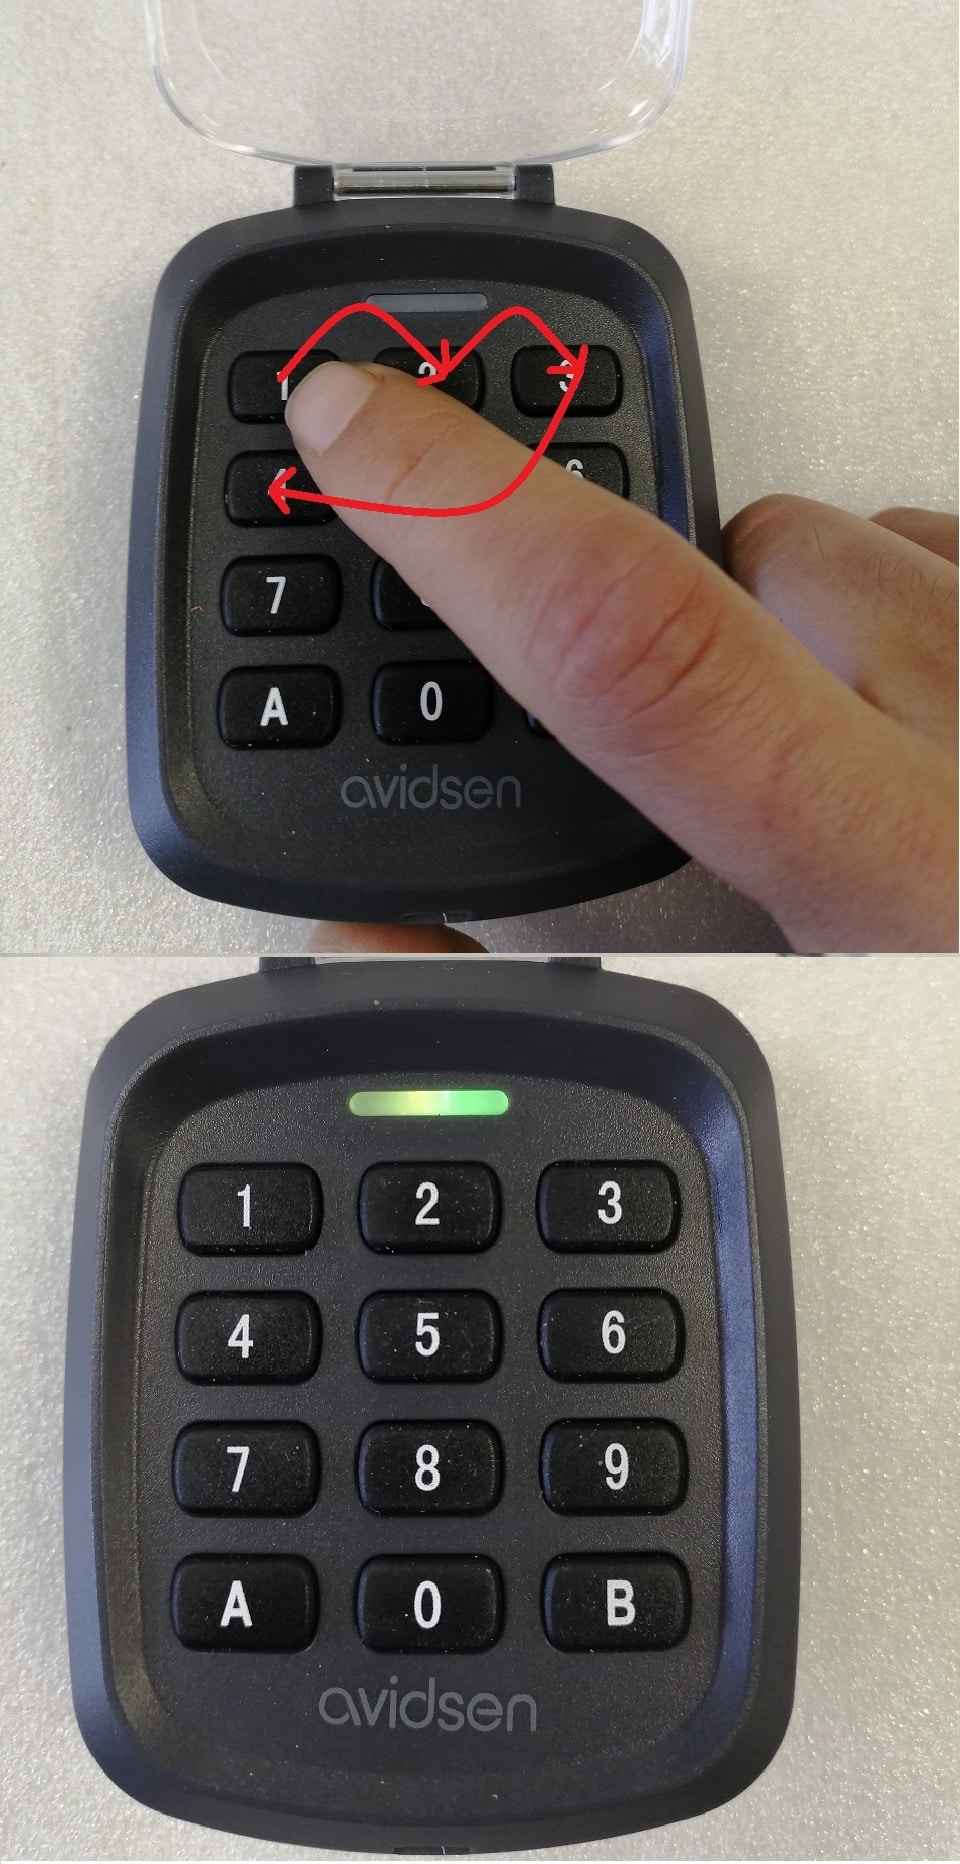
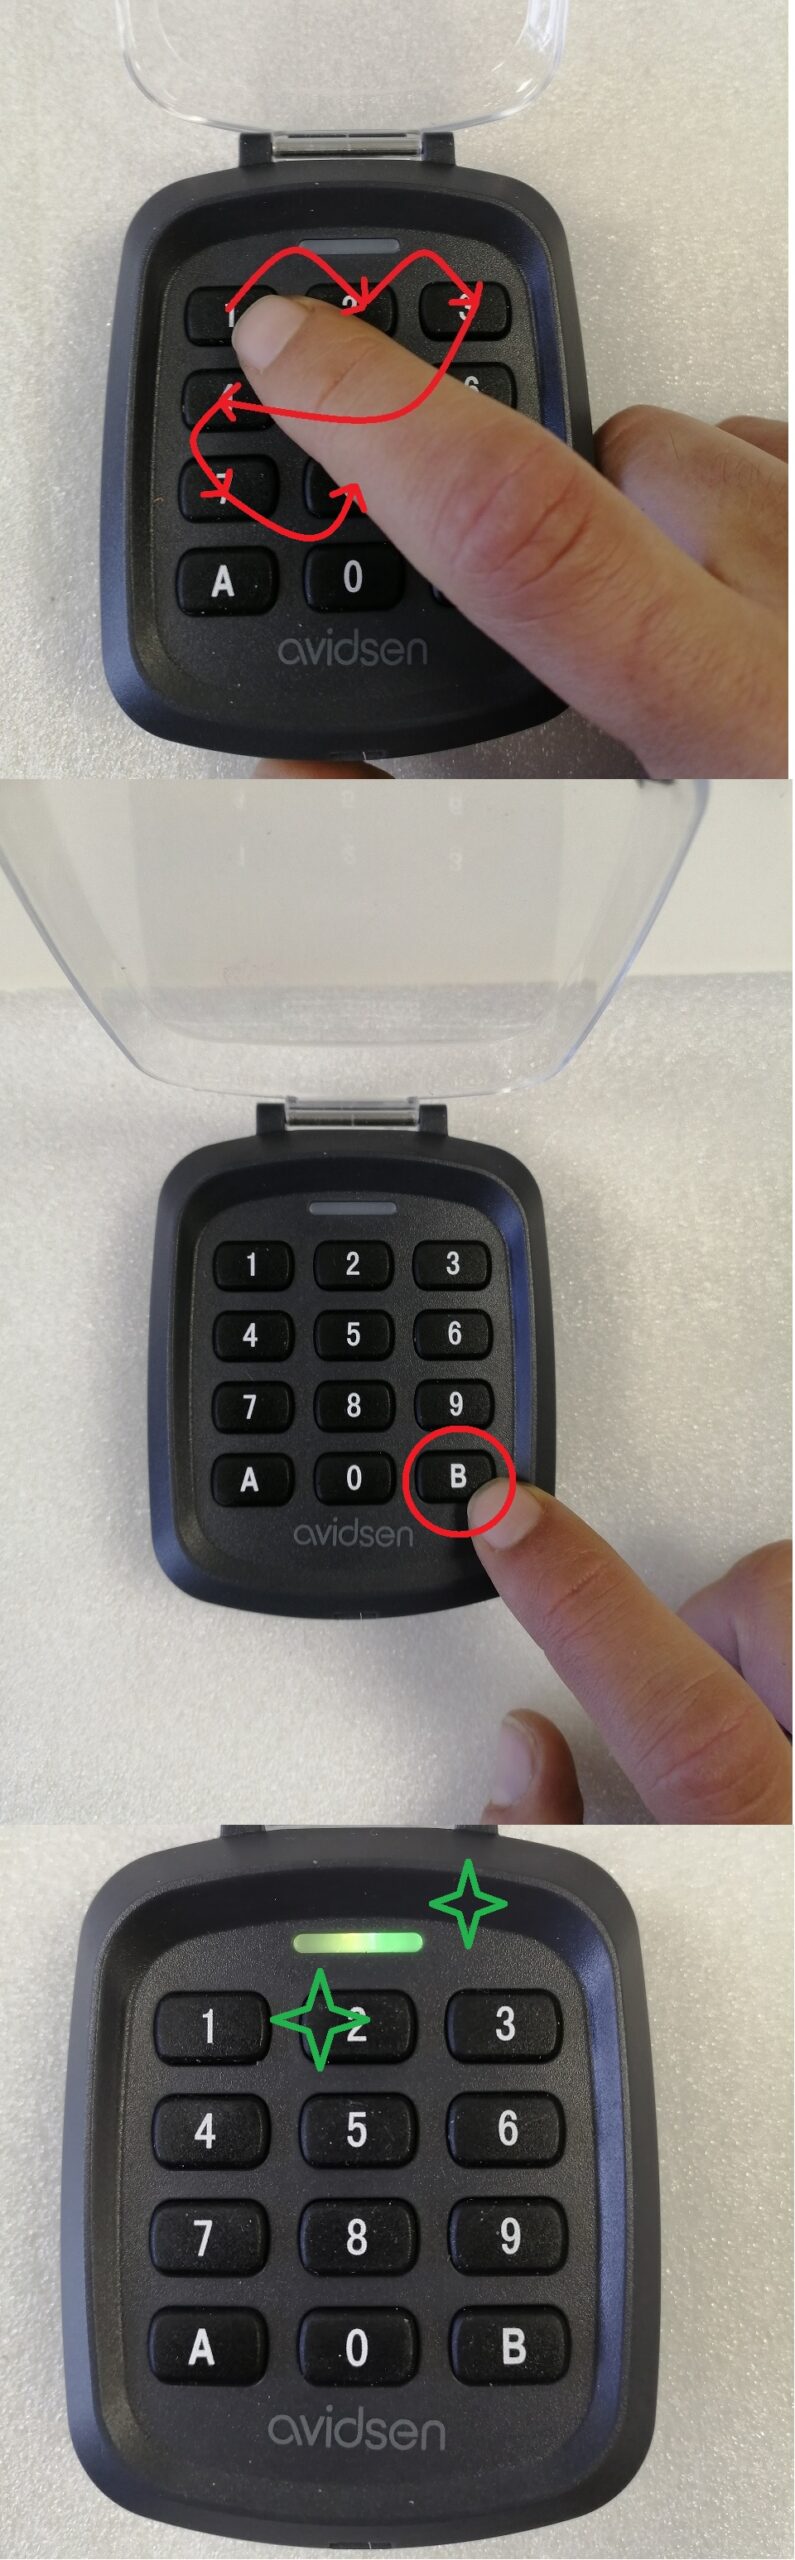
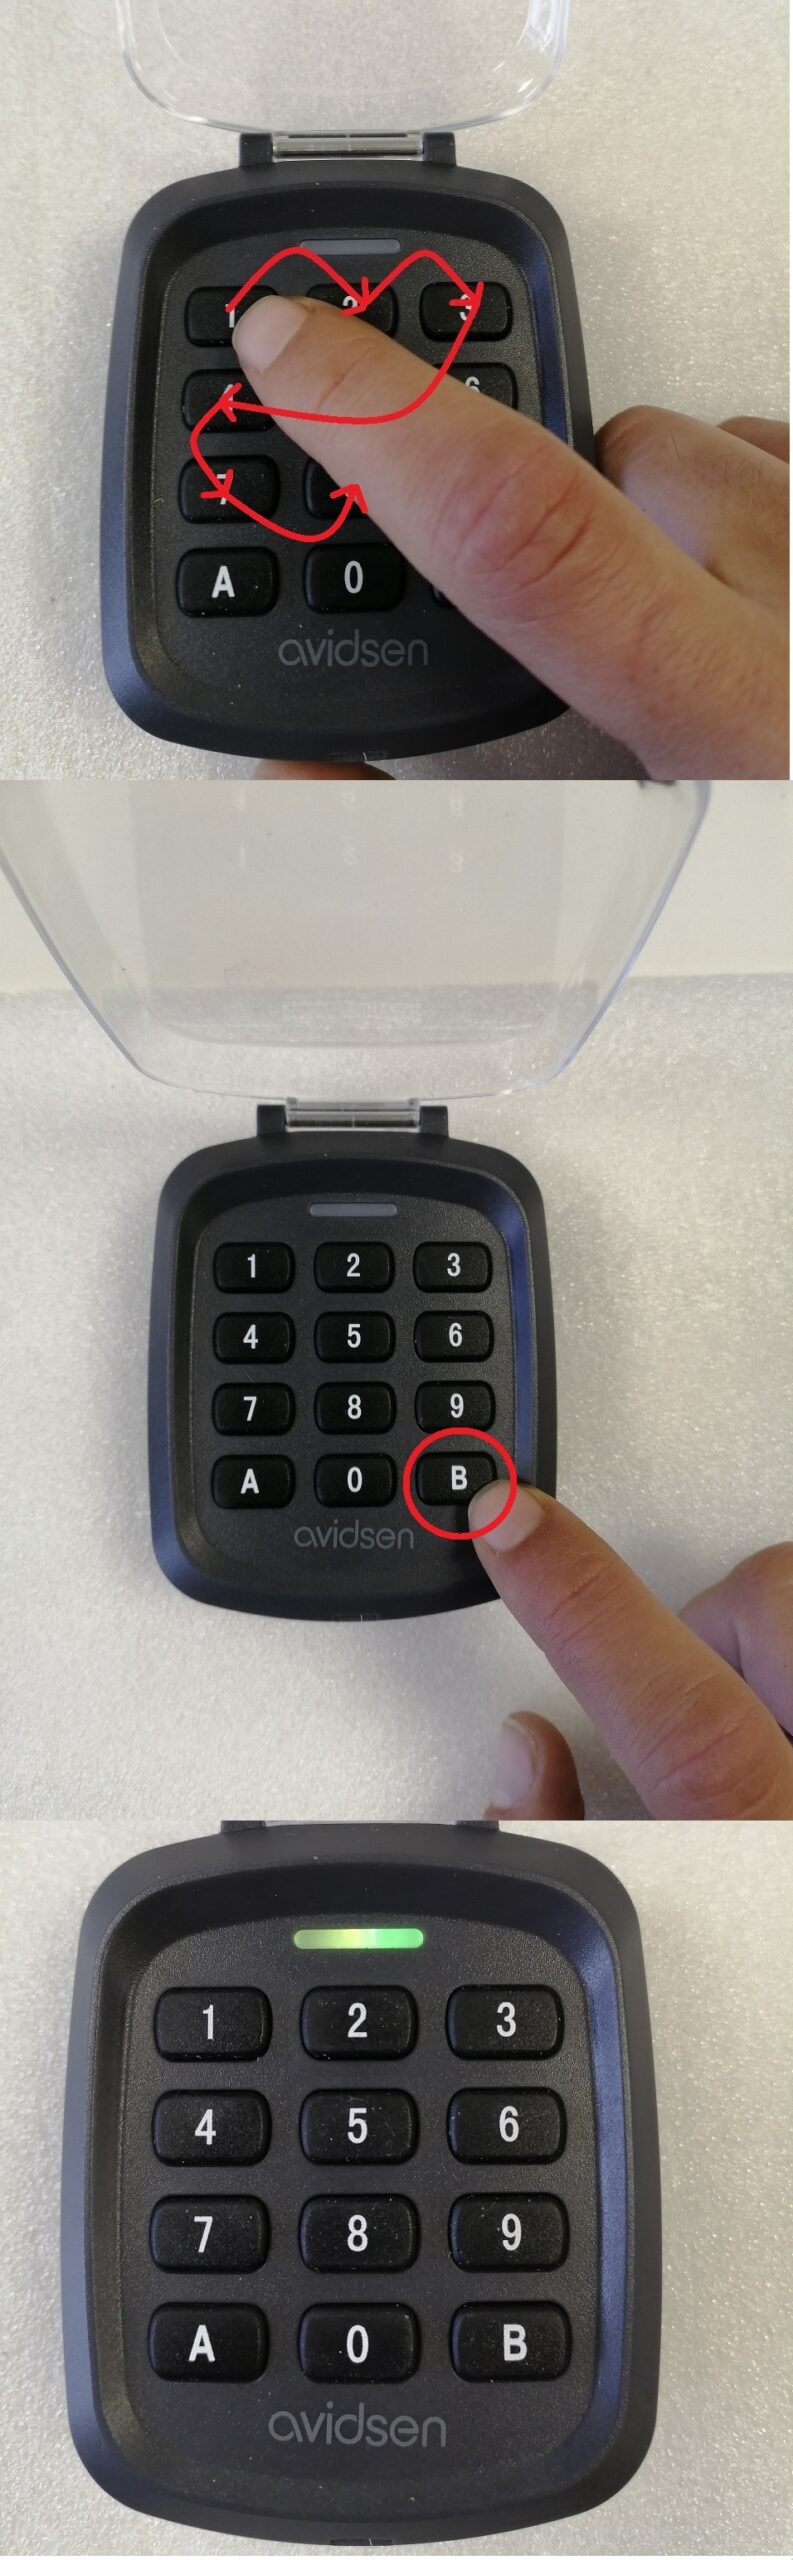
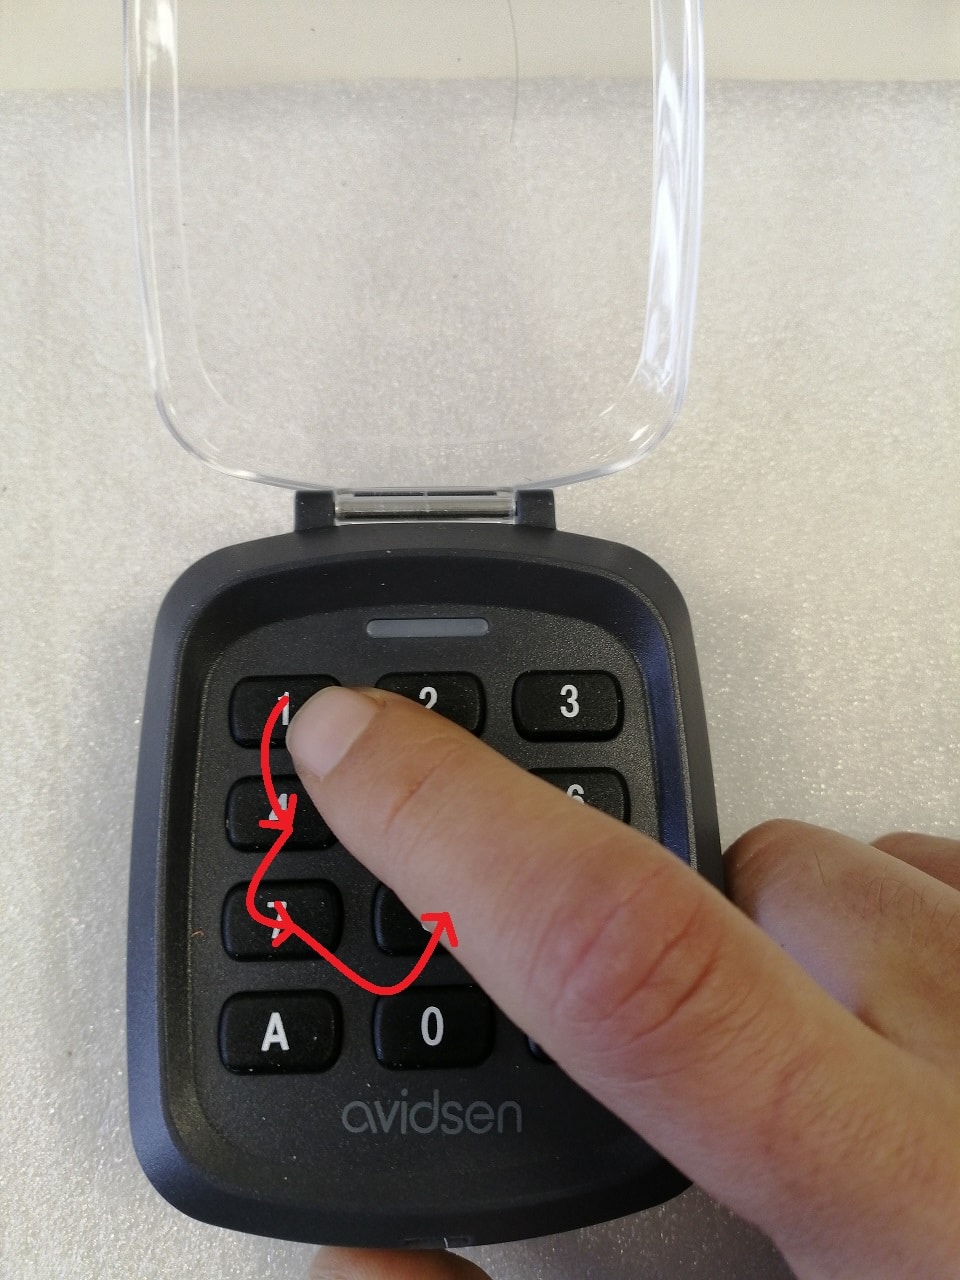
To check that all has gone well and that the keypad has memorized it correctly, enter the four digits of your access code directly on the keypad.

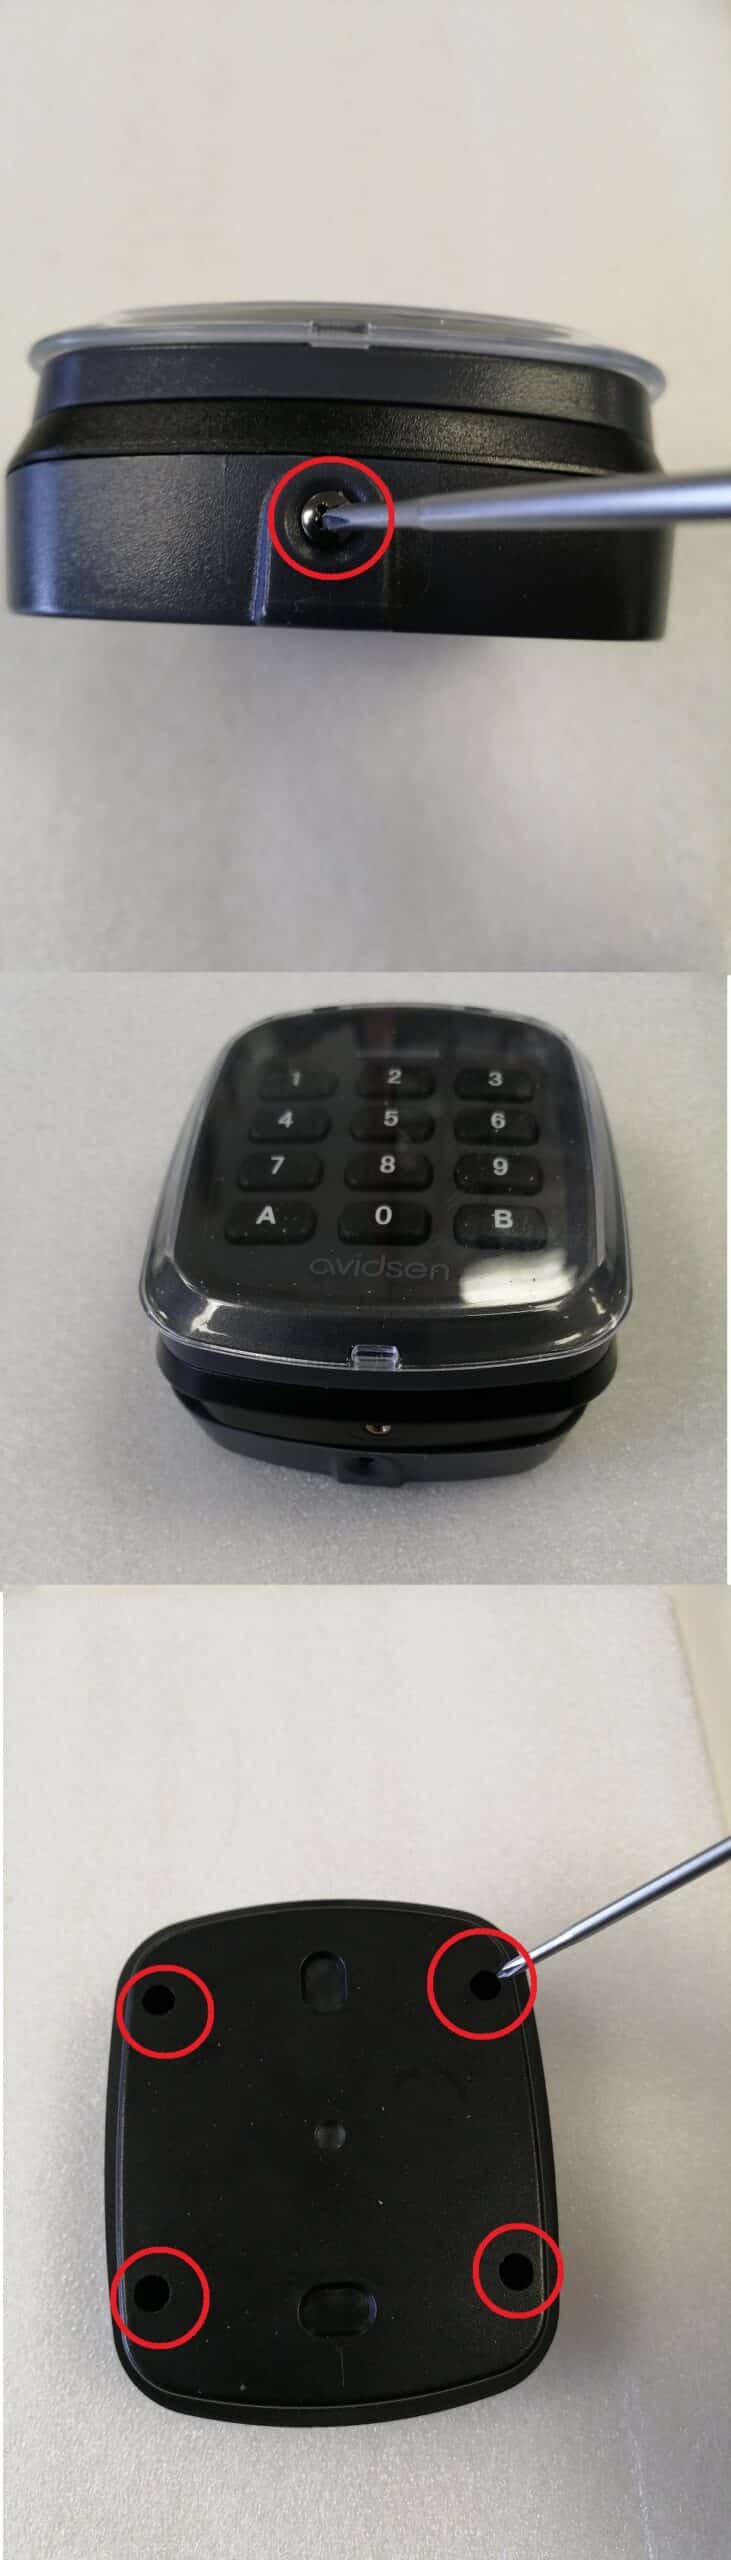
The keypad will light up its green LED for 2s if the code is correct.

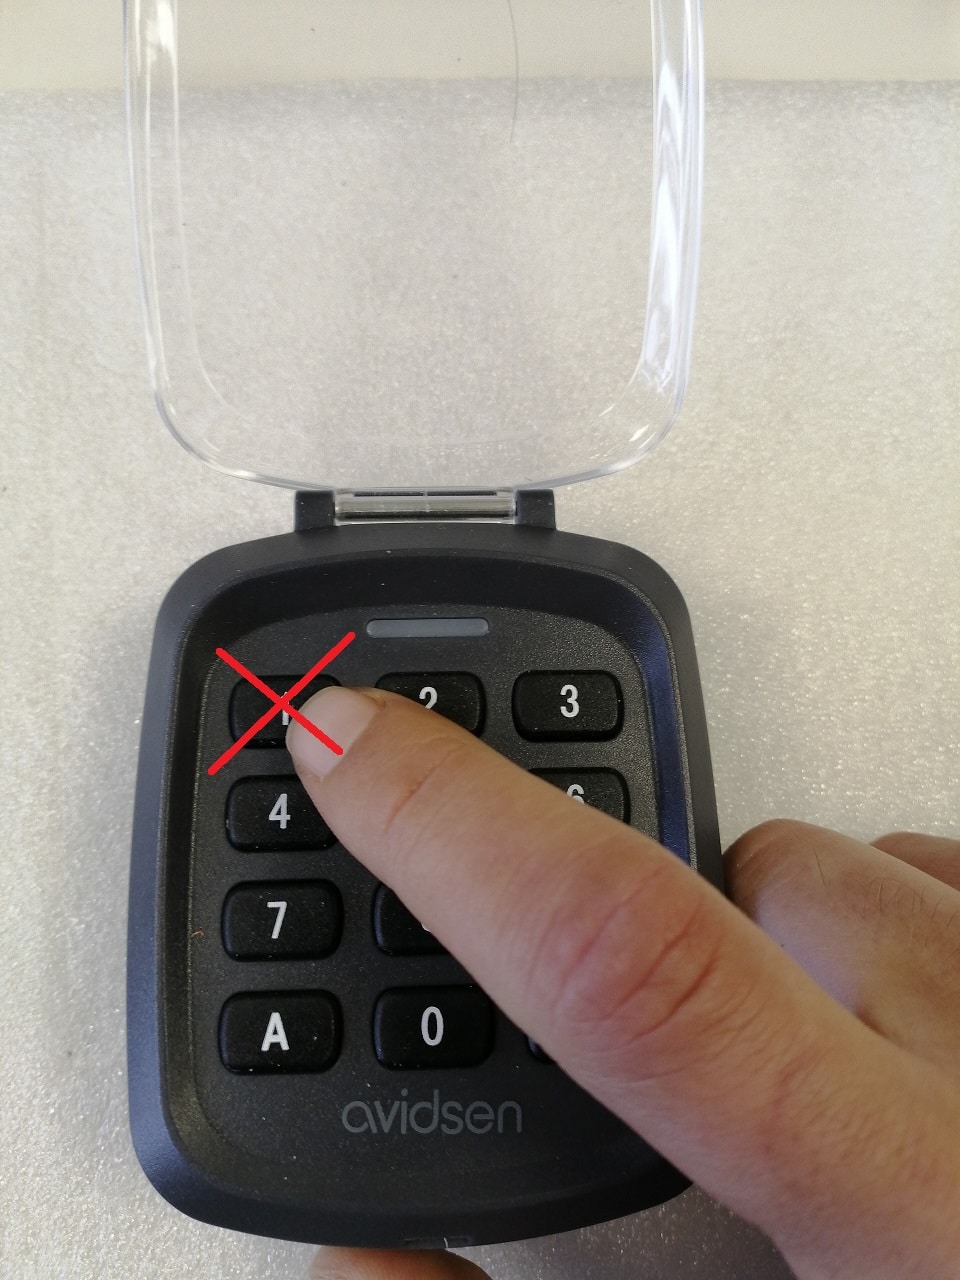
If the keypad beeps four times when entering the last digit of the access code, repeat the procedure from step 1.

Board

If you wish to program a second access code on the keypad (for a pedestrian code, for example), repeat the tutorial in step 1 and define an access code that does not begin with the same digit as the first one you created.

For example, the first code created was 1234. The second code cannot be 1985. It must start with any digit except 1.

Step 5: Programming the code on the circuit board

Now that the keypad emits radio commands when you enter your code, you need to register your keypad in the electronic board of your motorization so that it responds.

This process differs depending on the electronic board.

Make sure you know which model of board you have so that you can carry out the correct operations on it.

WARNING!

Before starting to program the keypad on the circuit board, please note that the circuit board only remains in radio programming mode for 10s.

After starting radio learning mode on the circuit board, quickly enter your code on your keypad, otherwise the circuit board will leave radio learning mode without having taken it into account.


SW200D2S

To program a code for total opening

  • Press the RF2 key for 3s
  • While the red LED on the circuit board lights up, enter the four-digit access code on the keypad.
  • Red LED flashes 3 times then goes out


To program a code for partial opening

  • Press the RF1 key for 3s
  • While the red LED on the circuit board lights up, enter the four-digit access code on the keypad.
  • Red LED flashes 3 times then goes out

CA2B9

To program a code for total opening

  • Press the – button on the board for 3s (L1 lights up)
  • Press SET once (L1 and L5 flash)
  • Enter your four-digit access code on the keypad
  • All red LEDs switch on and off.


To program a code for partial opening

  • Press the – button on the board for 3s (L1 lights up)
  • Press the + button on the card once (L2 lights up)
  • Press SET once (L1 and L5 flash)
  • Enter your four-digit access code on the keypad
  • All red LEDs on and off


You can find a detailed tutorial on how to program this card via the link below. In your case, entering the code on the keypad replaces pressing the button on the remote control.

Programmation des télécommandes sur une carte CA2B9 – Ouverture piéton/partielle


AVLO

To program a code for total opening

  • Press the – button on the board for 3s (L1 lights up)
  • Press OK once (L1 and L4 flash)
  • Enter your four-digit access code on the keypad
  • All red LEDs switch on and off.


To program a code for partial opening

  • Press the – button on the board for 3s (L1 lights up).
  • Press the + button on the card once (L2 lights up).
  • Press OK once (L1 and L4 flash).
  • Enter your four-digit access code on the keypad.
  • All red LEDs switch on and off.

Step 6: Modifying the master code

If you wish to increase the keypad’s security, you can modify the master code which allows access to the keypad’s settings.

Press B and then press 9 6 times.

The keypad makes a long beep and lights up its green LED during the beep.


Step 7: Enter master code settings

Press 1 and then B.

The keypad makes a long beep and lights up its green LED during the beep.

Step 8: Setting the master code

Enter your master code (6-digit code) and press B.

The keypad beeps and its green LED flashes twice.

Enter your master code a second time and press B.

The keypad beeps twice and lights up its green LED during the beeps.

Make a note of this code, which you can use if you ever need to change an access code.

Step 9: Reset keypad

If you have lost your master code and are unable to access the keypad settings

  • Remove the keyboard from its wall bracket by removing the screw on the underside.
  • Open the keypad by unscrewing the 4 rear screws.


Remove a battery from the keyboard.

v

Hold down the A key.

While holding down the A key, insert the battery back into the keypad.

Hold down the A key until you hear a long series of beeps.

The master code is reset to the default value (999999)

The reset does not modify the access codes.

Extra : Modify access code - Change keypad code

Have you entrusted the code to someone and no longer want them to access your property?

There are two ways to do this


SOLUTION 1

To change an access code, simply rewrite a new code starting with the same number instead. Repeat the tutorial from Step 1, and define a new access code starting with the same number as the one you no longer wish to have (e.g. old code 1234, new code 1478).

This code modification does not involve reprogramming the keypad on the motorization circuit board.


SOLUTION 2

The second solution is more restrictive. It consists in emptying the radio memory of your motorization electronic board, so that it can remove the keypad from its authorized transmitters.

Warning: resetting the radio memory deletes all stored elements, including any remote controls you may have in addition to the keypad.

Suppression de la mémoire radio d’une carte CA2B9


Keep in touch
Youtube Linkedin

Follow us on social networks

About Avidsen
  • Who are we?
  • Contact
  • Who are we?
  • Contact
Support
  • Avidsen Technical Support
  • Extel brand technical support
  • Philips technical support
  • Thomson Technical Support
  • Avidsen Technical Support
  • Extel brand technical support
  • Philips technical support
  • Thomson Technical Support
Avidsen group brand
  • Avidsen Brand
  • Extel Brand
  • Philips Brand
  • Thomson Brand
  • Avidsen Brand
  • Extel Brand
  • Philips Brand
  • Thomson Brand
Copyright 2025 © All rights reserved Avidsen
  • Legal Notice
  • Personal data protection policy
  • Terms and Conditions of Use
  • Legal Notice
  • Personal data protection policy
  • Terms and Conditions of Use
Thank you for your rating!
Thank you for your rating and comment!
This page was translated from: French
Please rate this translation:
Your rating:
Change
Please give some examples of errors and how would you improve them: