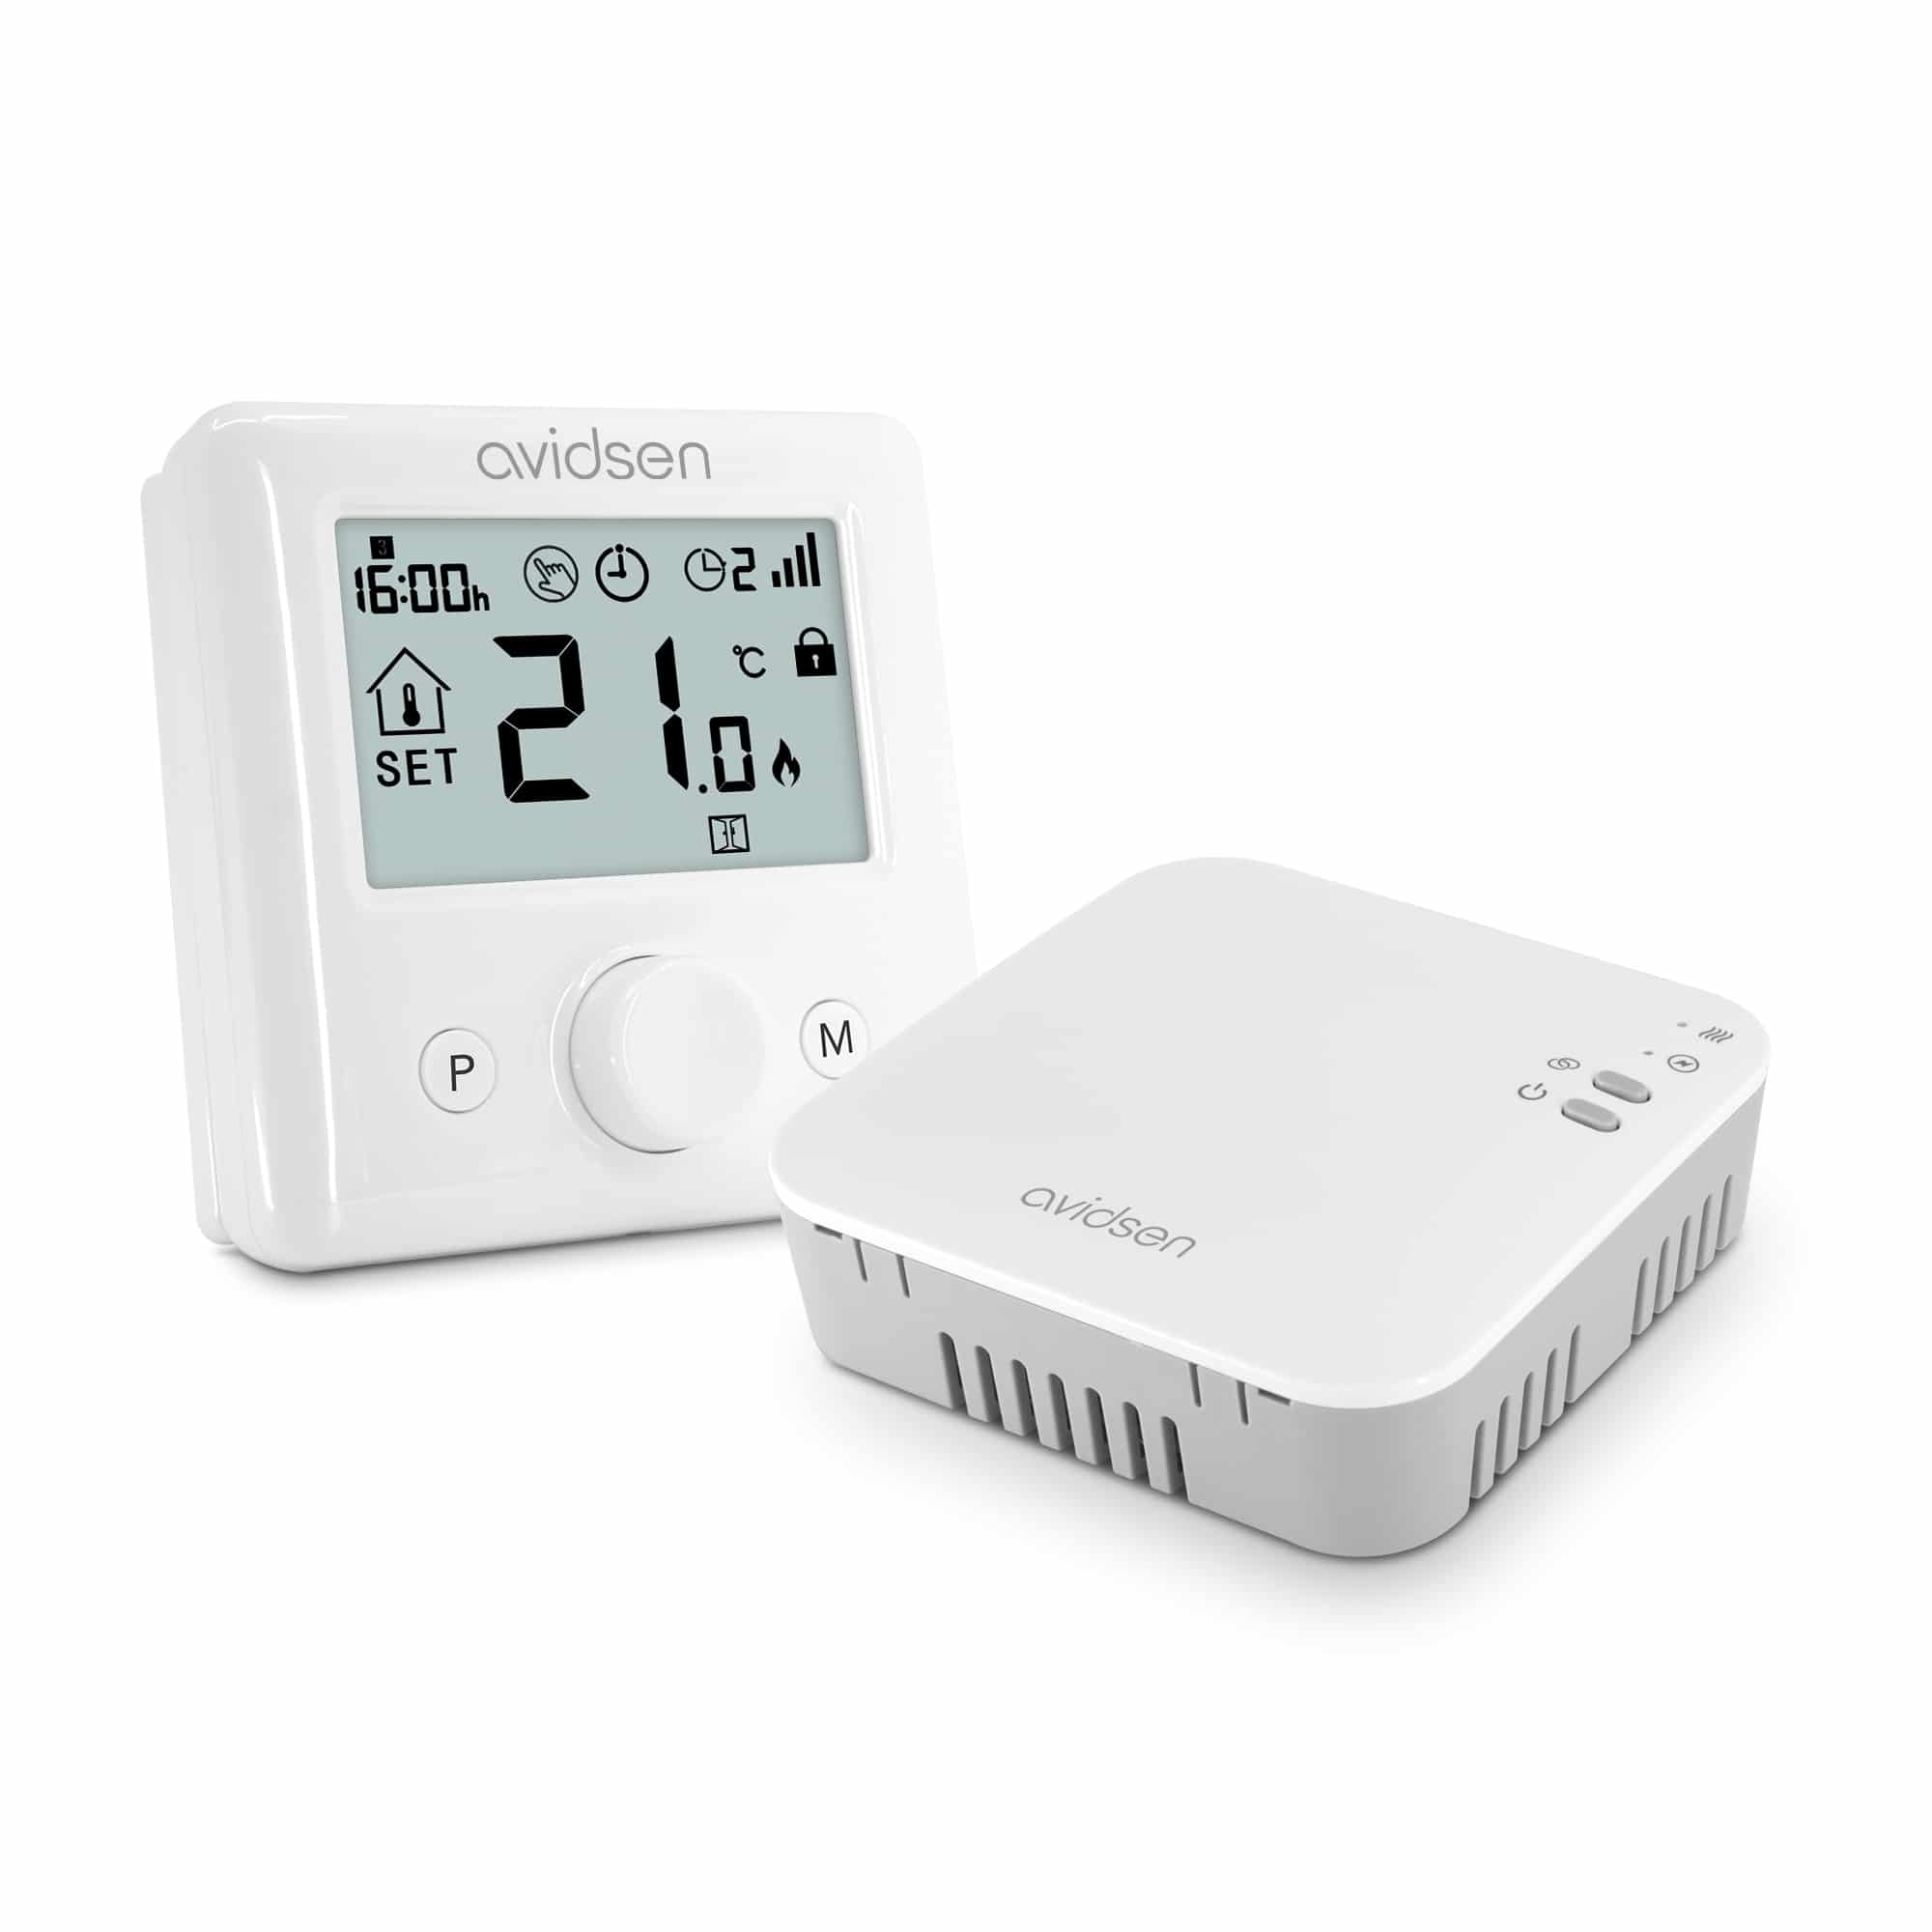
The sensor no longer activates the boiler module? Here's a tutorial to redo the association.
This tutorial is applicable for:
Difficulté : Easy
Temps nécessaire : 10 minutes
Nombre d’étapes : 4
Mise à jour : October 2025
Tutorial steps:
Step 1: Check module power supply
It is recommended to have the probe close to the module in order to make the association.
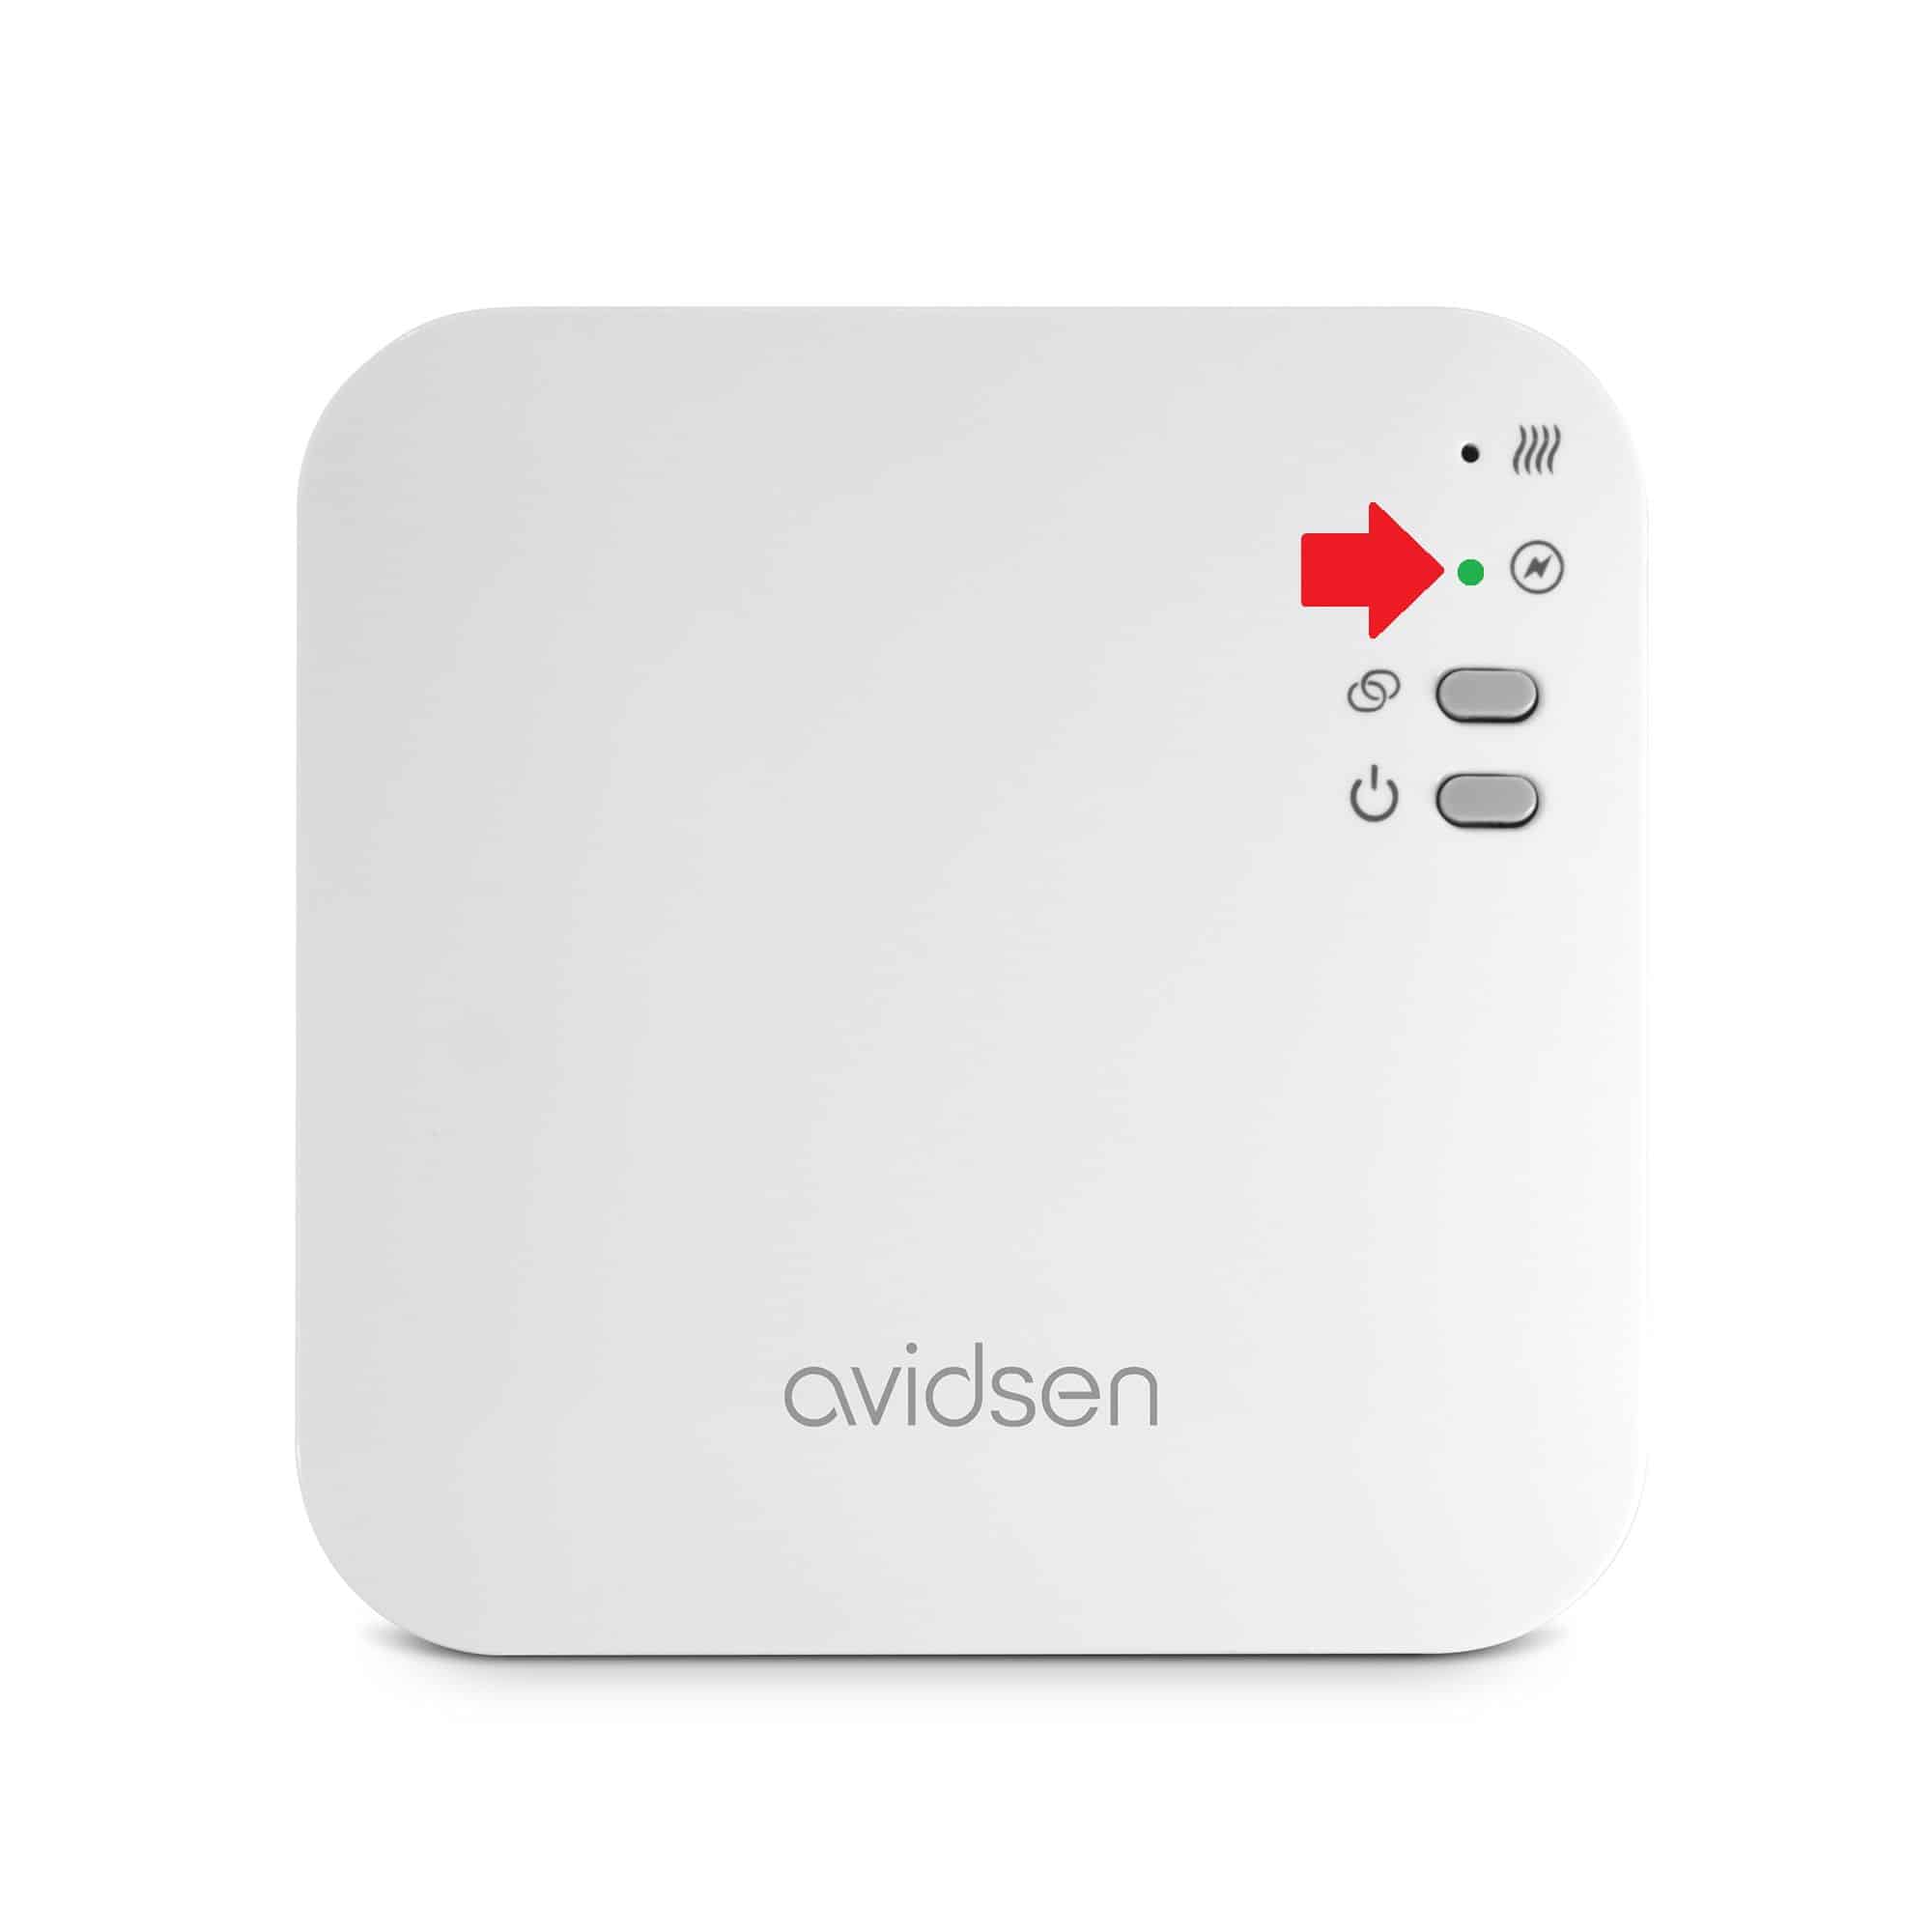
Make sure the module is correctly powered.
A steady green light in front of must be present.
If this is not the case, check that the 230V power supply is connected to terminals L and N and press the
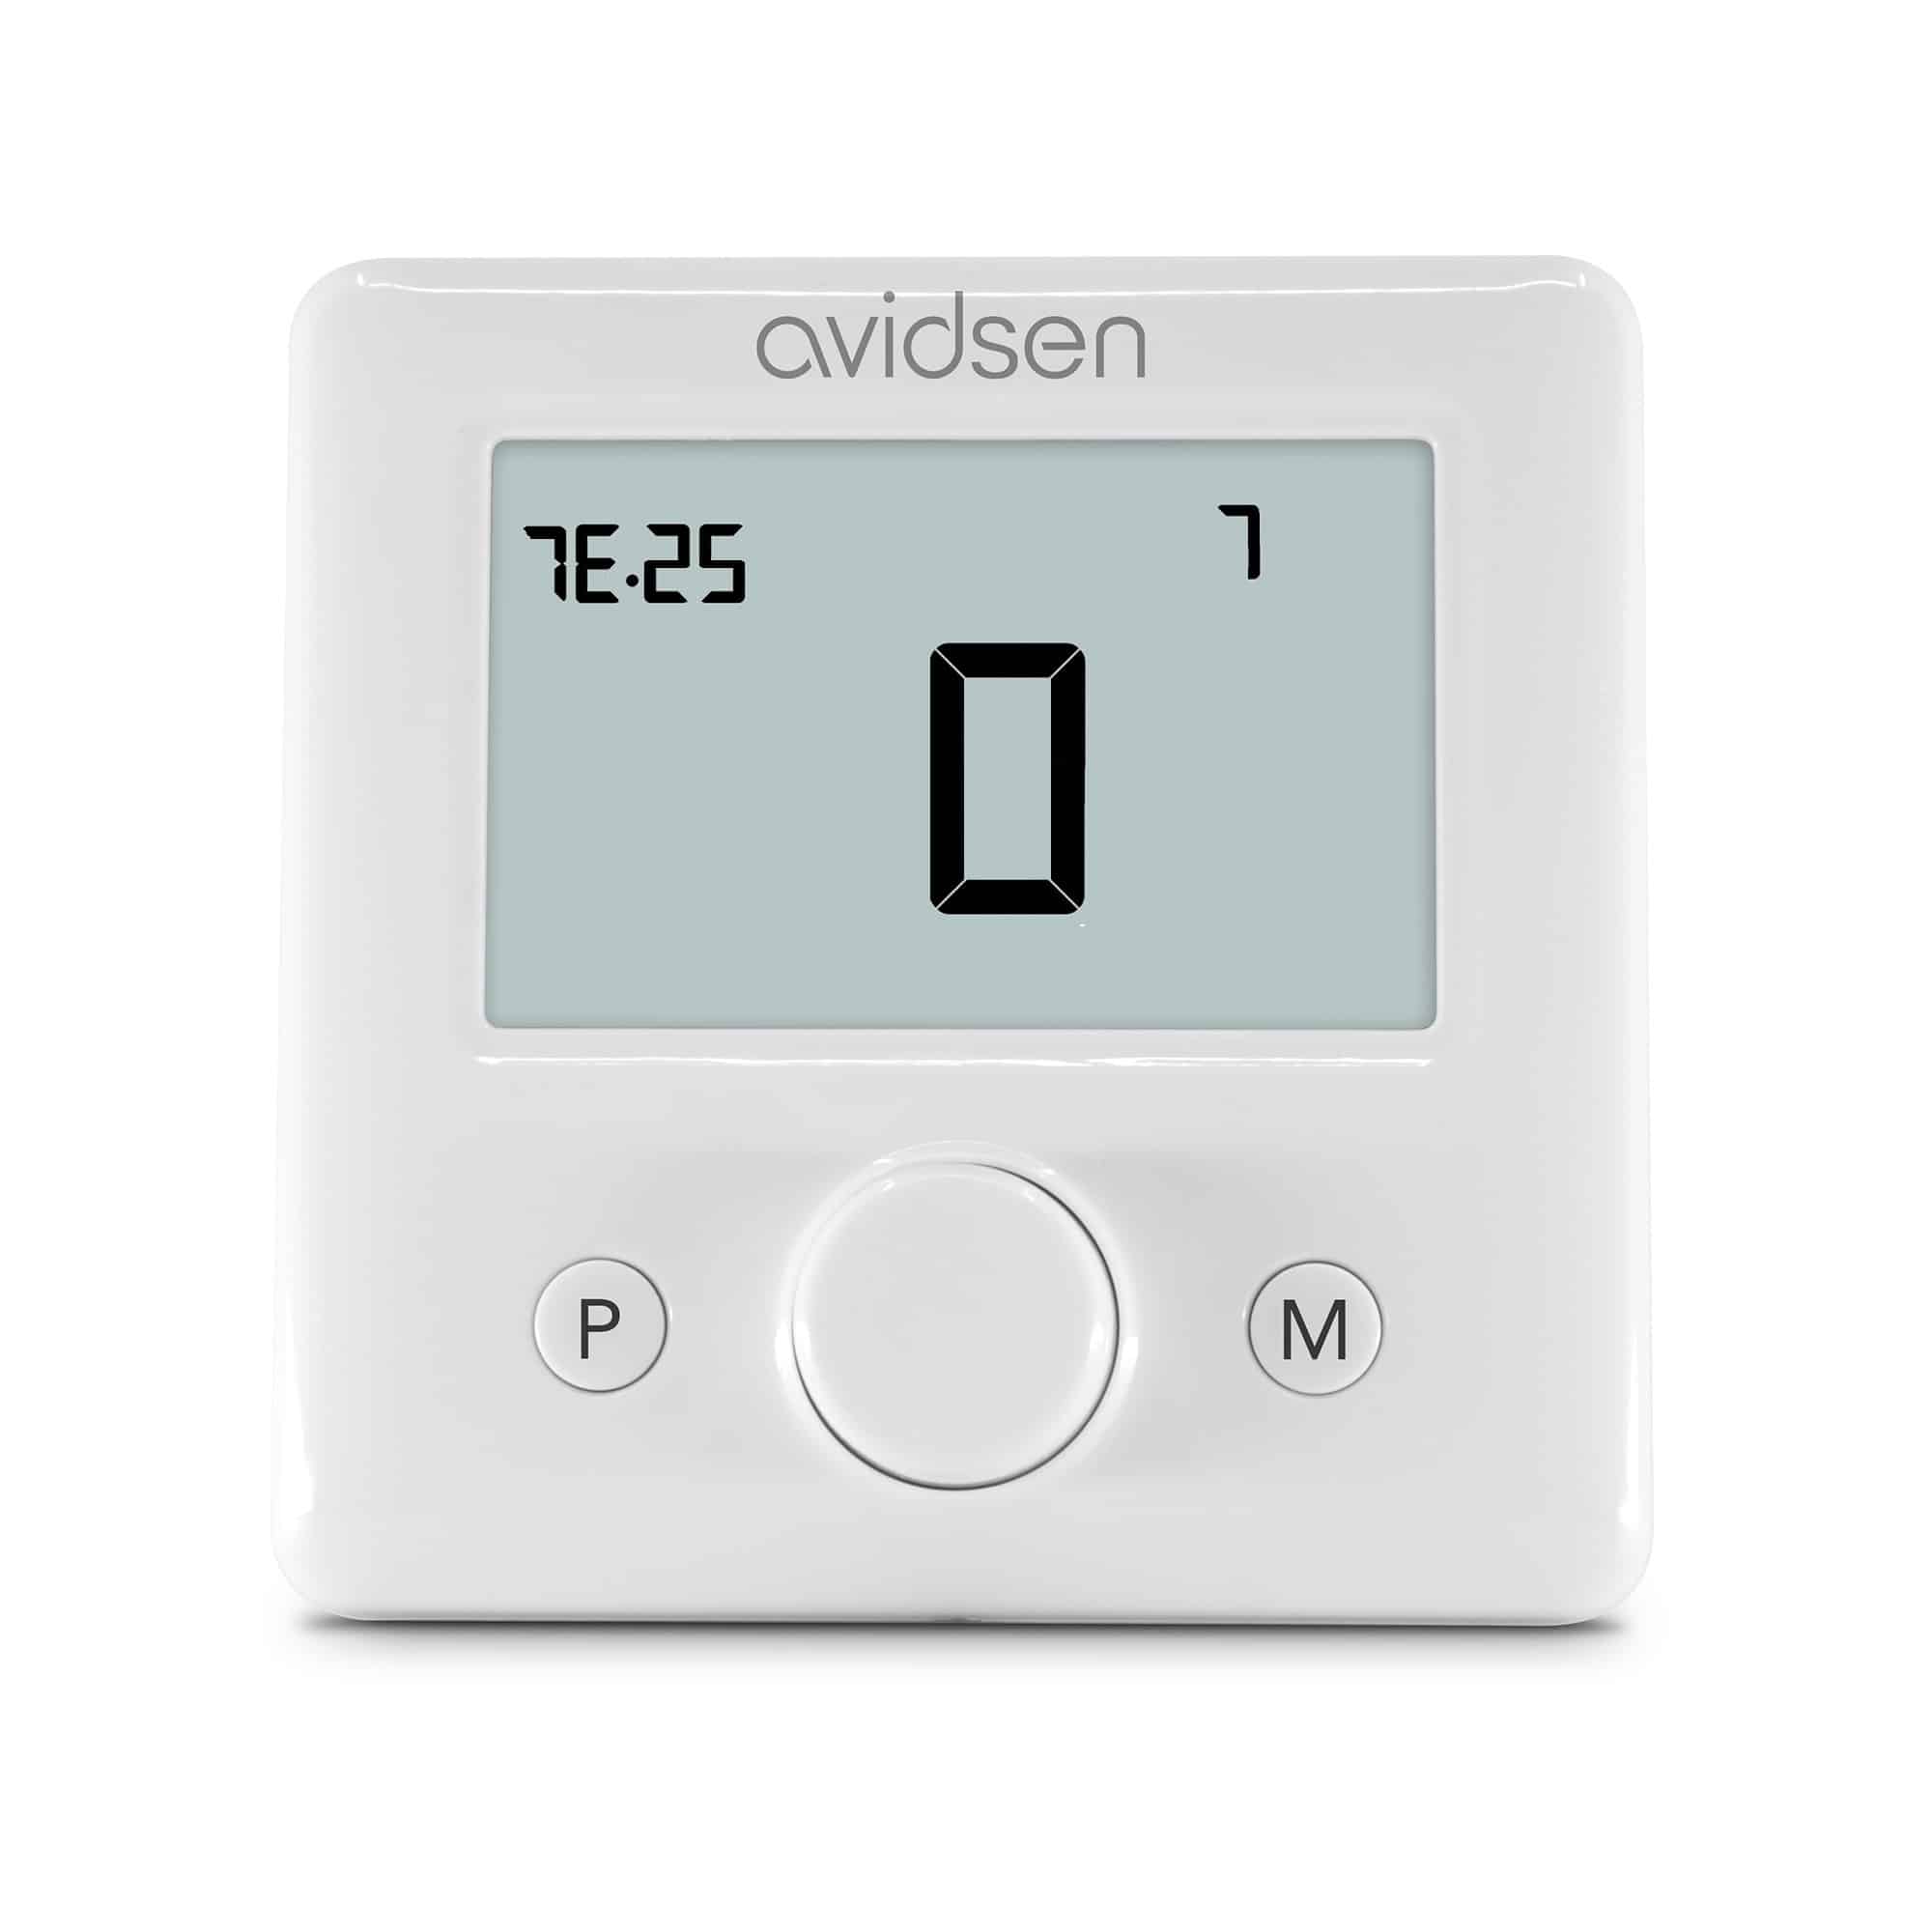
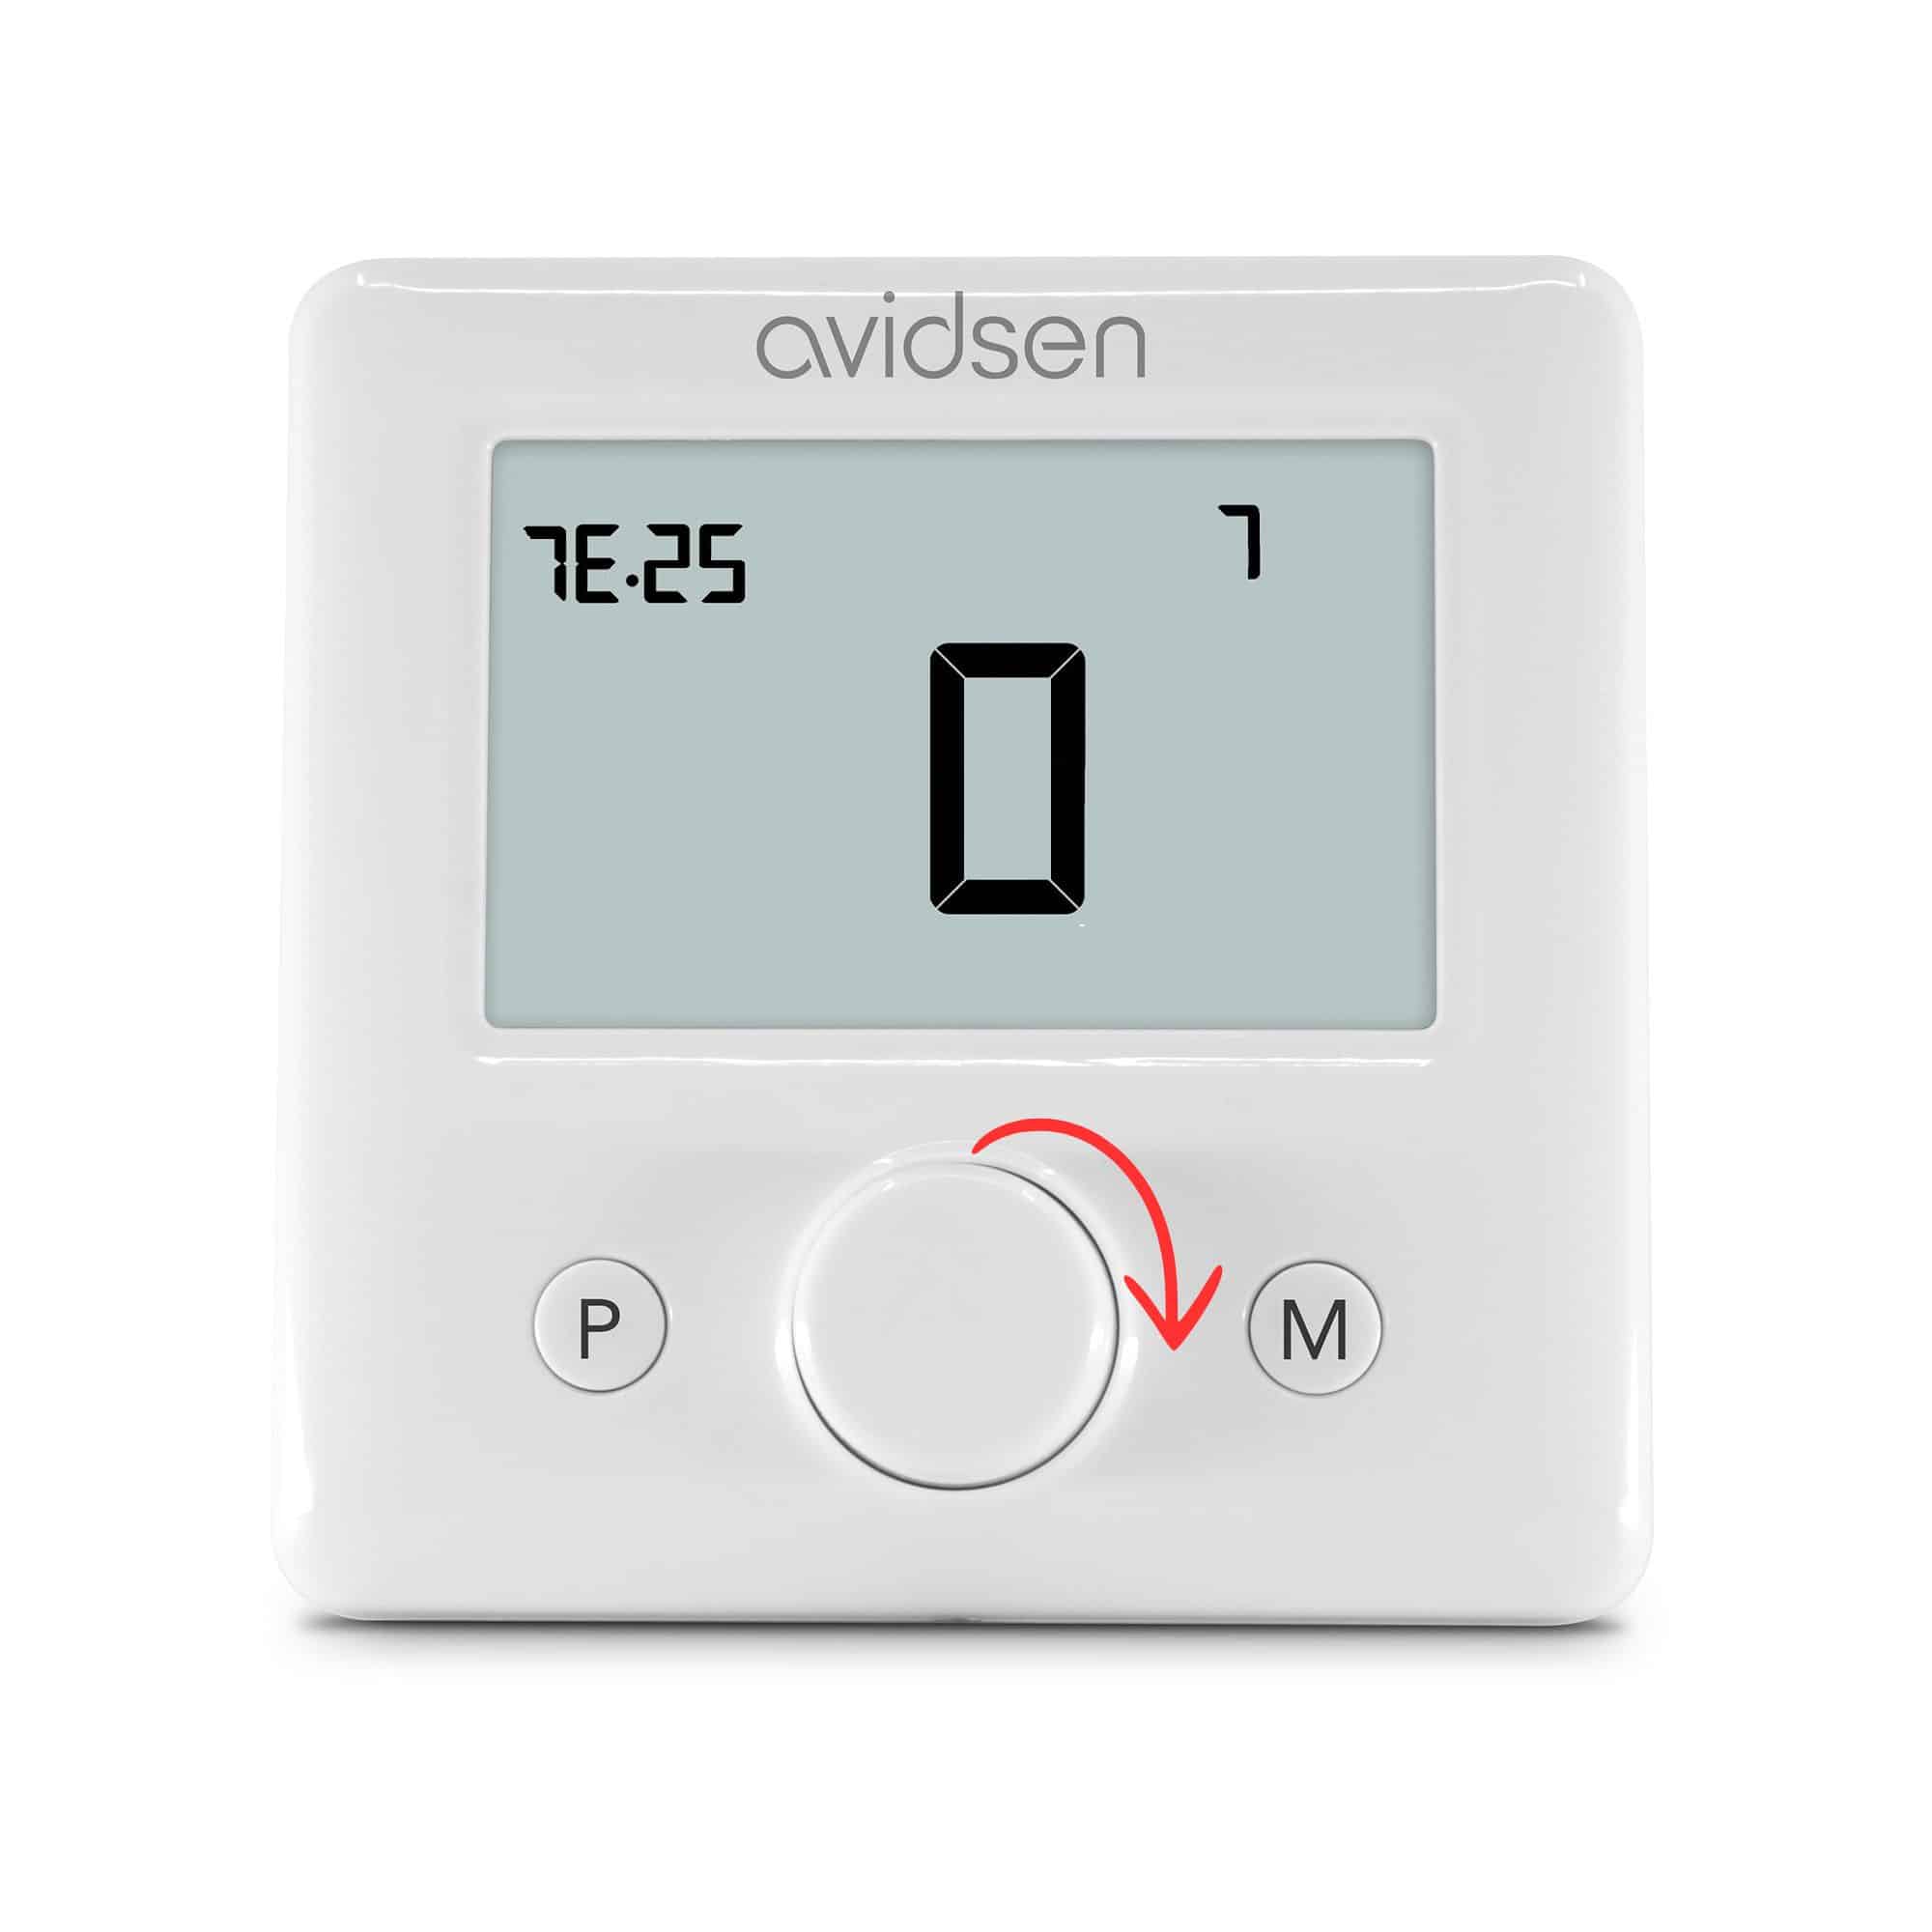
Step 2: Set sensor to association mode.
Make sure the batteries have been inserted into the probe.
With the display on, press and hold the probe adjustment button for 5 seconds.
The display should show 7E25 and 0.
If an indication other than 7E25 appears, wait for the probe to go into standby mode and press the central button just once, then press the central button again for 5 seconds.
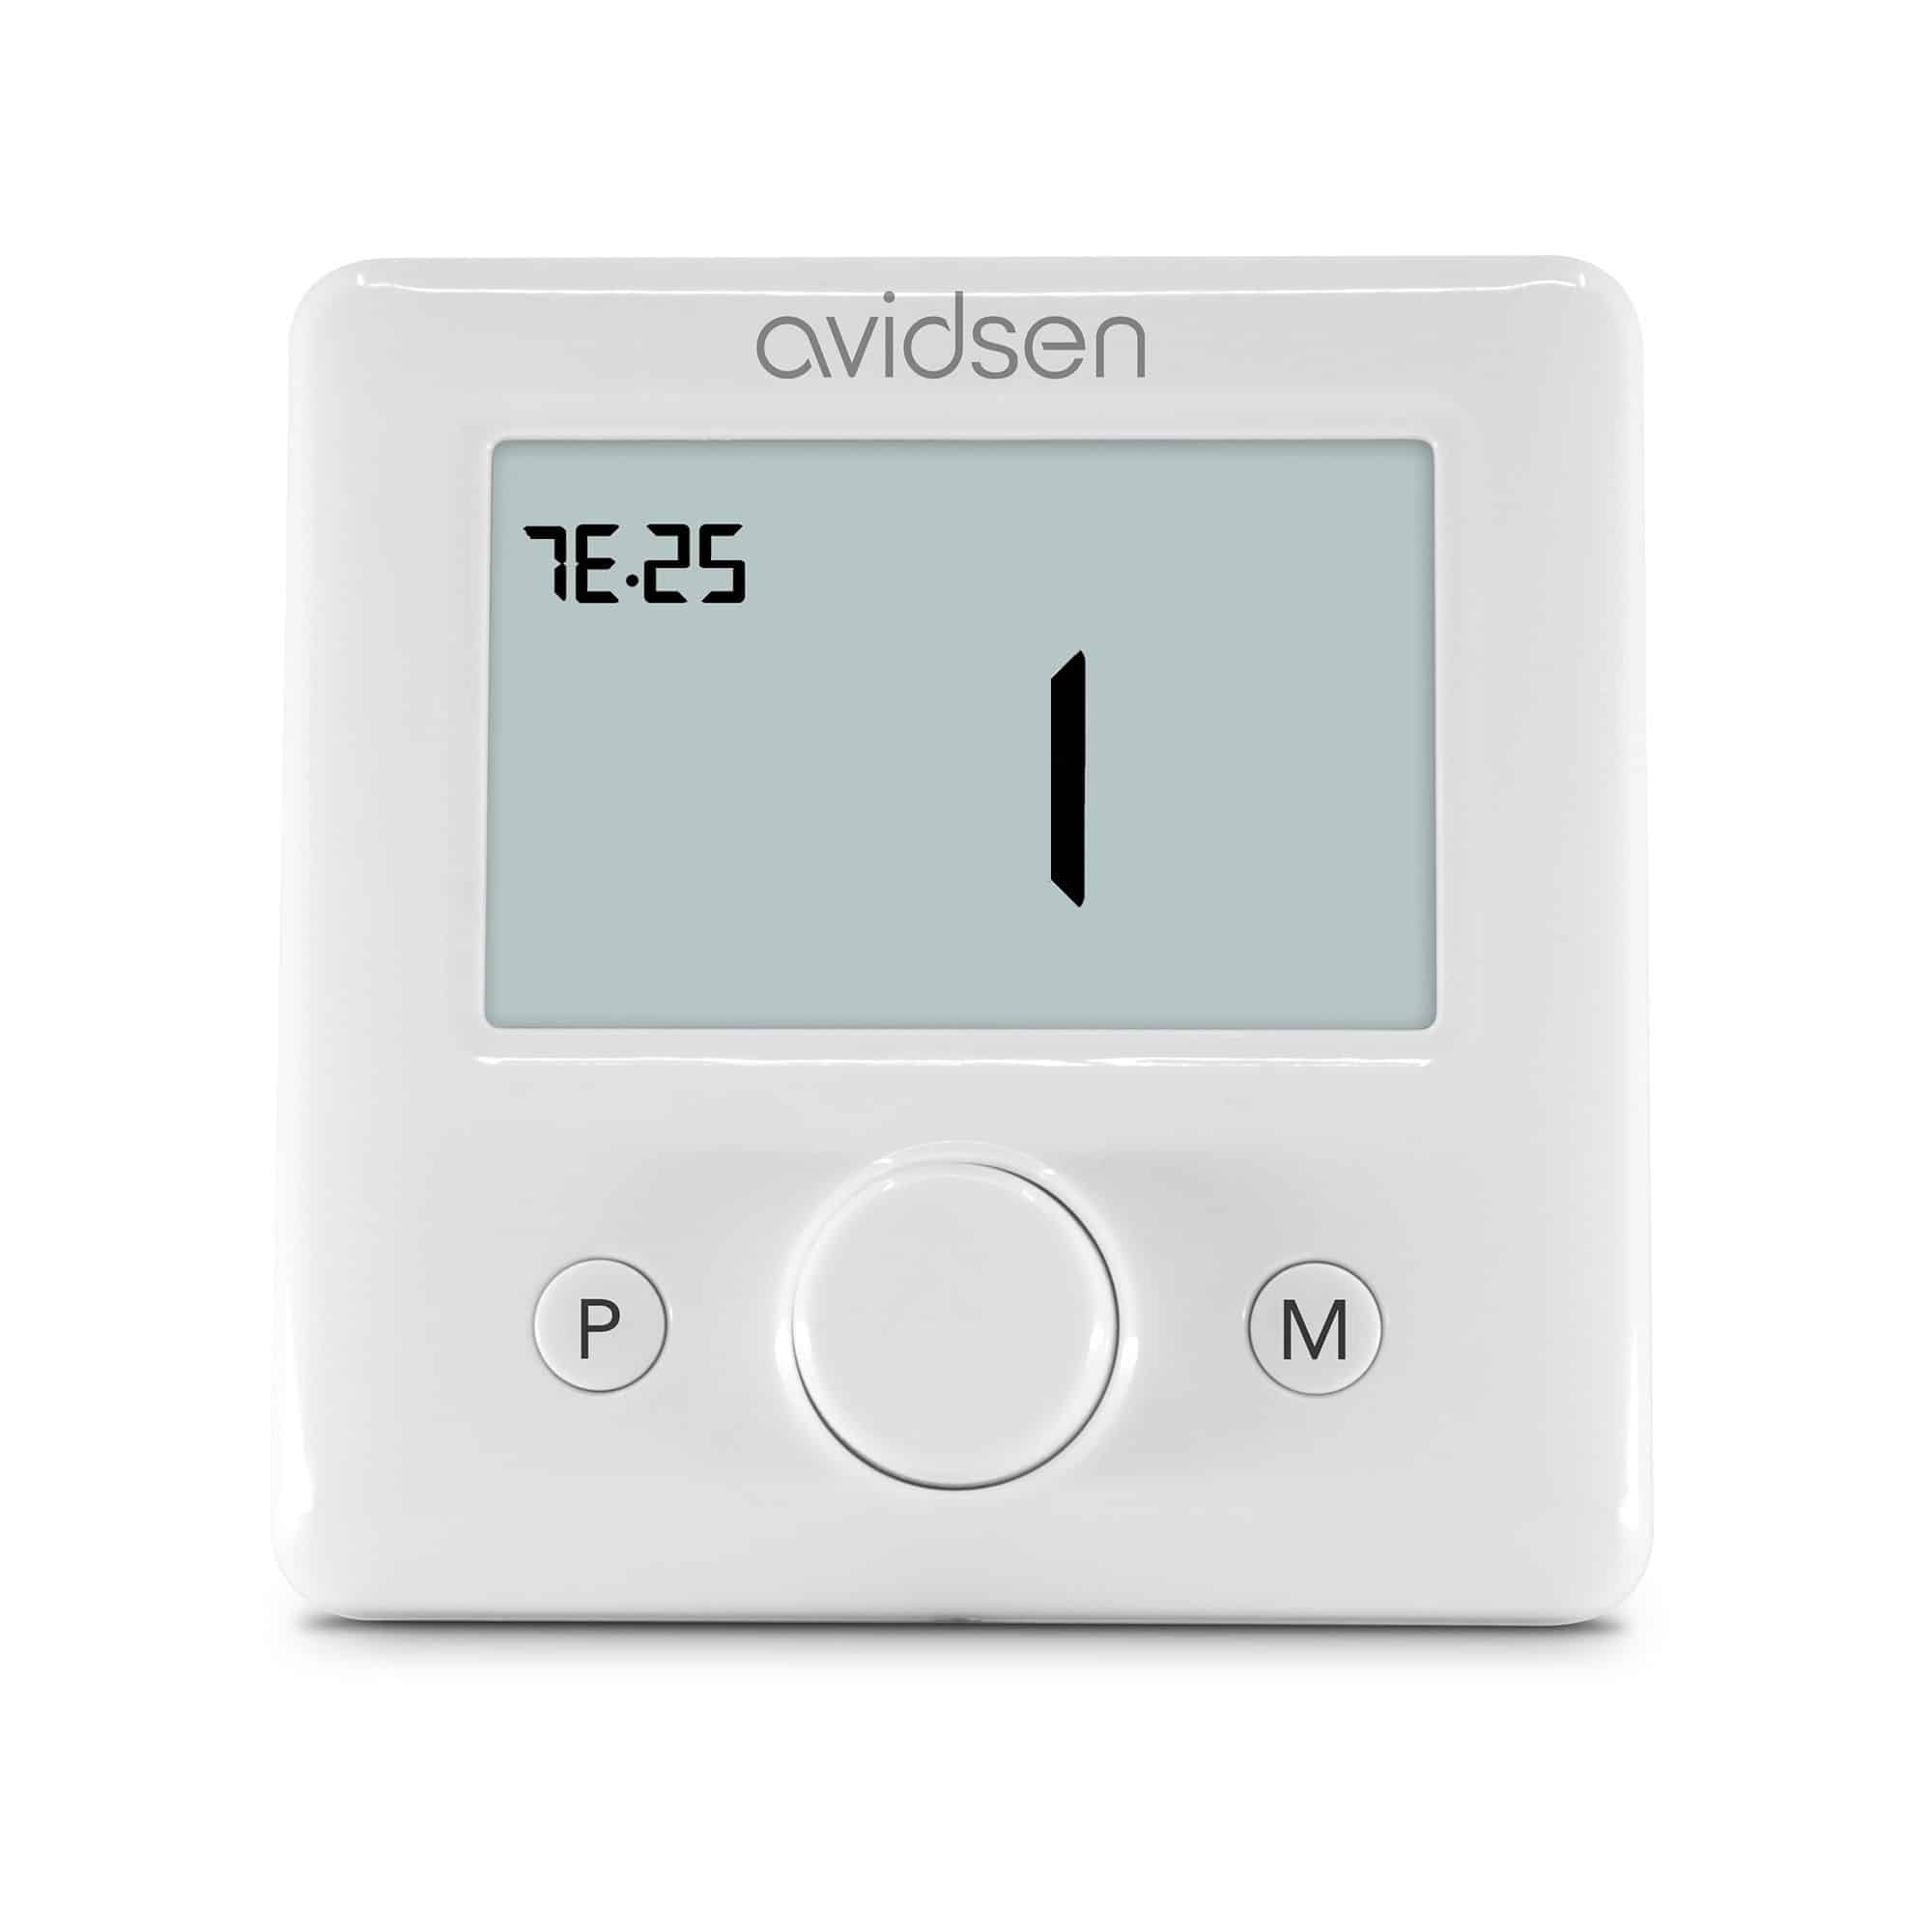
Turn the knob clockwise one notch.
the number 1 should appear on the display.
Indication 7E25 should flash
The probe then enters receive mode for 60 seconds.
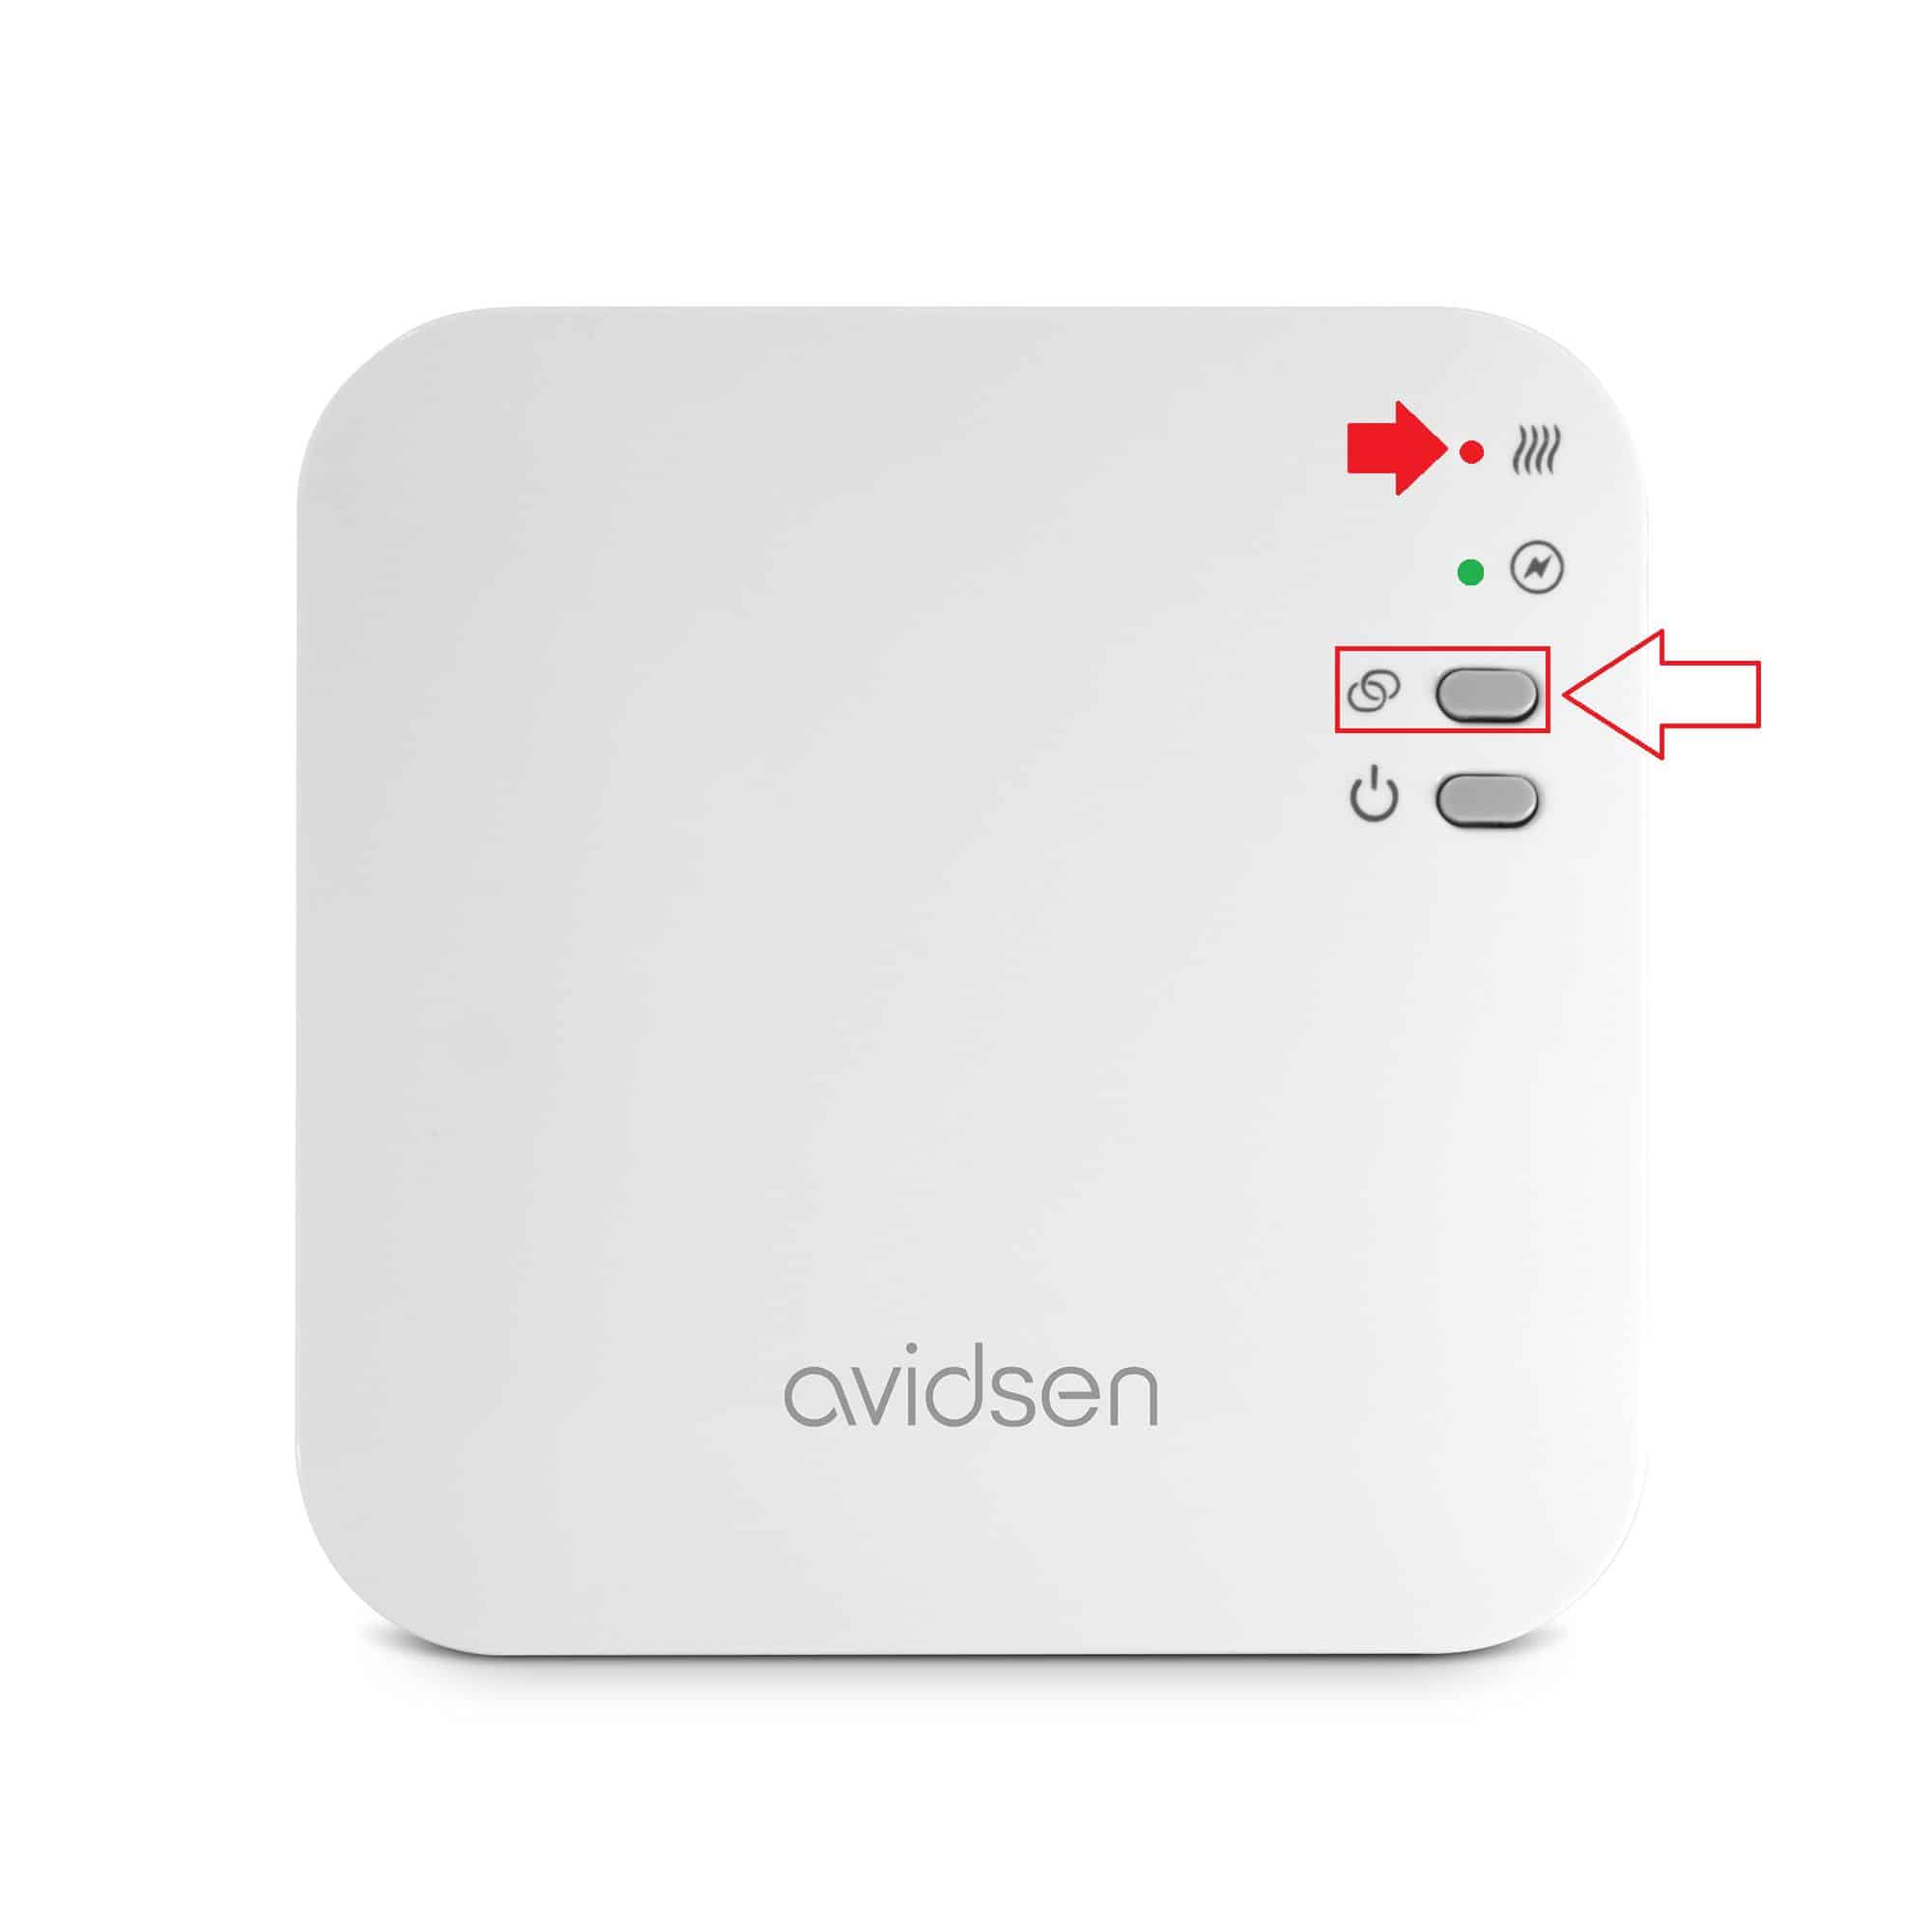
Step 3: Set the module to association mode.
Press for 3 seconds, the red LED will flash rapidly. The module will be in transmit mode for 60 seconds.
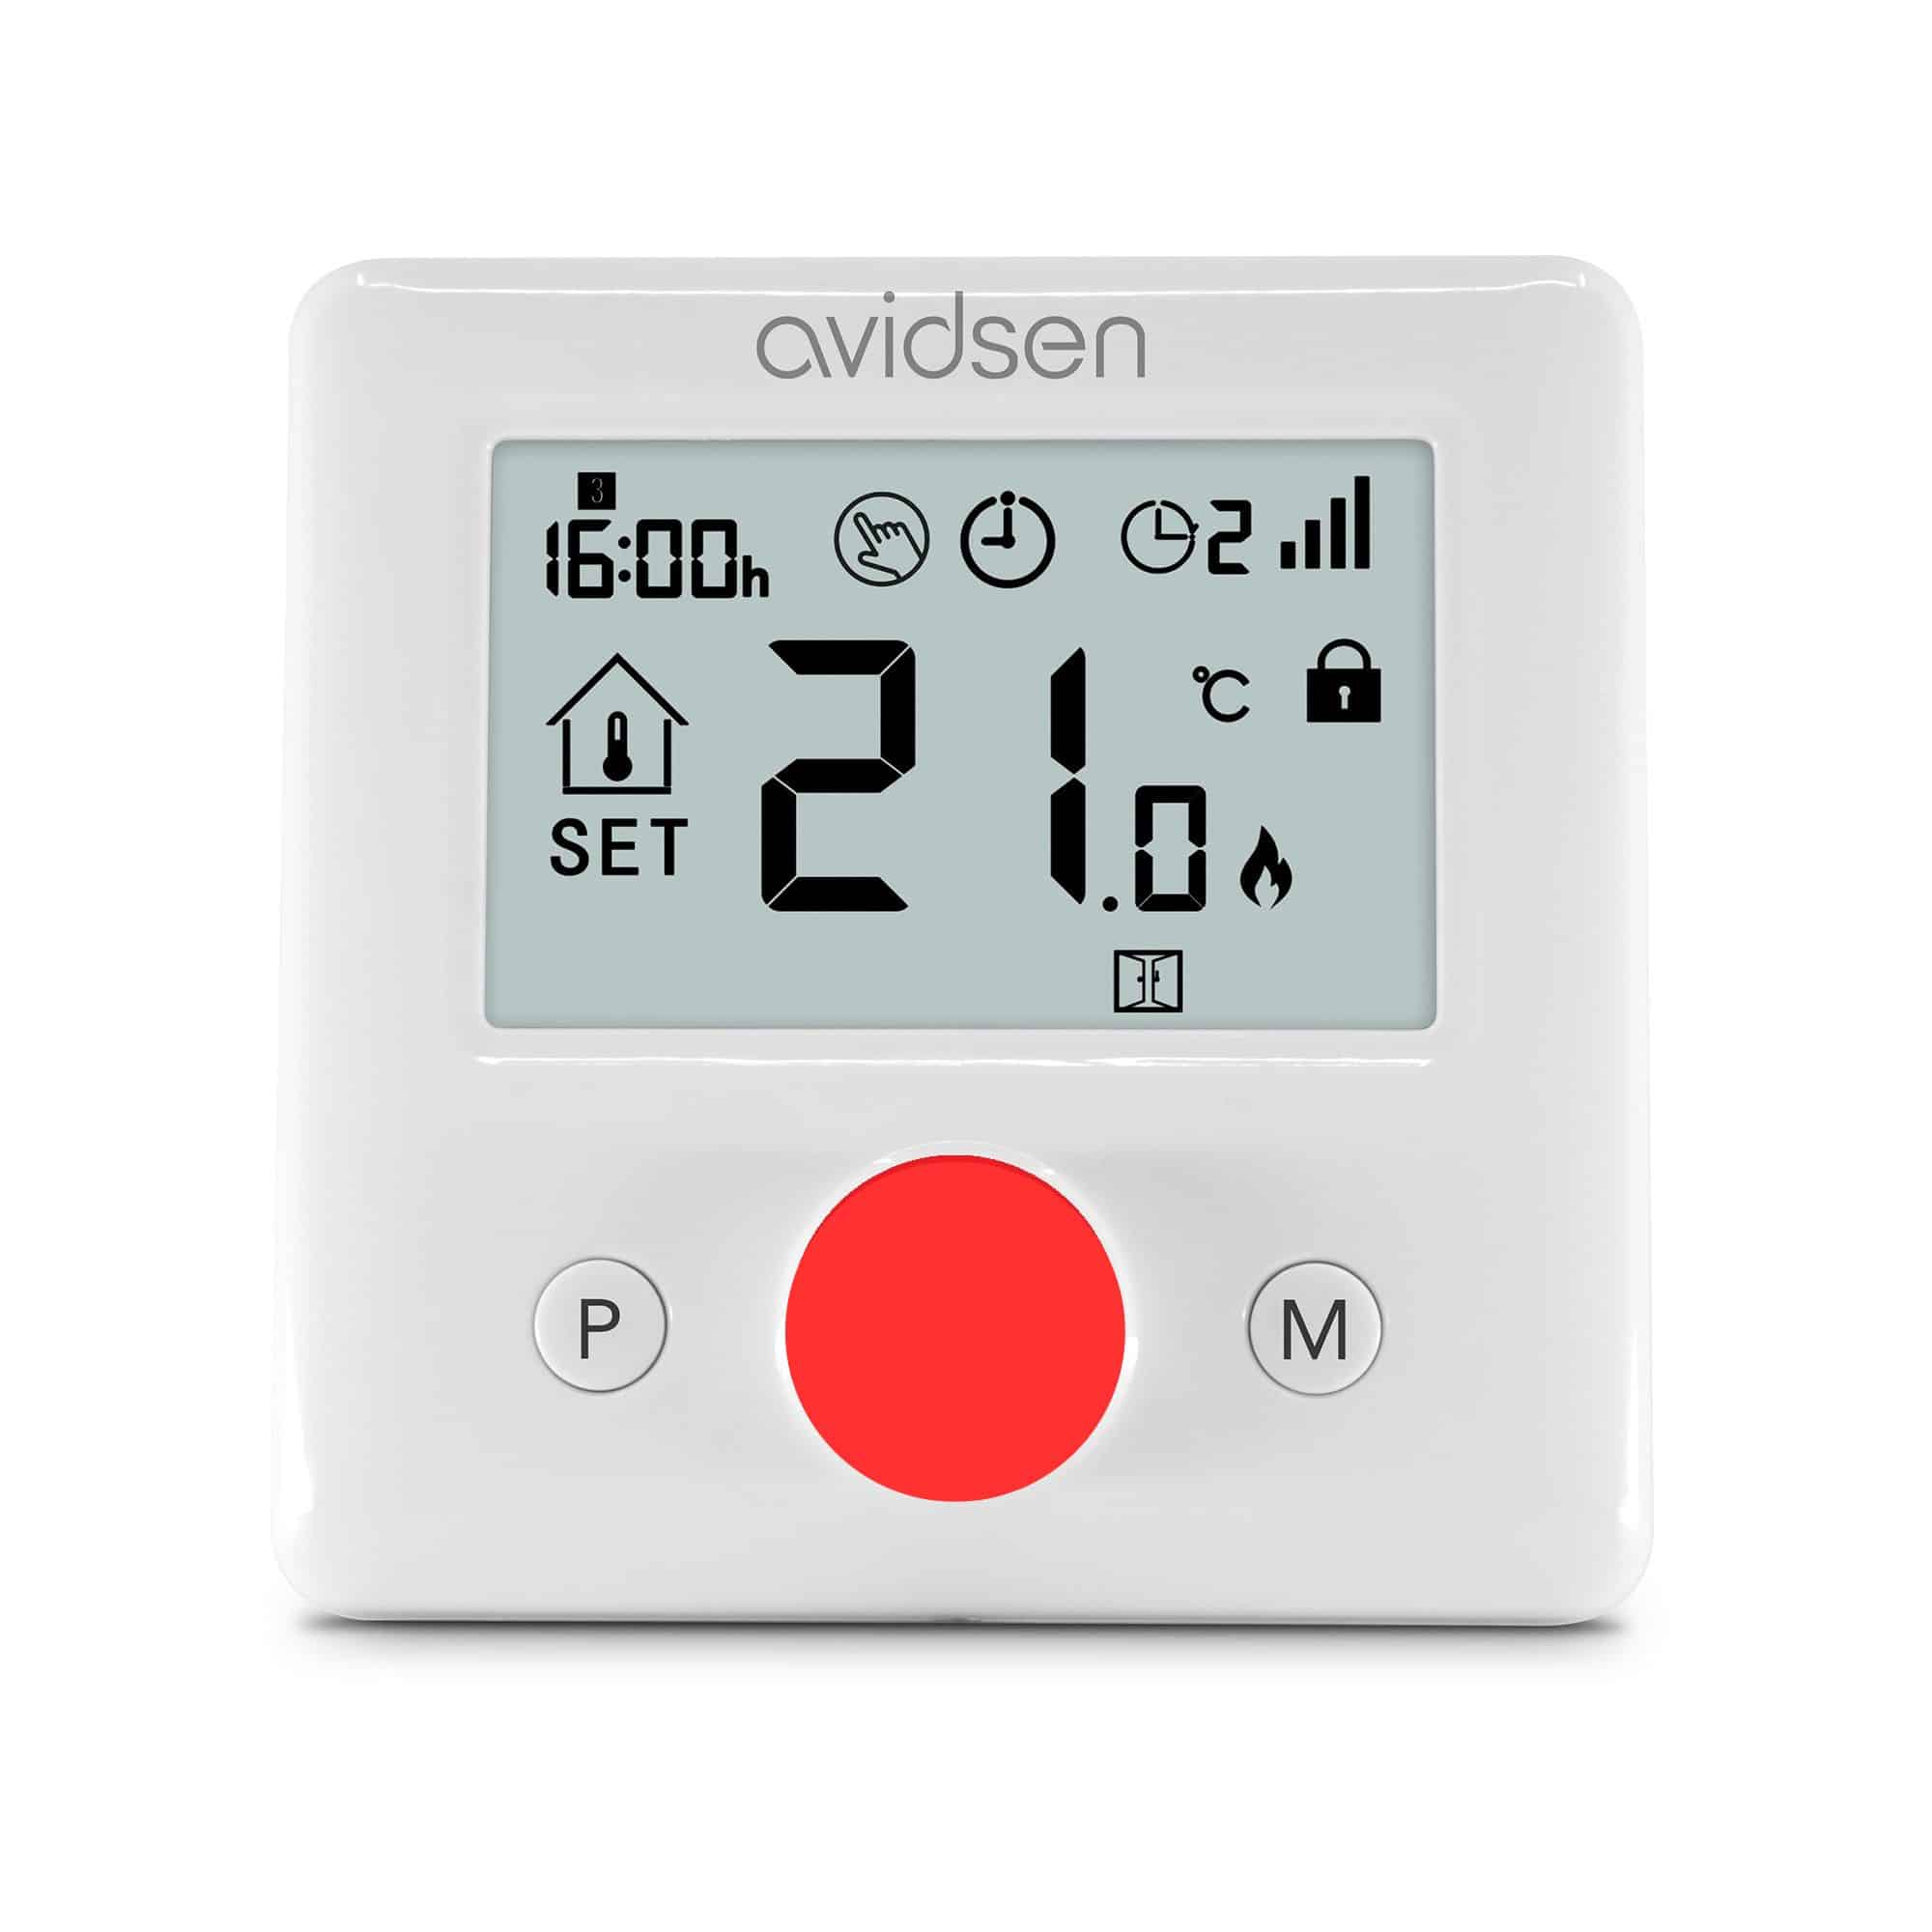
Step 4: successful synchronization
The probe should return to its main display immediately.
The module’s red LED should flash slowly.
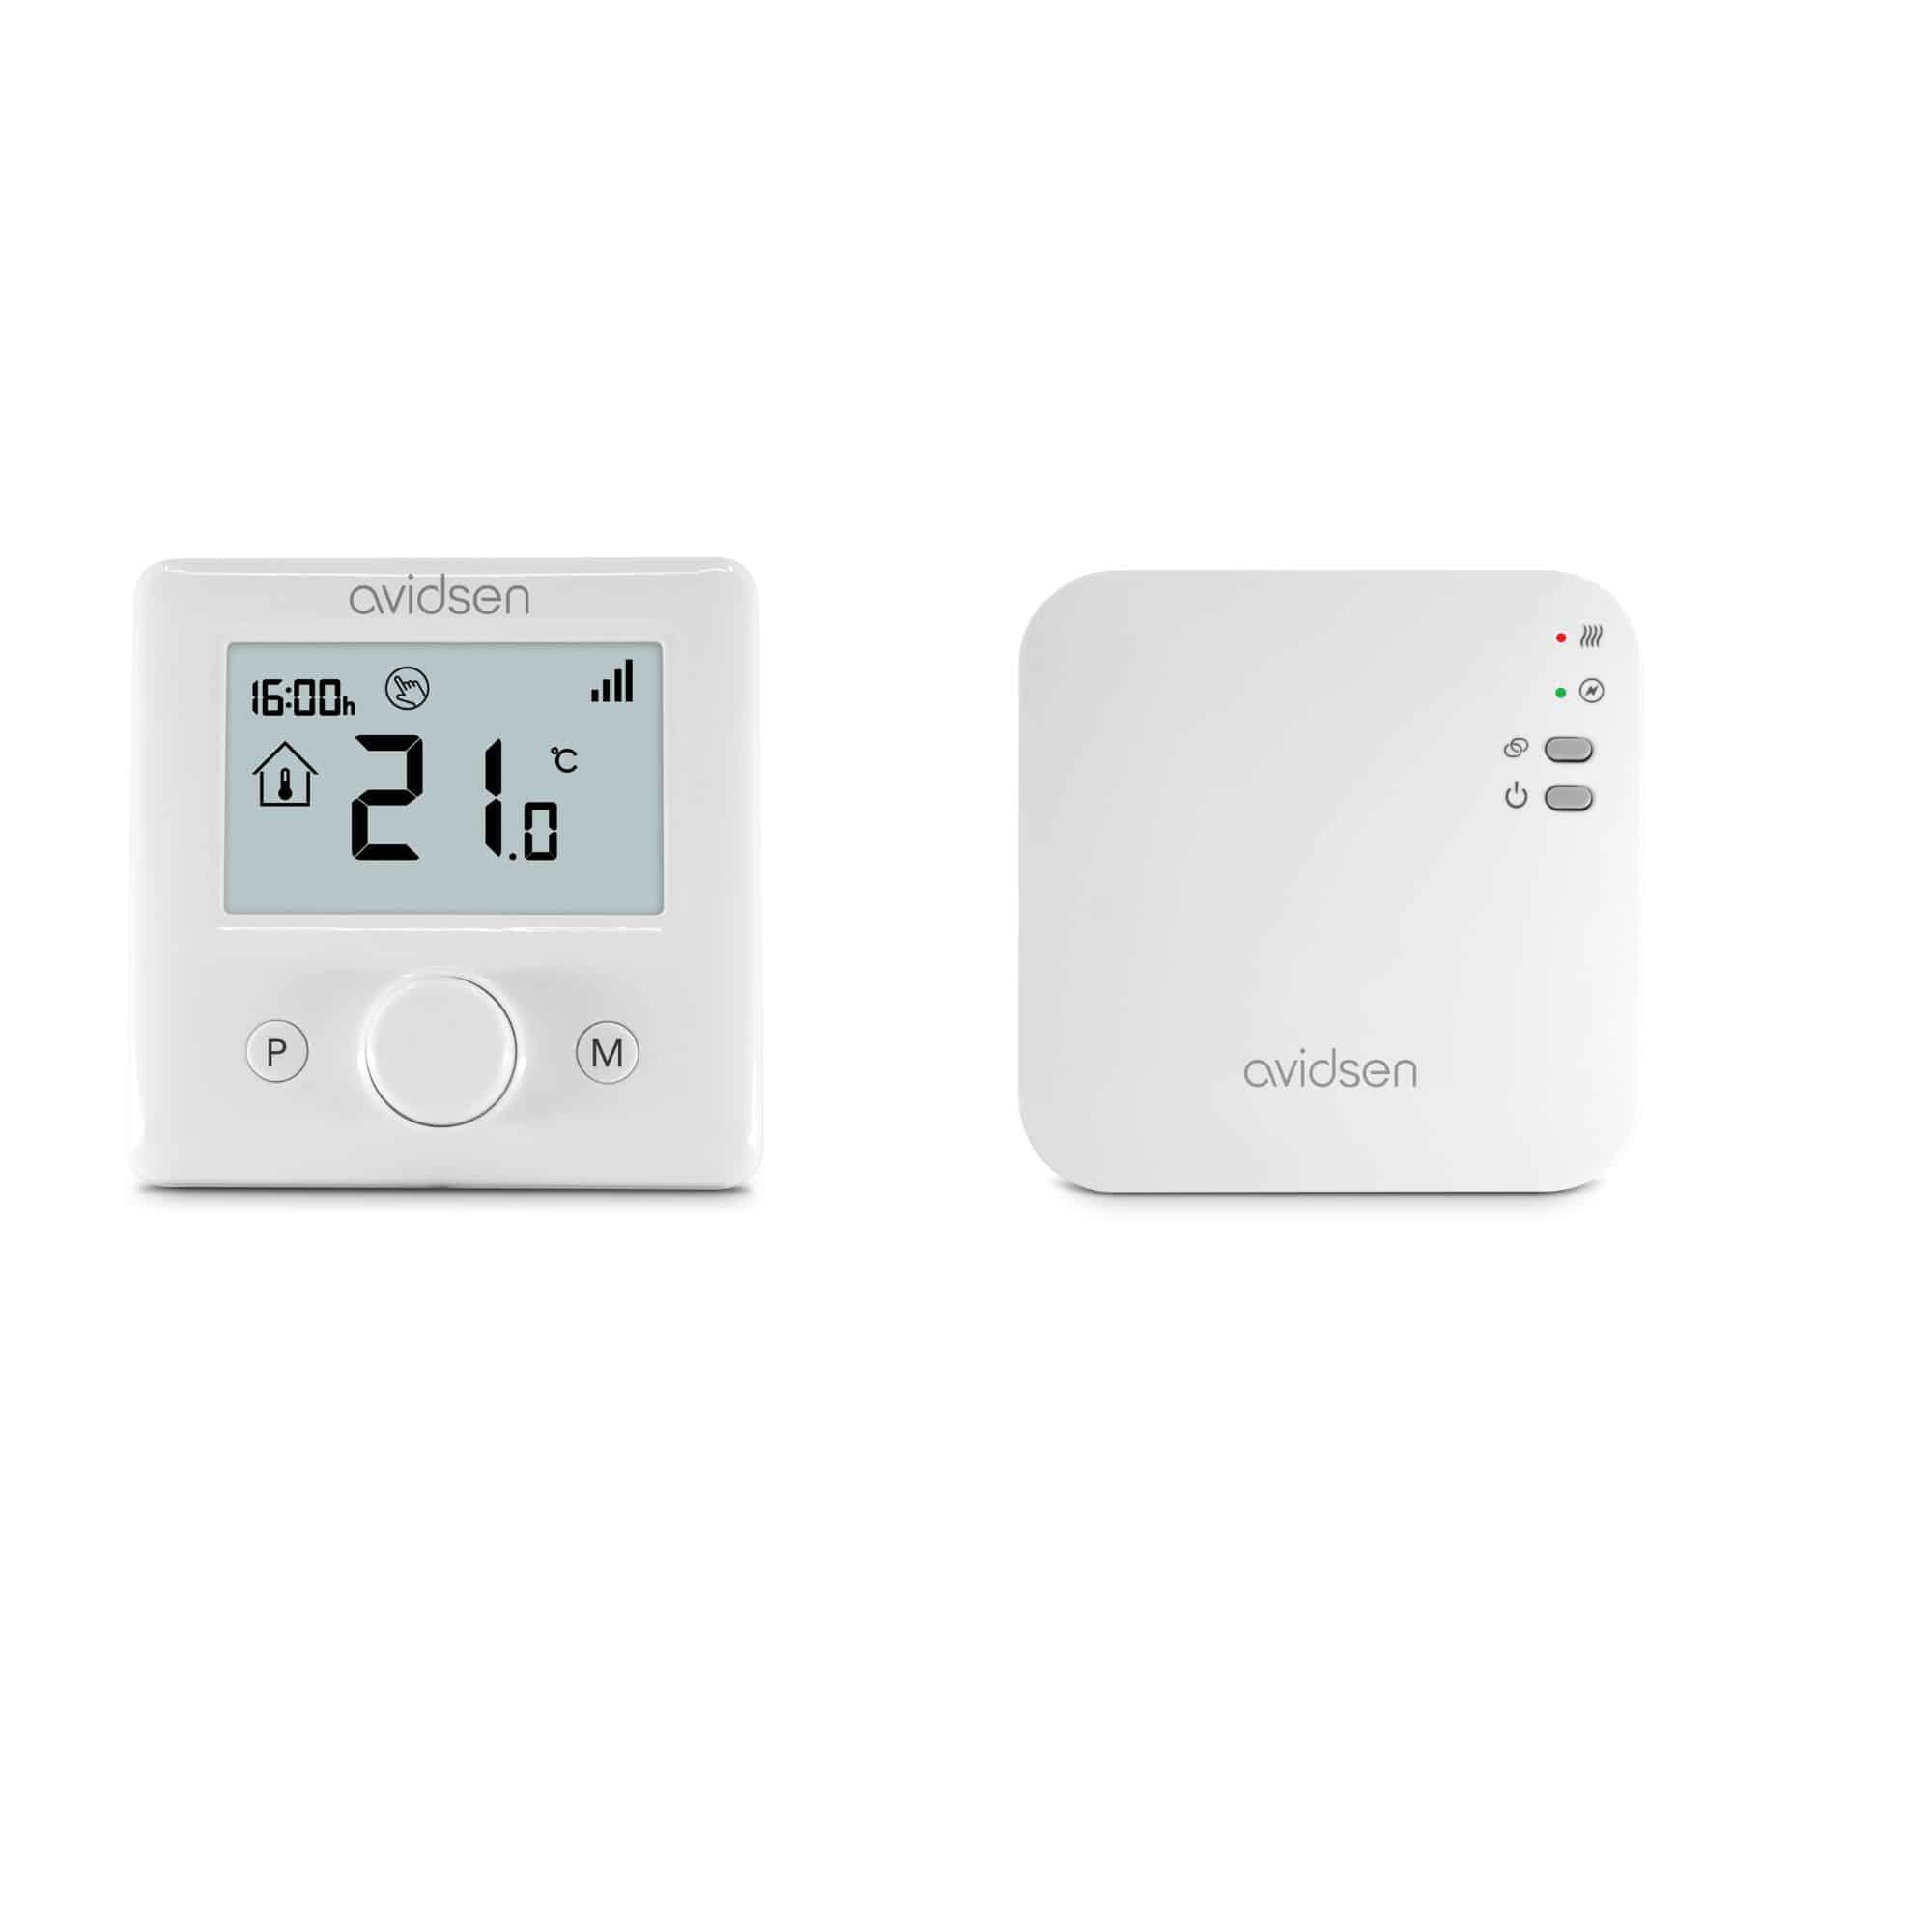
The thermostat is associated with the
If 7E25 continues to flash on the probe despite pressing the module button, please ensure that the module and probe are in close proximity.
Appendix: Meaning of module LEDs/buttons
= Association button
= ON/OFF button
= Off: The module is not supplied with 230V.
= Steady green: Power supply OK
= Off: Normal state of the module, heating is off.
= Slow flashing red: Not connected to the Internet.