Skip to content
  • English
    • French
    • Italian
    • Spanish
    • German
    • Dutch
    • Portuguese (Portugal)
    • Greek
    • Polish
  • English
    • French
    • Italian
    • Spanish
    • German
    • Dutch
    • Portuguese (Portugal)
    • Greek
    • Polish
Logo Avidsen
  • Products
    • Products
    • Avidsen Brand
    • Extel Brand
    • Philips Brand
    • Thomson Brand
  • Support
    • Tutorials on repair and use
    • Avidsen Technical Support
    • Extel brand technical support
    • Philips technical support
    • Thomson Technical Support
  • The Group
    • The Group
    • Contact
  • Ethic Company
  • Where to buy ?
\

Replacing the ORANE 410 drive shaft

  1. Home
  2. Replacing the ORANE 410 drive shaft

Replacing the ORANE 410 drive shaft

Follow this step-by-step tutorial to replace the drive shaft of an ORANE 410 motor.

This tutorial is applicable for:

Avidsen - 114200 - Orane 410 / Avidsen - 114201 - Orane 510 / Avidsen - 114202 - Orane Connect / Avidsen - 114302 - Orane 420 / Thomson - 510062 - Sésame 250
Difficulté : Moderate
Temps nécessaire : 20 minutes minutes
Nombre d’étapes : 10
Mise à jour : February 2025

Materials needed:

Wrench or BTR 4 head, Large flathead screwdriver

Tutorial steps:

Step 1: Locate the BTR screws

Locate the 7 BTR screws (circled in red).

Tip: Start unscrewing

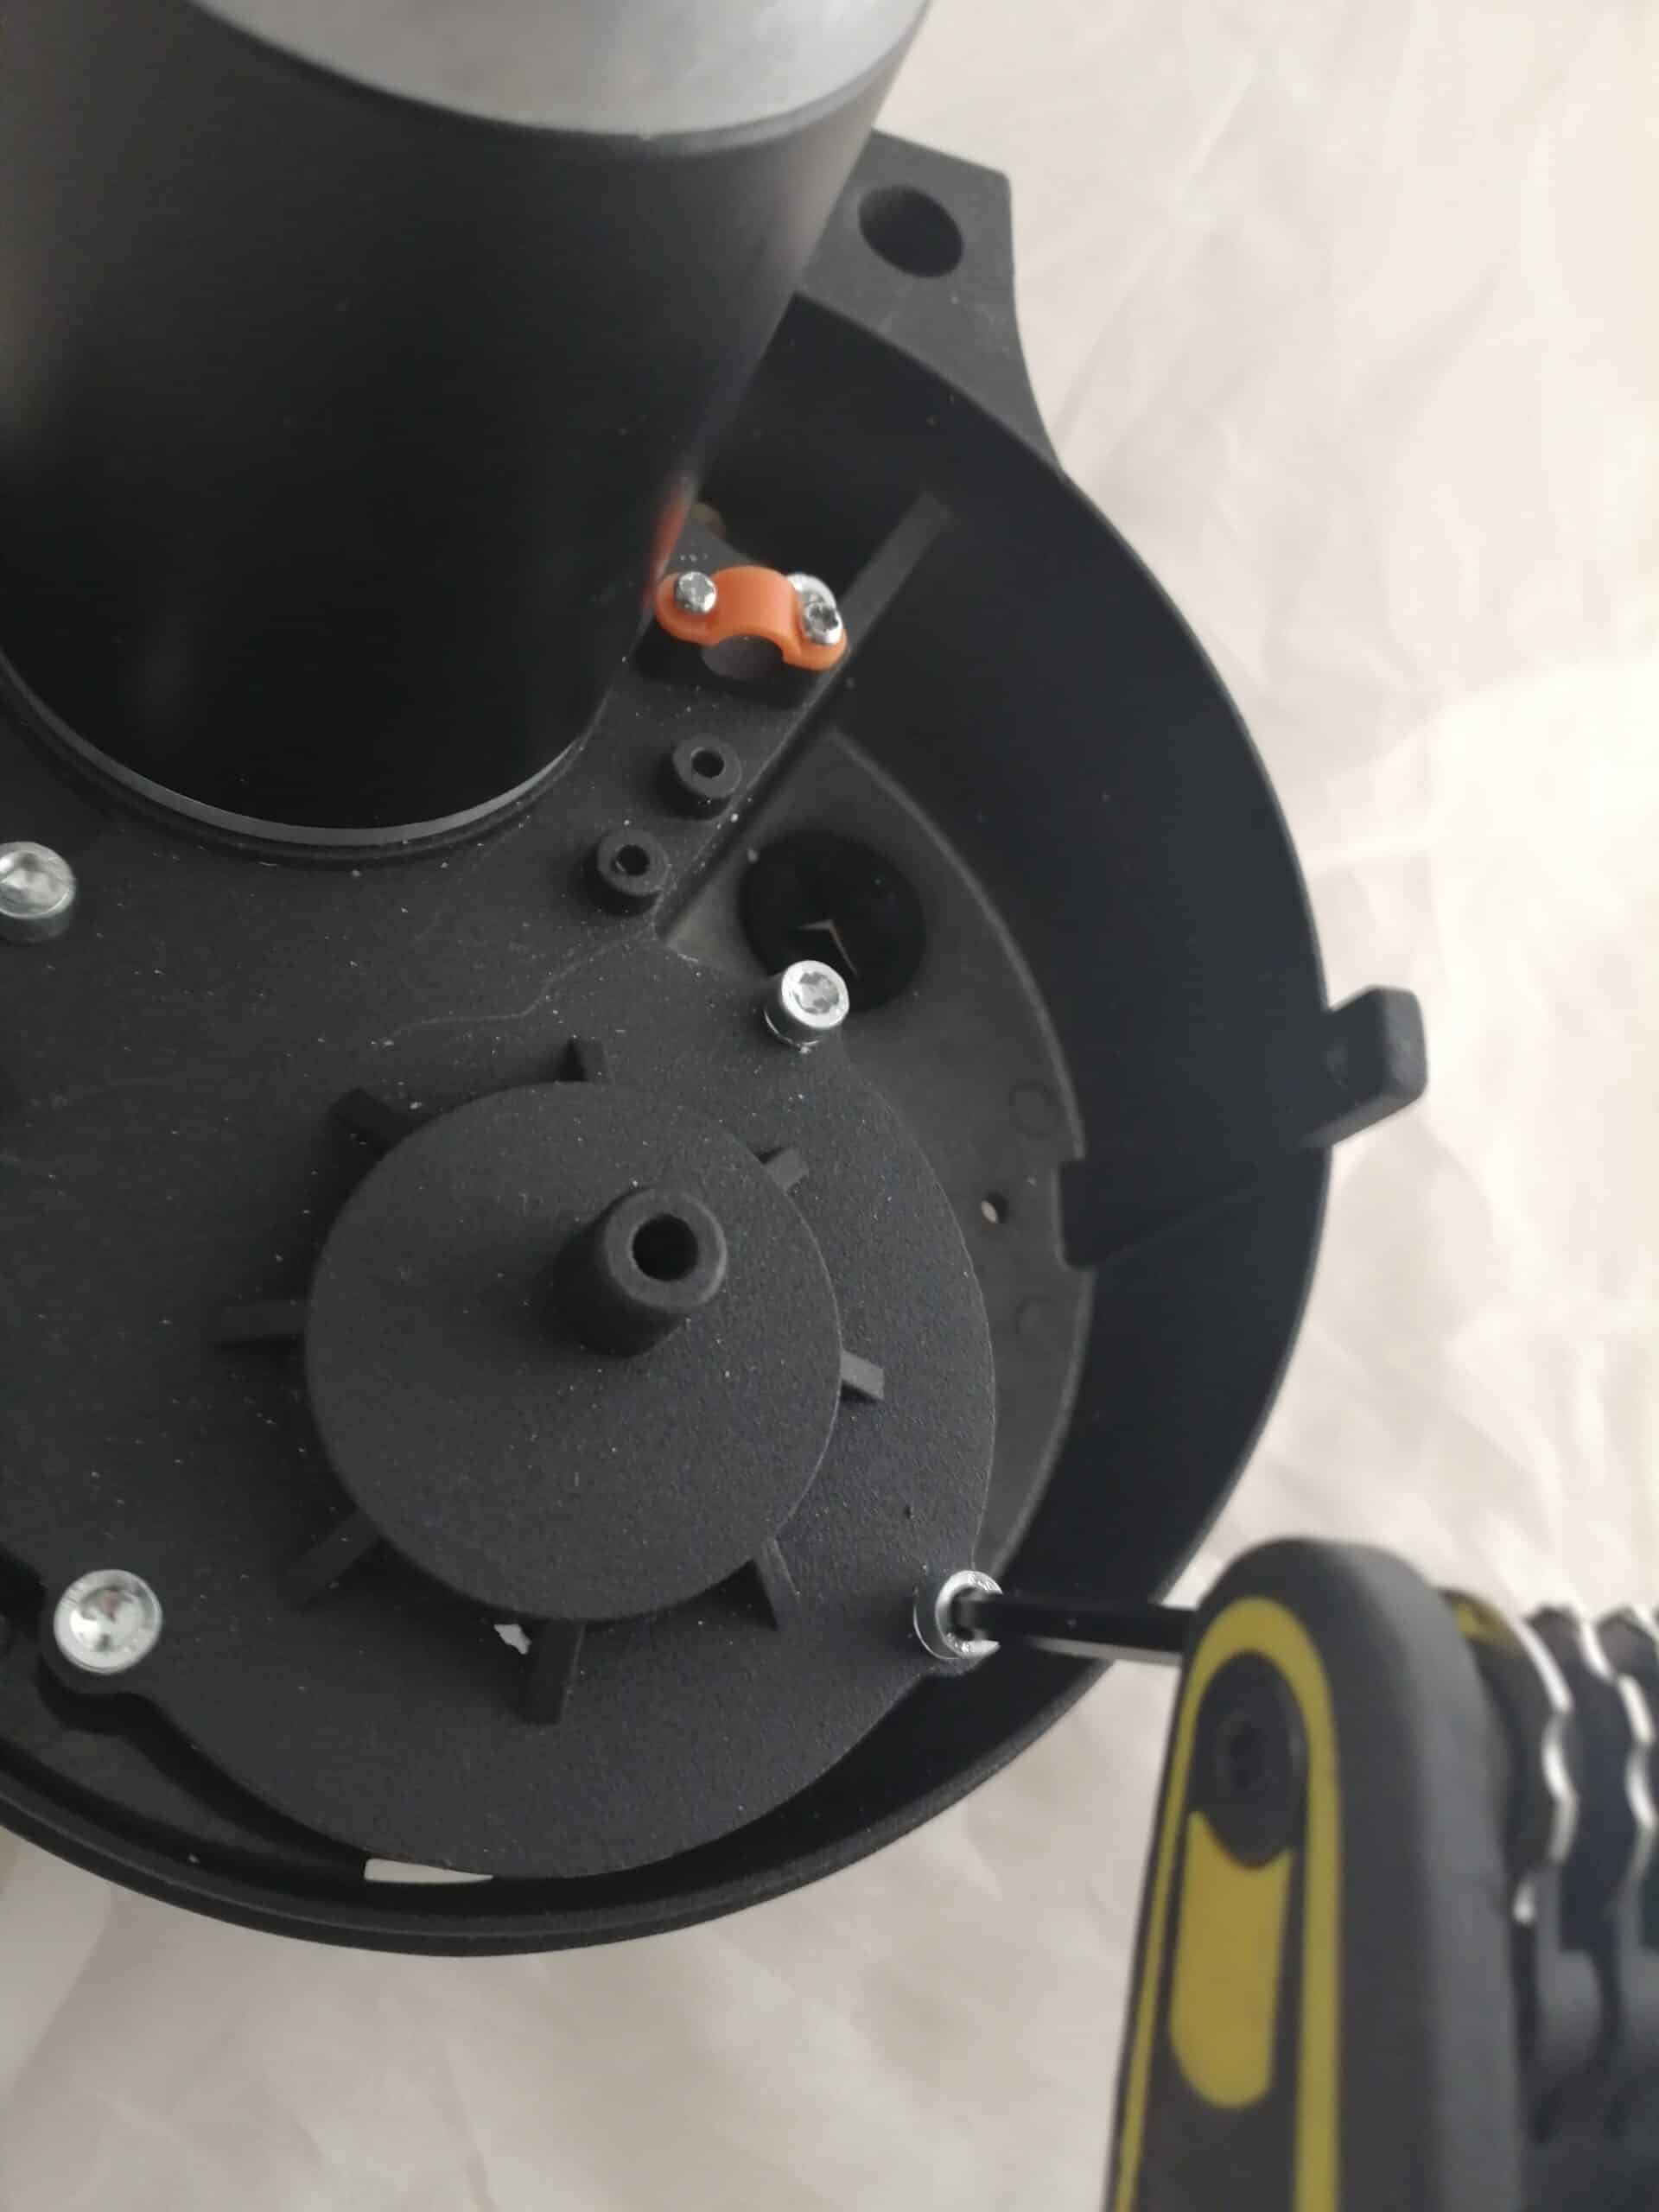
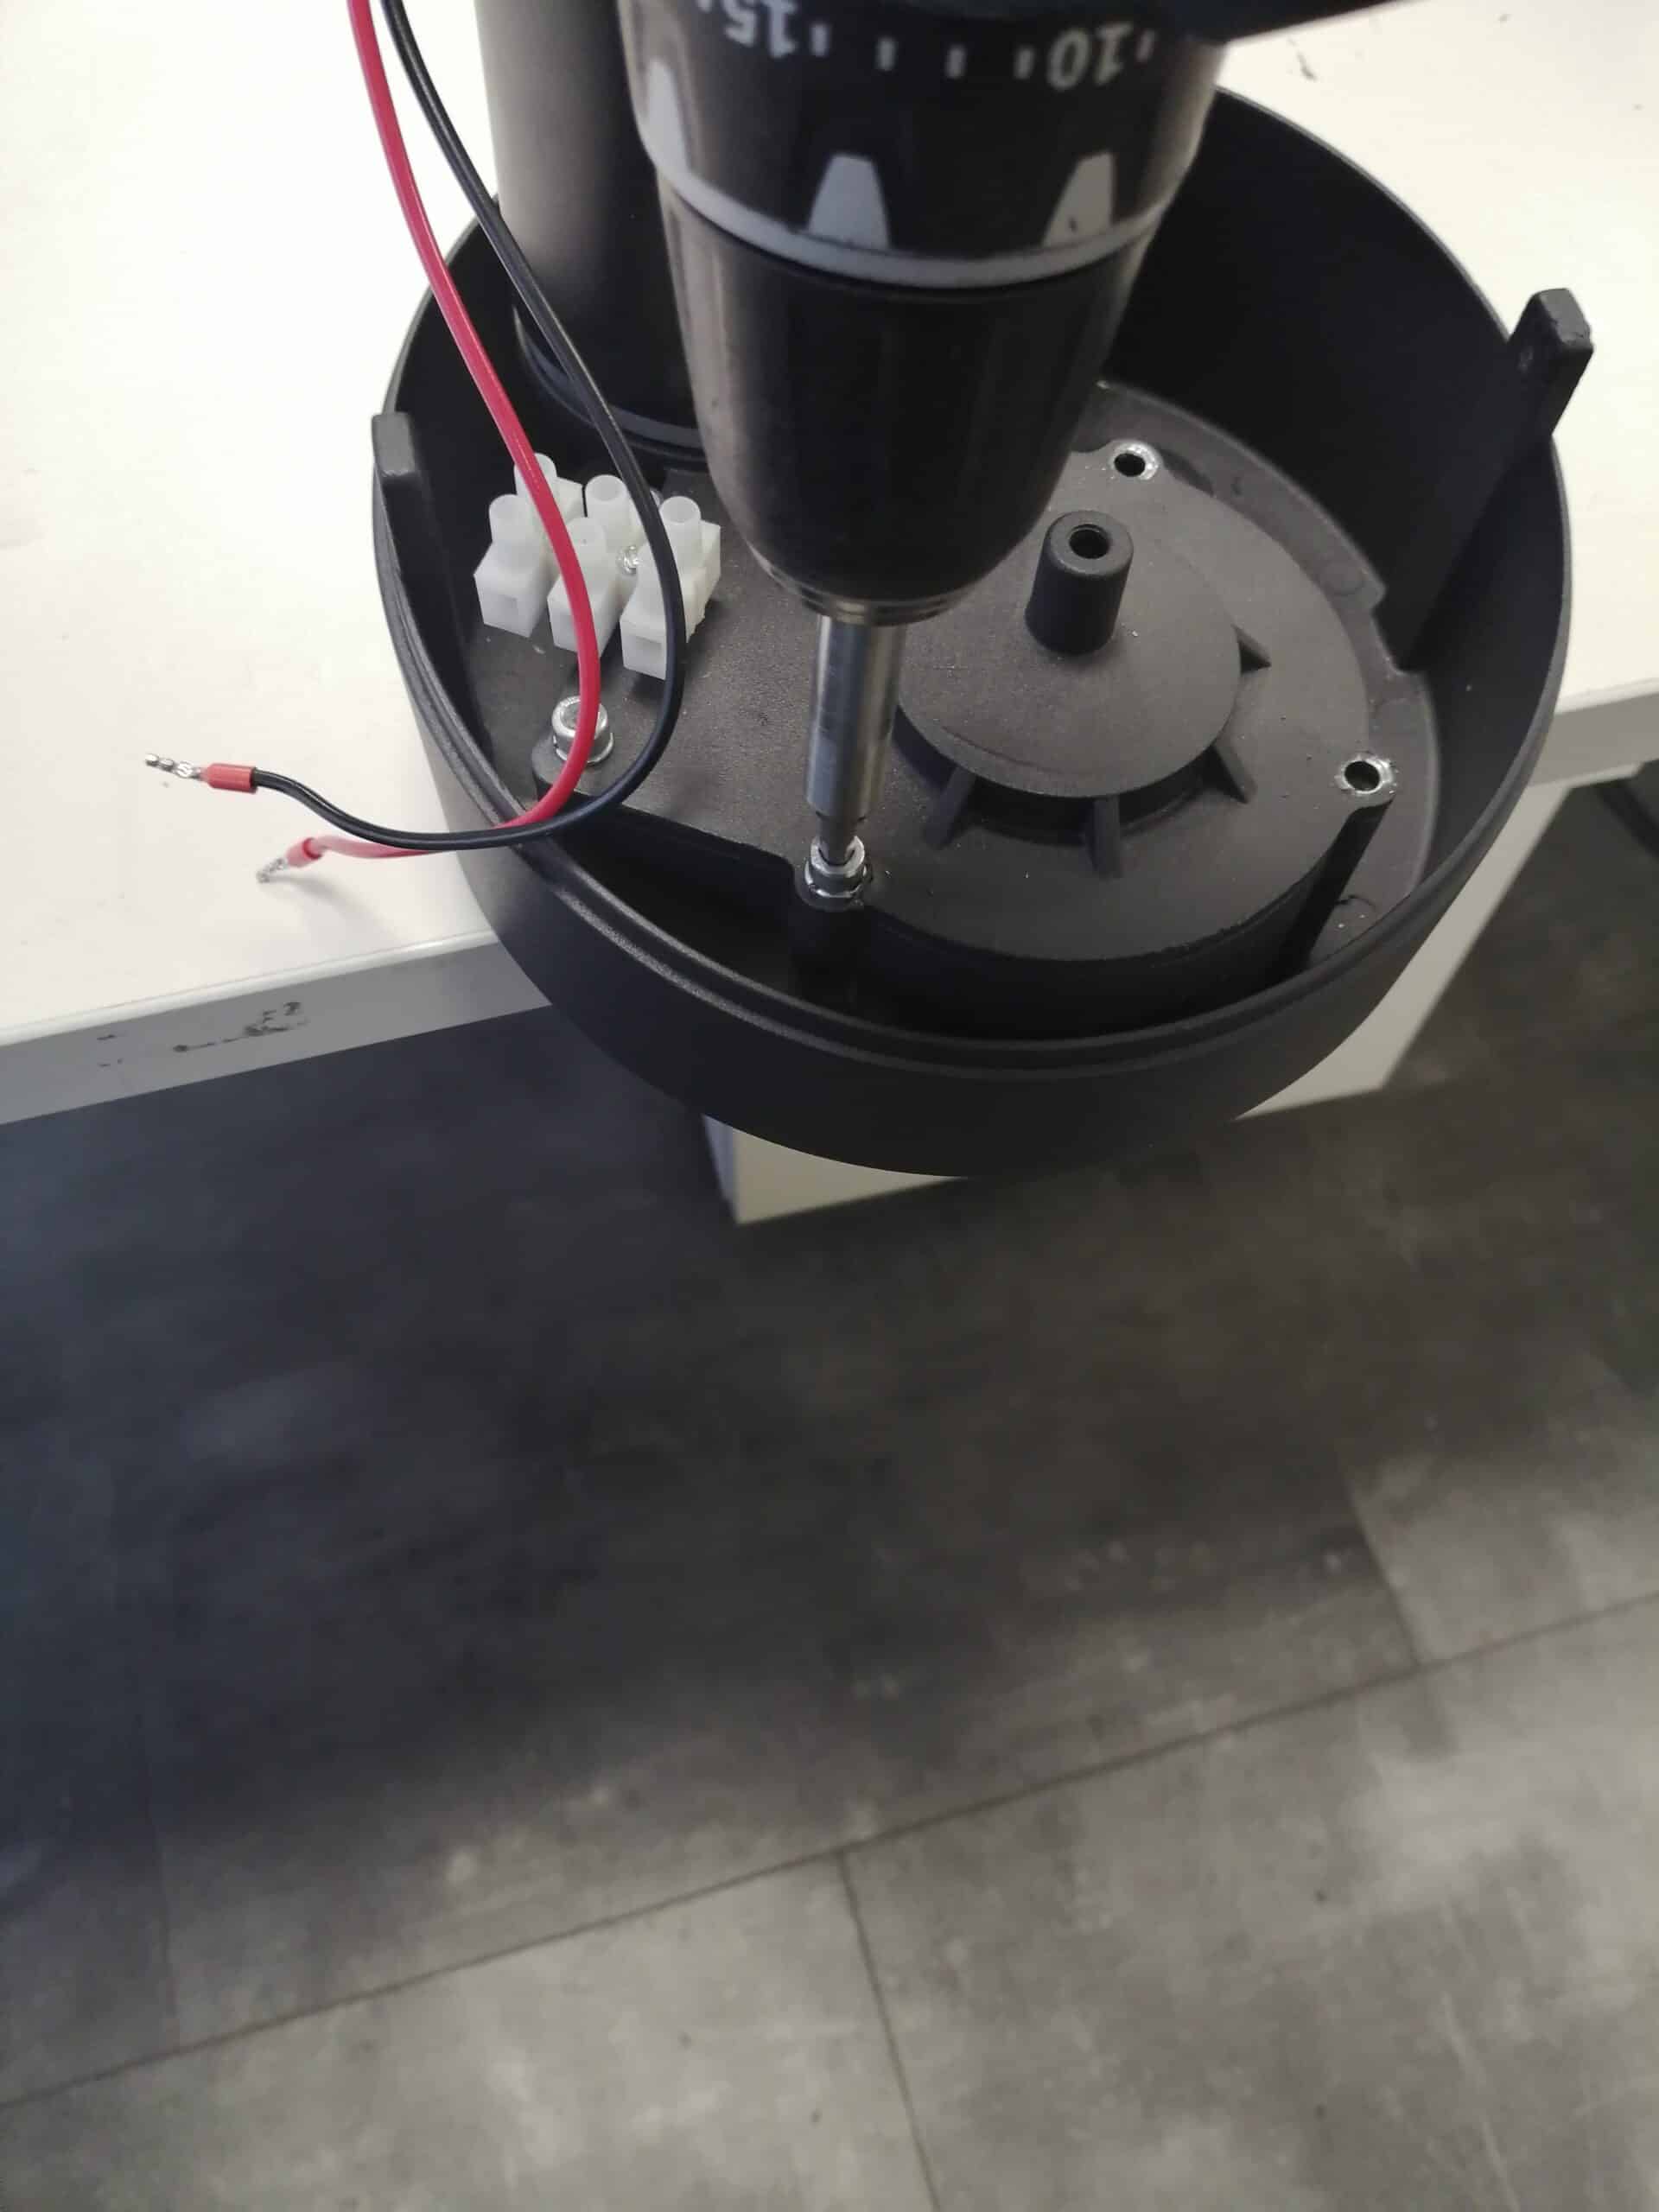
From the factory, the screws may be tight and cannot be turned with a screwdriver. Using a BTR wrench, unscrew the screws to loosen them. Once the screw can be turned freely, you can use the screwdriver to go faster.

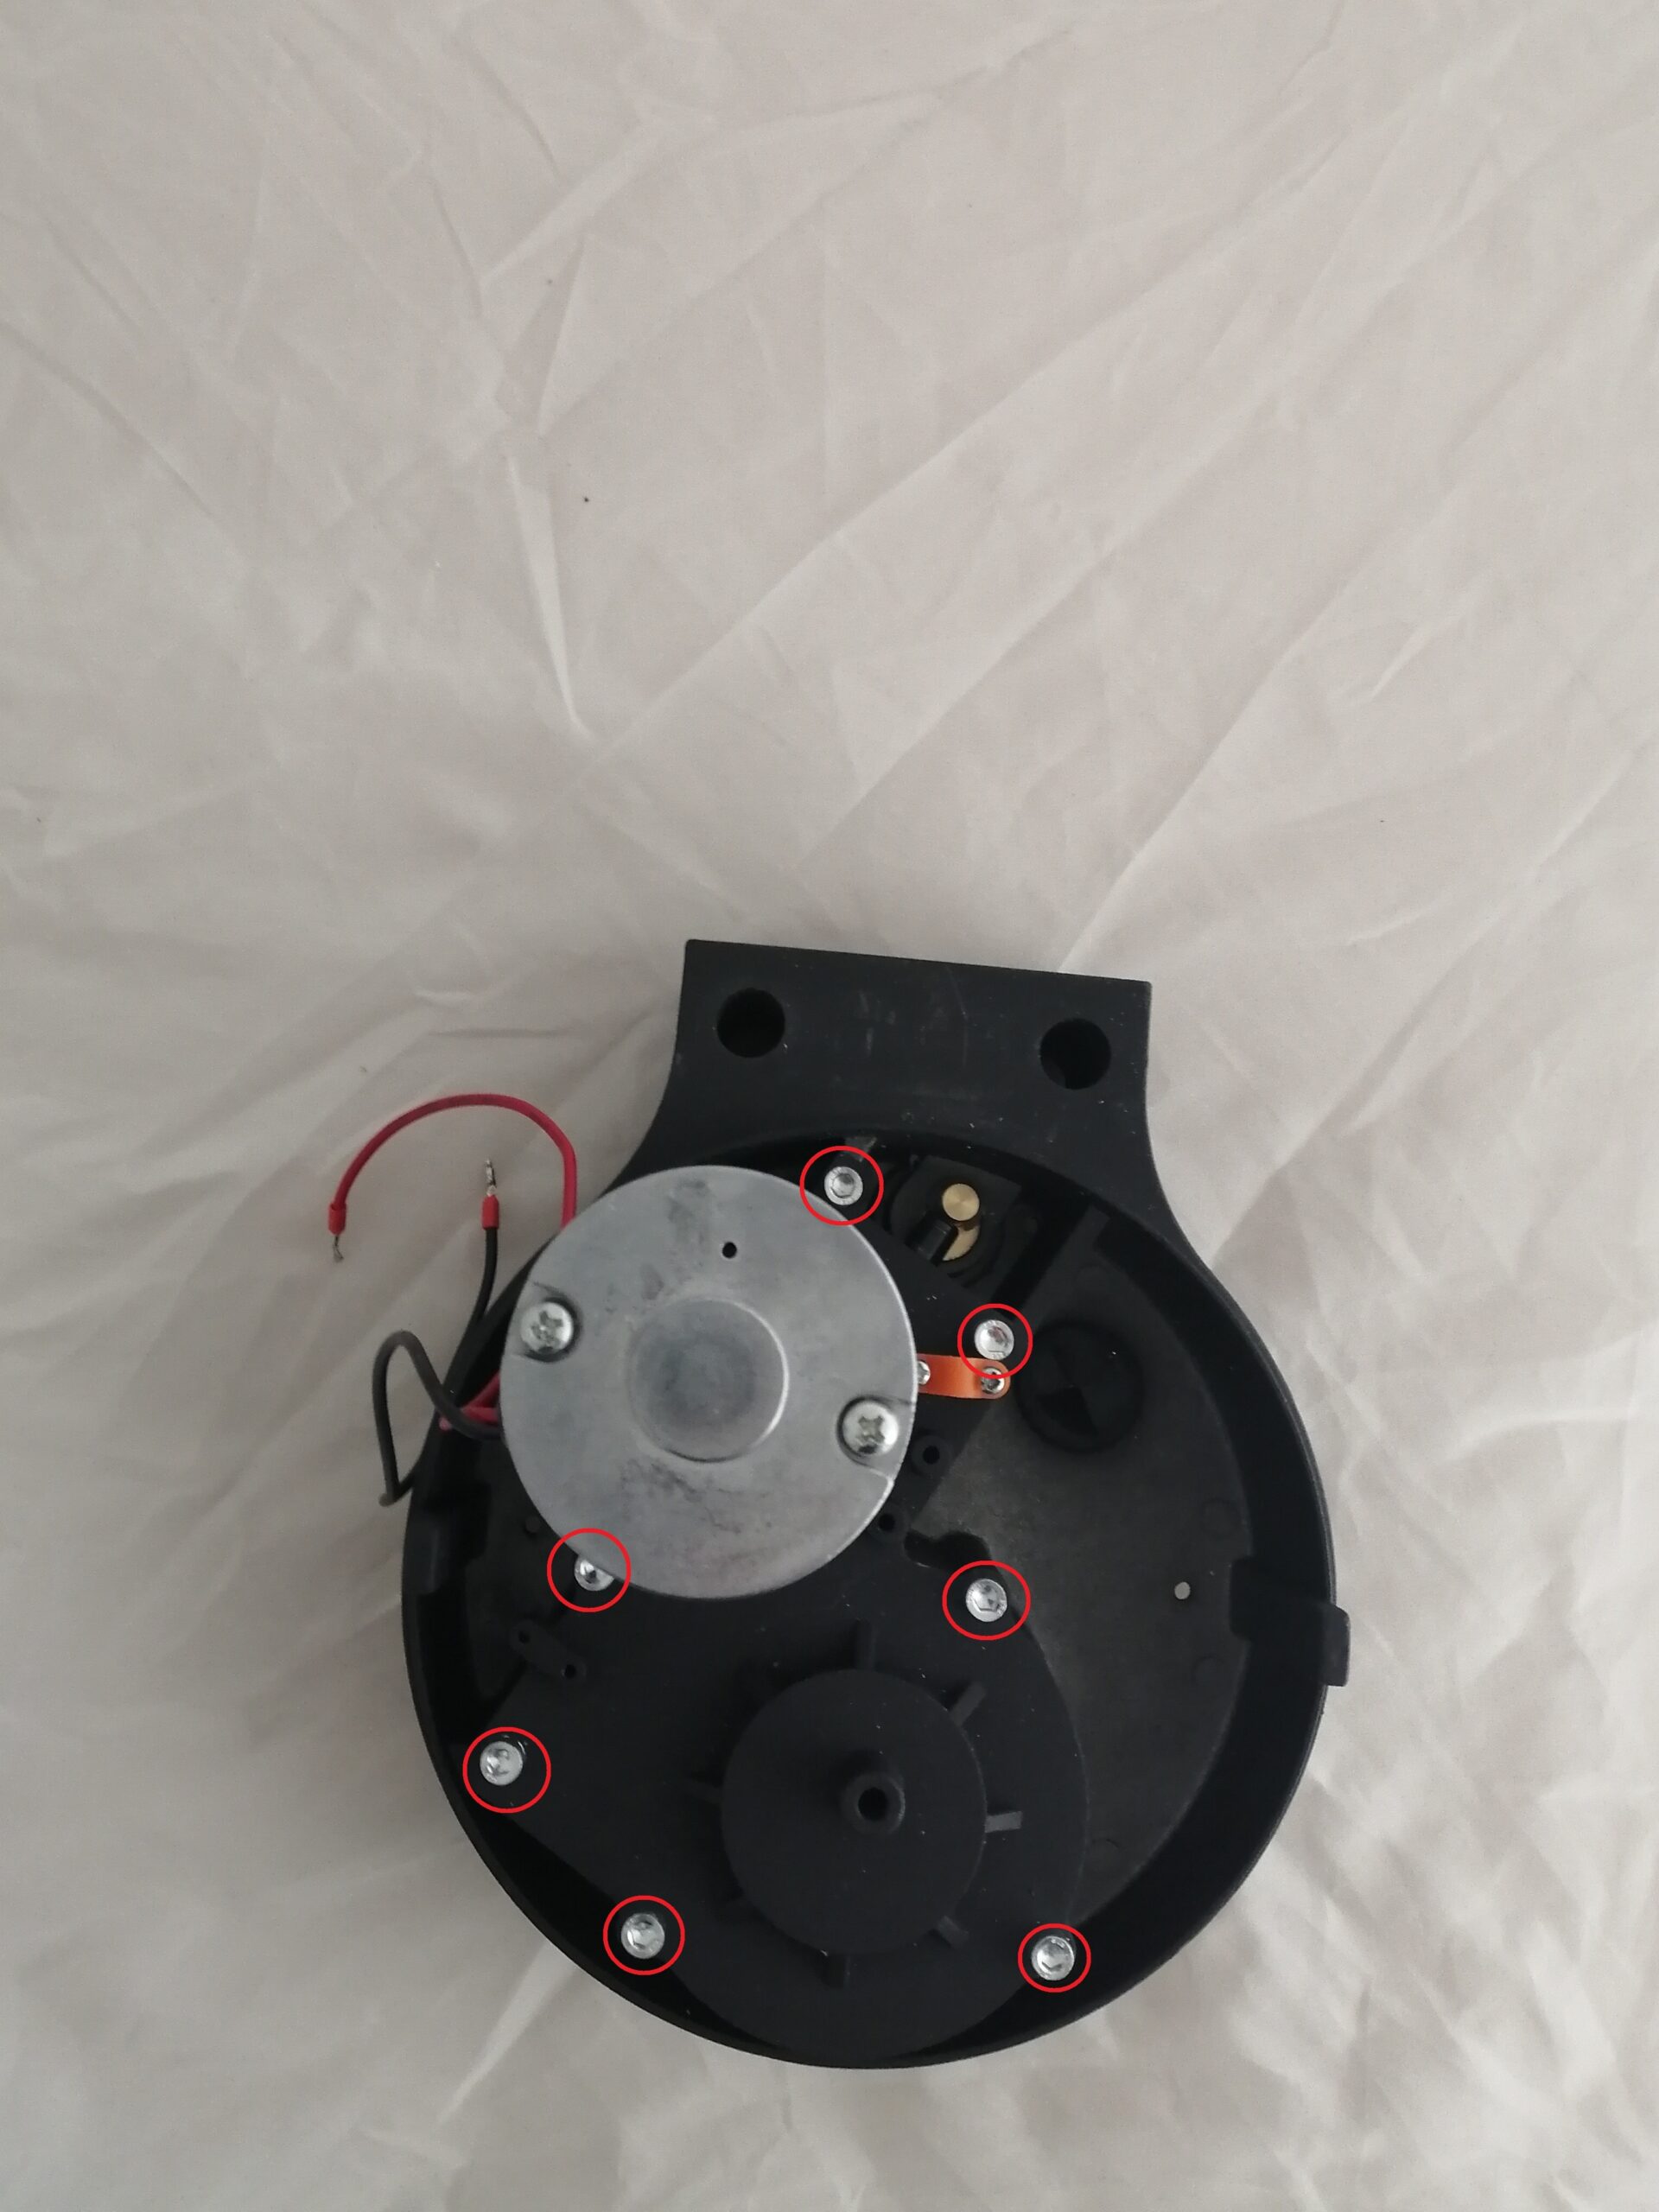
Step 2: Unscrew the BTR screws

Remove the 7 BTR screws from the motor.

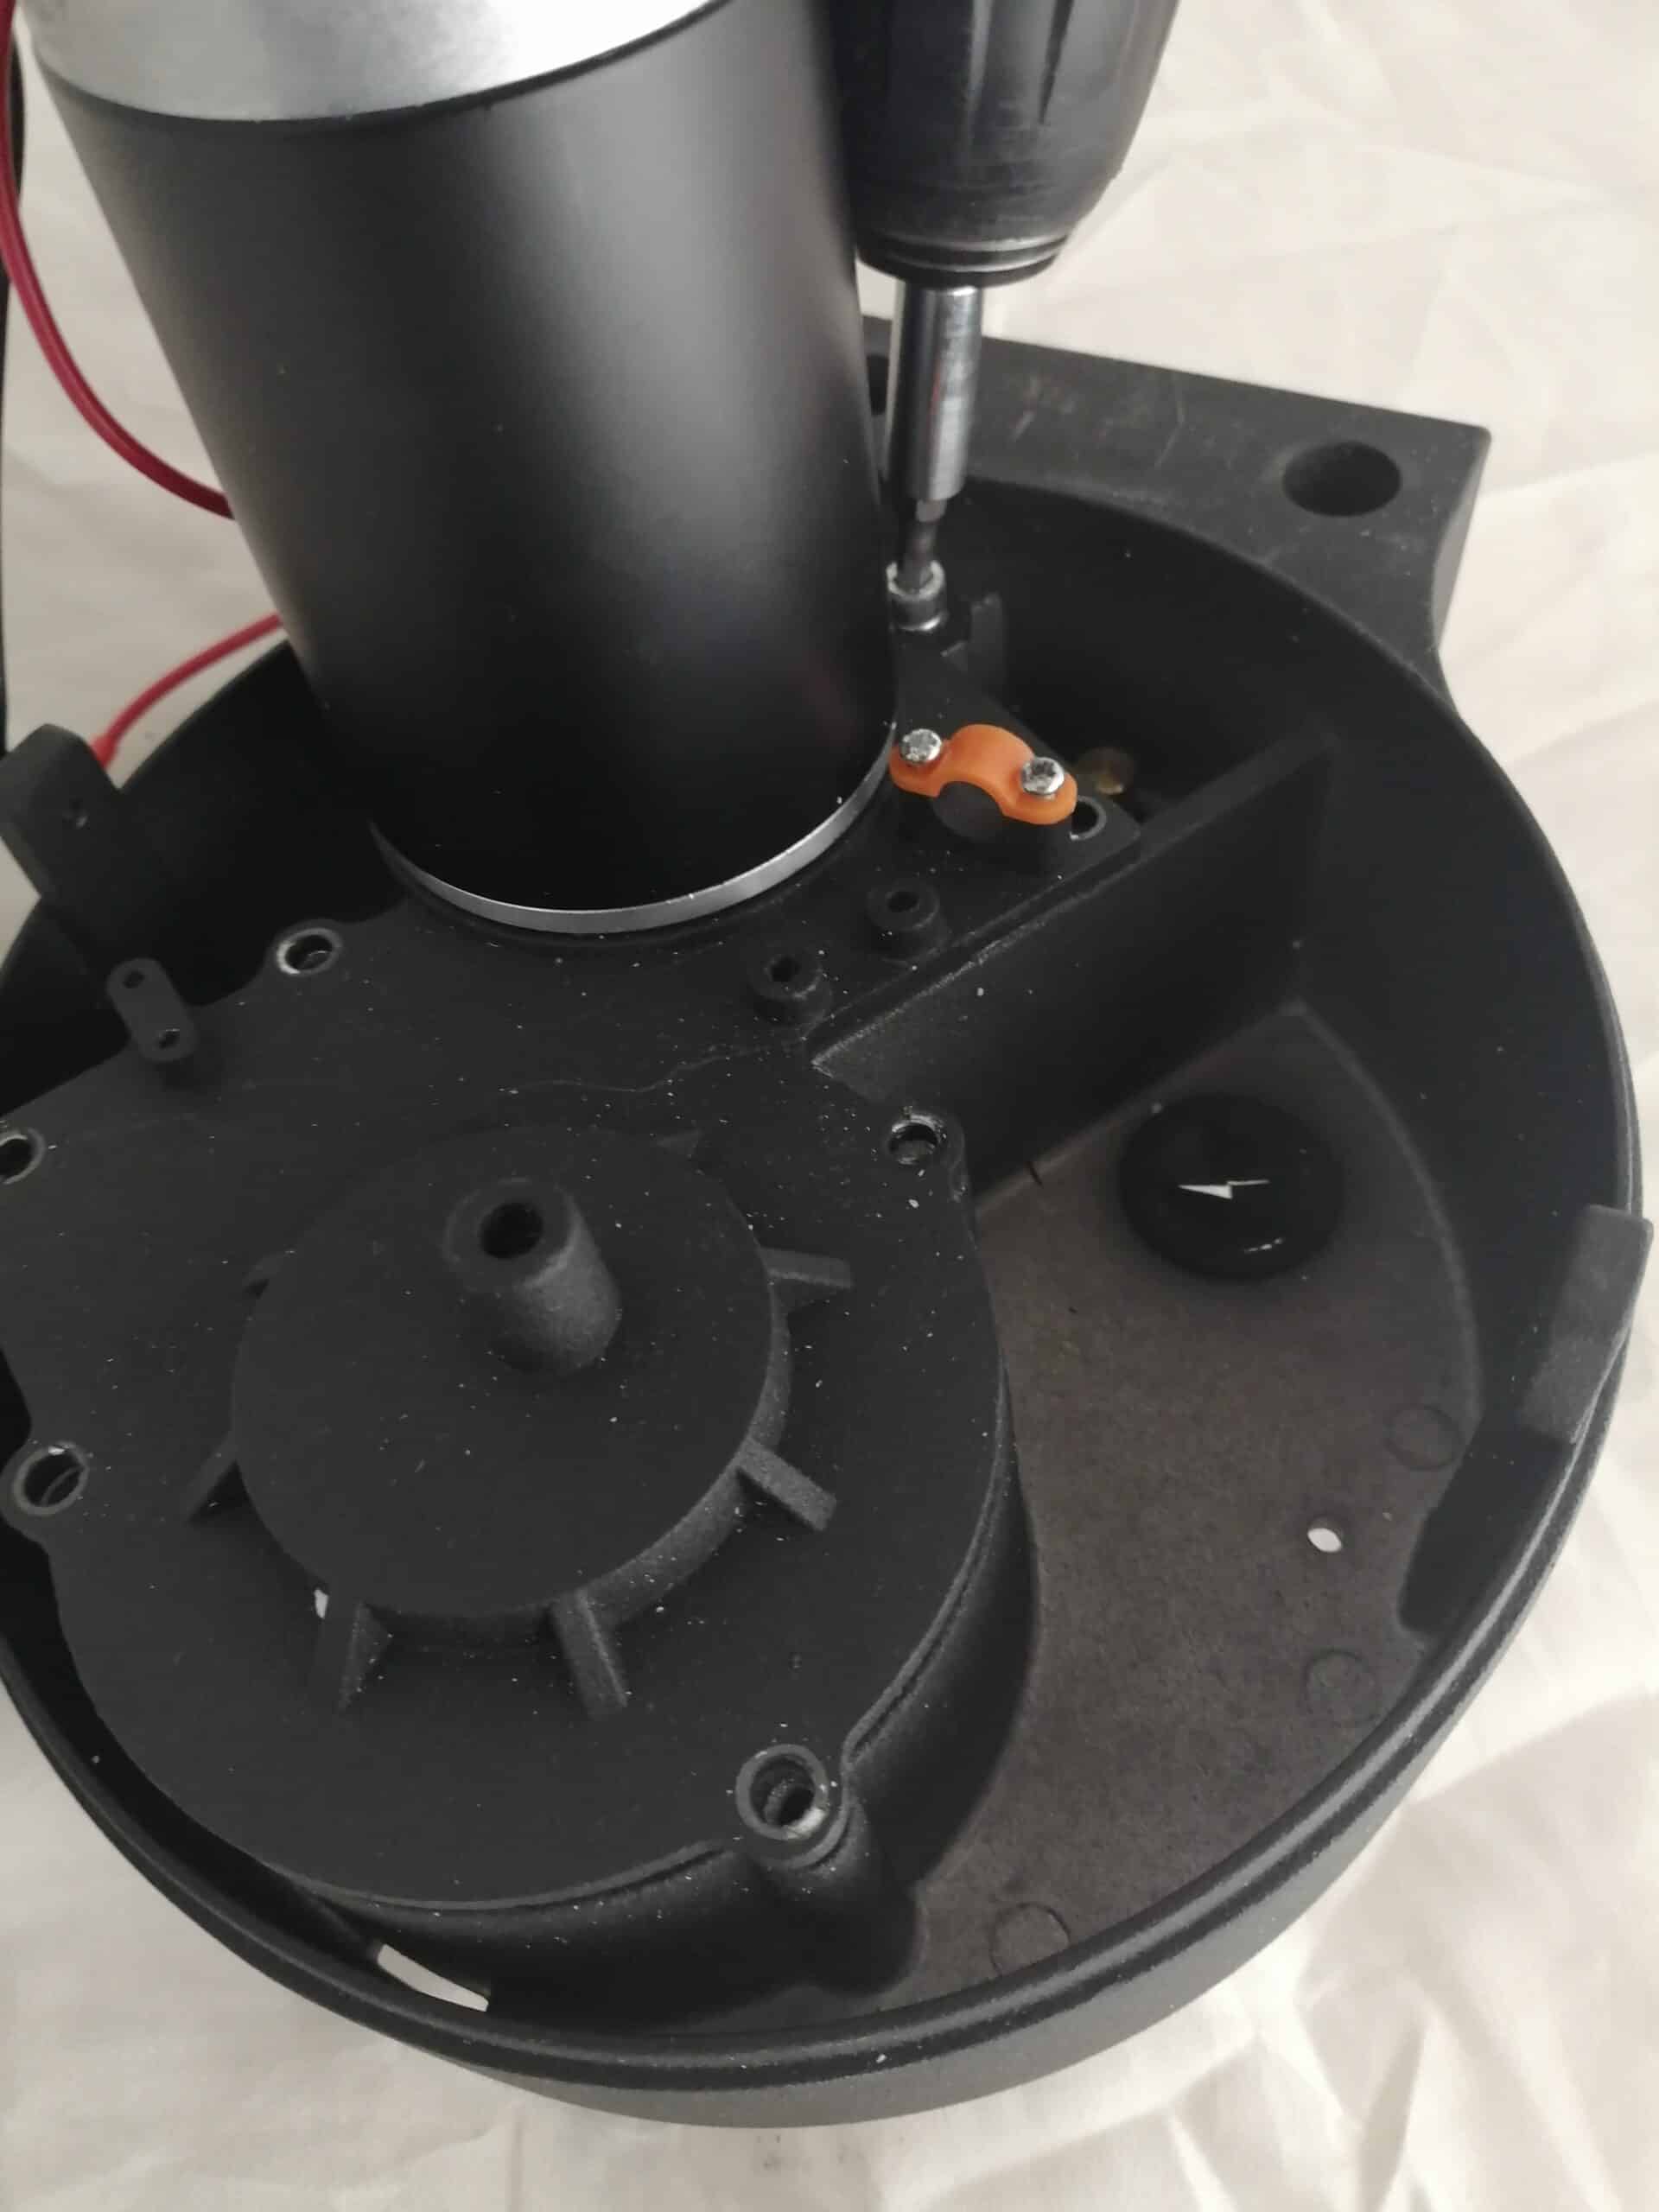
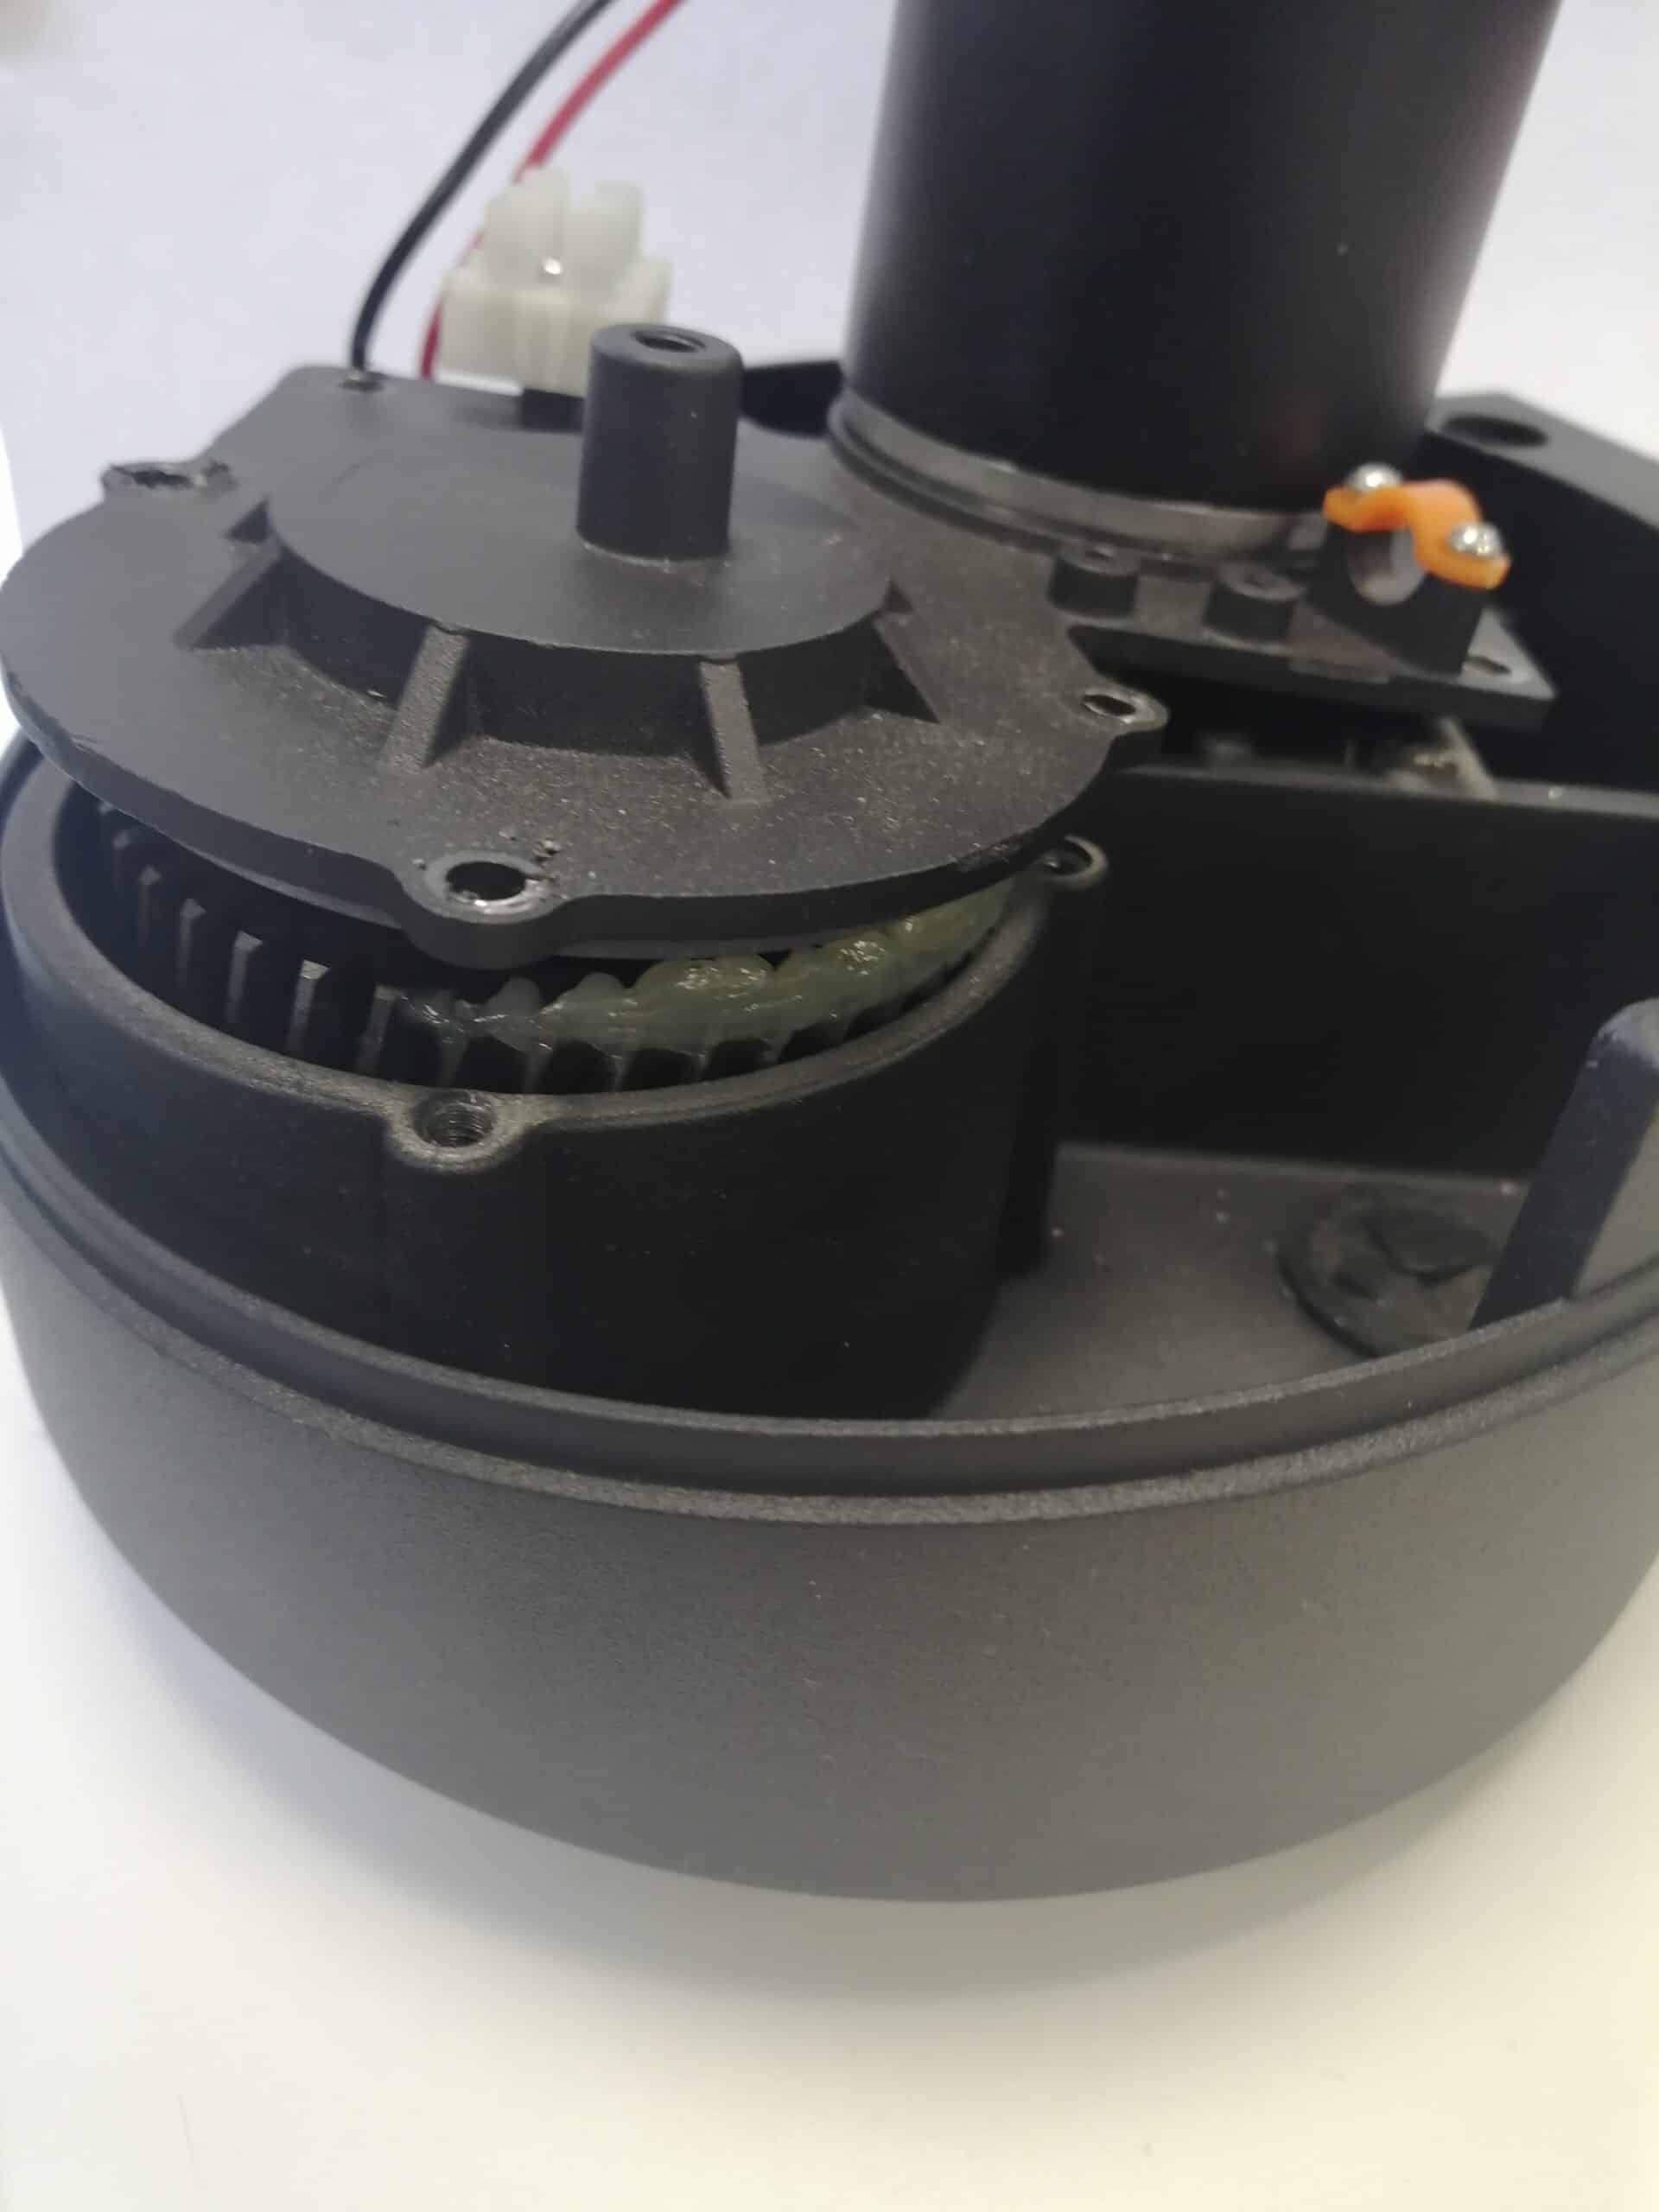
Step 3: Open the motor

Once the last screw has been removed, the motor will open on its own, the motor shaft rising as it rests on the work surface.

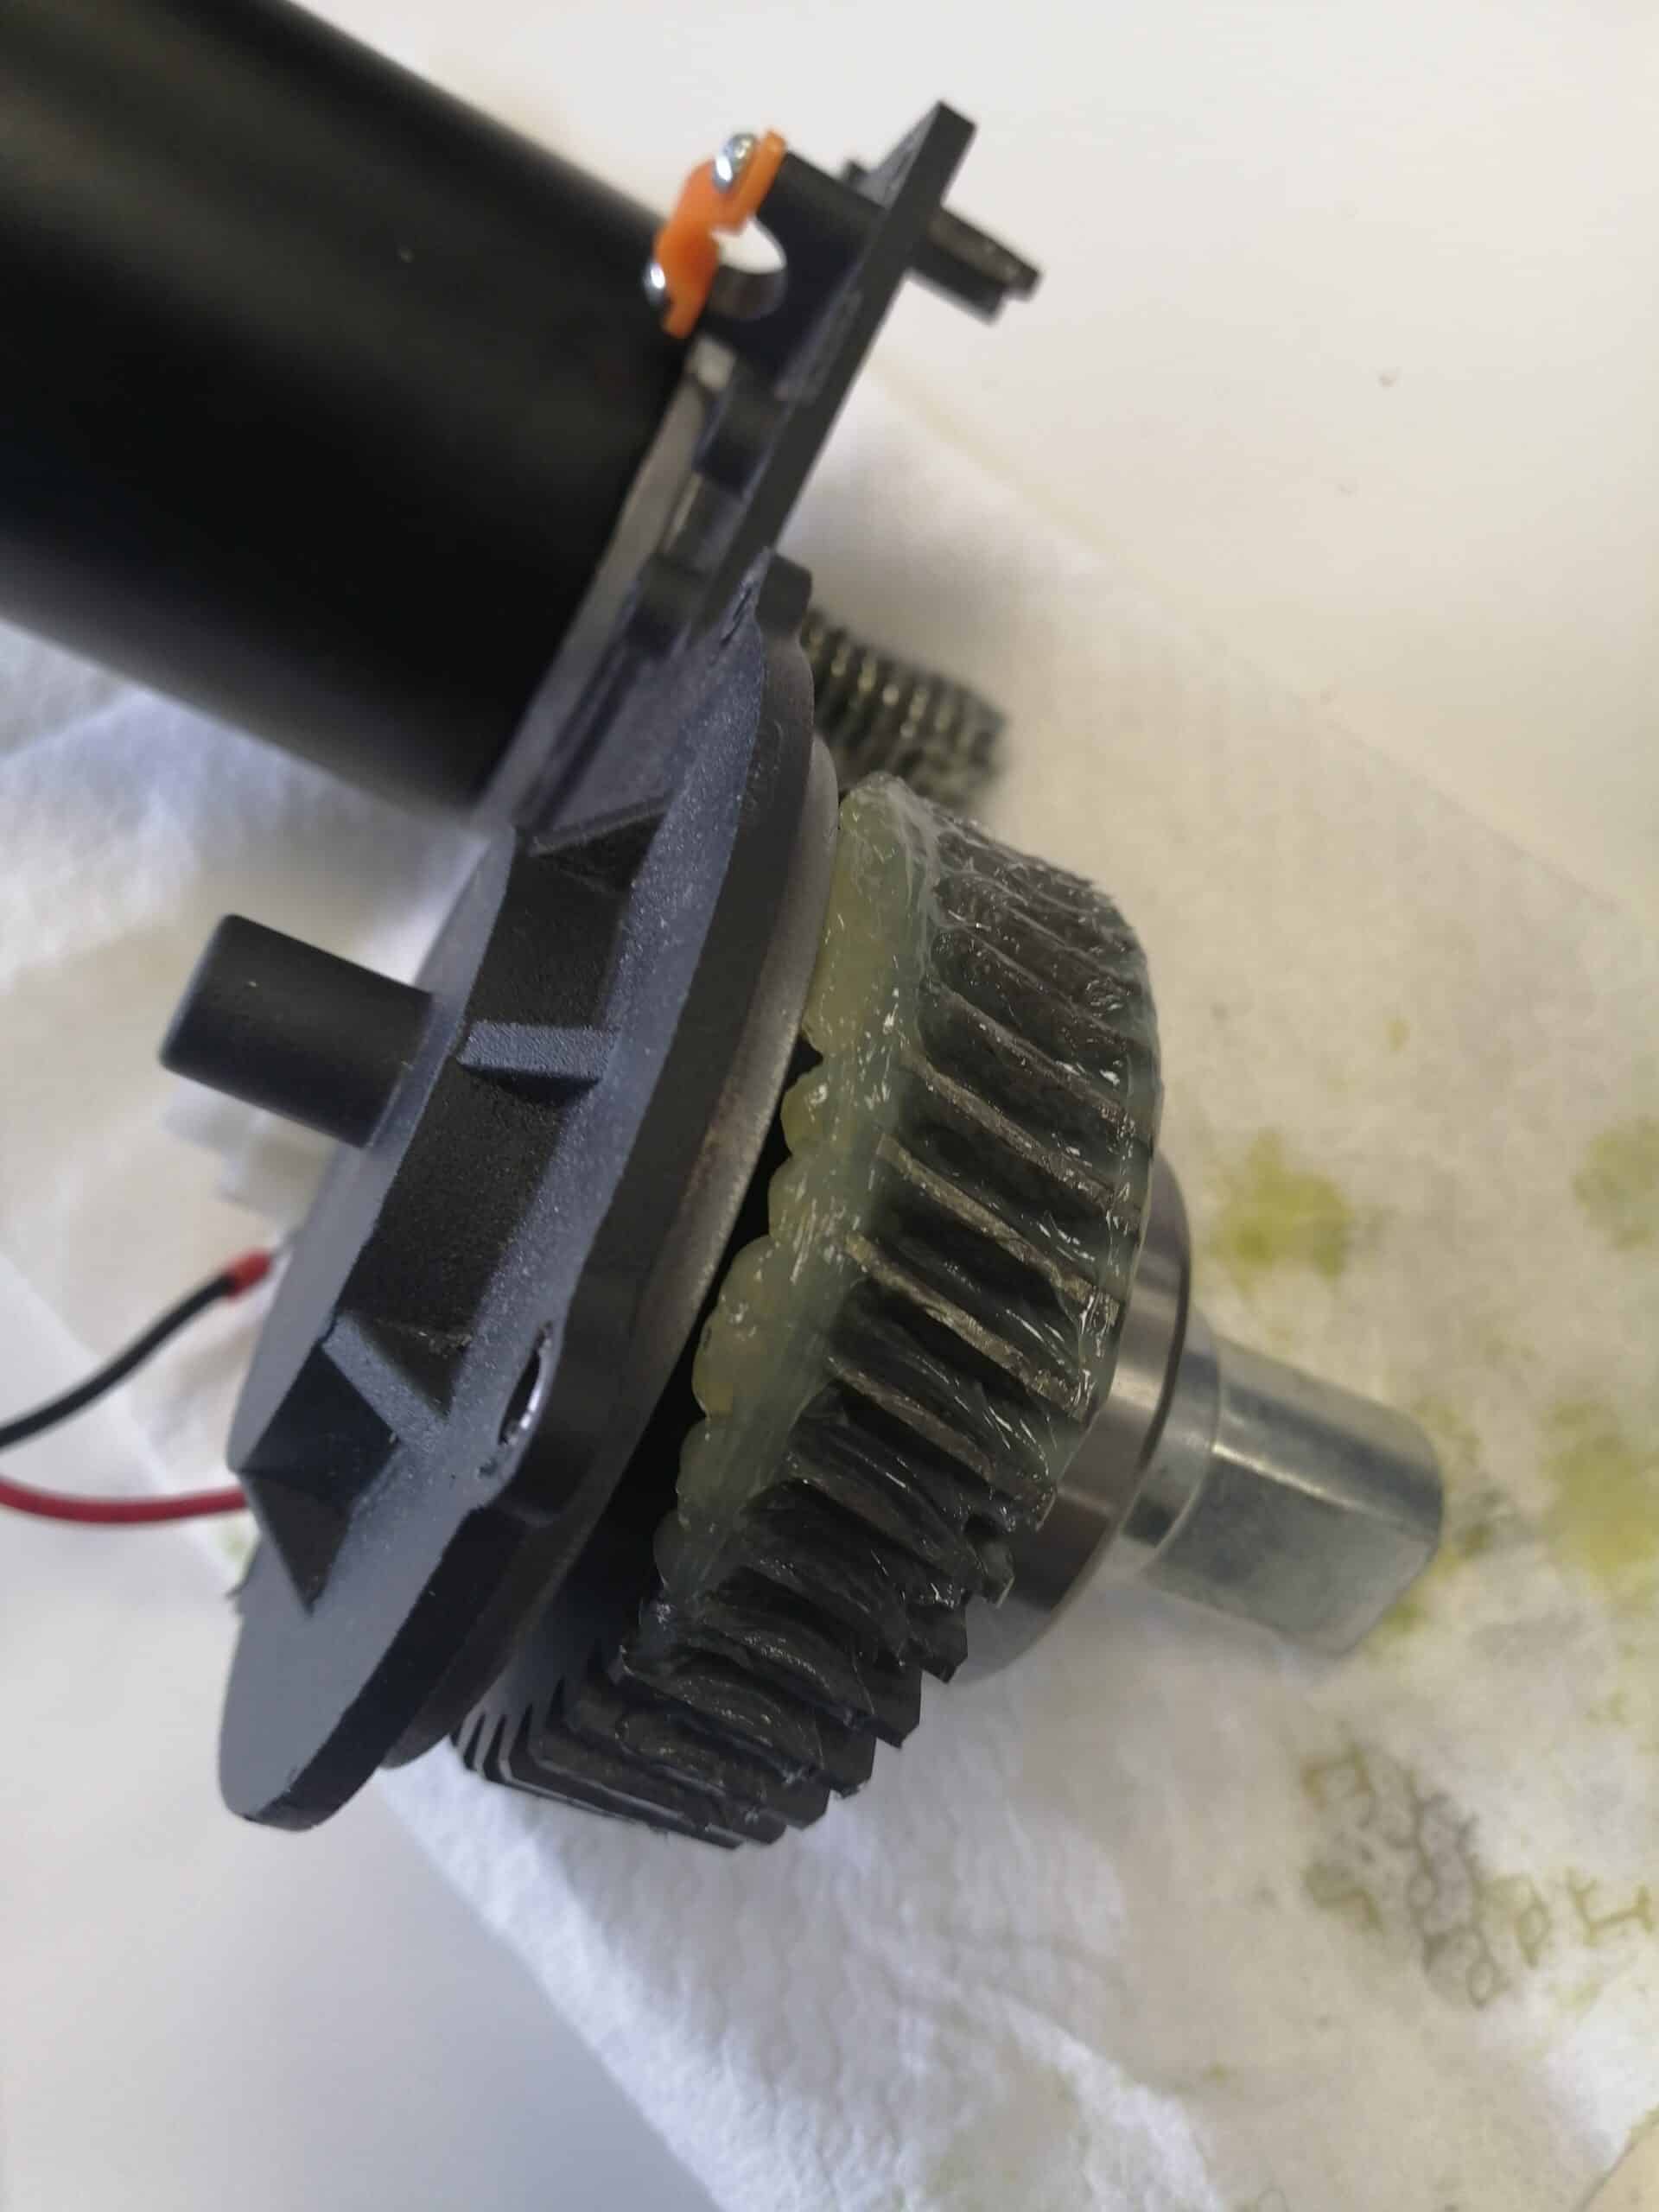
Step 4: Remove the motor

Remove the electric motor and motor shaft (which may sometimes remain attached to the motor mount).

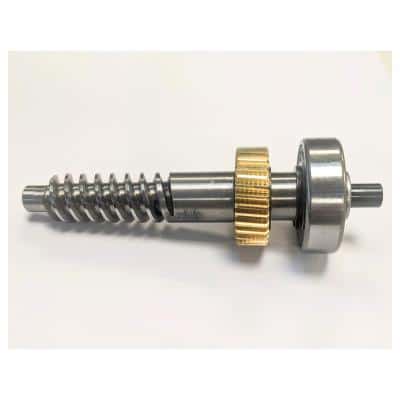
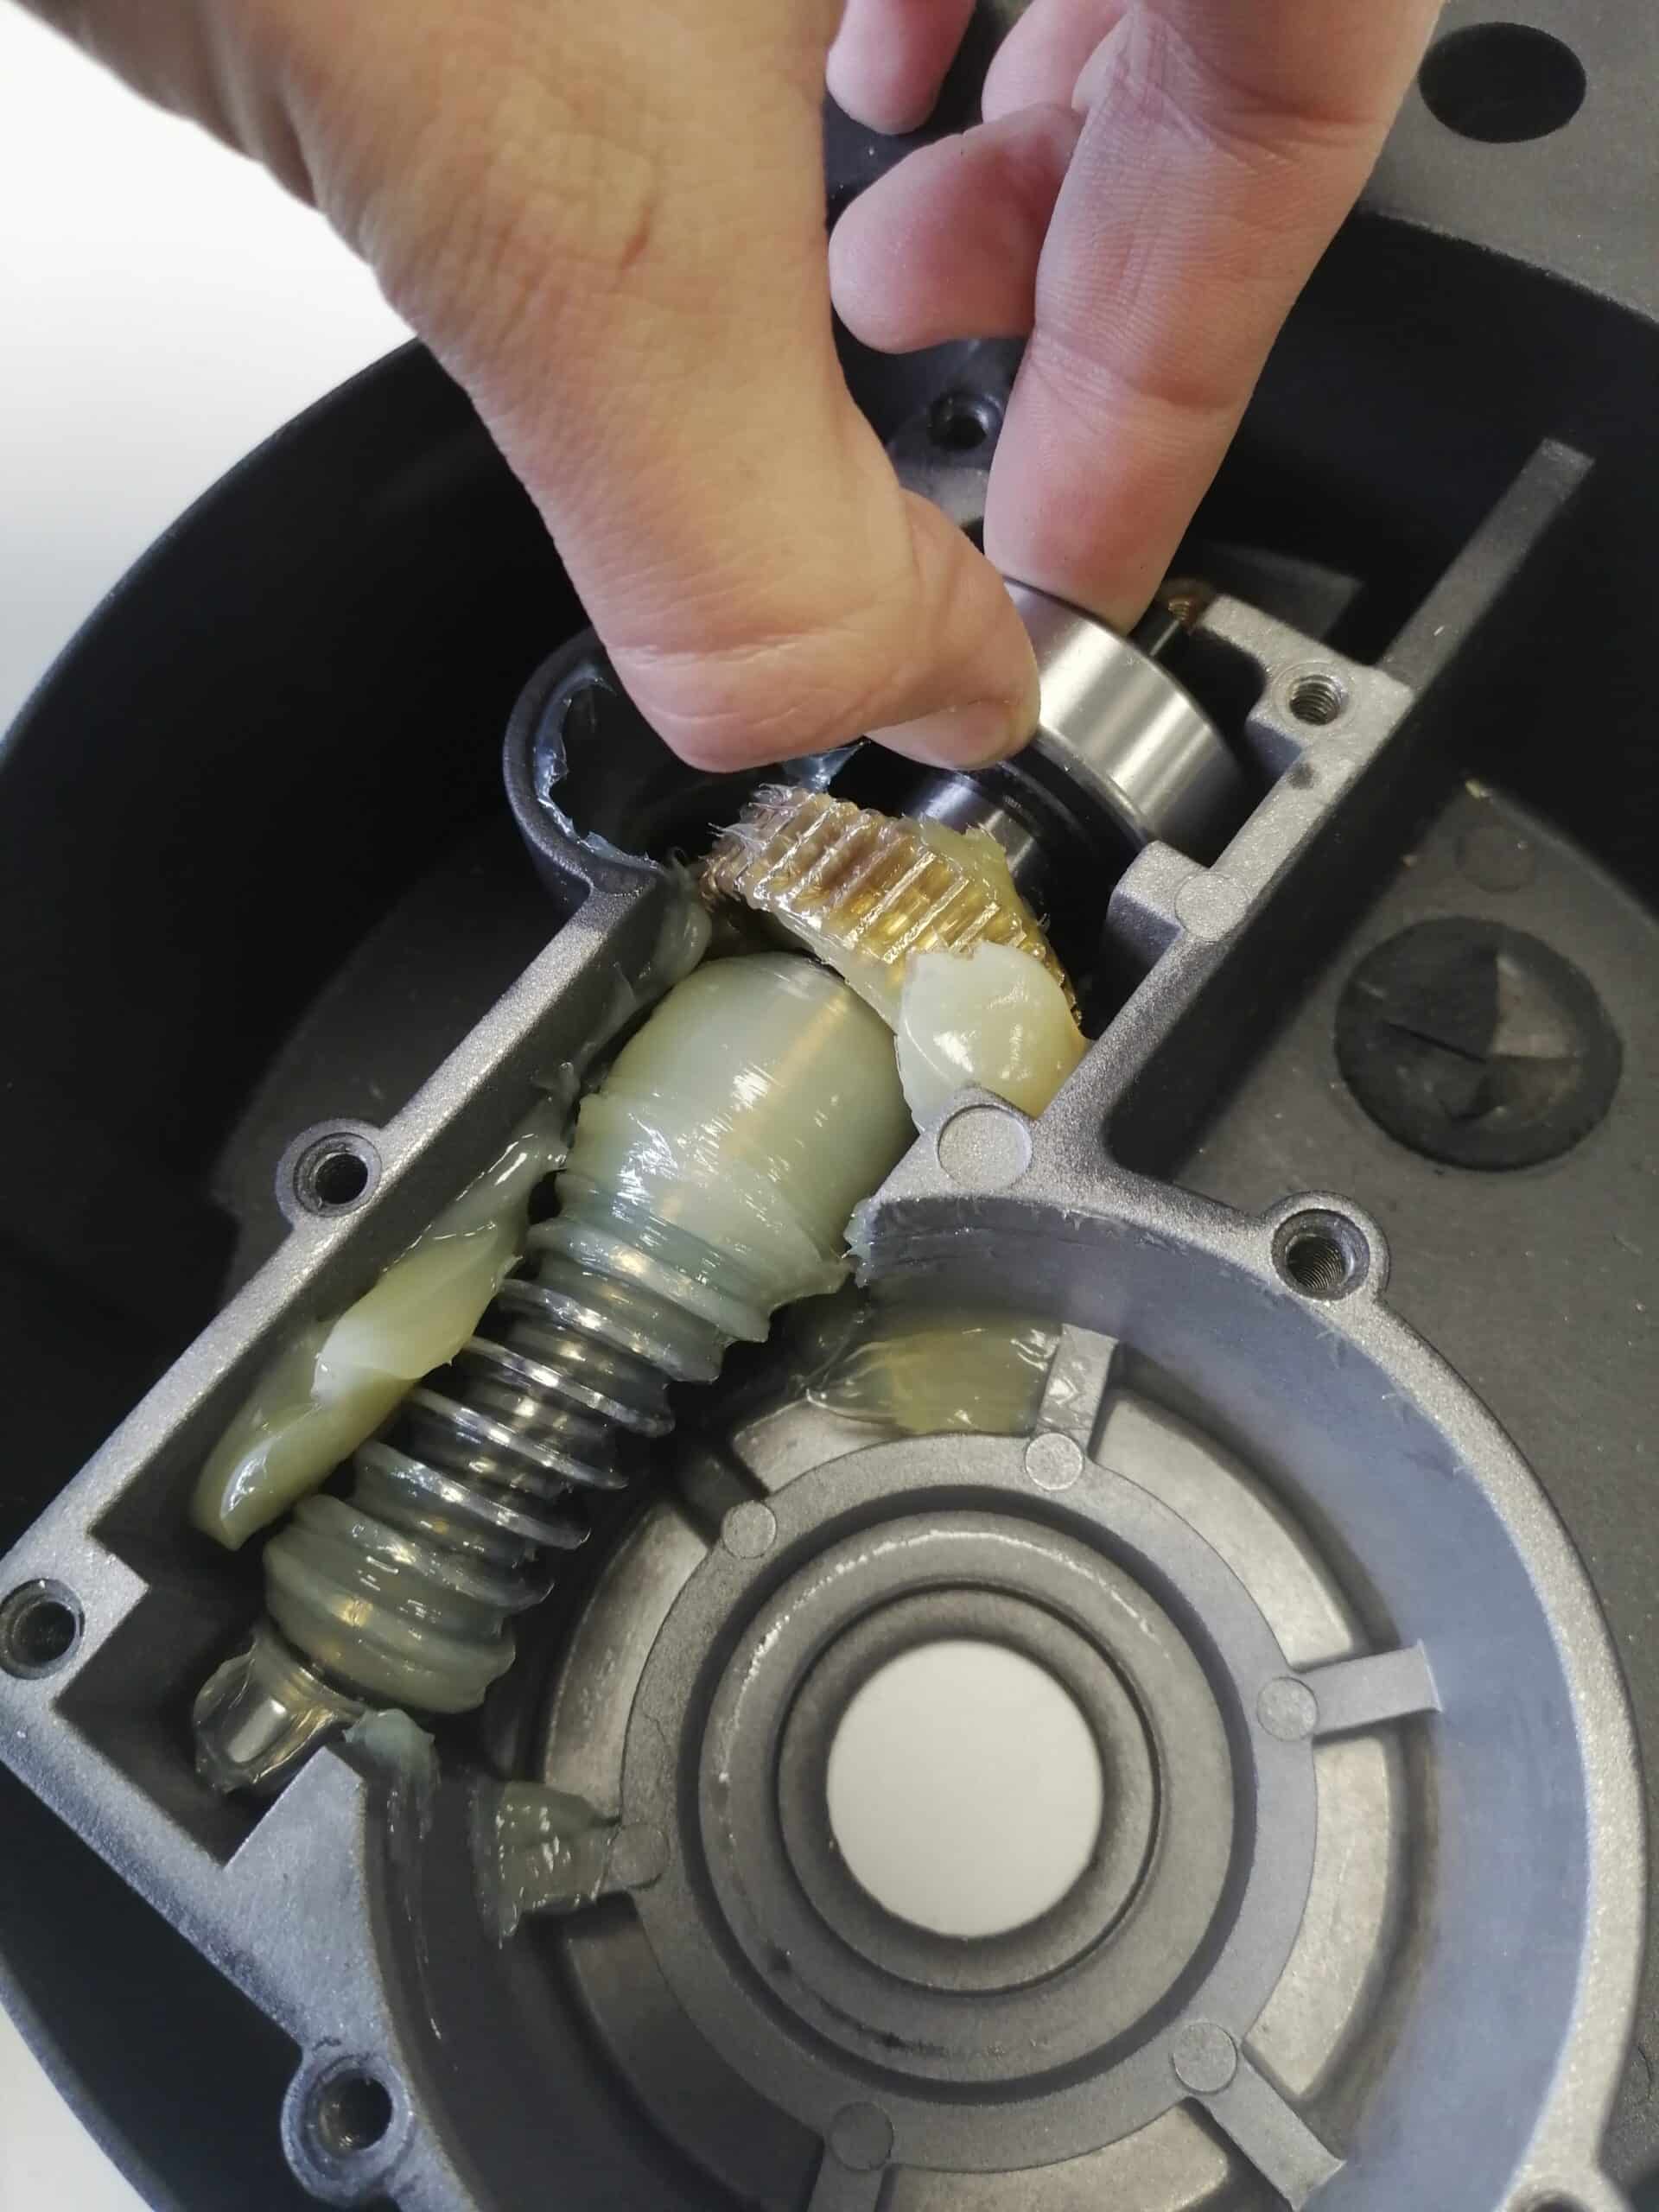
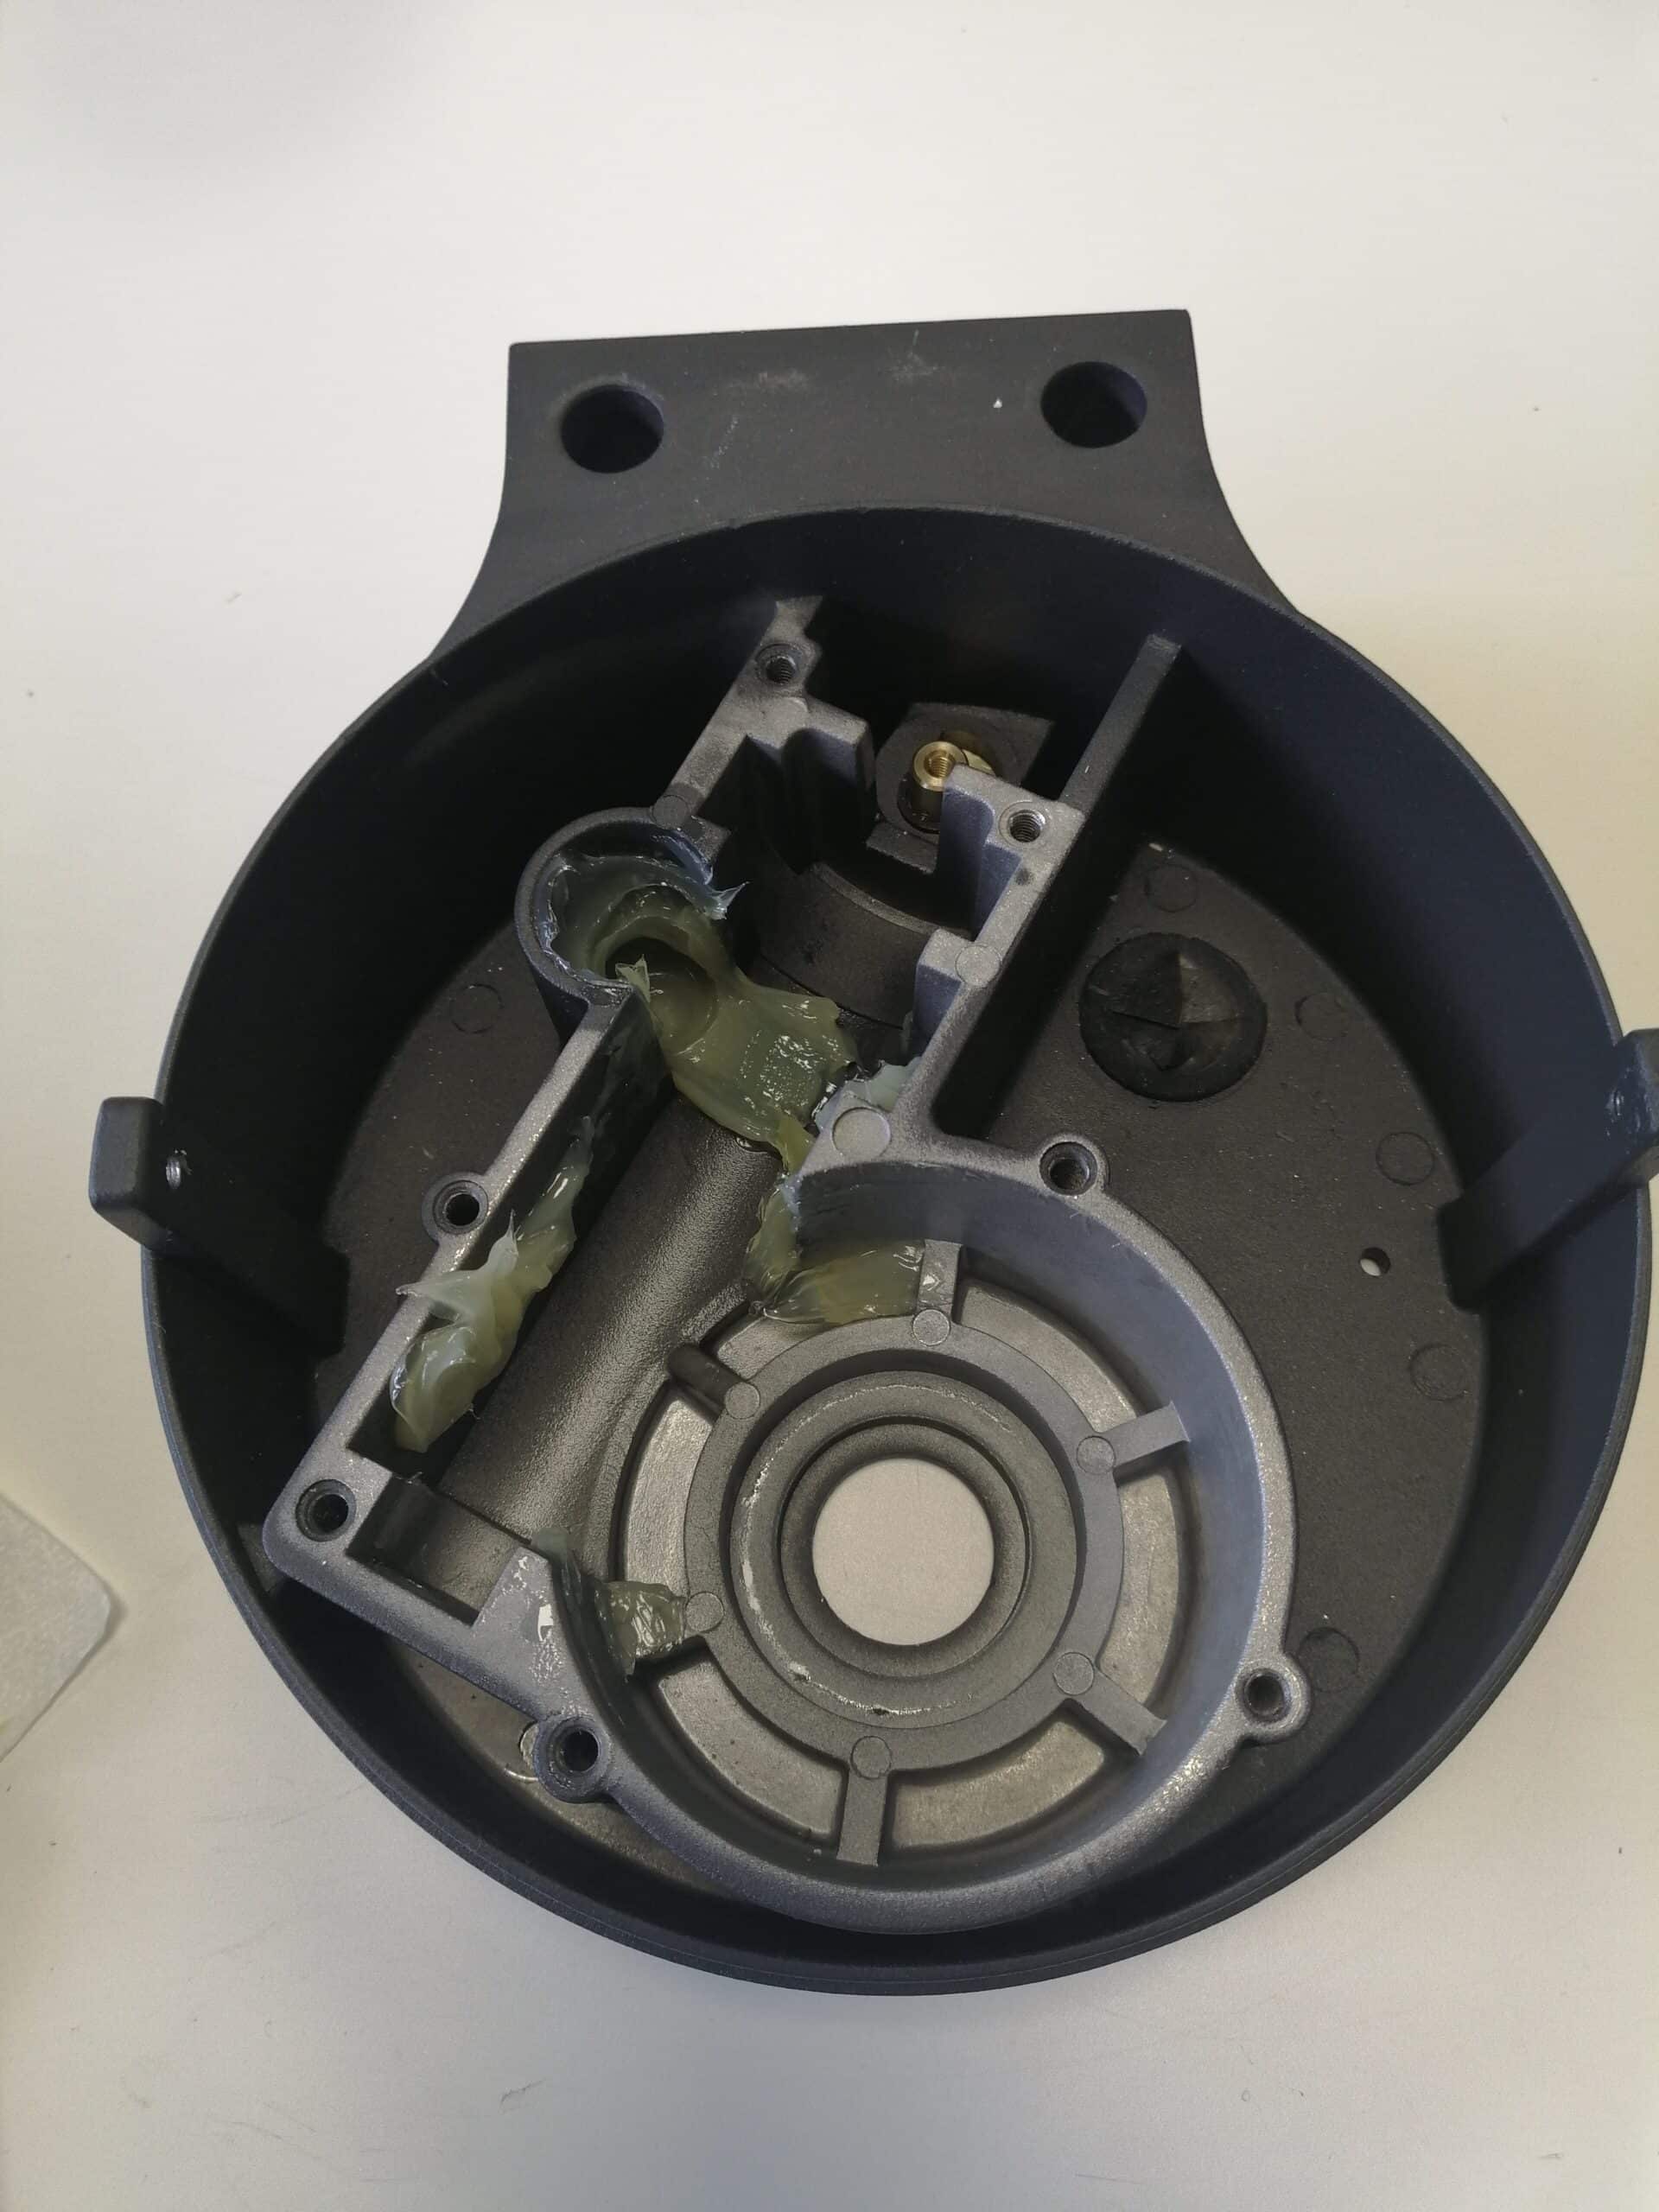
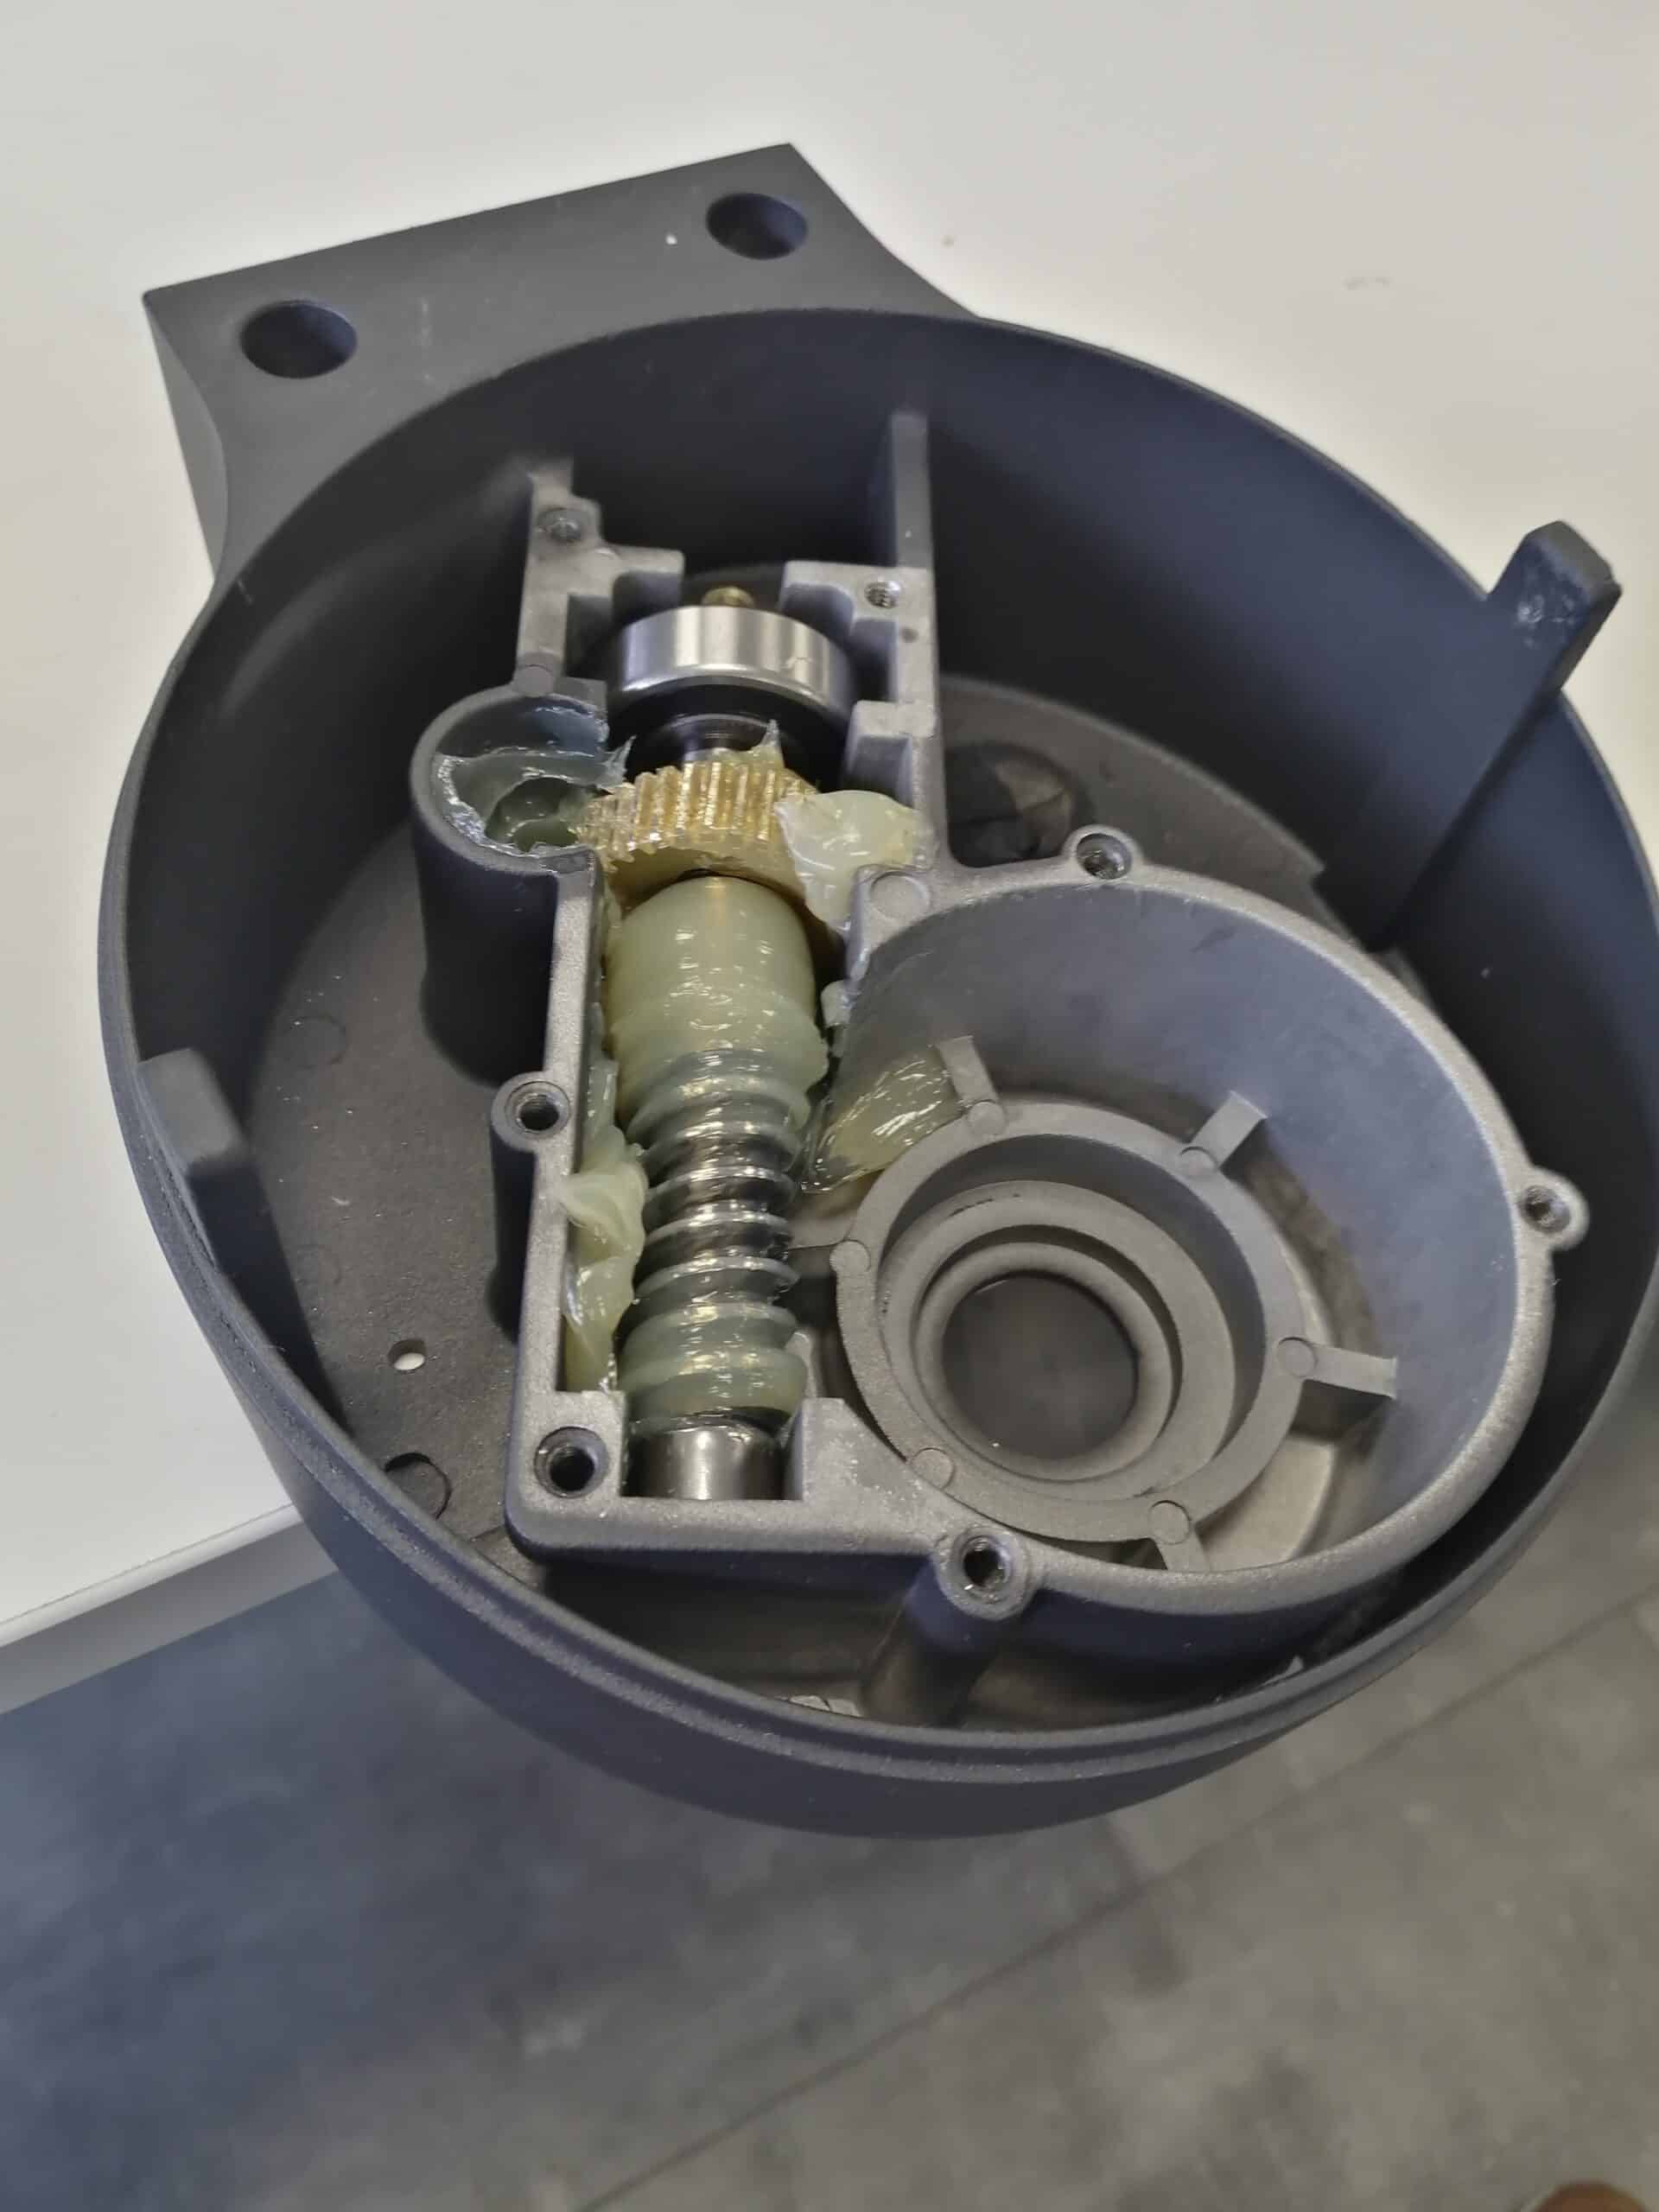
Step 5: Remove the drive shaft

Lift the transmission shaft by its large bearing.

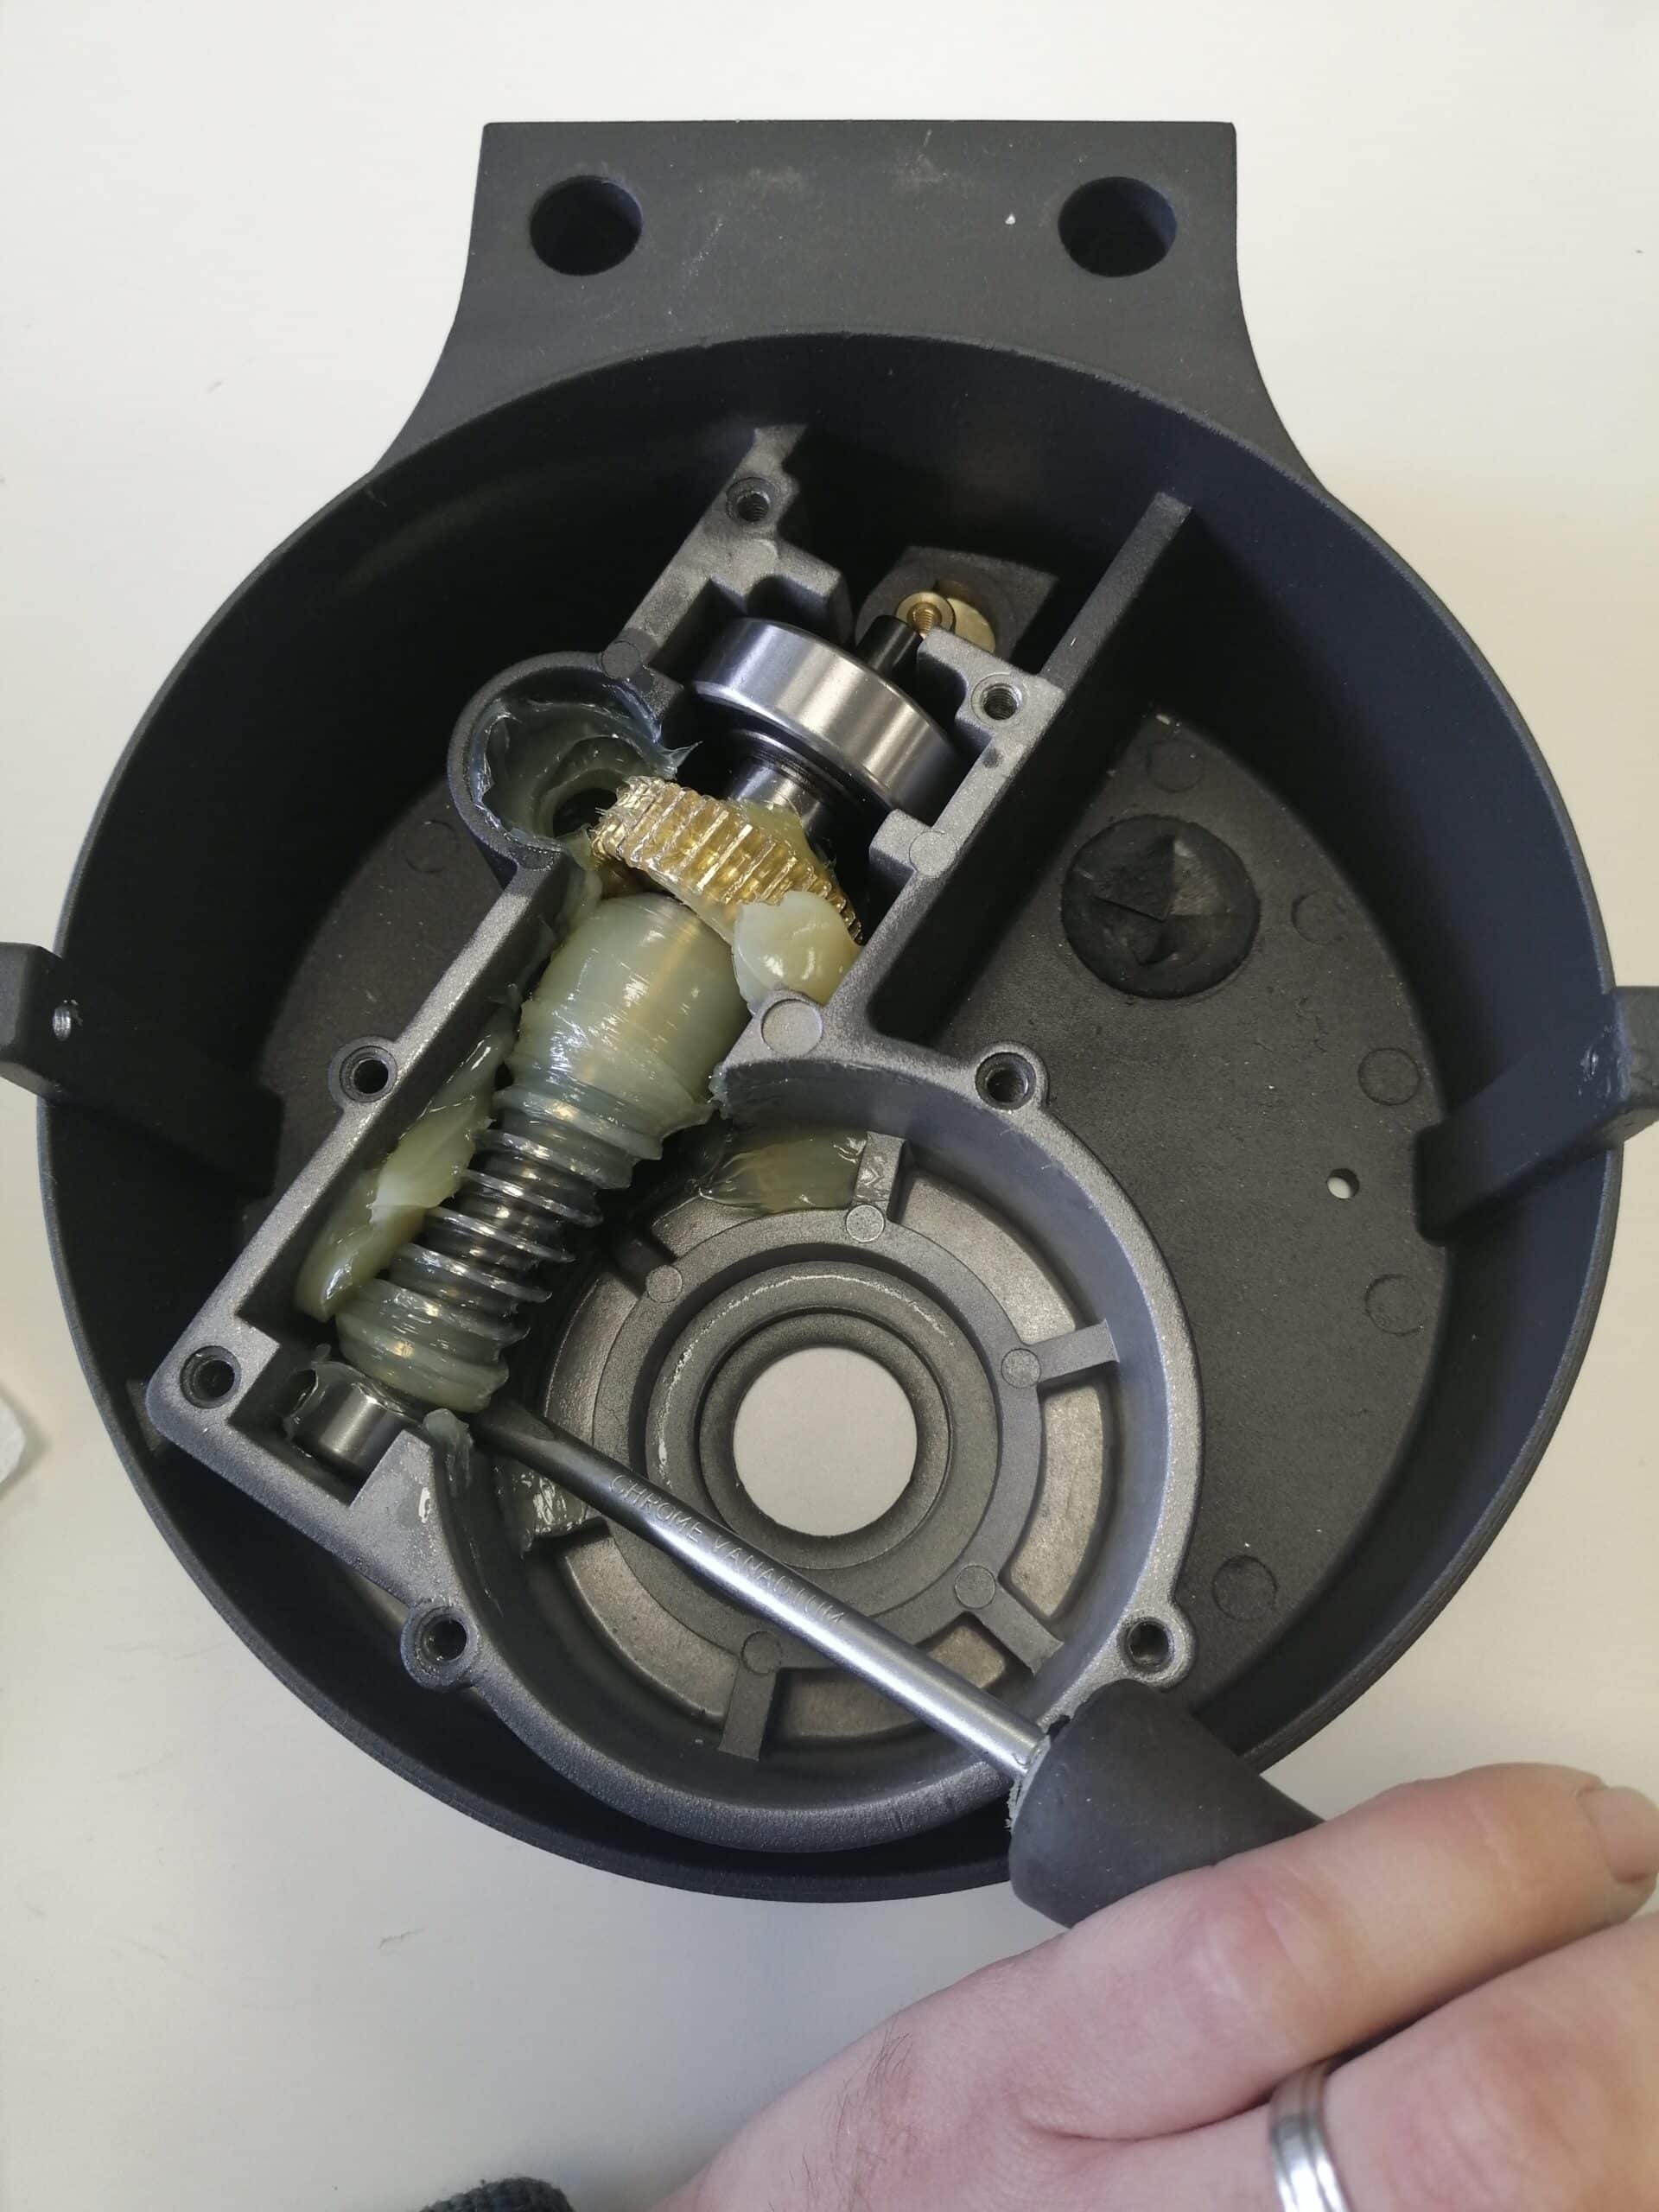
Step 6: Remove the drive shaft

Then take a flathead screwdriver and pry out the rear part of the drive shaft.

The drive shaft is out.

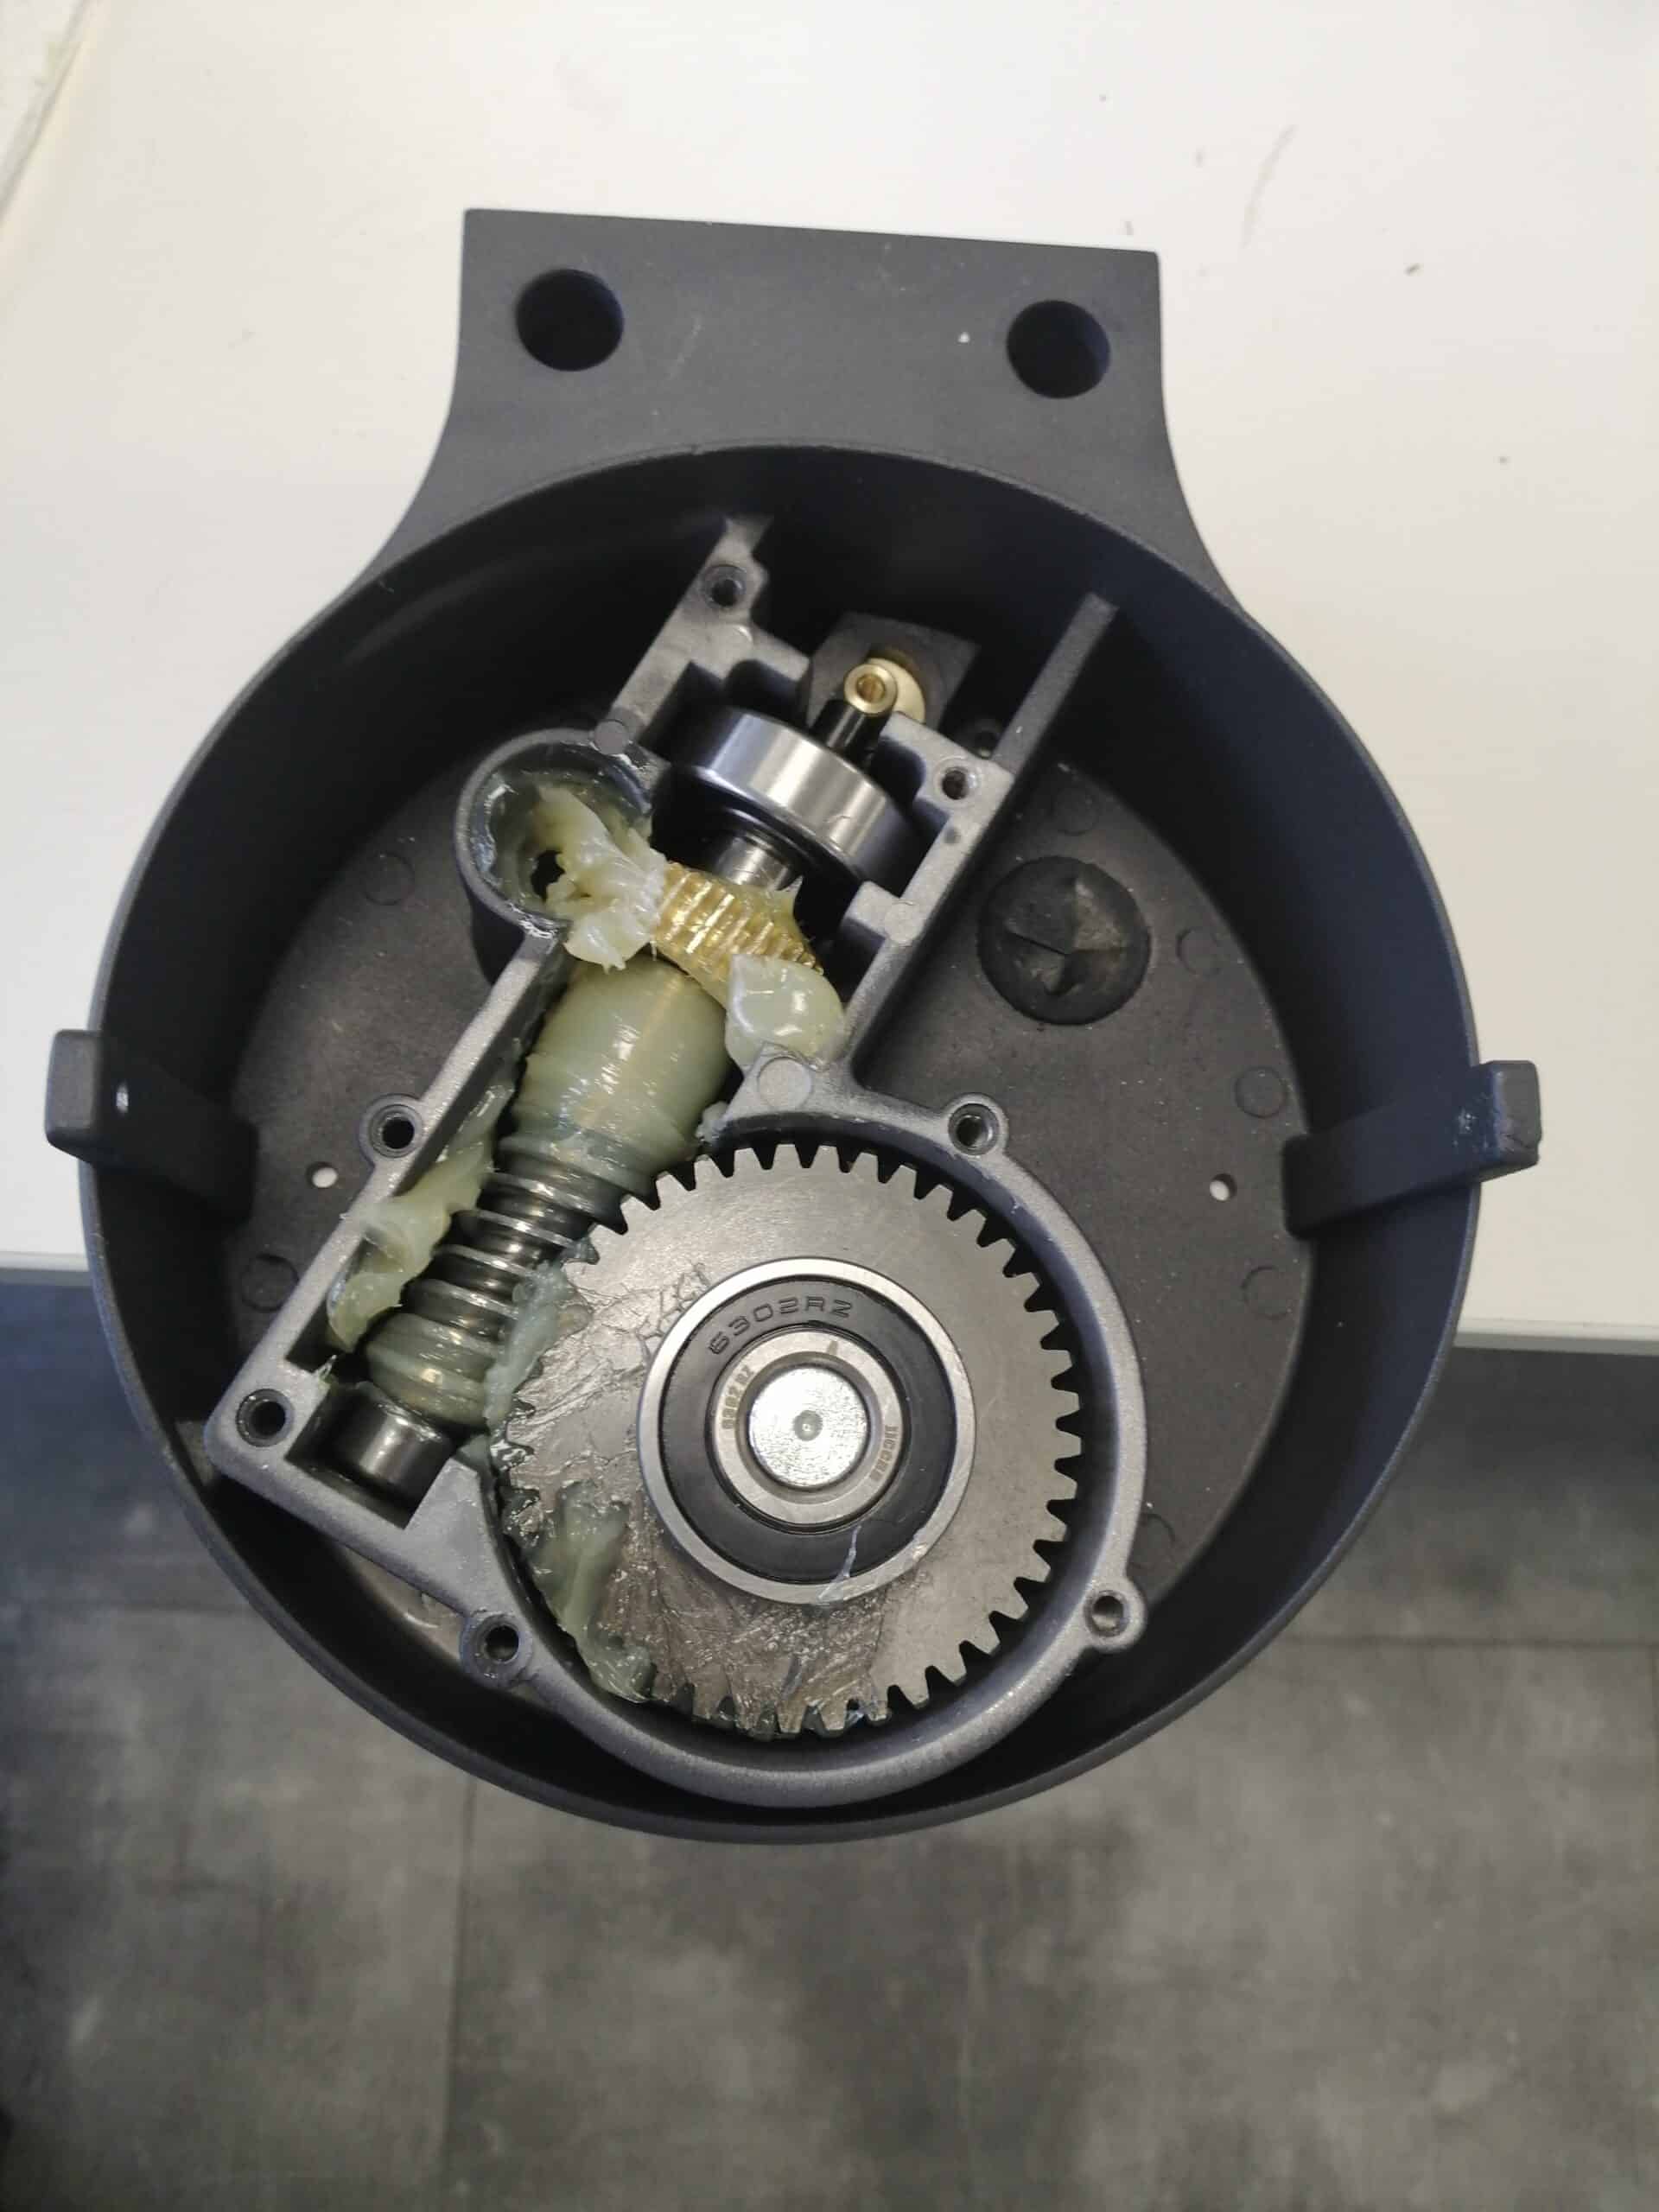
Step 7: Refit the new drive shaft

Move the motor base forward to the edge of the work surface, so that its arm shaft exit hole is in the empty space. Insert the new drive shaft into the motor.


WARNING!

Remember to grease the new drive shaft with bearing grease or the excess grease in the motor.

Step 8: Replace arm shaft

Reposition the arm shaft in the motor base.

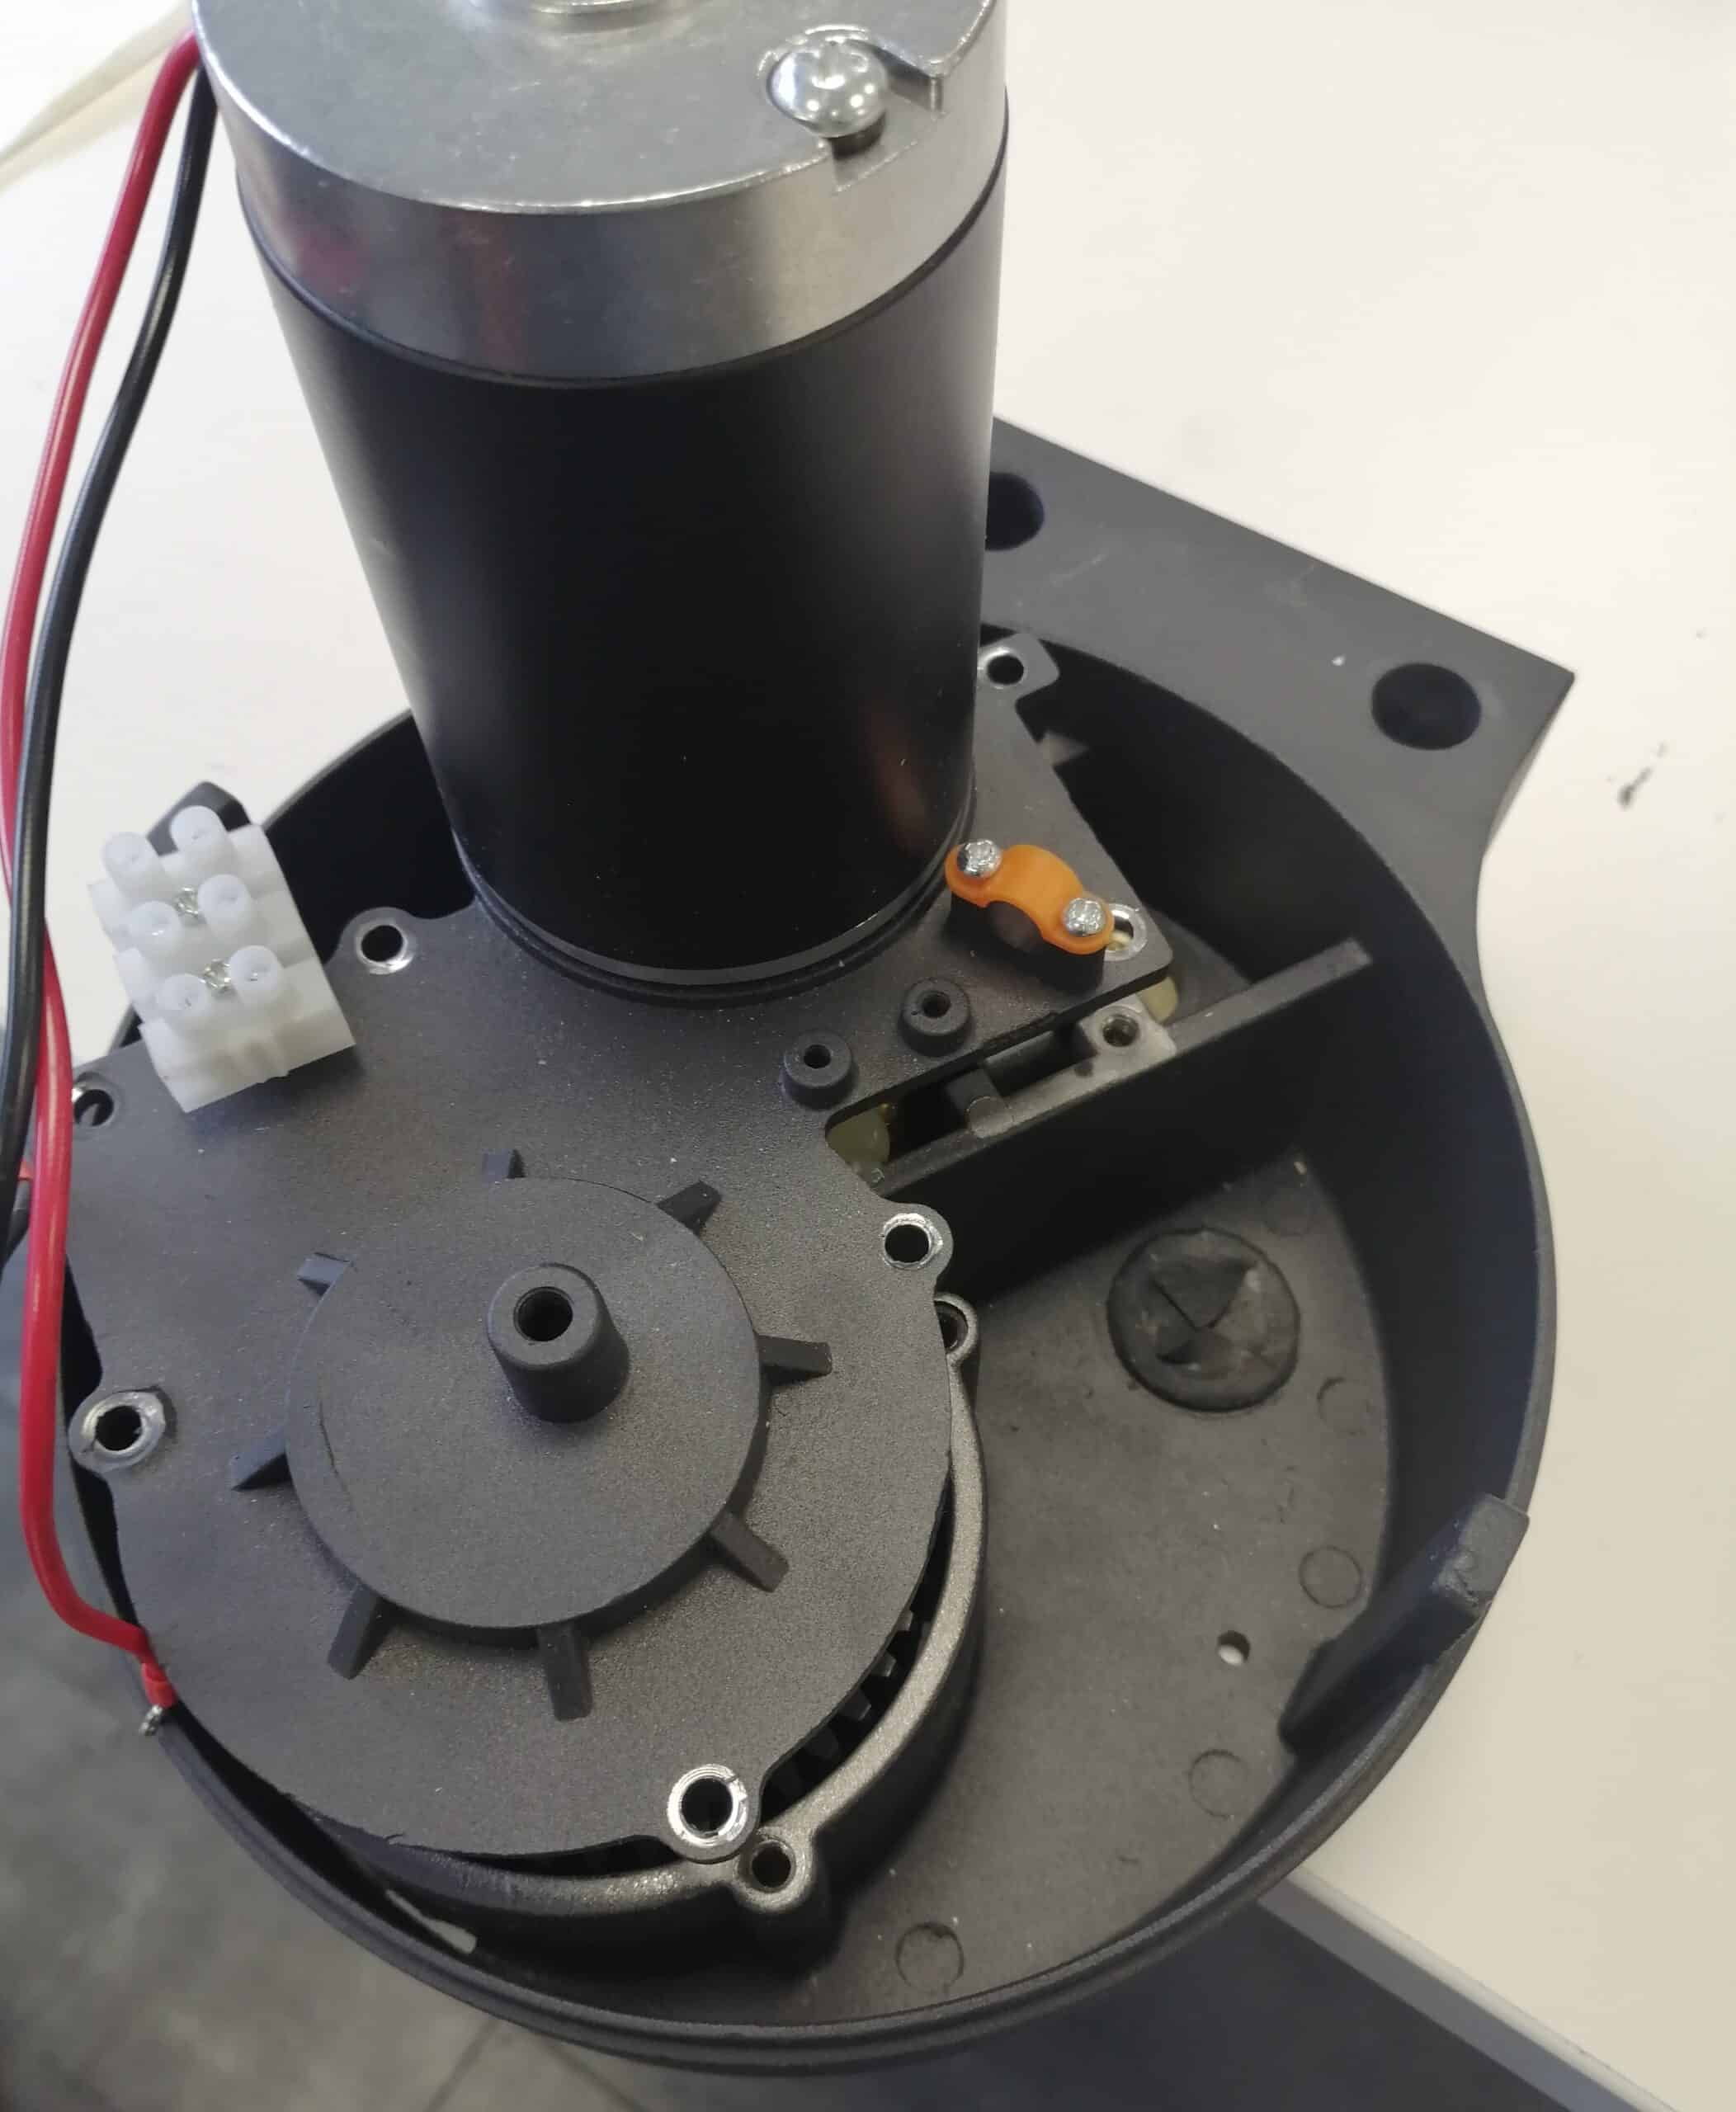
Step 9: Replace the electric motor

Reposition the electric motor on top of the motor base.

WARNING!

Check that there is no gap between the motor support and the motor base.

Step 10: Closing the motor

Screw the 7 BTR screws back onto the motor

Keep in touch
Youtube Linkedin

Follow us on social networks

About Avidsen
  • Who are we?
  • Contact
  • Who are we?
  • Contact
Support
  • Avidsen Technical Support
  • Extel brand technical support
  • Philips technical support
  • Thomson Technical Support
  • Avidsen Technical Support
  • Extel brand technical support
  • Philips technical support
  • Thomson Technical Support
Avidsen group brand
  • Avidsen Brand
  • Extel Brand
  • Philips Brand
  • Thomson Brand
  • Avidsen Brand
  • Extel Brand
  • Philips Brand
  • Thomson Brand
Copyright 2025 © All rights reserved Avidsen
  • Legal Notice
  • Personal data protection policy
  • Terms and Conditions of Use
  • Legal Notice
  • Personal data protection policy
  • Terms and Conditions of Use
Thank you for your rating!
Thank you for your rating and comment!
This page was translated from: French
Please rate this translation:
Your rating:
Change
Please give some examples of errors and how would you improve them: