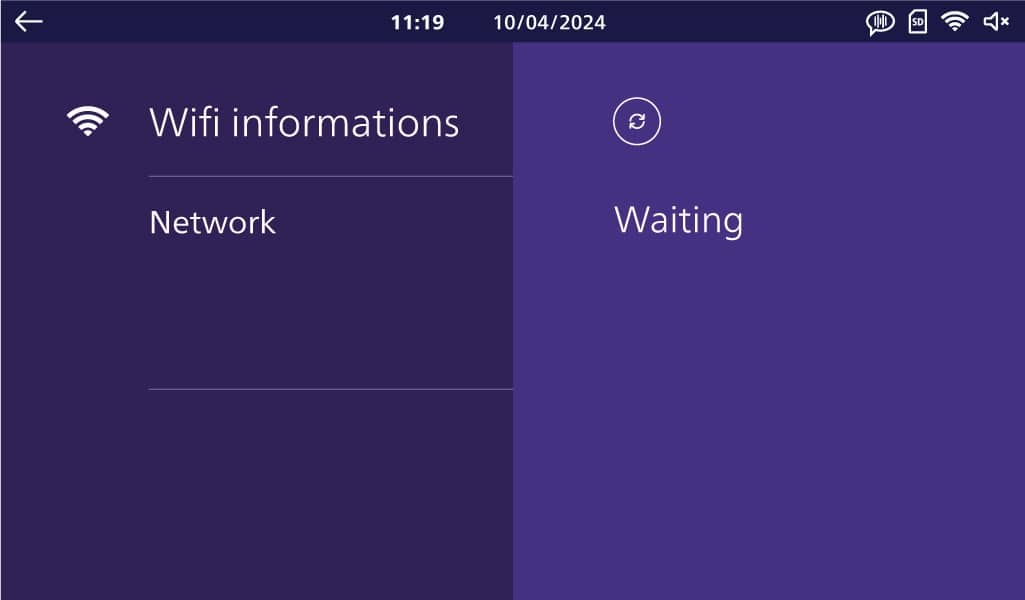
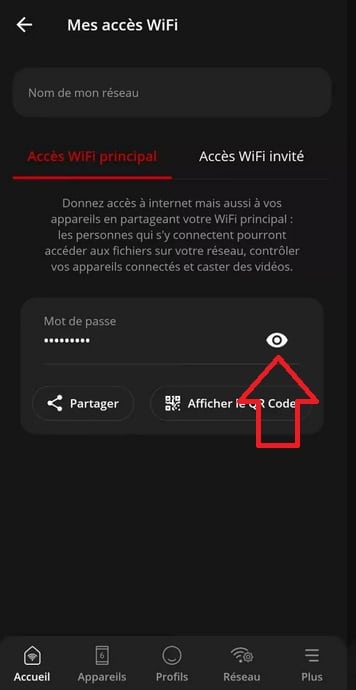
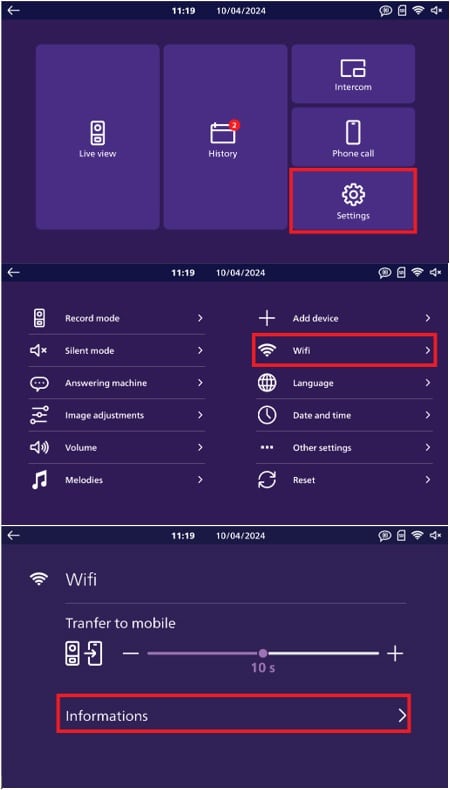
First, you’ll need to check the monitor’s connection status.
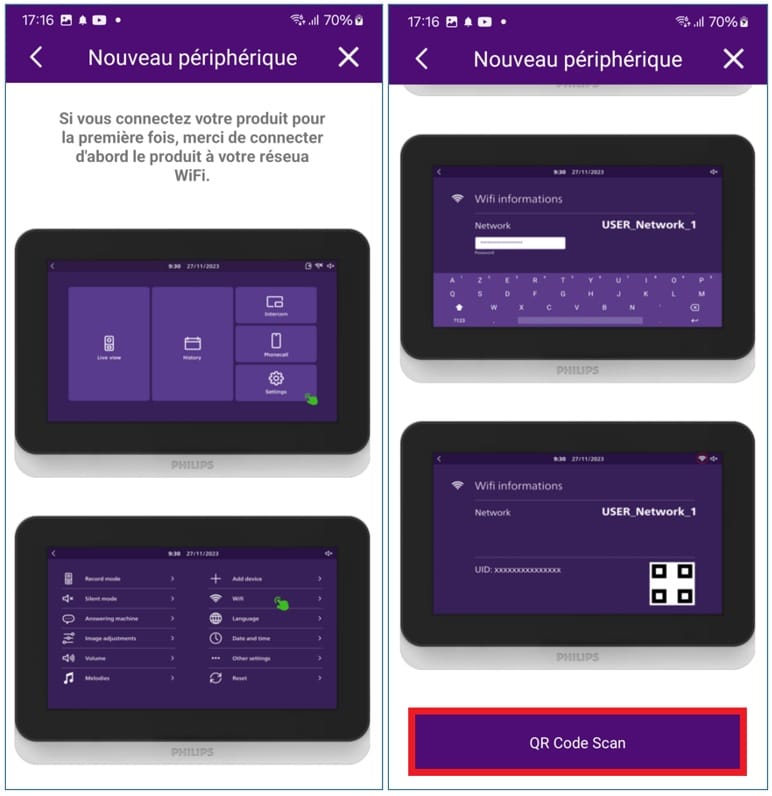
Go to Settings
Then Wifi
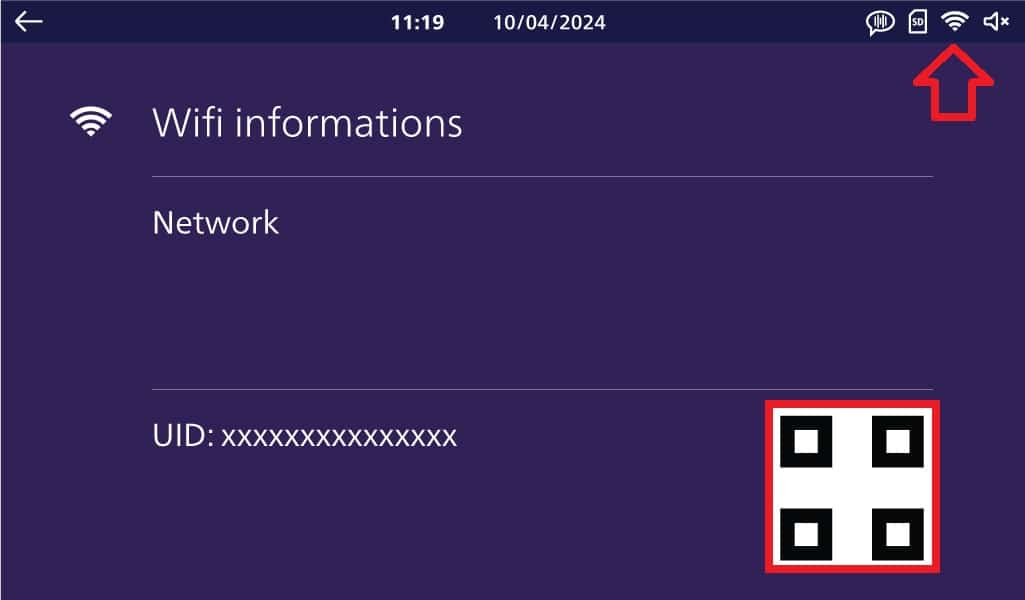
Then Information
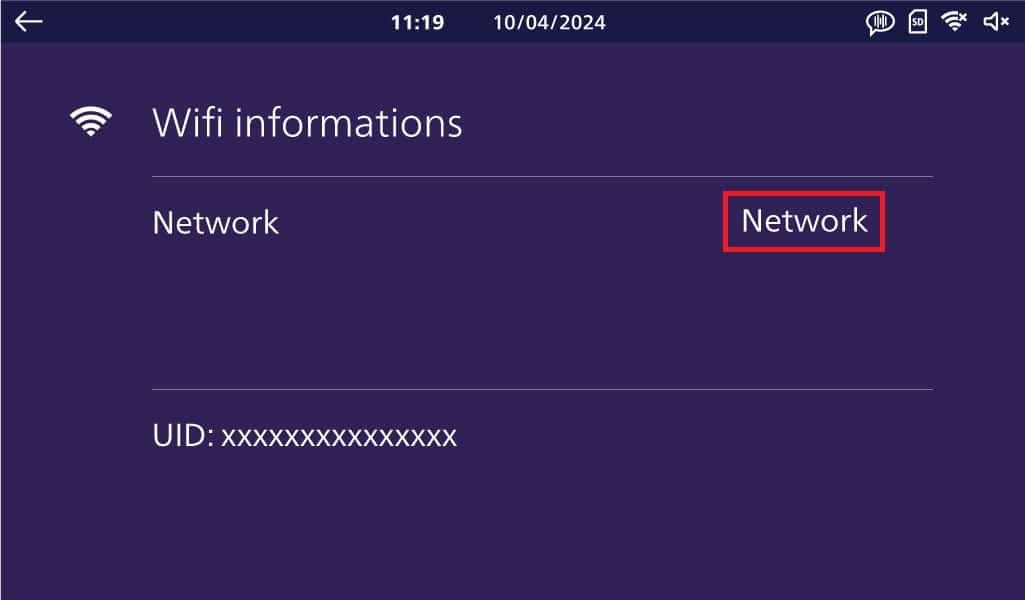
If a QR code is present, this means that the monitor has already been linked to a Wifi network.
In this case, check that the Wifi icon is full and not crossed out.
If yes, go to step 3
Step 2: Connecting the monitor
If the Wifi icon is crossed out and/or the QR code is missing, click on “add a new network” or on the name of the previously registered network.
The Philips WelcomeEye monitor will scan all compatible Internet boxes in the vicinity.
Select the name of your Internet box by clicking on it.
Then manually enter the wifi key of your internet box and click on “confirm”.
ATTENTION: Your wifi key must have a minimum of 8 characters. If your wifi key has less than 8 characters, please modify it.
If you’ve never changed the wifi key on your Internet box, or don’t know where to find it, please follow the instructions below.
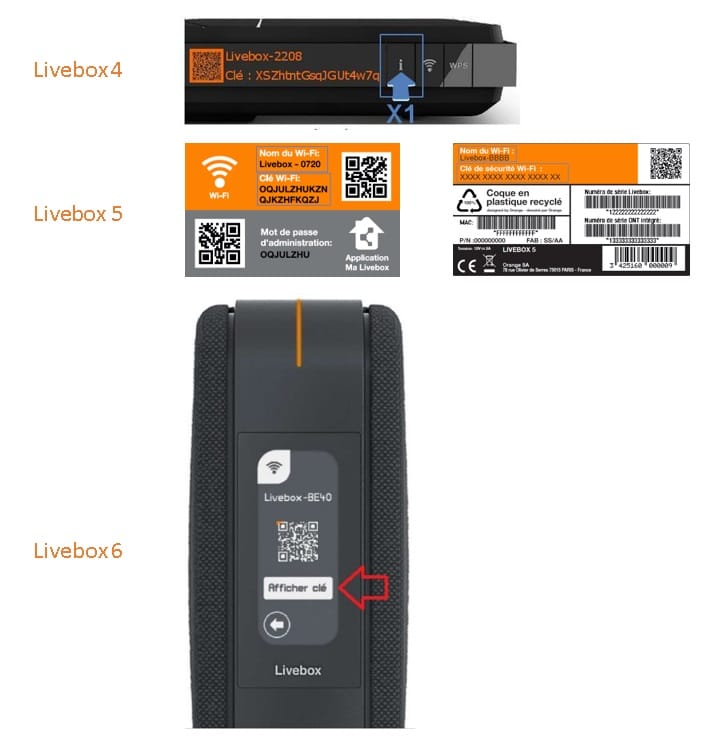
Step 2.1: Where to find the ORANGE operator Wifi key
LiveBox 4 = The wifi key is visible by clicking on the i on the front of your Livebox.
LiveBox 5 = The wifi key is located on the identification card and also on the label on the back of your Livebox.
LiveBox 6 = The wifi key is visible in the Wifi settings accessible from the front screen.
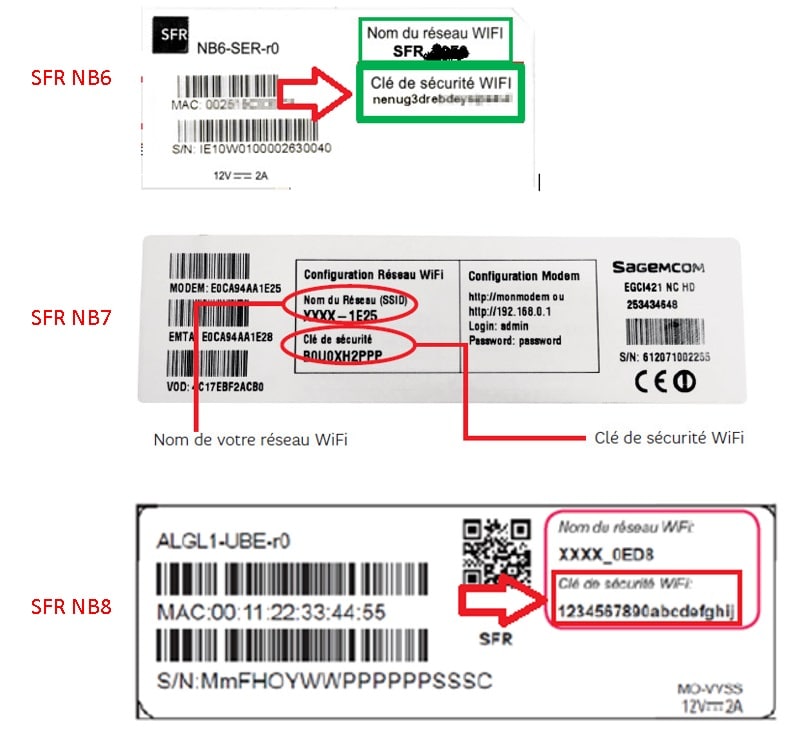
Step 2.2: Where to find the SFR operator Wifi key
SFR NB6/NB7/NB8 = The wifi key is located on the label on the back of your SFRBox.
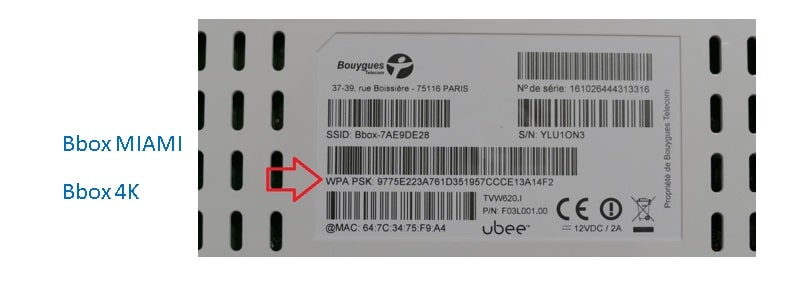
Step 2.3: Where to find the Bouygues operator WiFi key
Bbox Miami/ 4K = The wifi key is located on the label on the back of your Bbox. It’s the code on the WPA line.
Step 2.4: Where to find the Freebox operator Wifi key
Valid for Freebox Delta/Pop/Révolution/mini/One/4G+/Crystal
Please download the “Freebox Connect” application available on the AppStore and Google Playstore.
Select your Freebox model and log in.
The wifi key for your Freebox is located in the “My Wifi Access” menu.
If entered correctly, your monitor’s QR code will appear and the wifi icon will be fixed.
In the event of an error, a brief message will be displayed during connection and the wifi icon will always be Please repeat the procedure from step 2.
Step 3: Connecting to your smartphone
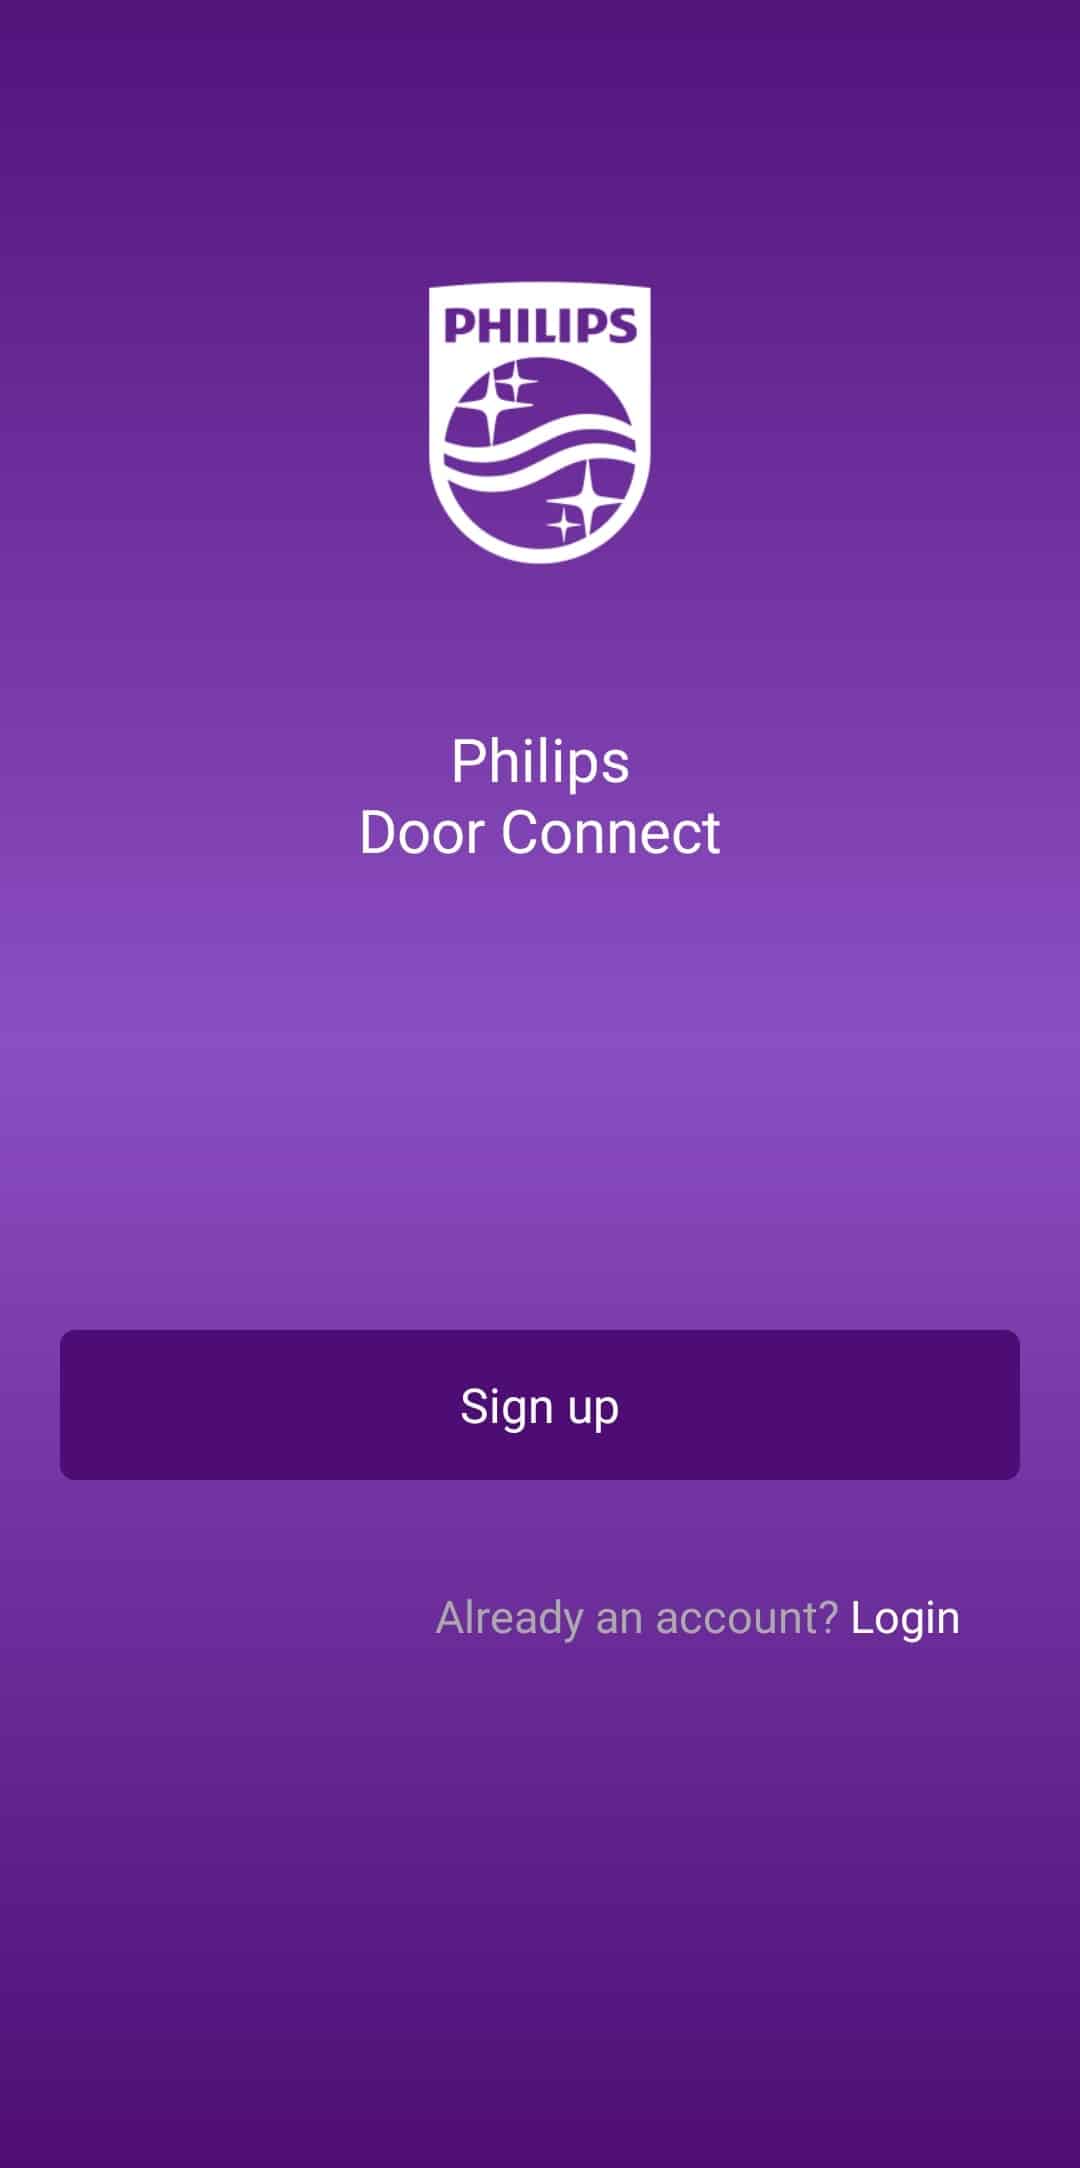
Now take your smartphone and install the “Door connect” application, available from the AppStore or GooglePlay store.
During the entire procedure, if the application asks you for authorizations, please authorize them.
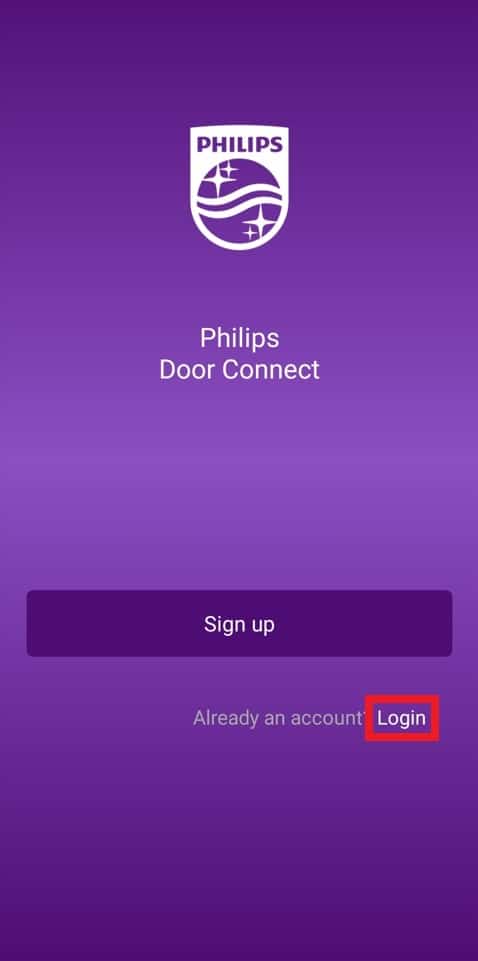
Log in to your Philips Door Connect account by clicking on “login”.
Enter your user account and password
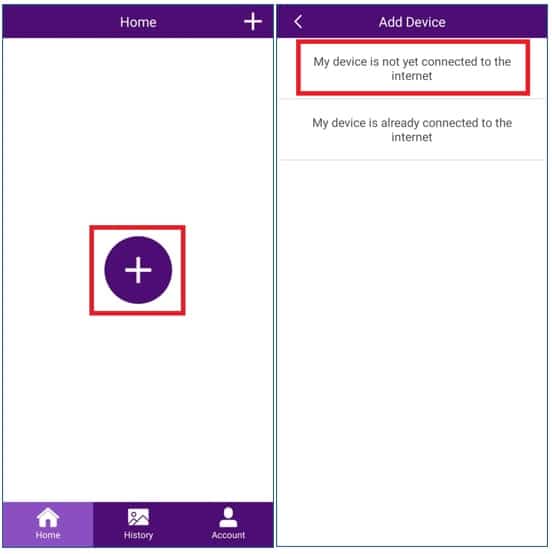
Click on the “+”.
Click on “My device is already connected to the Internet”.
Step 3.1 - The monitor is recognized by the application
If your Philips Welcome connect 3 monitor is connected to the same local network as your smartphone, it should be detected immediately by the application.
Select it by pressing it.
If your smartphone is connected to another network, or automatic detection fails, go to step 3.2.
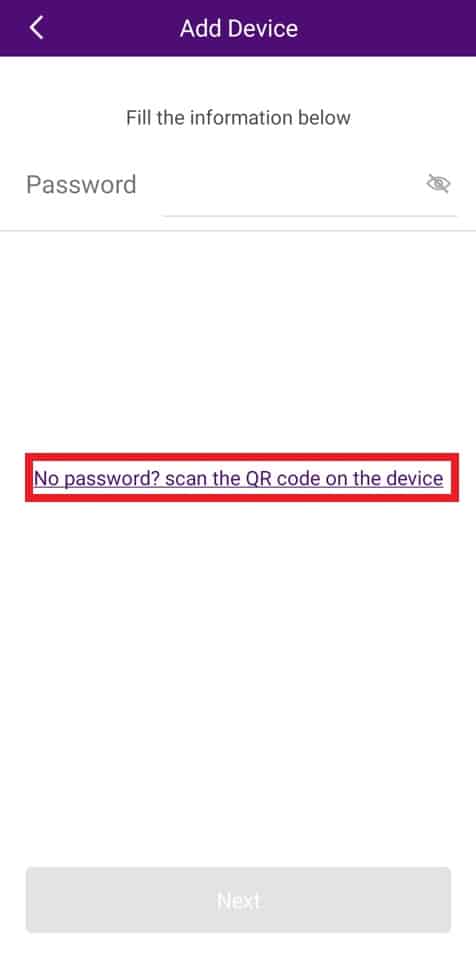
As this is your first installation, click on “No password set? Scan the QR code in the product menu”.
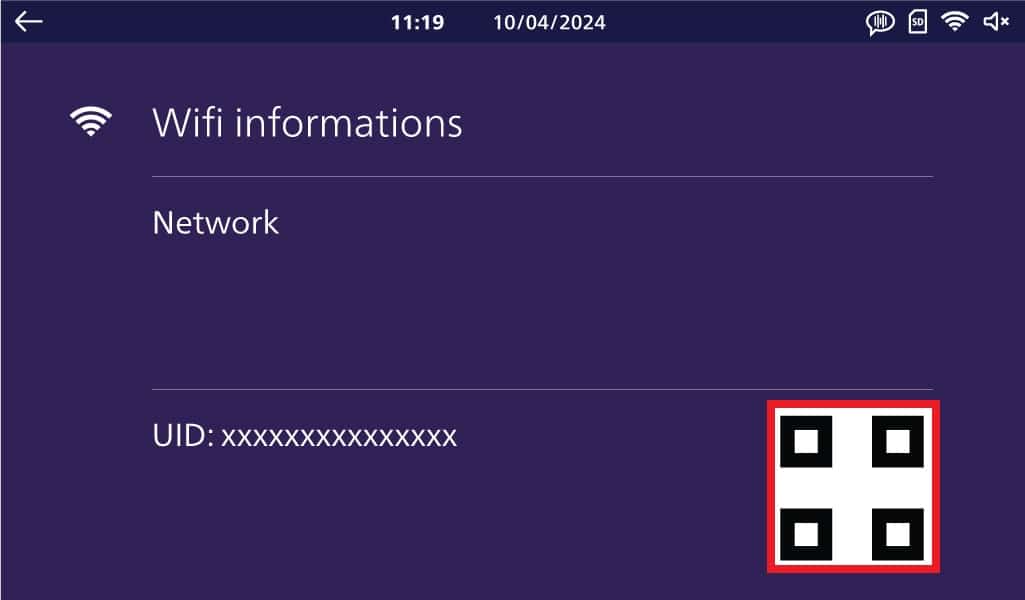
Scan the QR code in the wifi settings of your Philips monitor.
If you have difficulty scanning the QR code, please improve the surrounding lighting and move slightly away from the QR code to improve focusing.
Go to step 3.3 – Device registration
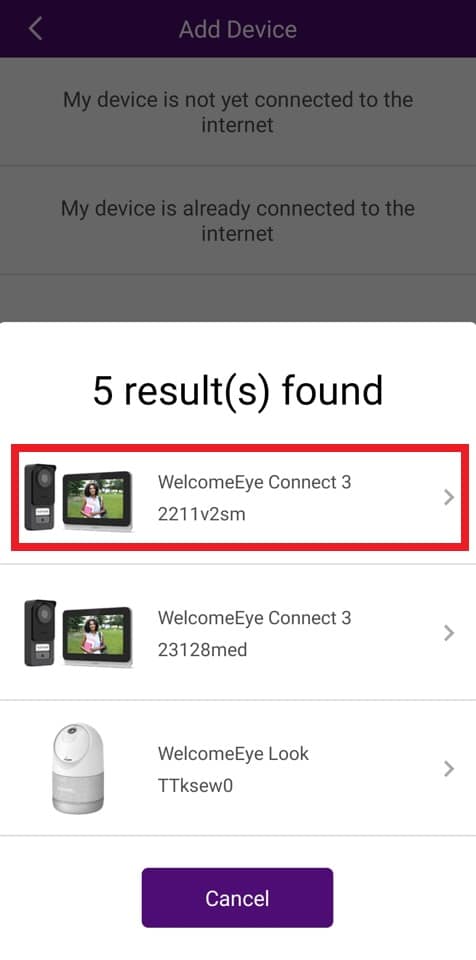
Step 3.2- The monitor is not automatically recognized by the application
If the application does not automatically detect your video door phone on your network, please select the WelcomeEye Connect 3 video door phone.
Scroll to the bottom of the application page and press “Next”.
Scan the QR code in the wifi settings of your Philips monitor.
If you have difficulty scanning the QR code, please improve the surrounding lighting and move slightly away from the QR code to improve focusing.
Step 3.3 - Device registration
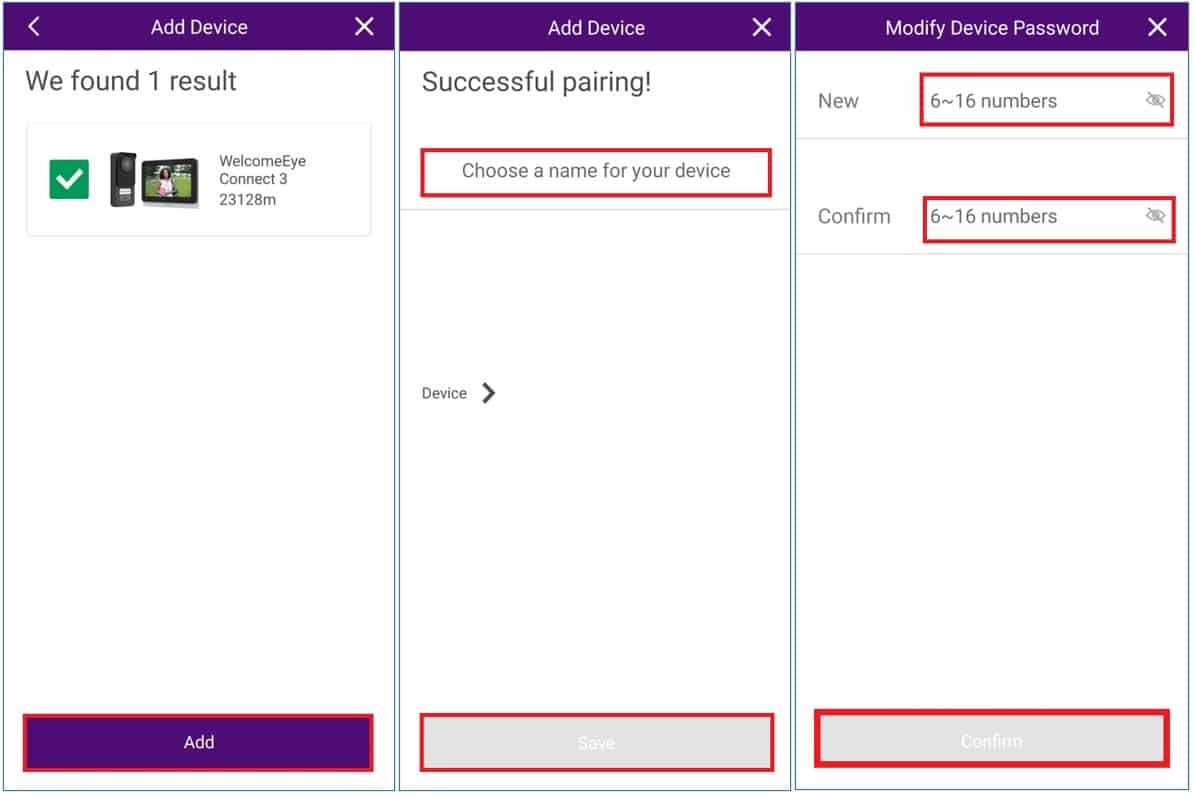
The Philips monitor should be recognized by the application.
Select it and click on “Add”.
Choose a name for your Philips monitor and click on “Save”.
Change the default password for the Philips monitor. Remember: the default password is 123456. You cannot use it.
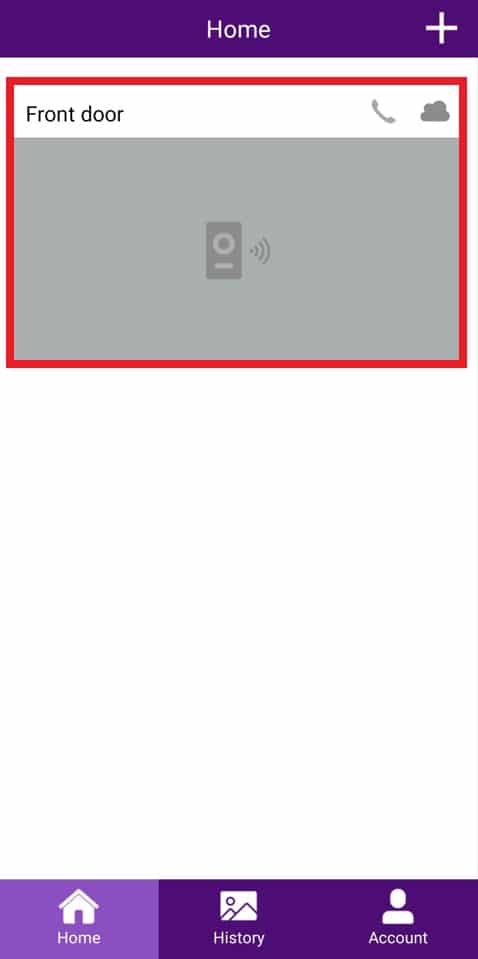
Your monitor is now connected.
Please click on your monitor to view intercom panel live.
Bonus step 4: Adding the monitor to another smartphone
Please take the second smartphone and launch the Philips Door Connect application.
Log in to your Philips Door Connect account by clicking on “login”.
Enter the same user account and password as for the first smartphone.
The monitor will already be connected and you’ll be able to enjoy the device.
Step 5 bonus: If you change your Internet box or Wifi connection
If you change your Internet box, your monitor needs to be reconnected to your new Internet box.
Go to Monitor settings
Then Wifi
Then Information
Then click on the name of your old Internet box, which should be there.
The Philips WelcomeEye monitor will scan all compatible Internet boxes in the vicinity.
Select the name of your new Internet box by clicking on it.
Then manually enter the wifi key of your new internet box and click on “confirm”.
Once the wifi icon is fixed, the monitor is online and can be viewed with your smartphone.

 and/or the QR code is missing, click on “add a new network” or on the name of the previously registered network.