Skip to content
  • English
    • French
    • Italian
    • Spanish
    • German
    • Dutch
    • Portuguese (Portugal)
    • Greek
    • Polish
  • English
    • French
    • Italian
    • Spanish
    • German
    • Dutch
    • Portuguese (Portugal)
    • Greek
    • Polish
Logo Avidsen
  • Products
    • Products
    • Avidsen Brand
    • Extel Brand
    • Philips Brand
    • Thomson Brand
  • Support
    • Tutorials on repair and use
    • Avidsen Technical Support
    • Extel brand technical support
    • Philips technical support
    • Thomson Technical Support
  • The Group
    • The Group
    • Contact
  • Ethic Company
  • Where to buy ?
\

Replacing the microphone on intercom panel Philips WelcomeEye

  1. Home
  2. Replacing the microphone on intercom panel Philips WelcomeEye

Replacing the microphone on intercom panel Philips WelcomeEye

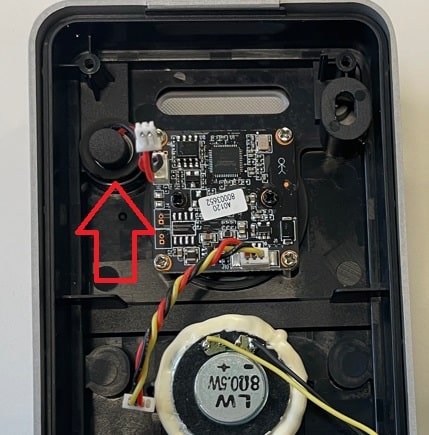
You can no longer hear your visitors, or your video door entry system makes a loud crackling noise 
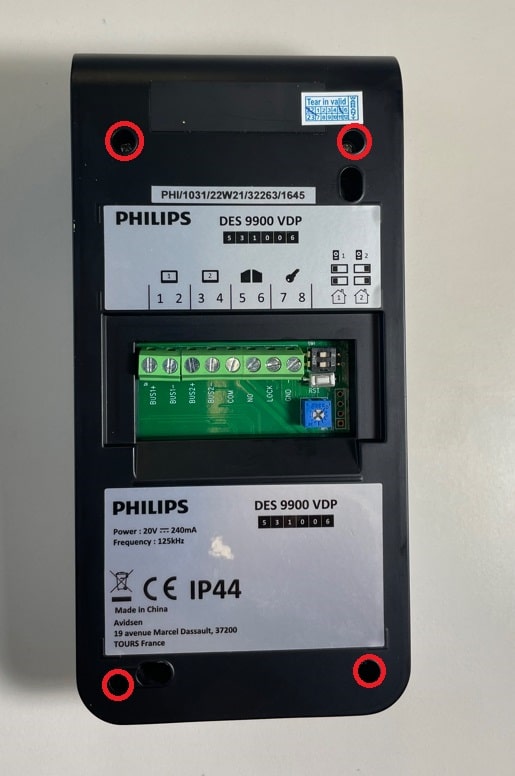
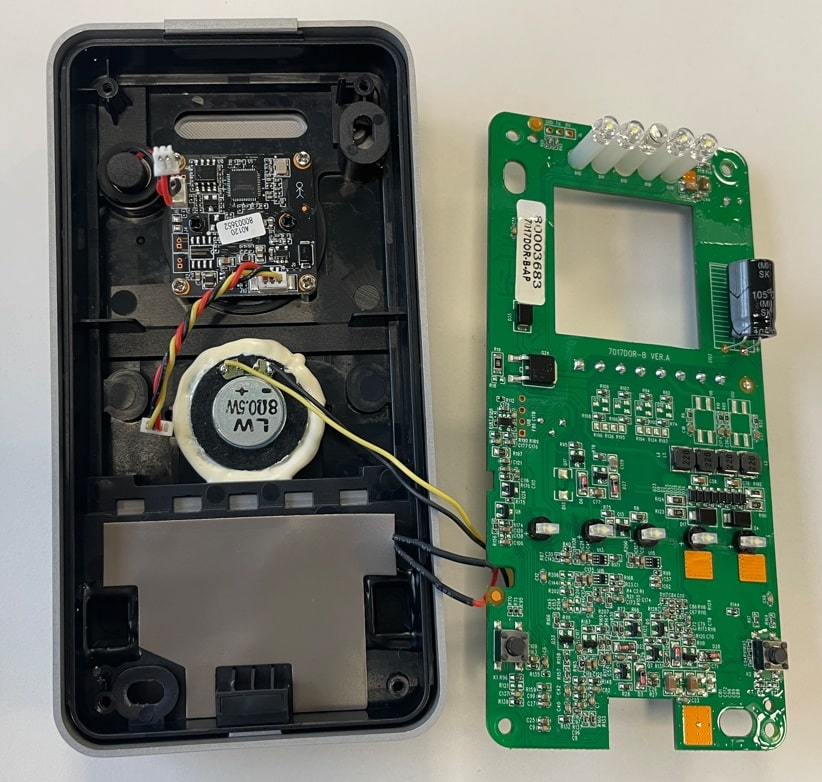
Before carrying out any work or maintenance, please switch off all components of your video door entry system and place yourself on a suitable surface to avoid scratching the lens.

This tutorial is applicable for:

531006, Philips - 531001 - WelcomeEye Touch, Philips - 531004 - WelcomeEye Compact, Philips - 531019 - WelcomeEye Comfort, Philips - 531036 - WelcomeEye Connect 2
Difficulté : Easy
Temps nécessaire : 20 minutes minutes
Nombre d’étapes : 8
Mise à jour : February 2025

Materials needed:

Phillips screwdriver, plastic spatula, precision pliers

Tutorial steps:

Step 1: Remove the rear bracket

  • Turn the Door Station upside down.
  • Remove the 4 rear screws from intercom panel using a Phillips screwdriver.
  • Please note that these 4 screws may be located under a protective rubber.
  • Carefully remove the black rear panel.

Step 2: Disconnect the microphone

  • Gently disconnect the microphone connector by pulling it towards you with precision pliers. Be careful not to pull on the wires.

Step 3: How to remove a connector

  • To remove the connector safely, hold it in place with the precision pliers and make gentle left and right movements.

Step 4: Disconnect the video circuit board

  • Gently disconnect the connector from the video circuit board by pulling it towards you with precision pliers. Be careful not to pull on the wires.

Step 5: Access to the microphone

  • Gently tip the circuit board to the right. Be careful not to damage the remaining wires

Step 6: Replace the microphone

  • Remove the old microphone using the spatula.
  • Reposition the new microphone in its housing.

Step 7: Repositioning the circuit board

  • Reposition the circuit board in its housing. Don’t forget to route the camera and microphone connector wires through the middle of the circuit board.
  • Reconnect the components as described in steps 2 to 4.

Step 8: Refitting the rear bracket

  • Reposition the intercom panel rear bracket by screwing back the 4 screws previously removed in step 1. Be careful not to pinch the cables.
  • The replacement is complete.
Keep in touch
Youtube Linkedin

Follow us on social networks

About Avidsen
  • Who are we?
  • Contact
  • Who are we?
  • Contact
Support
  • Avidsen Technical Support
  • Extel brand technical support
  • Philips technical support
  • Thomson Technical Support
  • Avidsen Technical Support
  • Extel brand technical support
  • Philips technical support
  • Thomson Technical Support
Avidsen group brand
  • Avidsen Brand
  • Extel Brand
  • Philips Brand
  • Thomson Brand
  • Avidsen Brand
  • Extel Brand
  • Philips Brand
  • Thomson Brand
Copyright 2025 © All rights reserved Avidsen
  • Legal Notice
  • Personal data protection policy
  • Terms and Conditions of Use
  • Legal Notice
  • Personal data protection policy
  • Terms and Conditions of Use
Thank you for your rating!
Thank you for your rating and comment!
This page was translated from: French
Please rate this translation:
Your rating:
Change
Please give some examples of errors and how would you improve them: