Skip to content
  • English
    • French
    • Italian
    • Spanish
    • German
    • Dutch
    • Portuguese (Portugal)
    • Greek
    • Polish
  • English
    • French
    • Italian
    • Spanish
    • German
    • Dutch
    • Portuguese (Portugal)
    • Greek
    • Polish
Logo Avidsen
  • Products
    • Products
    • Avidsen Brand
    • Extel Brand
    • Philips Brand
    • Thomson Brand
  • Support
    • Tutorials on repair and use
    • Avidsen Technical Support
    • Extel brand technical support
    • Philips technical support
    • Thomson Technical Support
  • The Group
    • The Group
    • Contact
  • Ethic Company
  • Where to buy ?
\

OREA 500 + electric motor replacement

  1. Home
  2. OREA 500 + electric motor replacement

OREA 500 + electric motor replacement

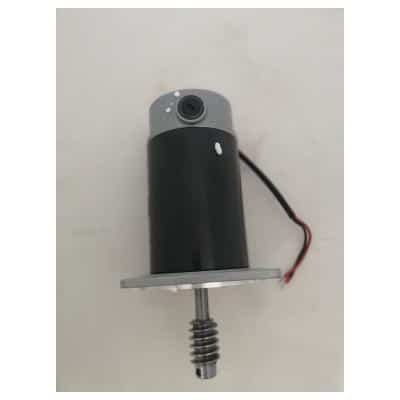
In this tutorial you will find all the steps to replace an electric motor for OREA 500 +.

This tutorial is applicable for:

Avidsen - 114457 - Orea 500 Plus / Avidsen - 114460 - Orea 550 / Avidsen - 114461 - Orea Connect / Thomson - 510064 - Swip 500
Difficulté : Moderate
Temps nécessaire : 15 minutes
Nombre d’étapes : 10
Mise à jour : February 2025

Materials needed:

Wrench BTR 5, Phillips screwdriver, Flathead screwdriver

Tutorial steps:

Step 1: Remove the card holder

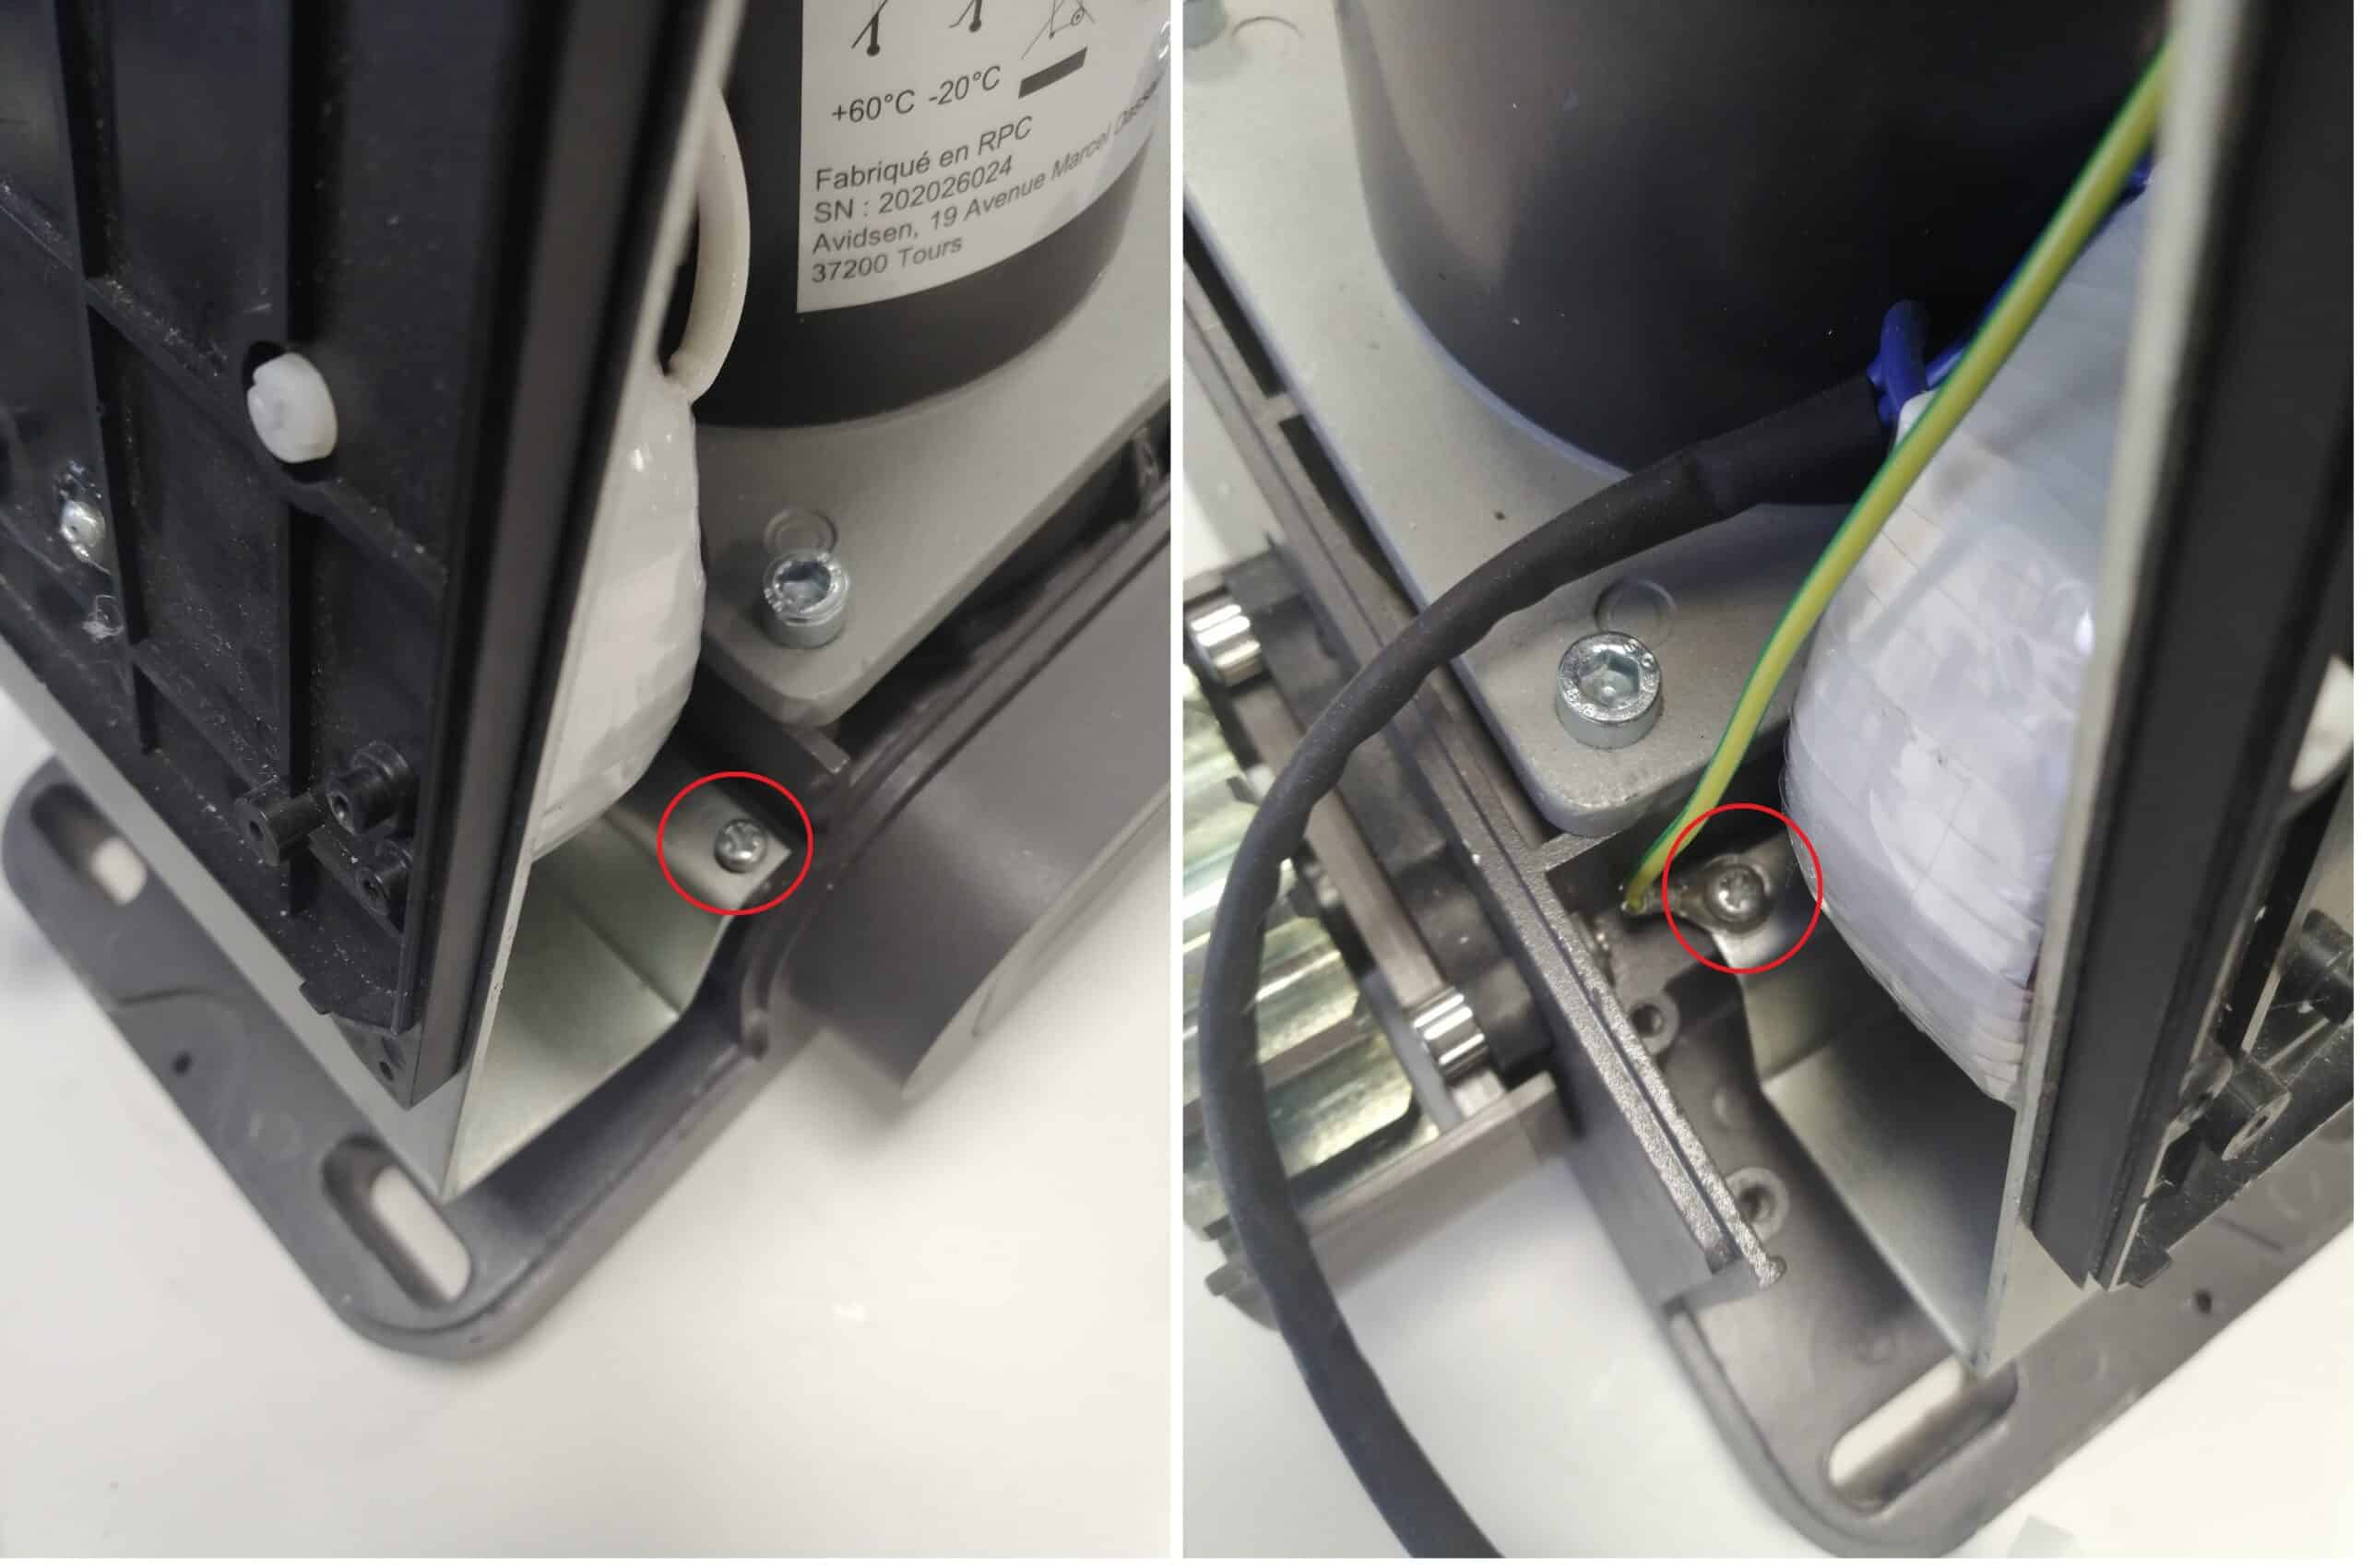
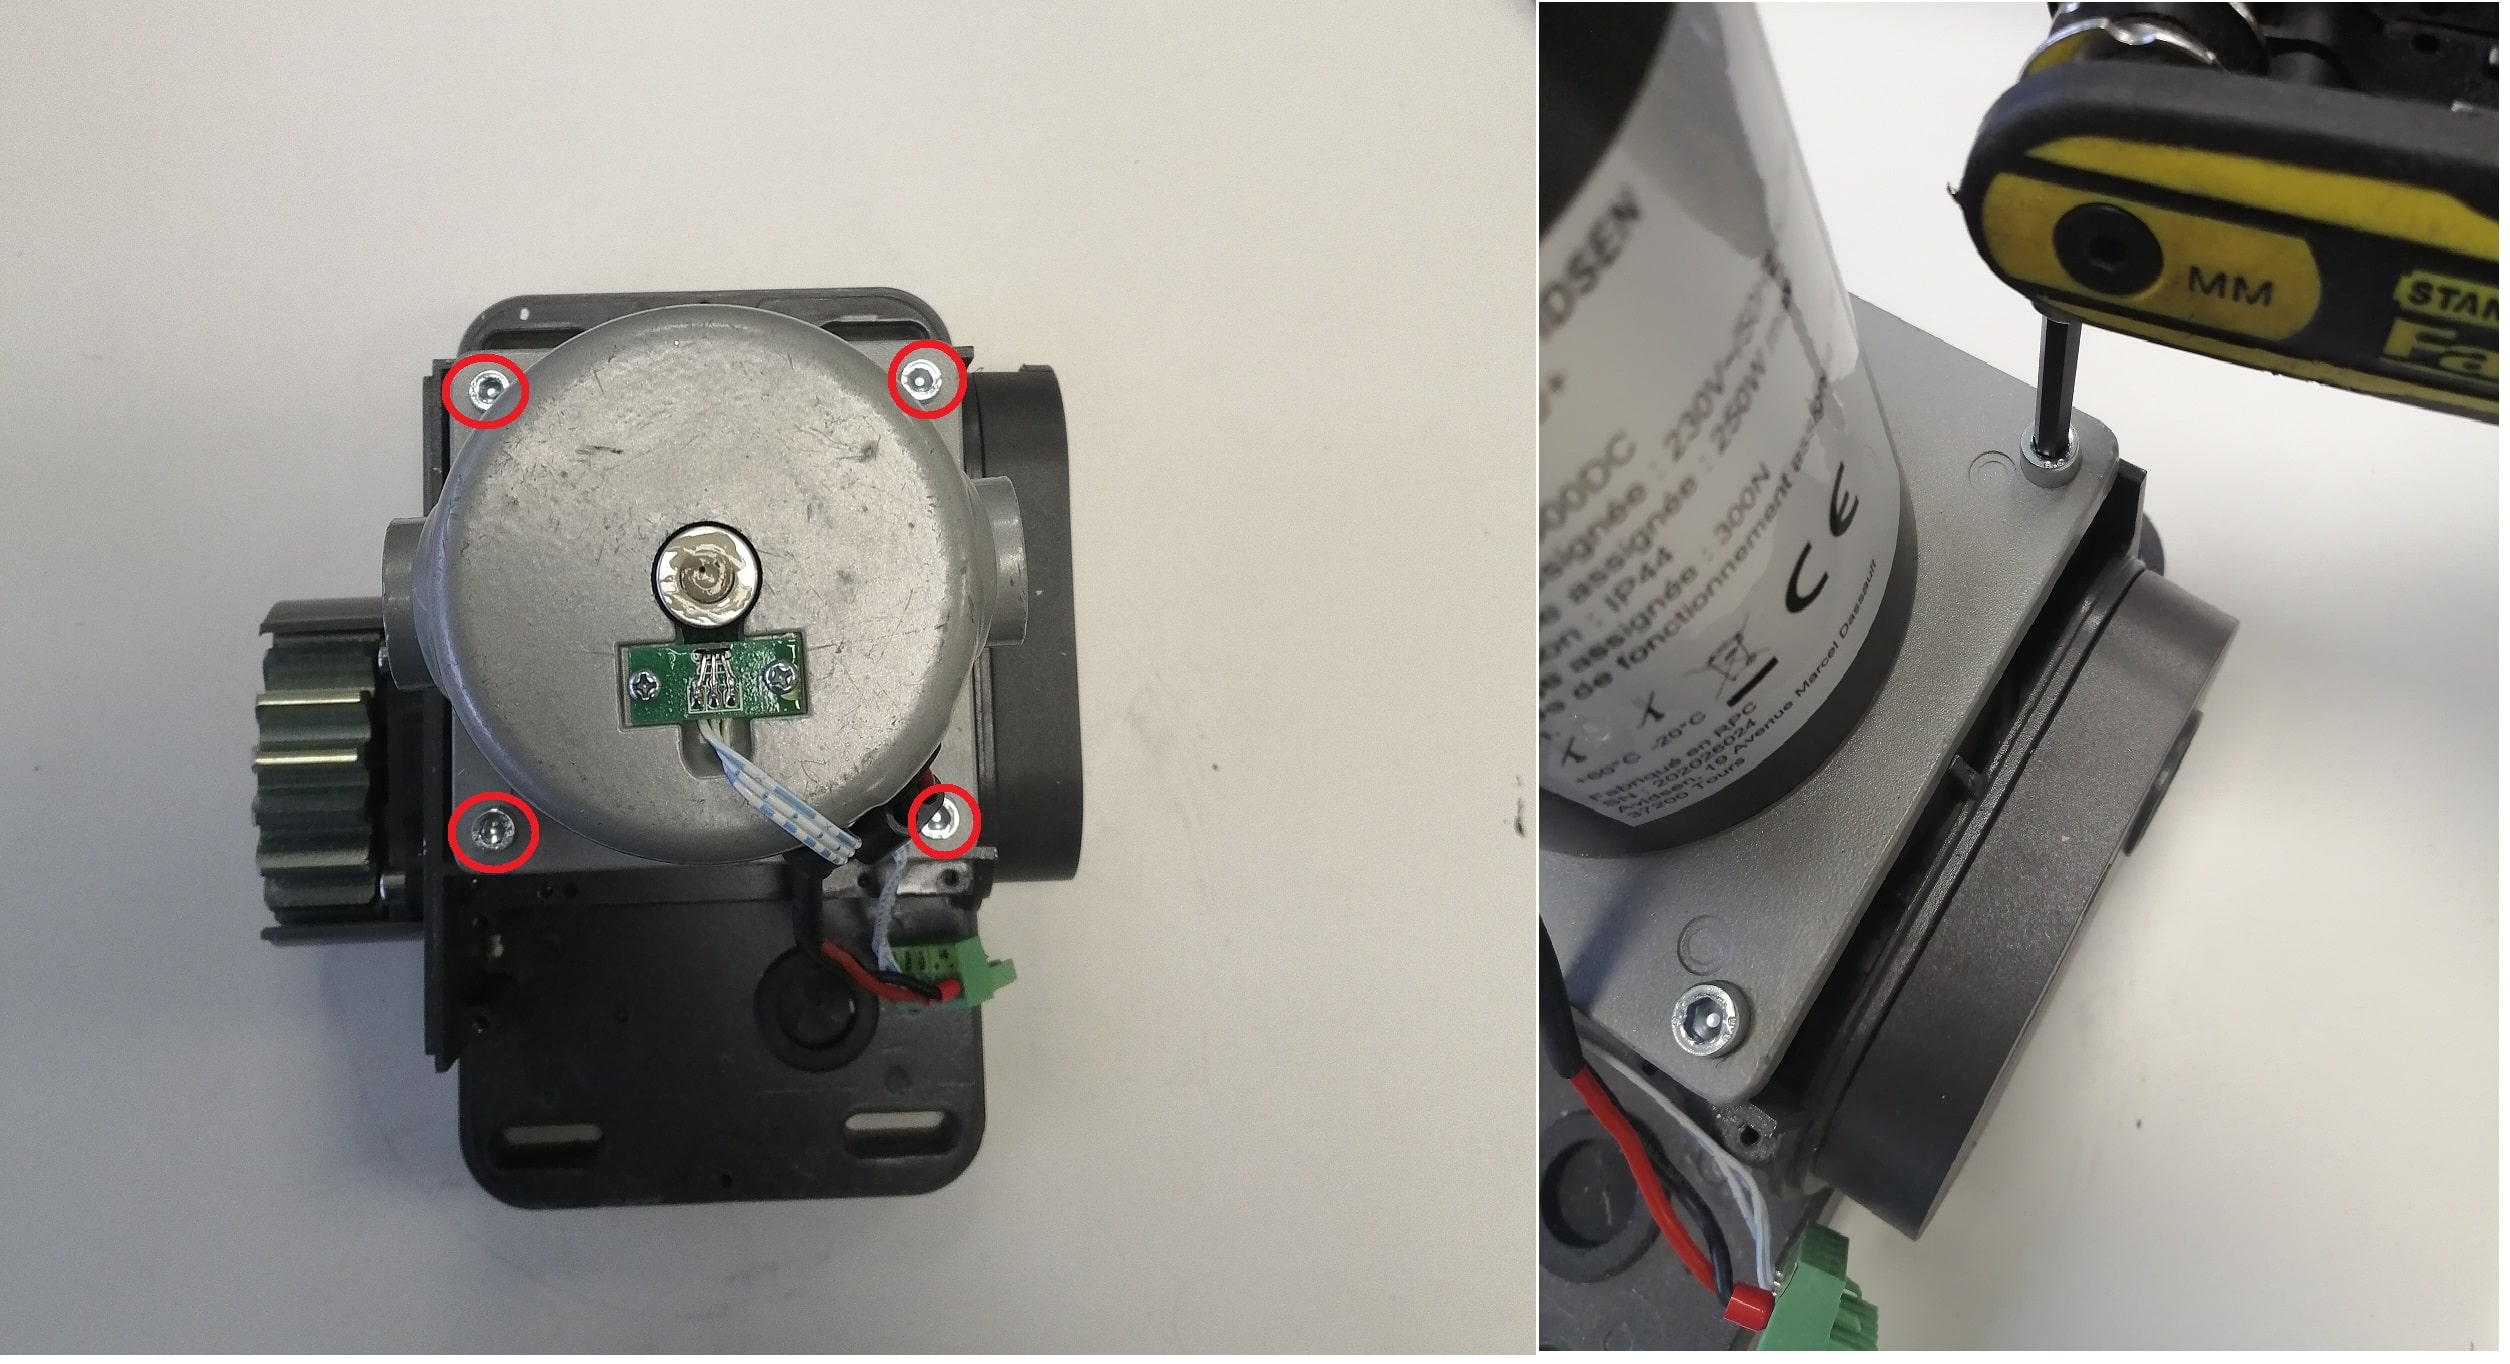
Remove the two screws securing the card/transformer support and remove it from the motor block.

Step 2: Remove the hall effect card

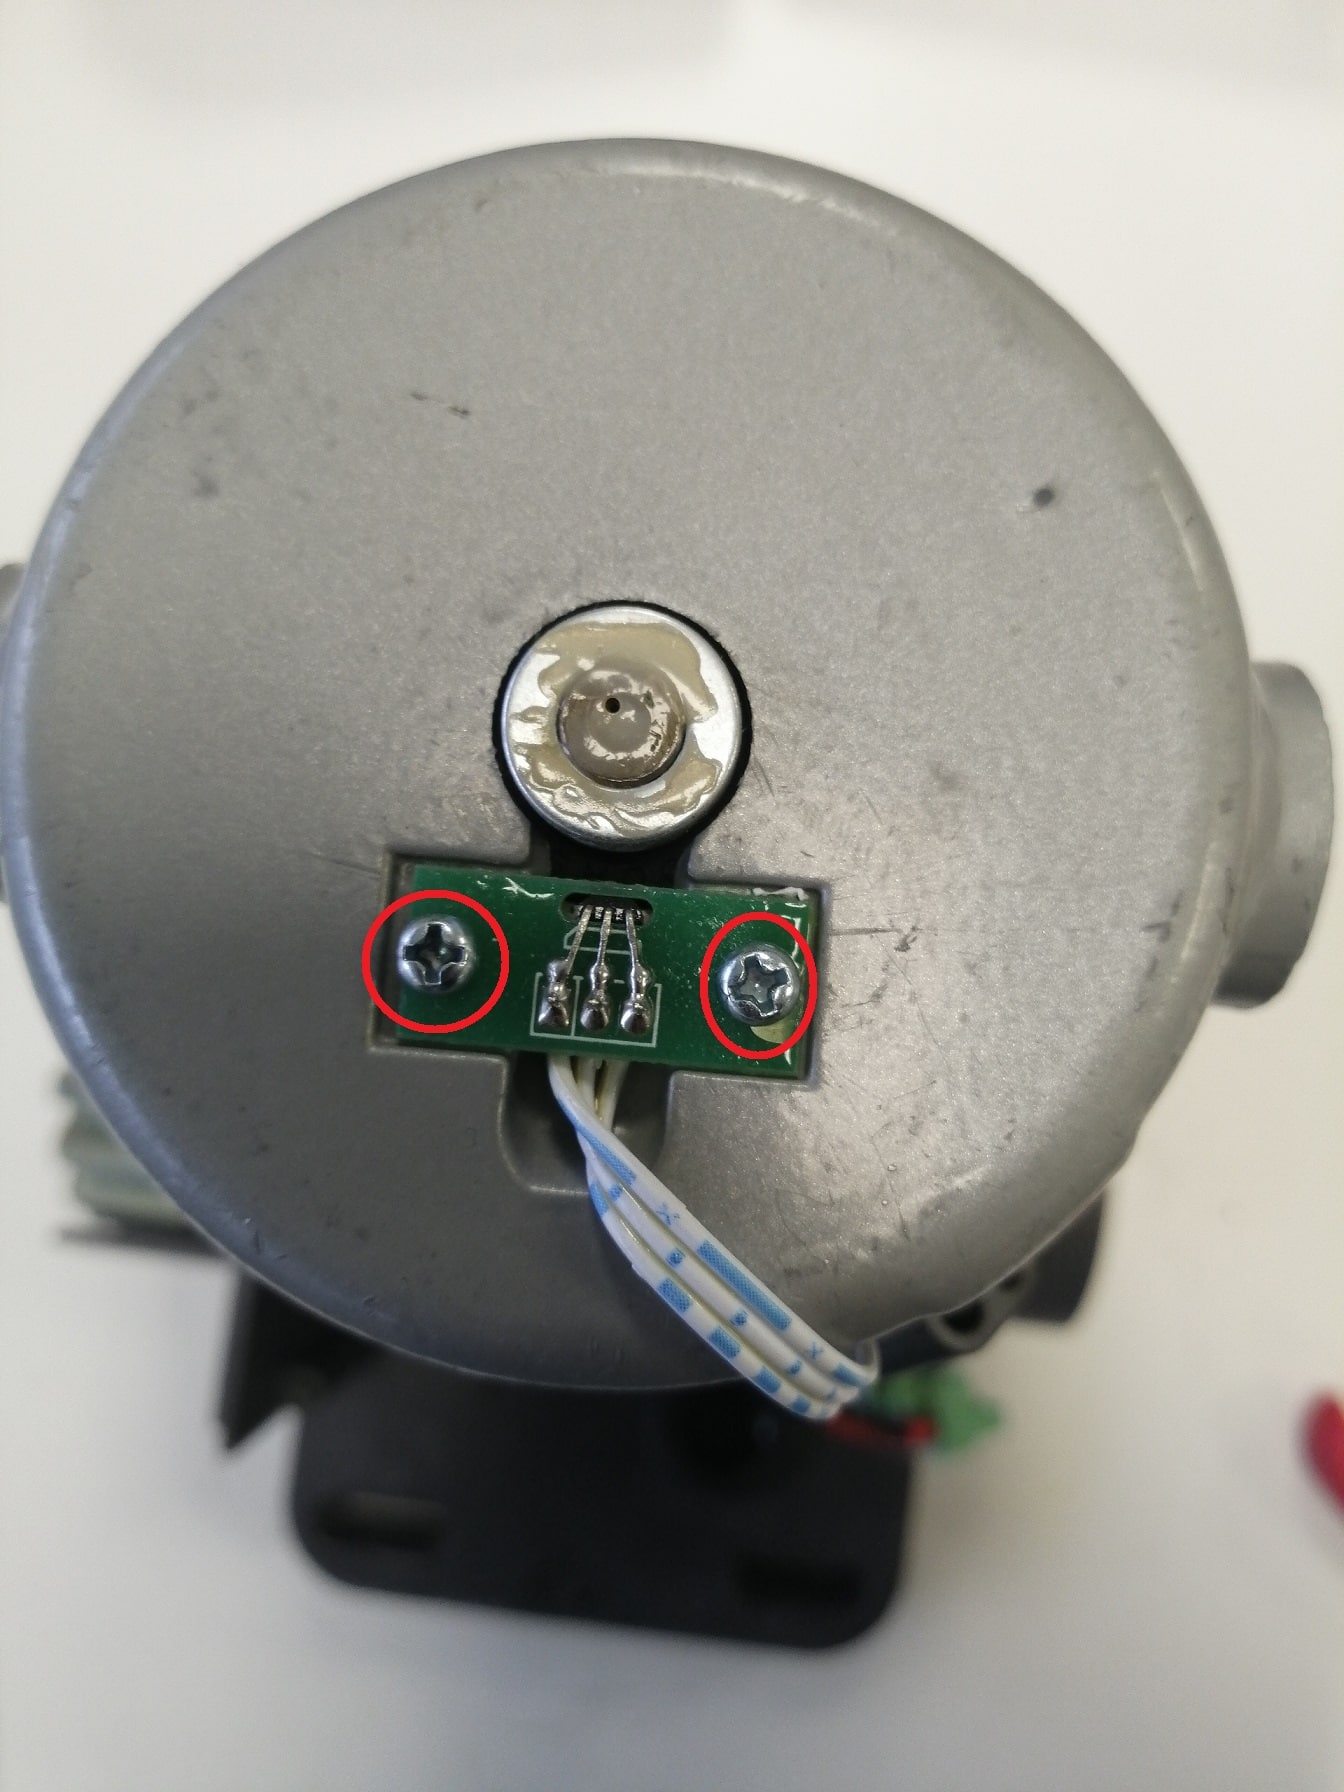
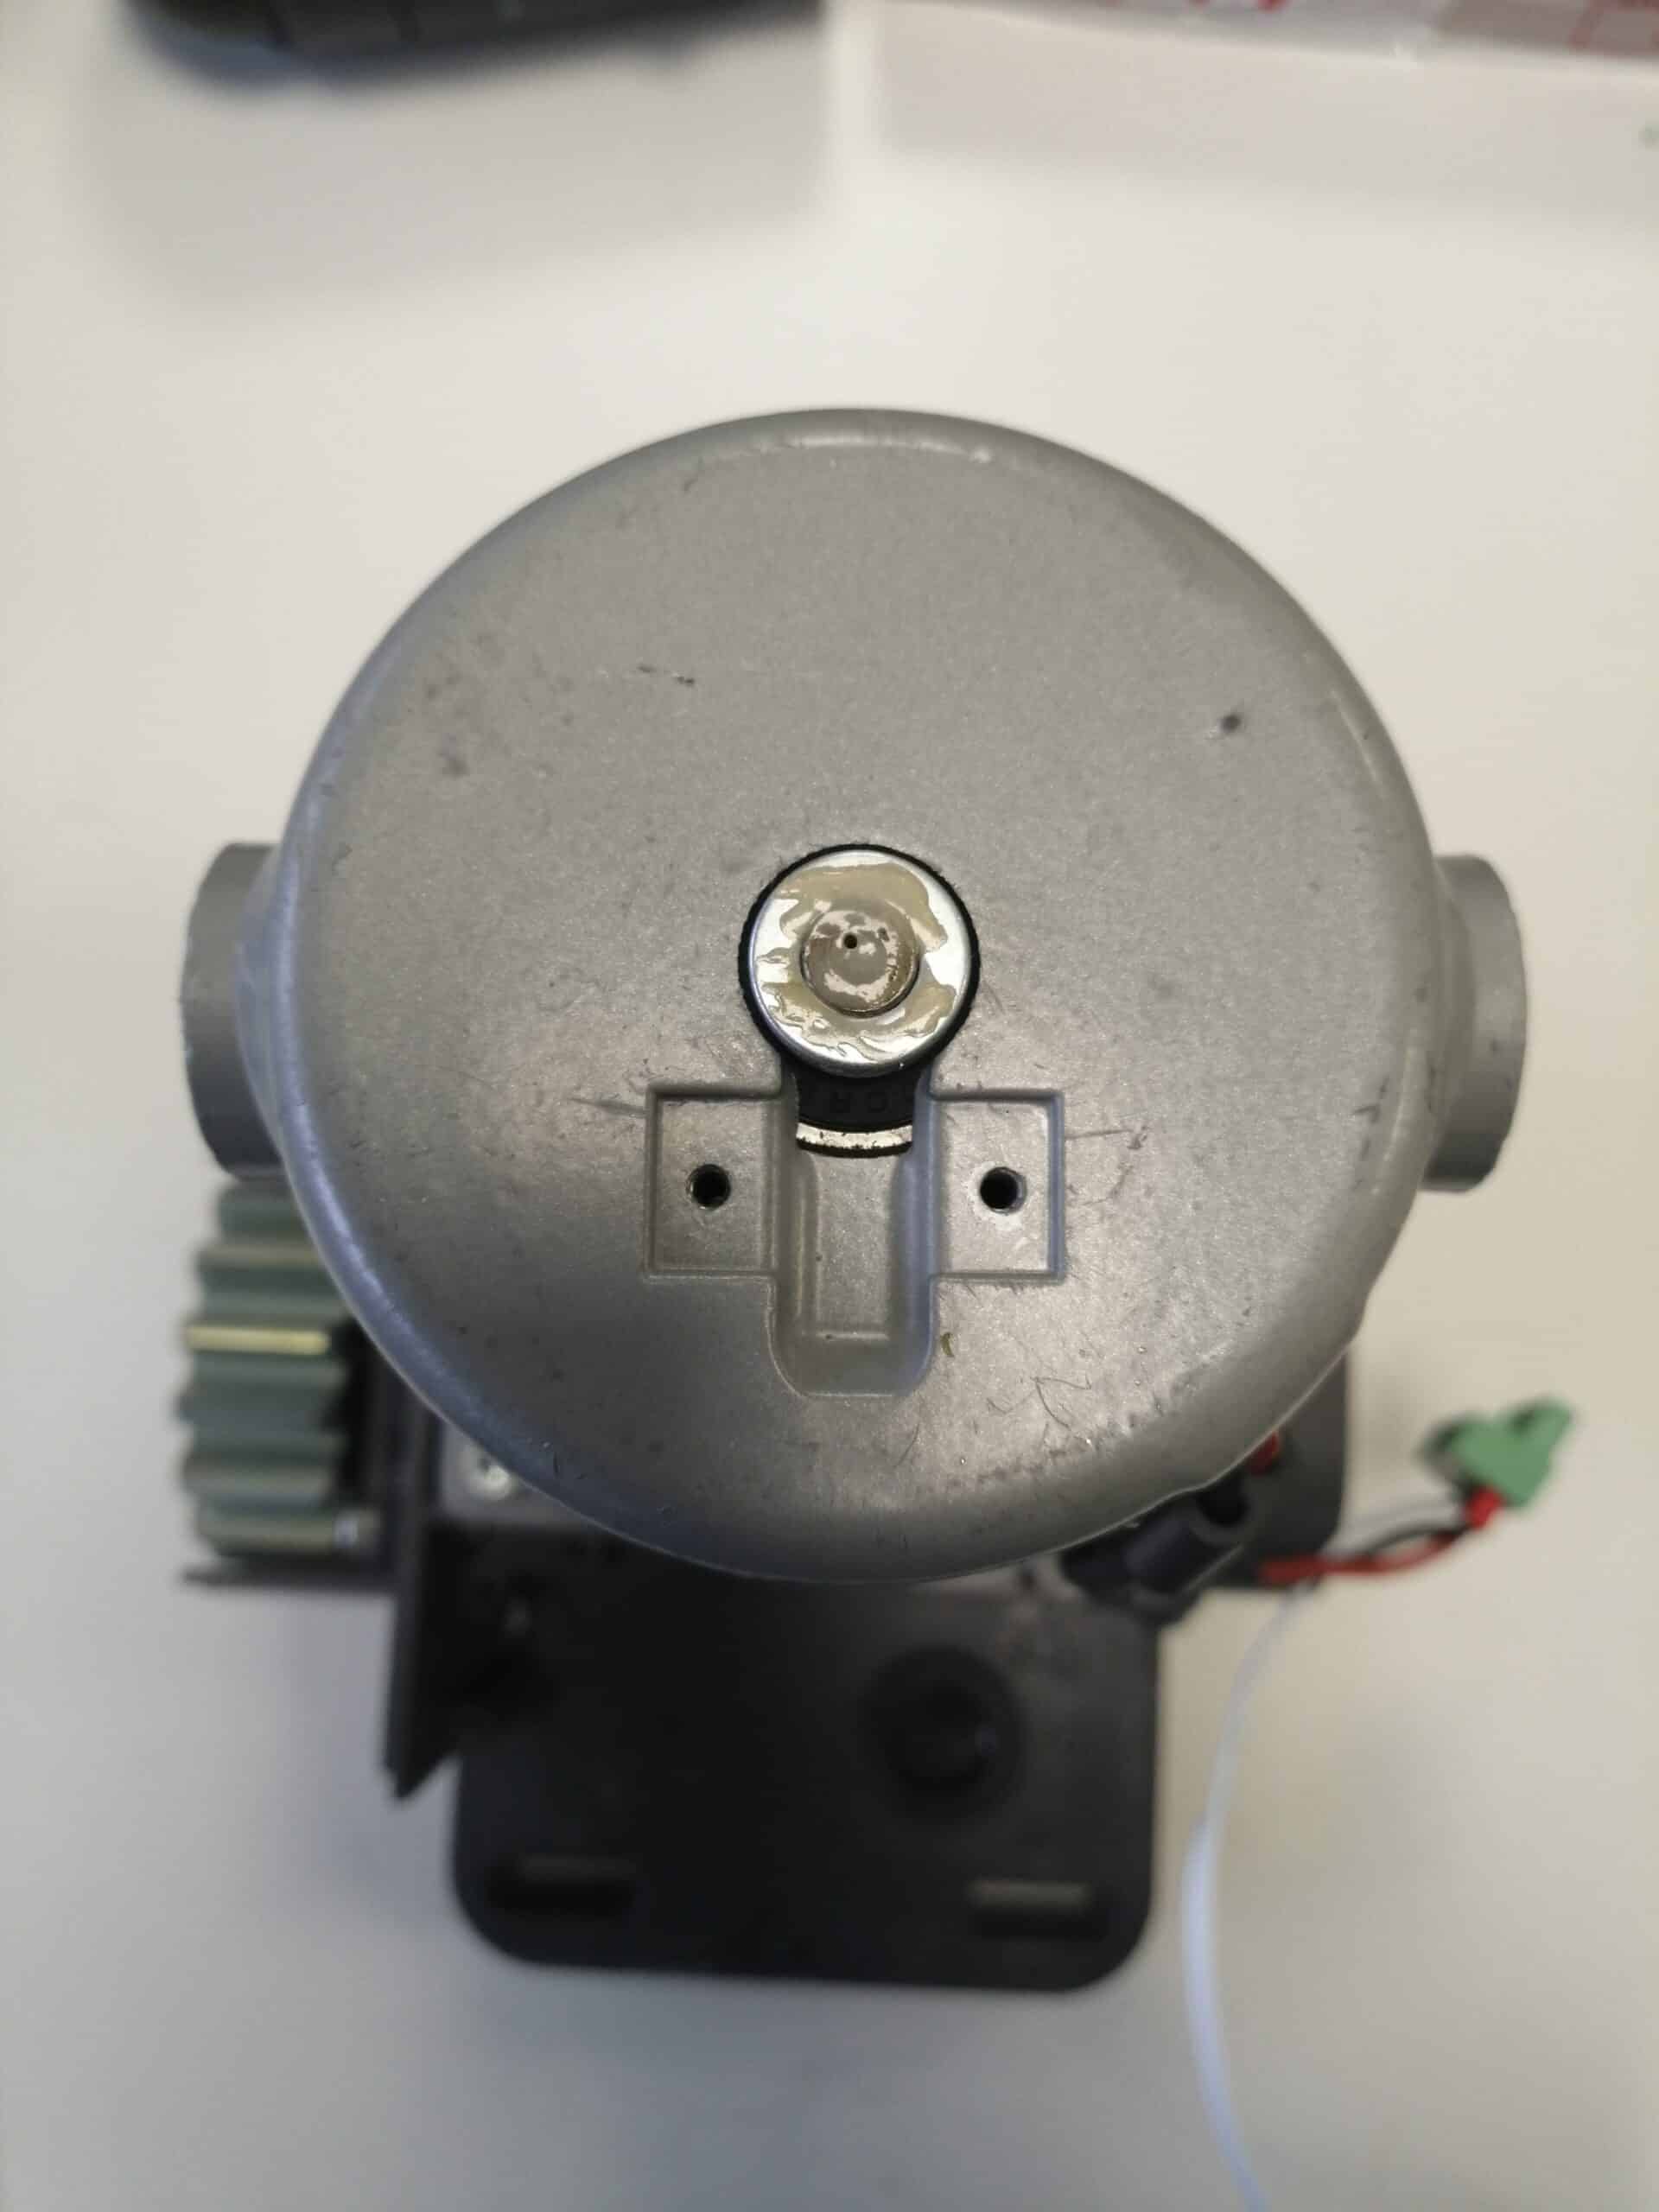
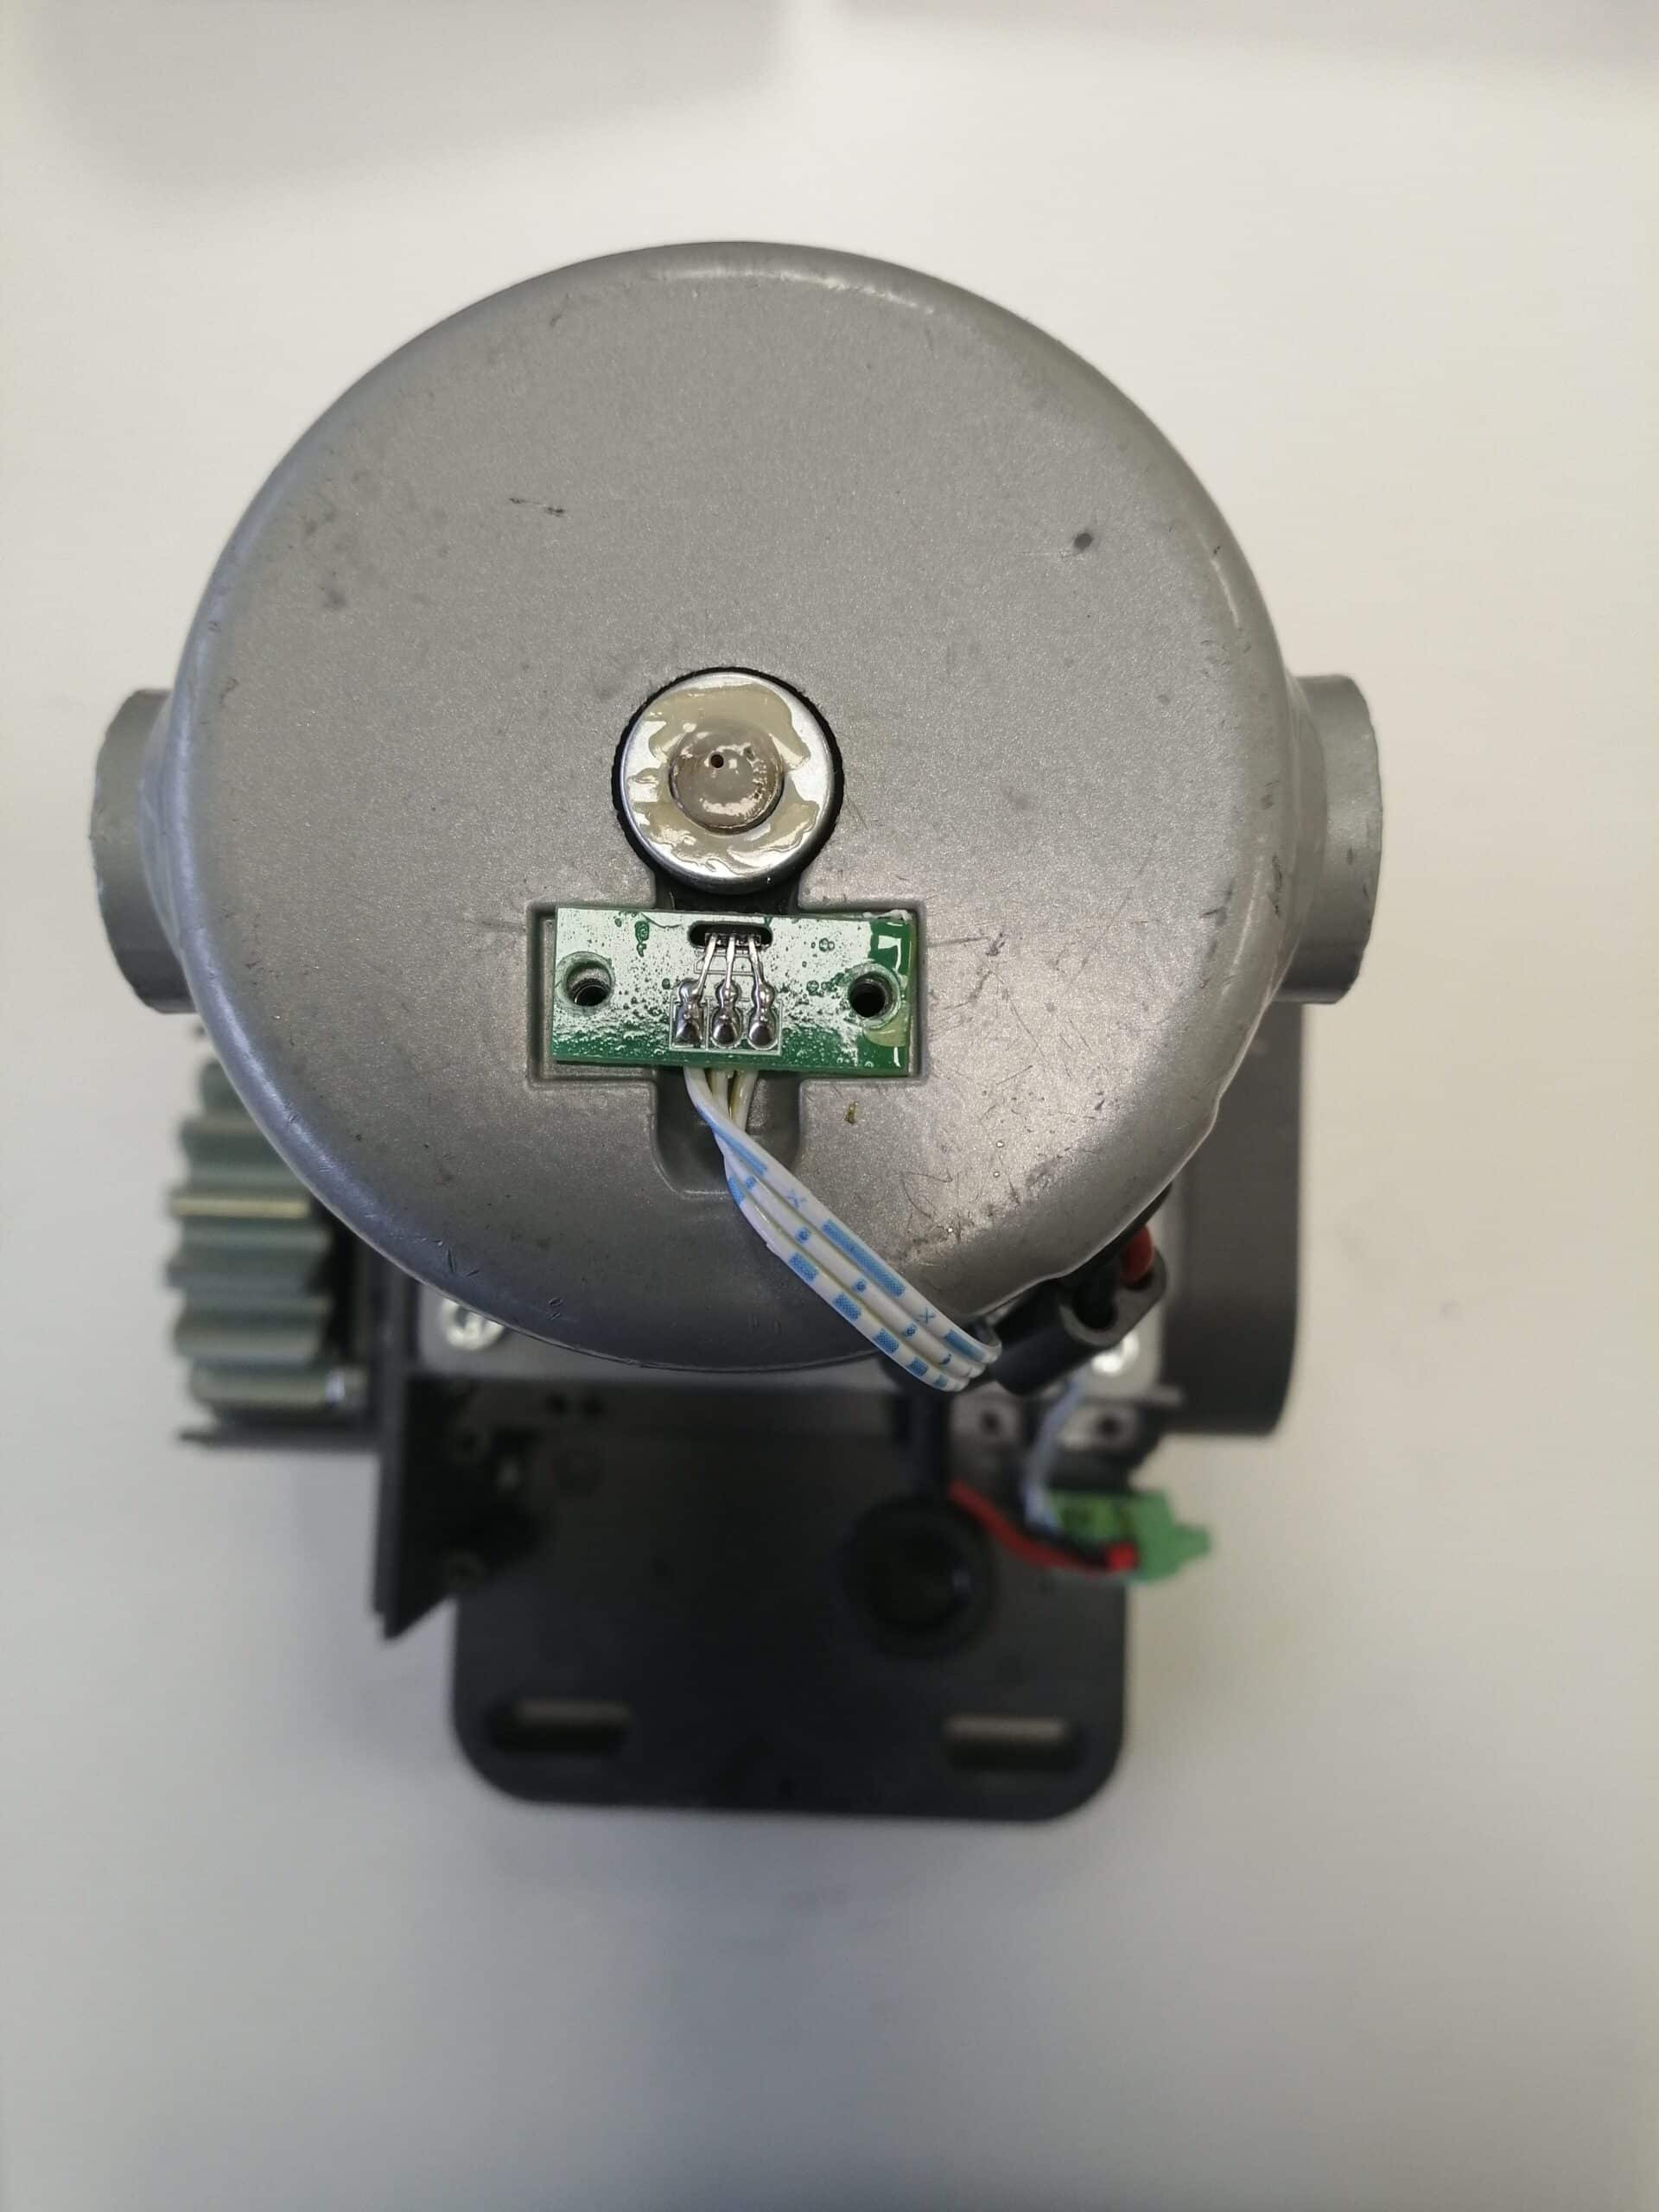
Unscrew the two Phillips screws holding the Hall-effect card to the electric motor.

Step 3: Unscrew the motor cables from the terminal block

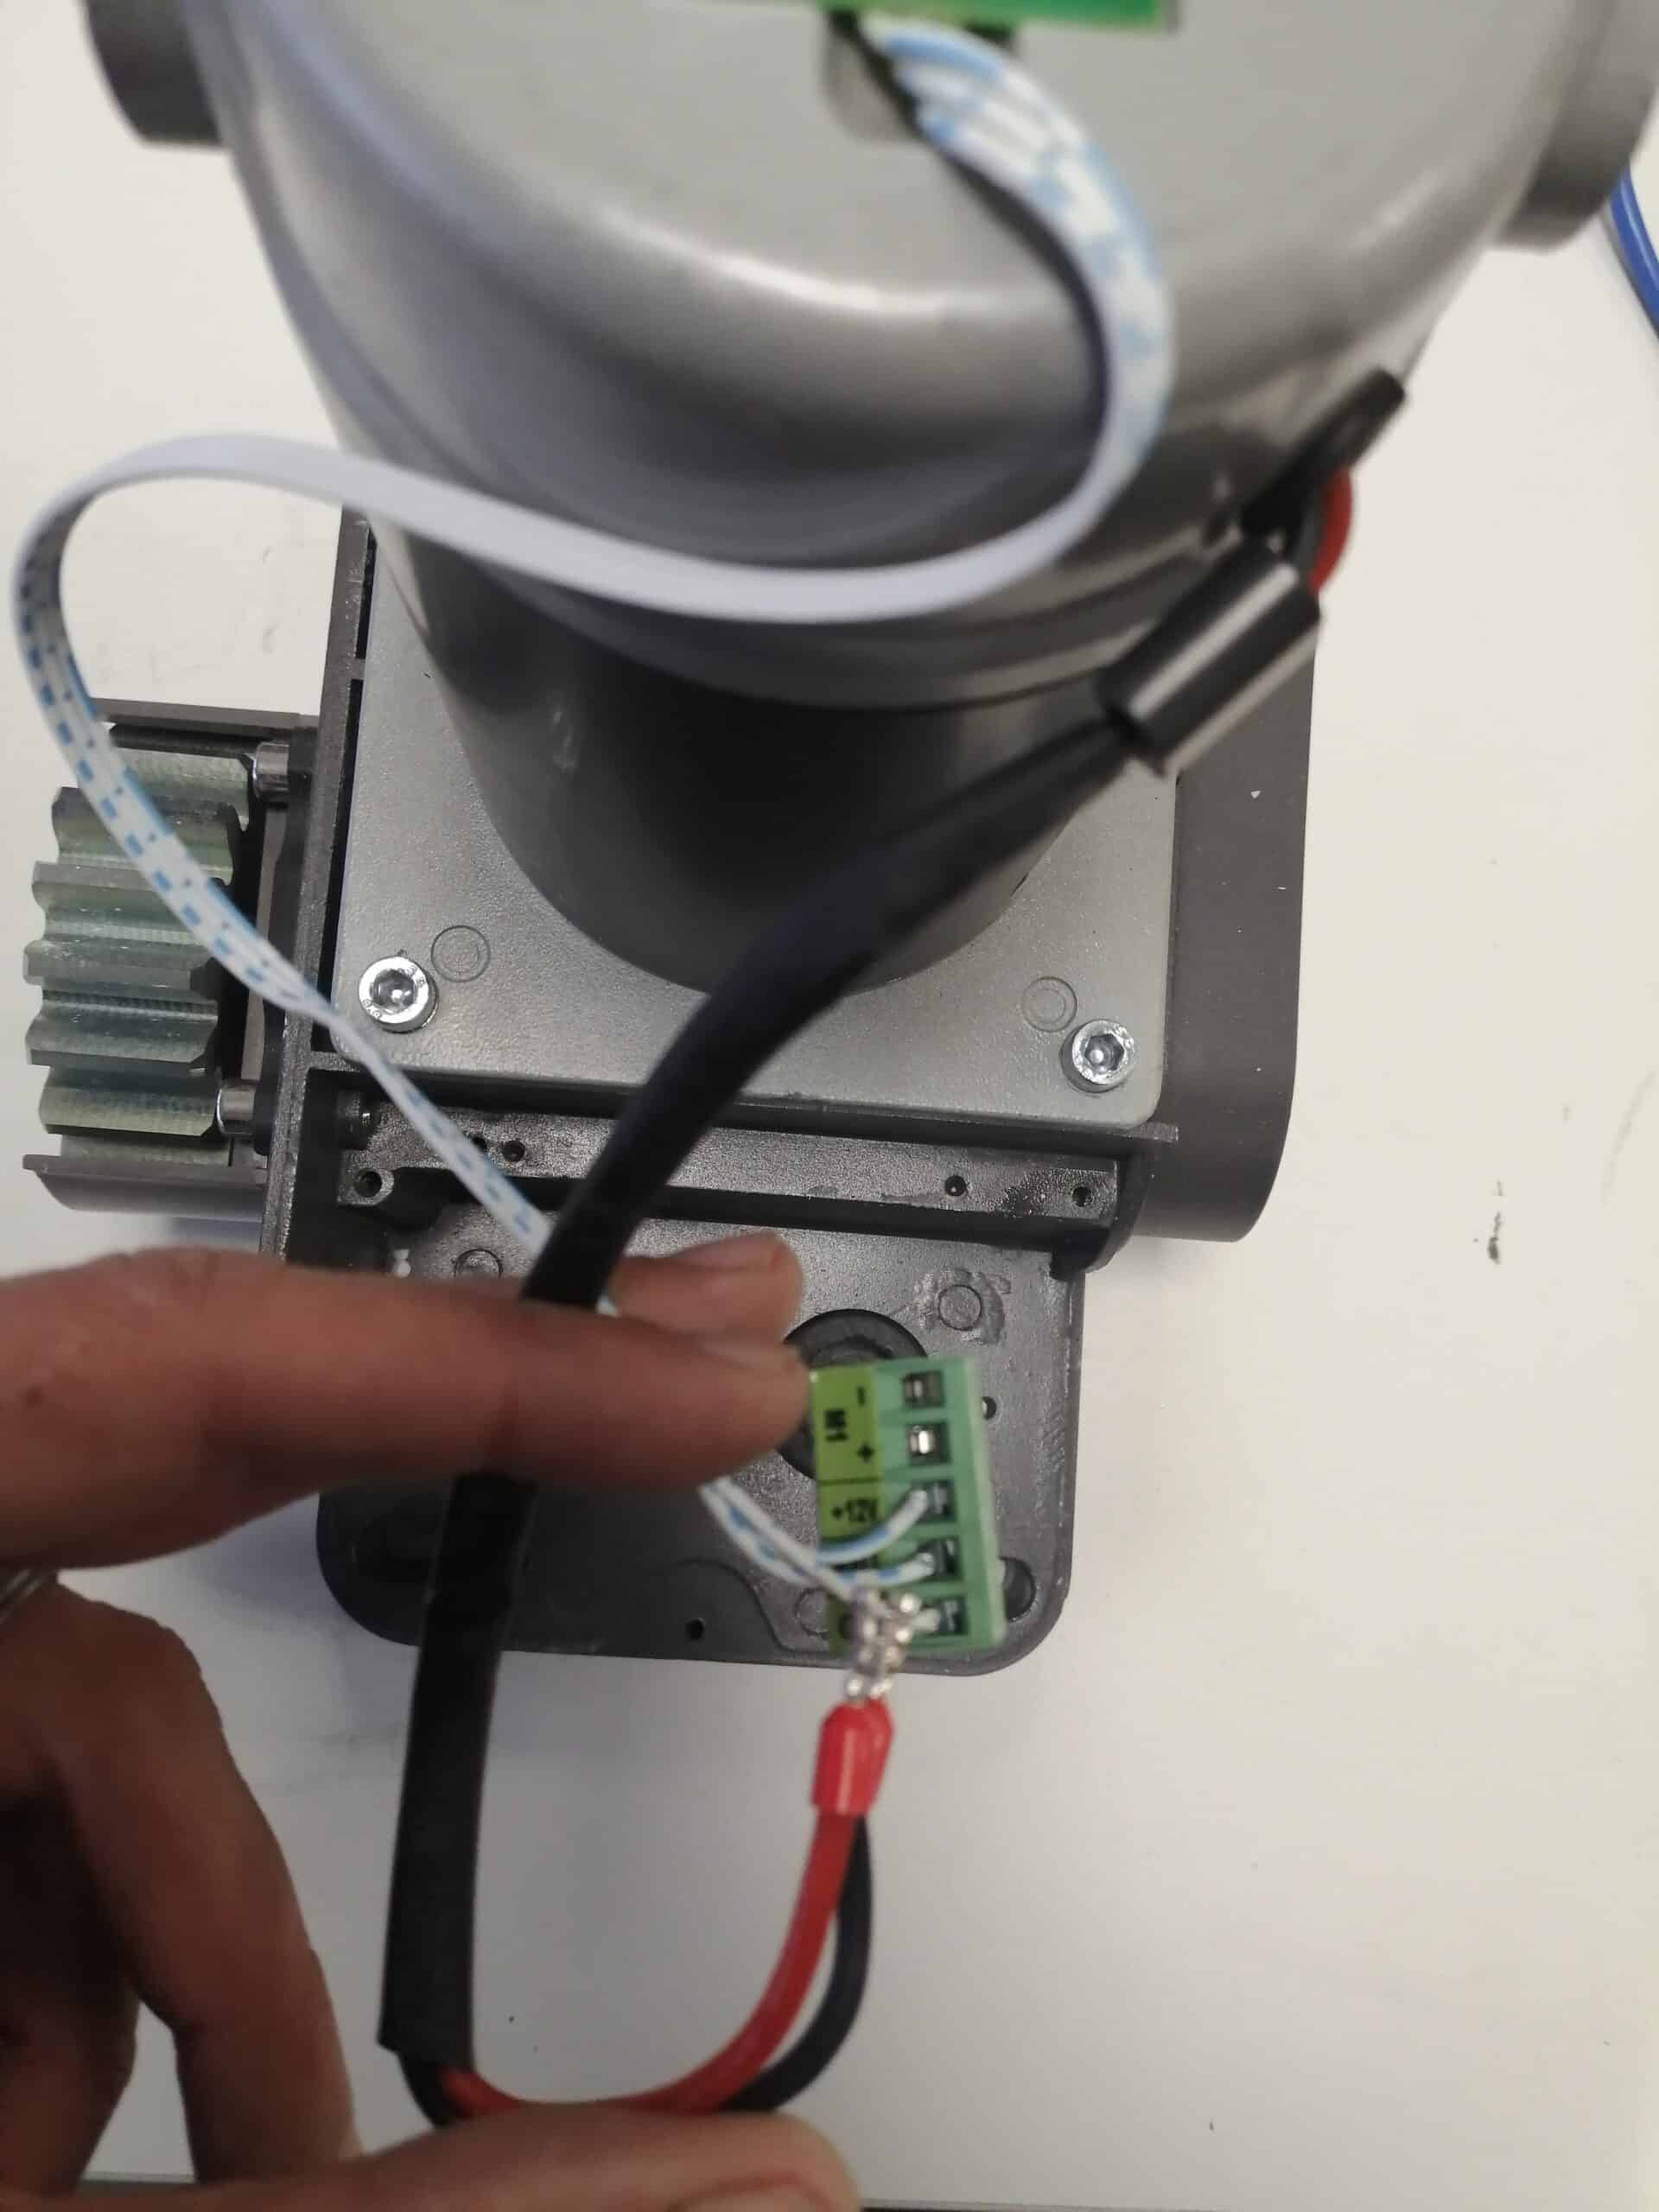
Use a small flathead screwdriver to remove the motor wires from the board terminal block.

Step 4: Remove the Hall effect card

Remove the Hall effect card from the electric motor

Step 5: Remove motor screws

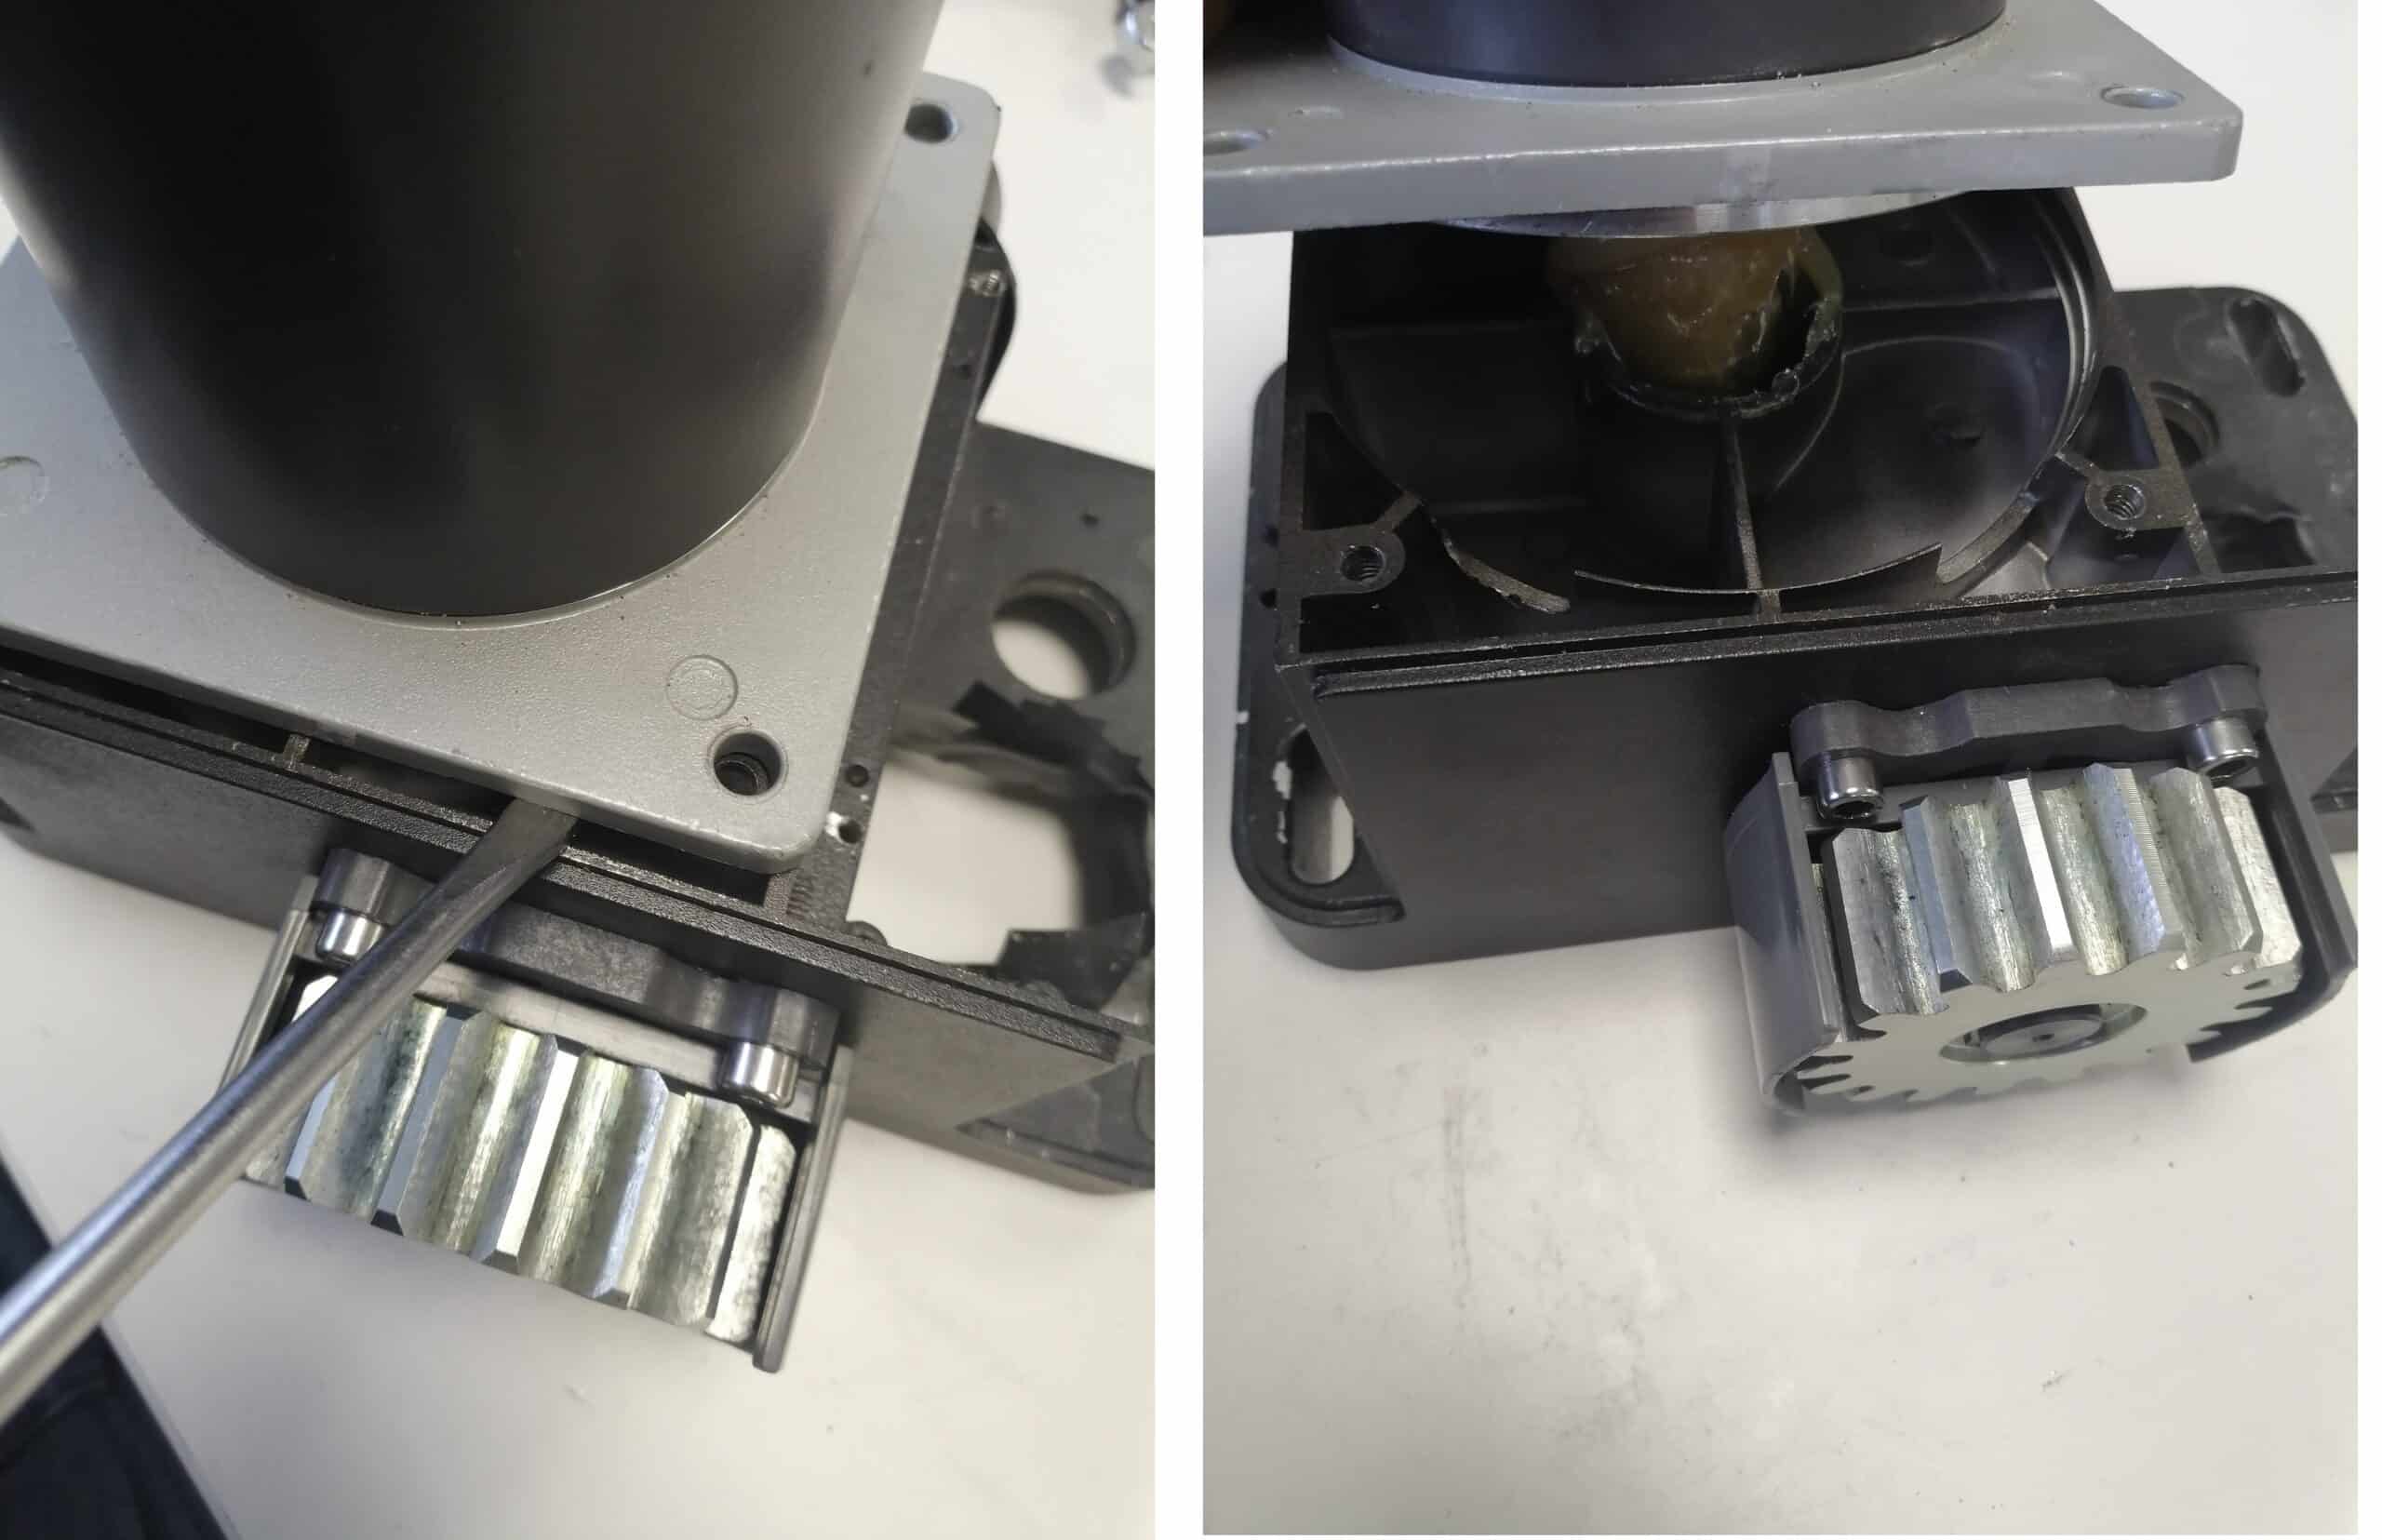
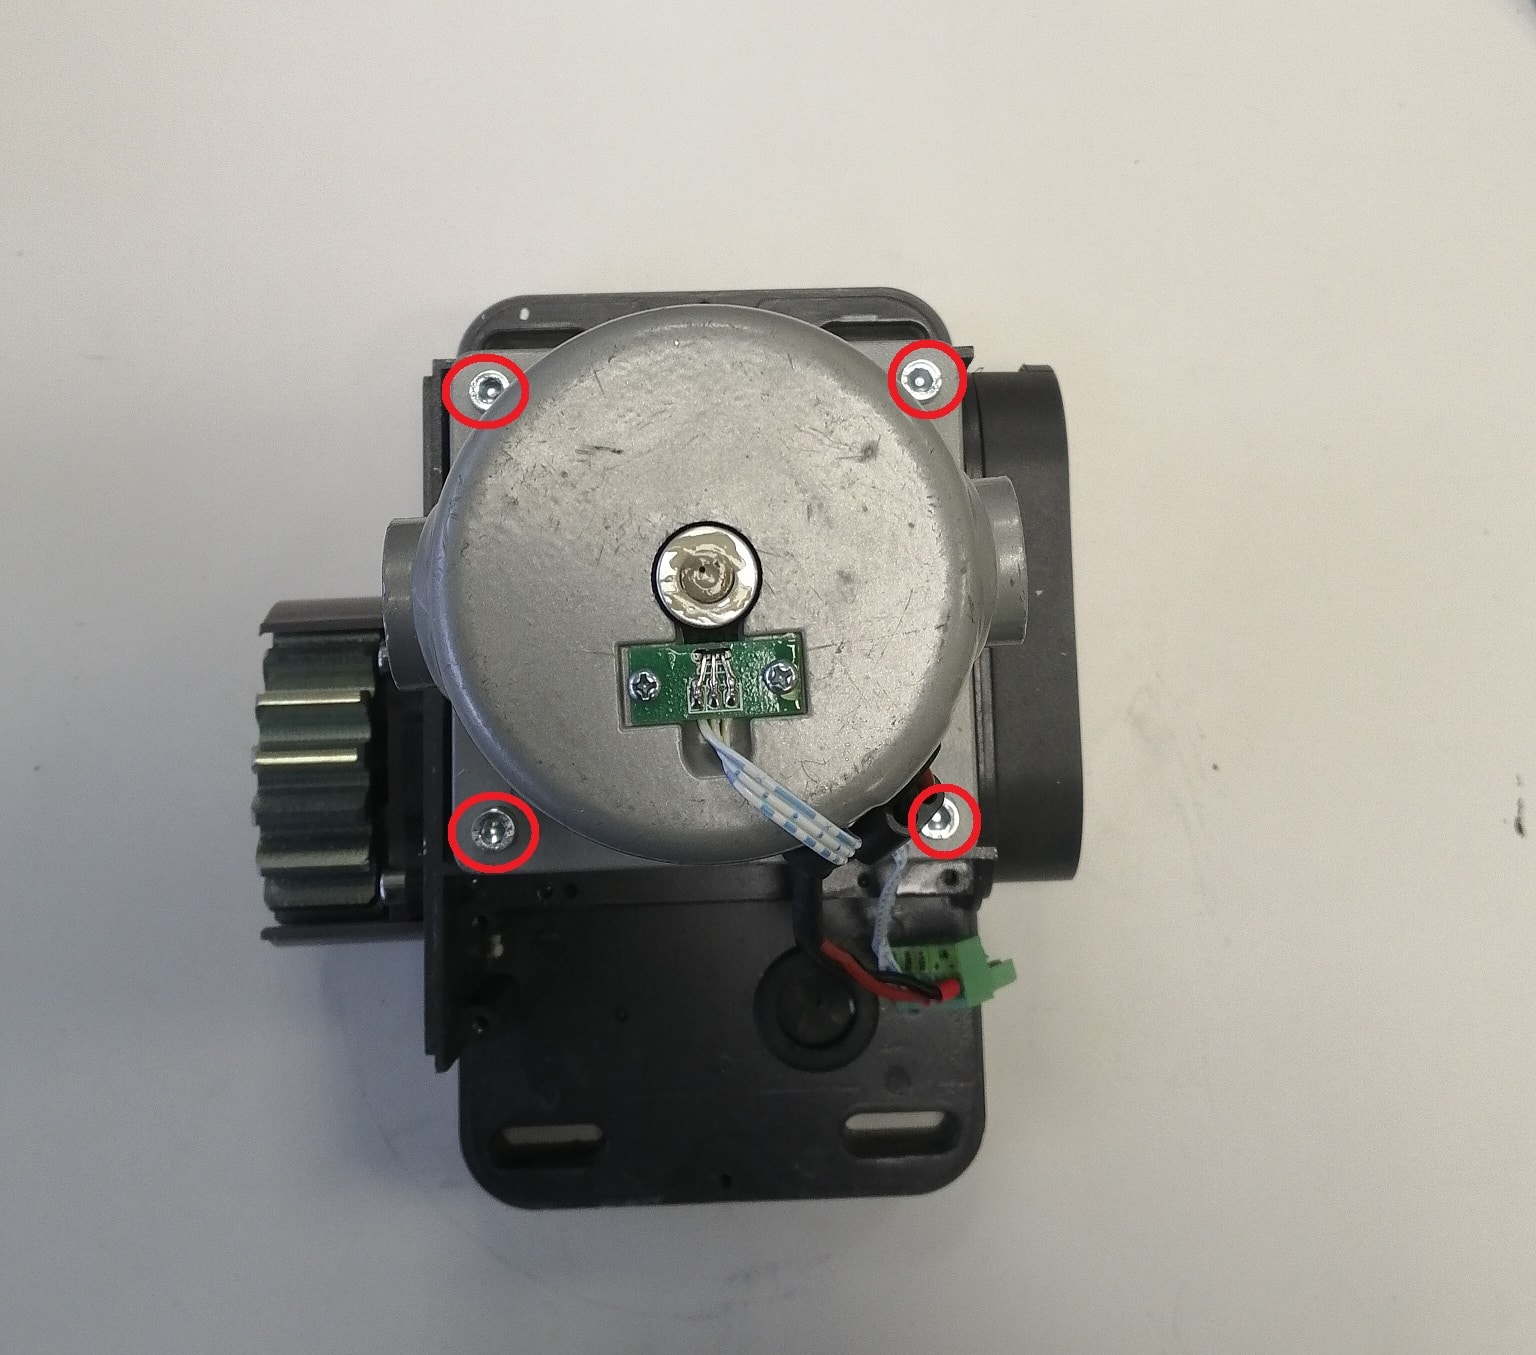
Unscrew the 4 BTR screws using a 5 mm BTR wrench.

Step 6: Remove the electric motor

Lift the motor to remove it. You can use a flathead screwdriver to pry up the motor.

Step 7: Replace the new electric motor

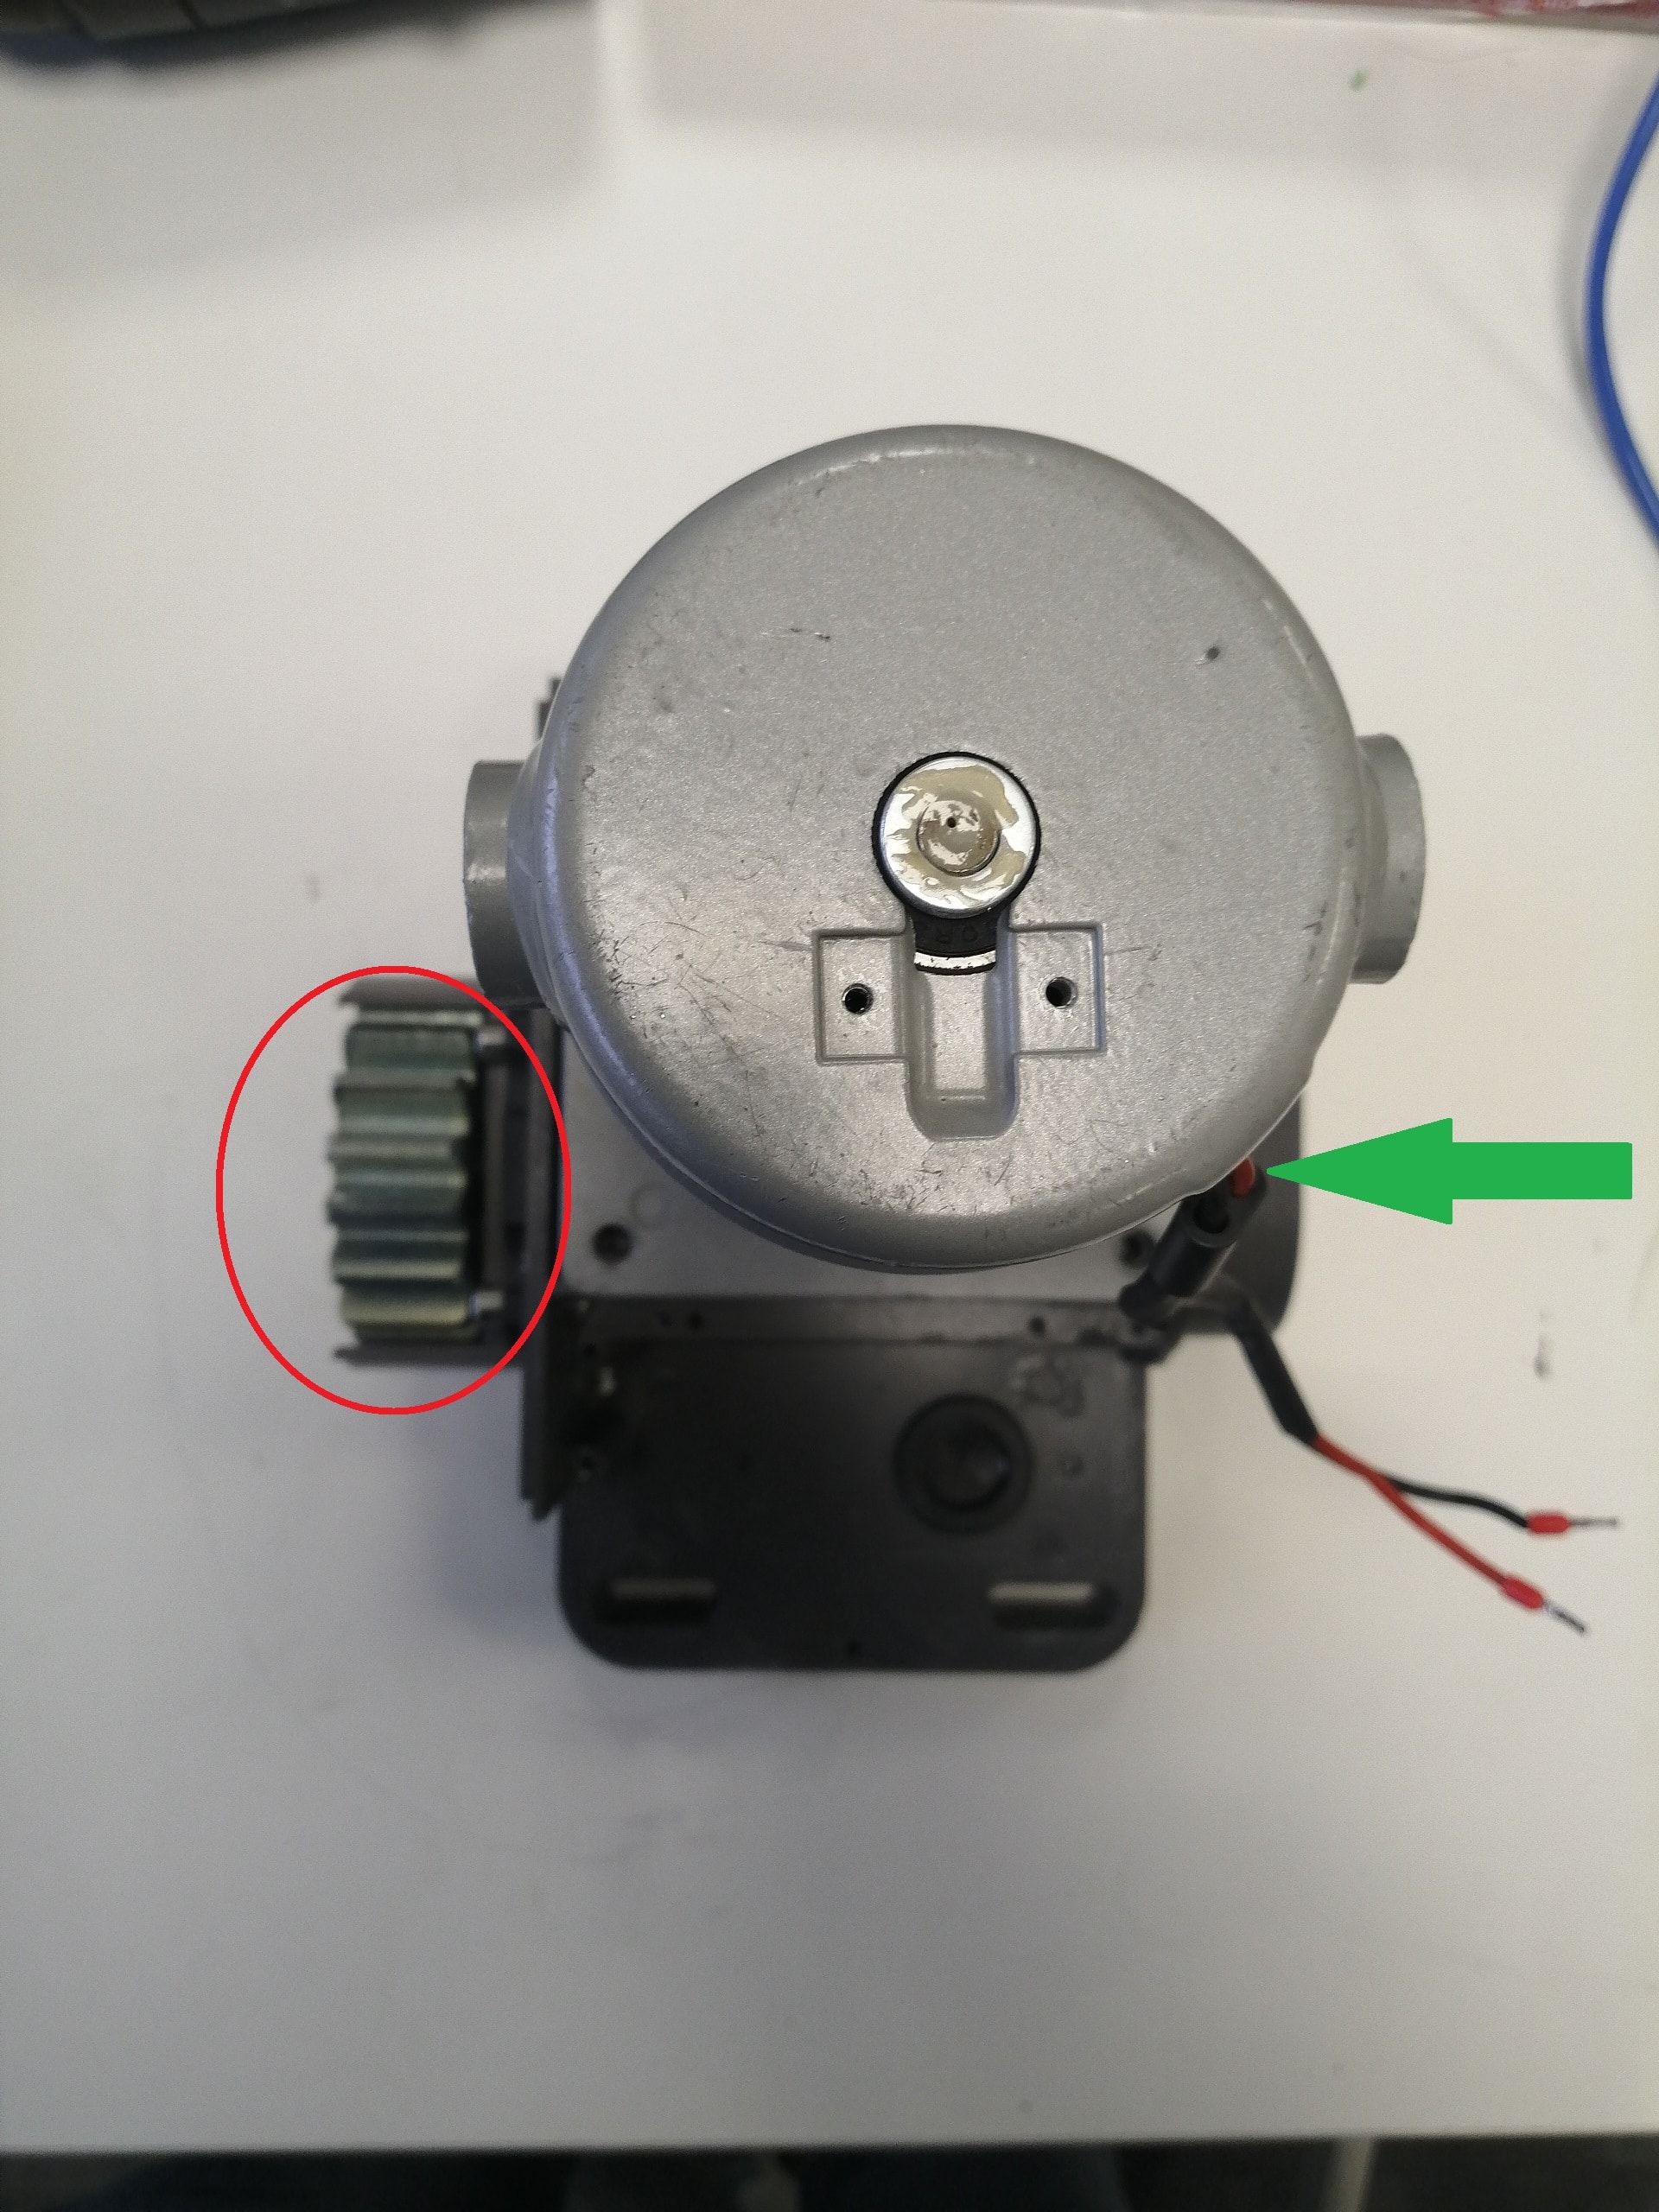
Refit the new electric motor, paying attention to the position of the cable outlet (arrow green) in relation to the gearwheel (red circle).

Step 8: Hand over the hall effect card

Reposition the hall effect card.

Position the component lugs upwards.

Step 9: Reassemble the motor

Screw back the Hall-effect card, electric motor and card holder.

Step 10: Reattach the cables

Screw the motor wires back onto the terminal block.

Keep in touch
Youtube Linkedin

Follow us on social networks

About Avidsen
  • Who are we?
  • Contact
  • Who are we?
  • Contact
Support
  • Avidsen Technical Support
  • Extel brand technical support
  • Philips technical support
  • Thomson Technical Support
  • Avidsen Technical Support
  • Extel brand technical support
  • Philips technical support
  • Thomson Technical Support
Avidsen group brand
  • Avidsen Brand
  • Extel Brand
  • Philips Brand
  • Thomson Brand
  • Avidsen Brand
  • Extel Brand
  • Philips Brand
  • Thomson Brand
Copyright 2025 © All rights reserved Avidsen
  • Legal Notice
  • Personal data protection policy
  • Terms and Conditions of Use
  • Legal Notice
  • Personal data protection policy
  • Terms and Conditions of Use
Thank you for your rating!
Thank you for your rating and comment!
This page was translated from: French
Please rate this translation:
Your rating:
Change
Please give some examples of errors and how would you improve them: