Skip to content
  • English
    • French
    • Italian
    • Spanish
    • German
    • Dutch
    • Portuguese (Portugal)
    • Greek
    • Polish
  • English
    • French
    • Italian
    • Spanish
    • German
    • Dutch
    • Portuguese (Portugal)
    • Greek
    • Polish
Logo Avidsen
  • Products
    • Products
    • Avidsen Brand
    • Extel Brand
    • Philips Brand
    • Thomson Brand
  • Support
    • Tutorials on repair and use
    • Avidsen Technical Support
    • Extel brand technical support
    • Philips technical support
    • Thomson Technical Support
  • The Group
    • The Group
    • Contact
  • Ethic Company
  • Where to buy ?
\

Installation of an ORANE motor – opening to the outside

  1. Home
  2. Installation of an ORANE motor – opening to the outside

Installation of an ORANE motor – opening to the outside

In this tutorial, you'll discover the installation recommendations, as well as the steps to follow to correctly install an ORANE motor on your outward-opening gate.

This tutorial is applicable for:

Avidsen - 114200 - Orane 410 / Avidsen - 114201 - Orane 510 / Avidsen - 114202 - Orane Connect / Avidsen - 114302 - Orane 420
Difficulté : Moderate
Temps nécessaire : 120 minutes
Nombre d’étapes : 9
Mise à jour : February 2025

Tutorial steps:

Portal requirements

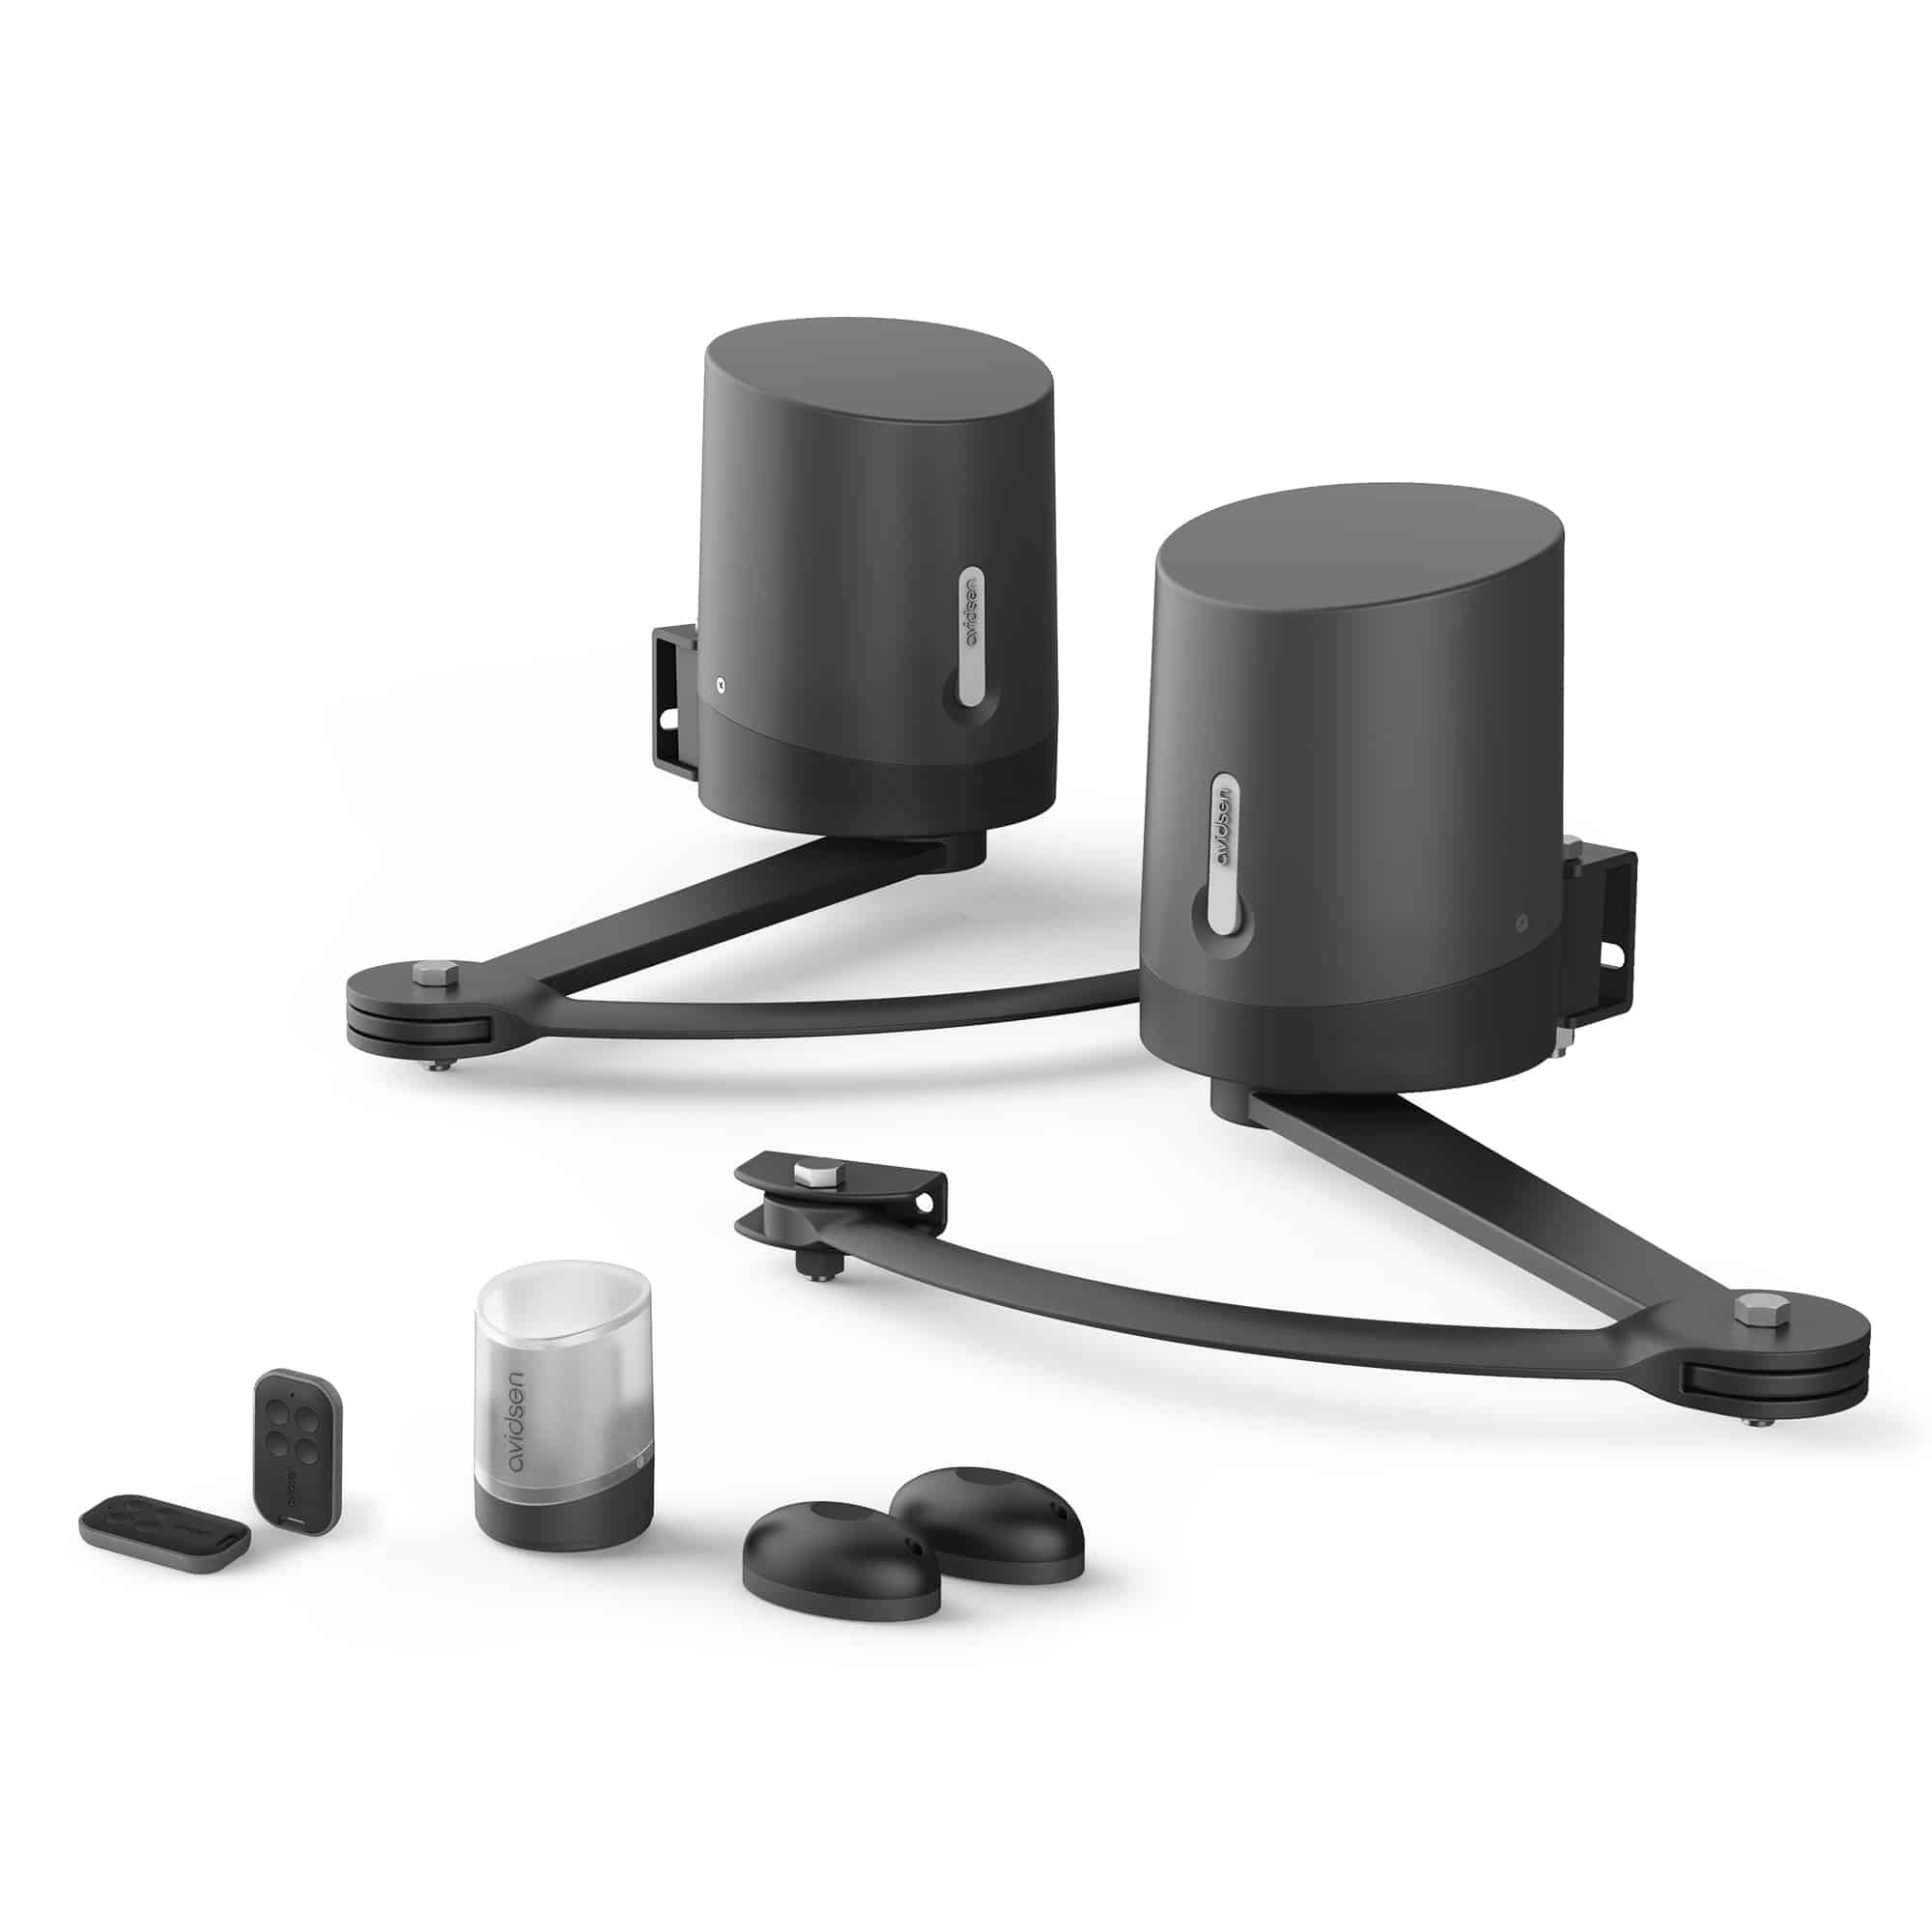
The ORANE motorization can operate a gate with one or two leaves, up to a maximum length of 2.5 m, in the case of a light, openwork gate. In the case of a semi-open, heavy gate, the size of the leaf should be smaller.

The leaves can be asymmetrical (of different sizes) as long as the largest leaf does not exceed the size limit supported by the operator.

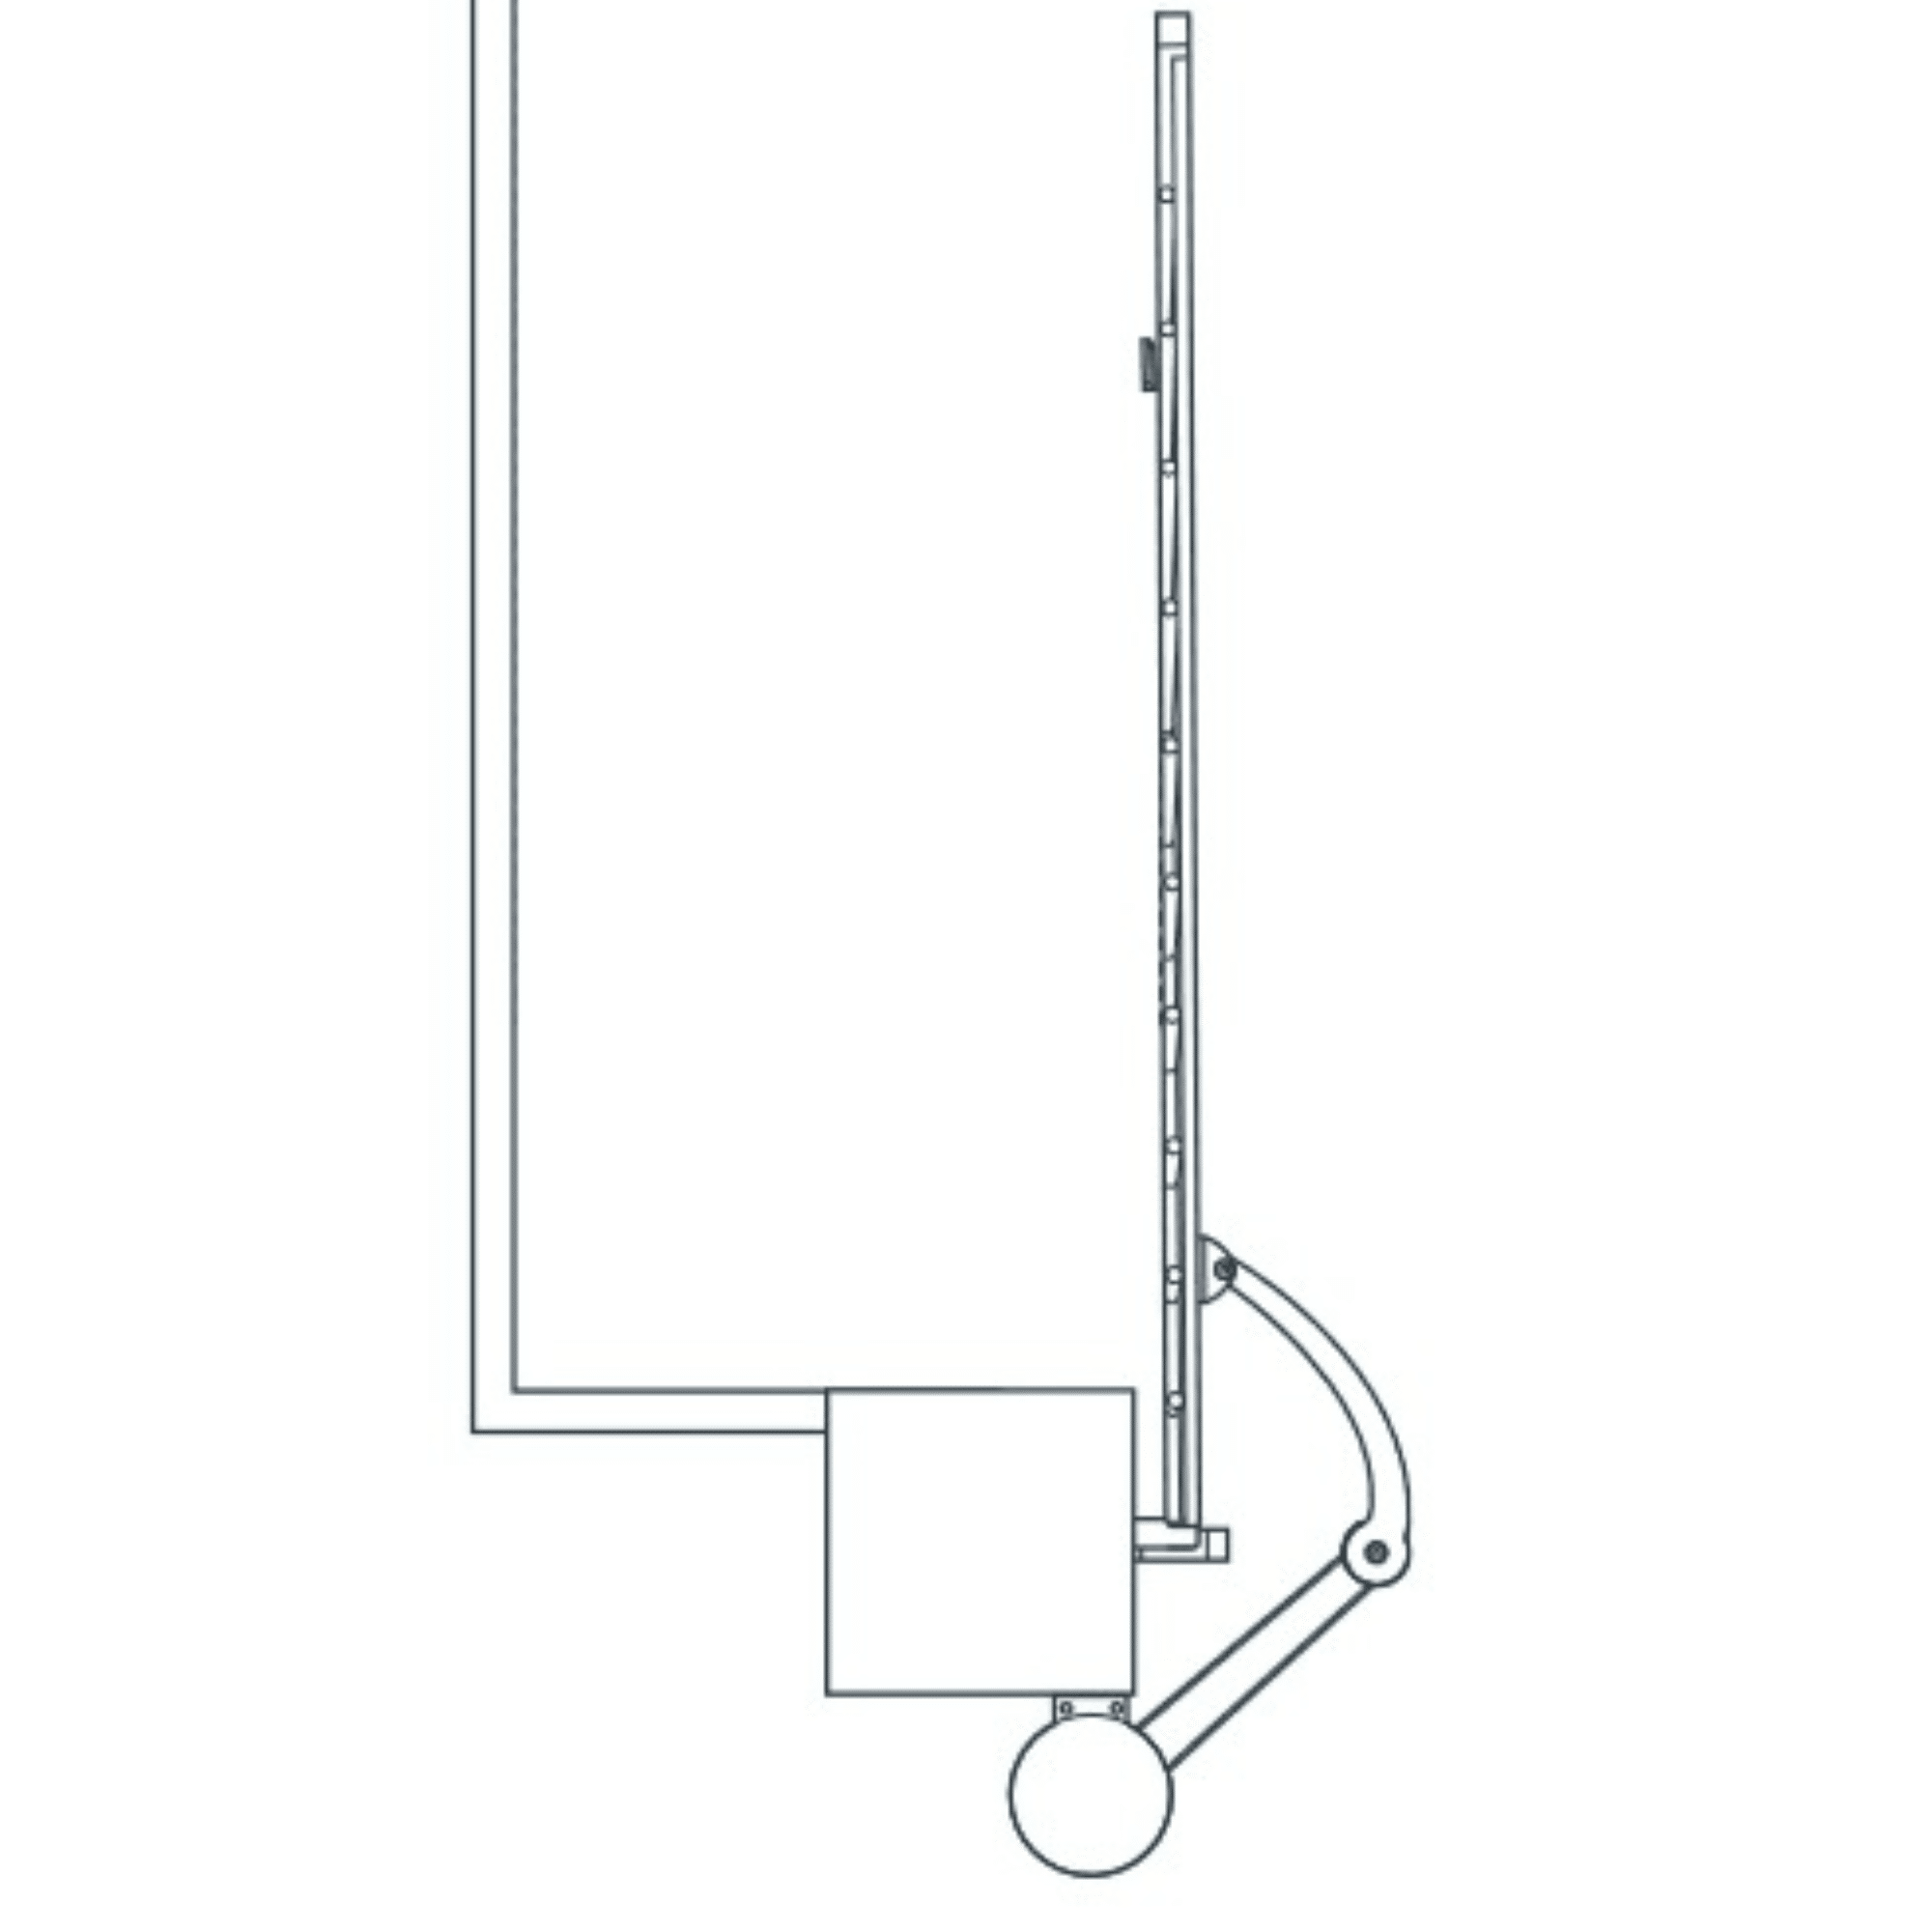
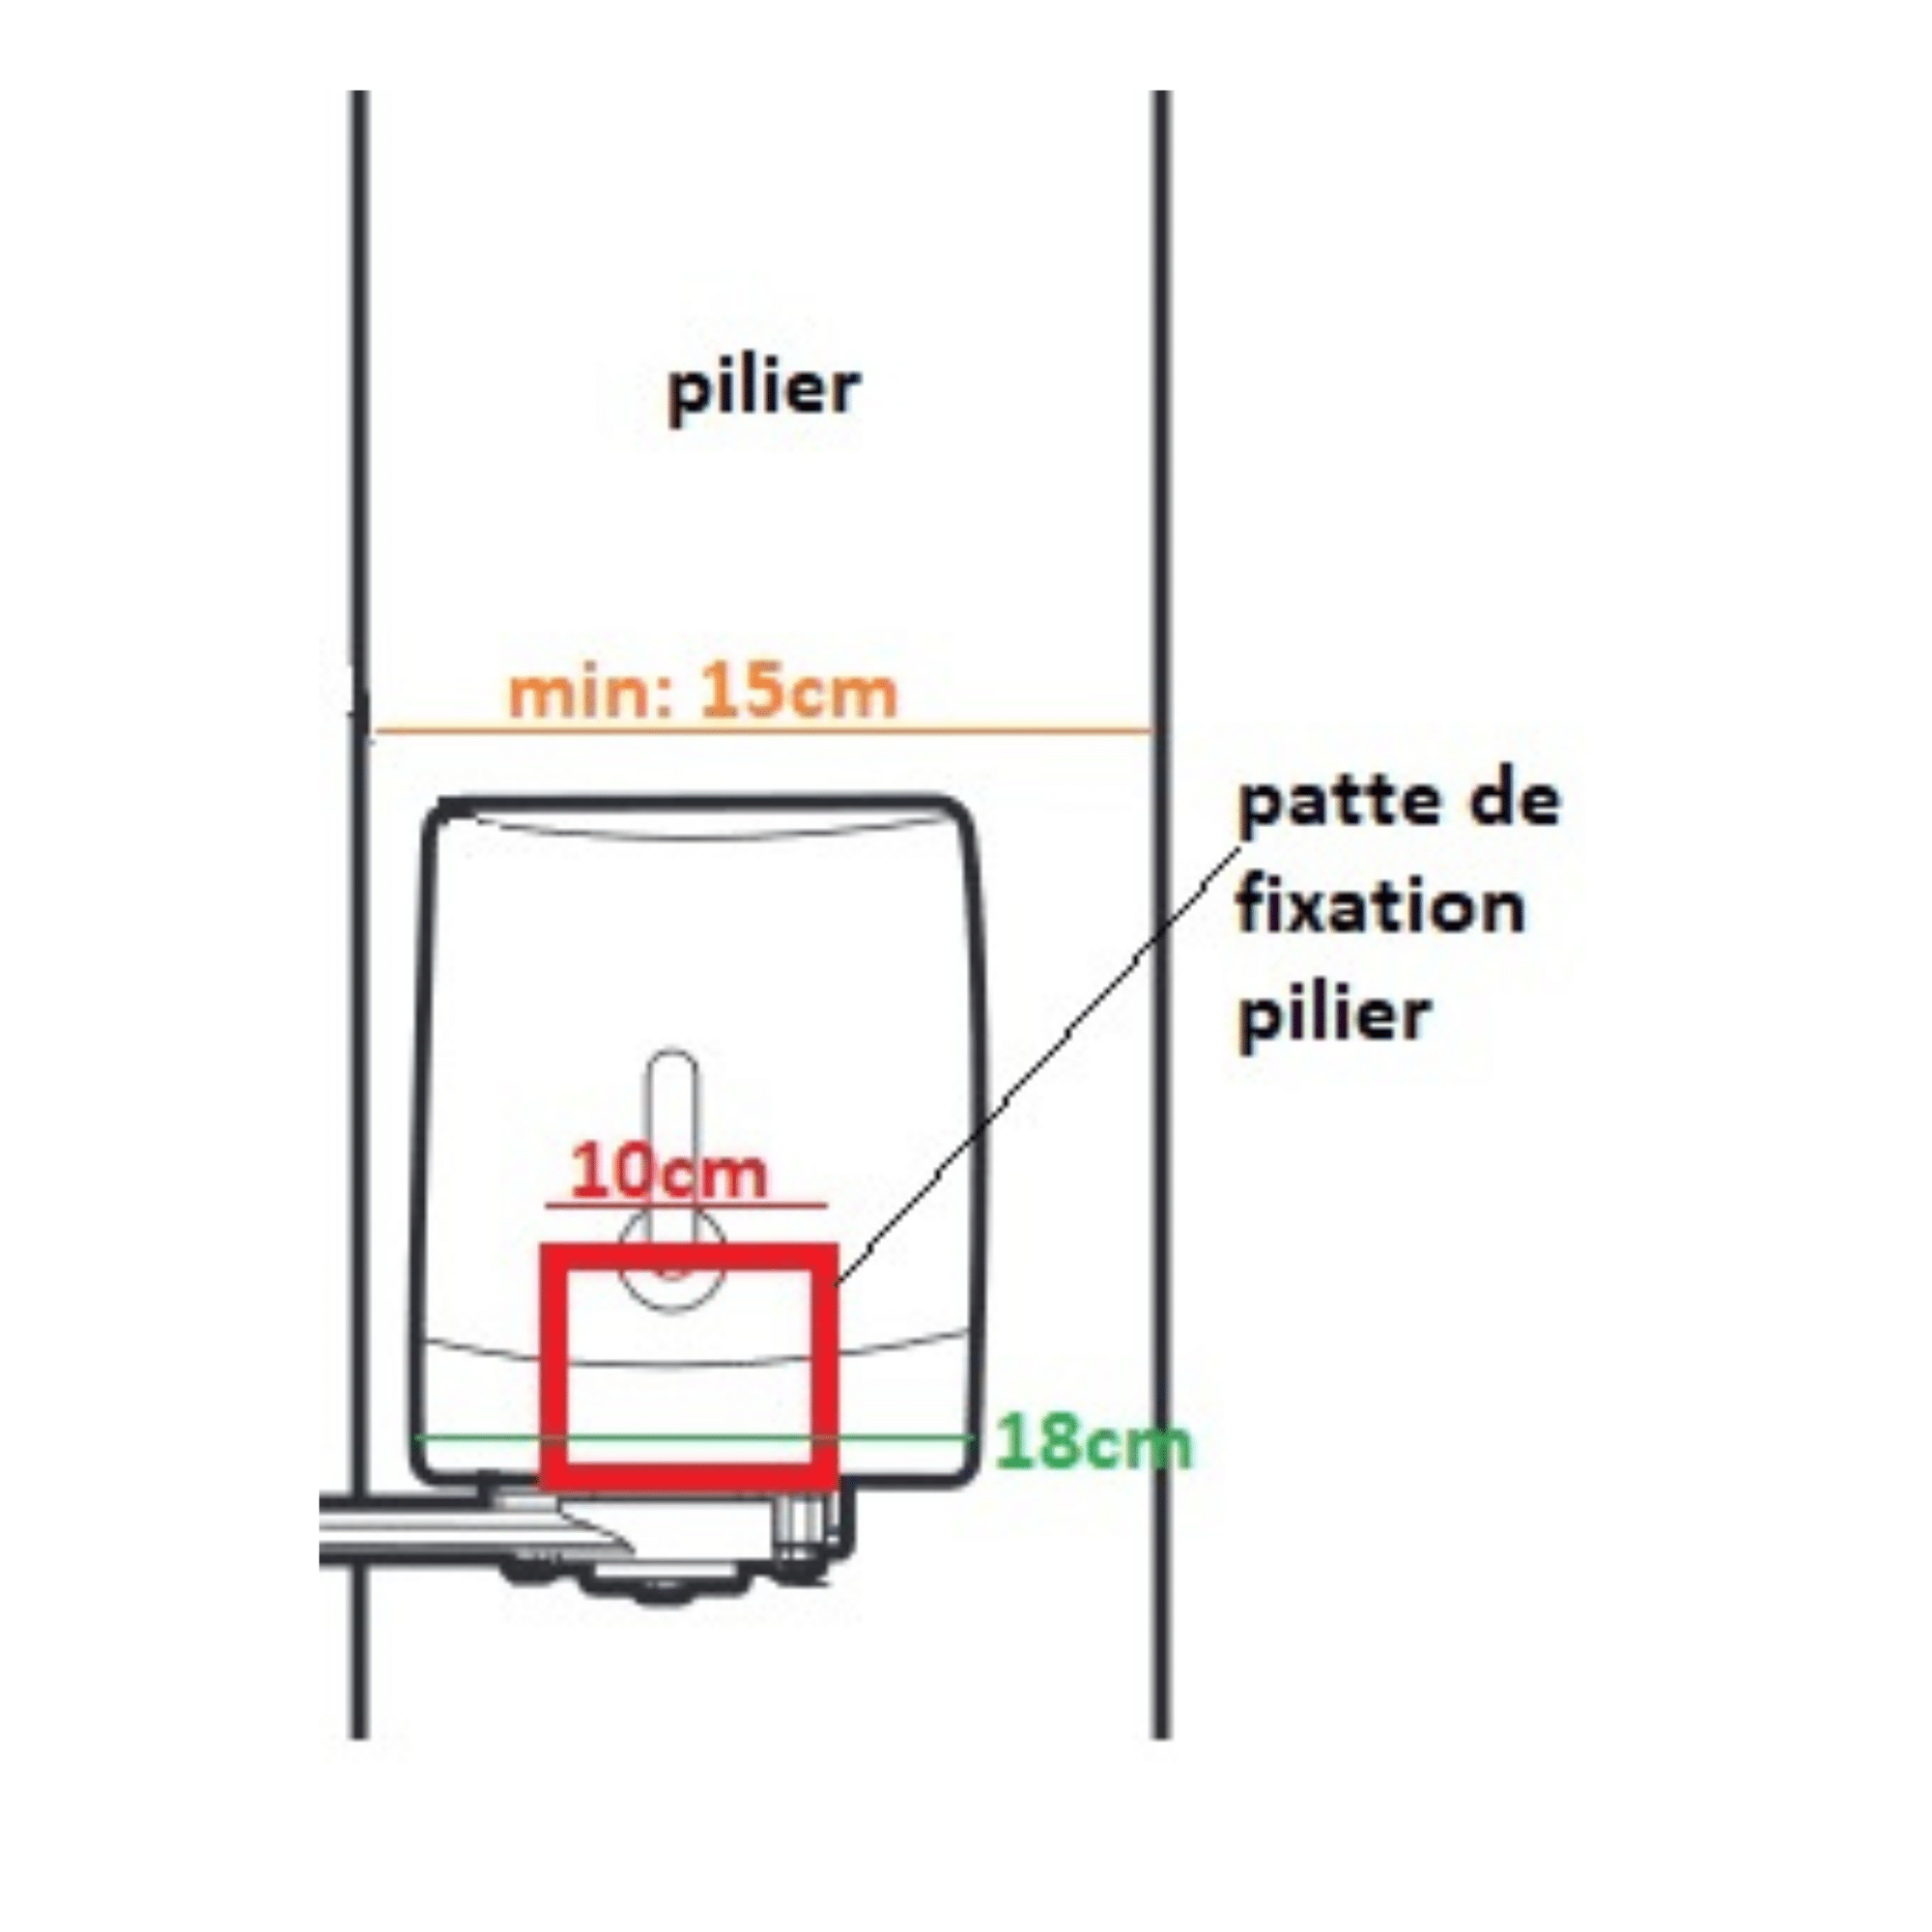
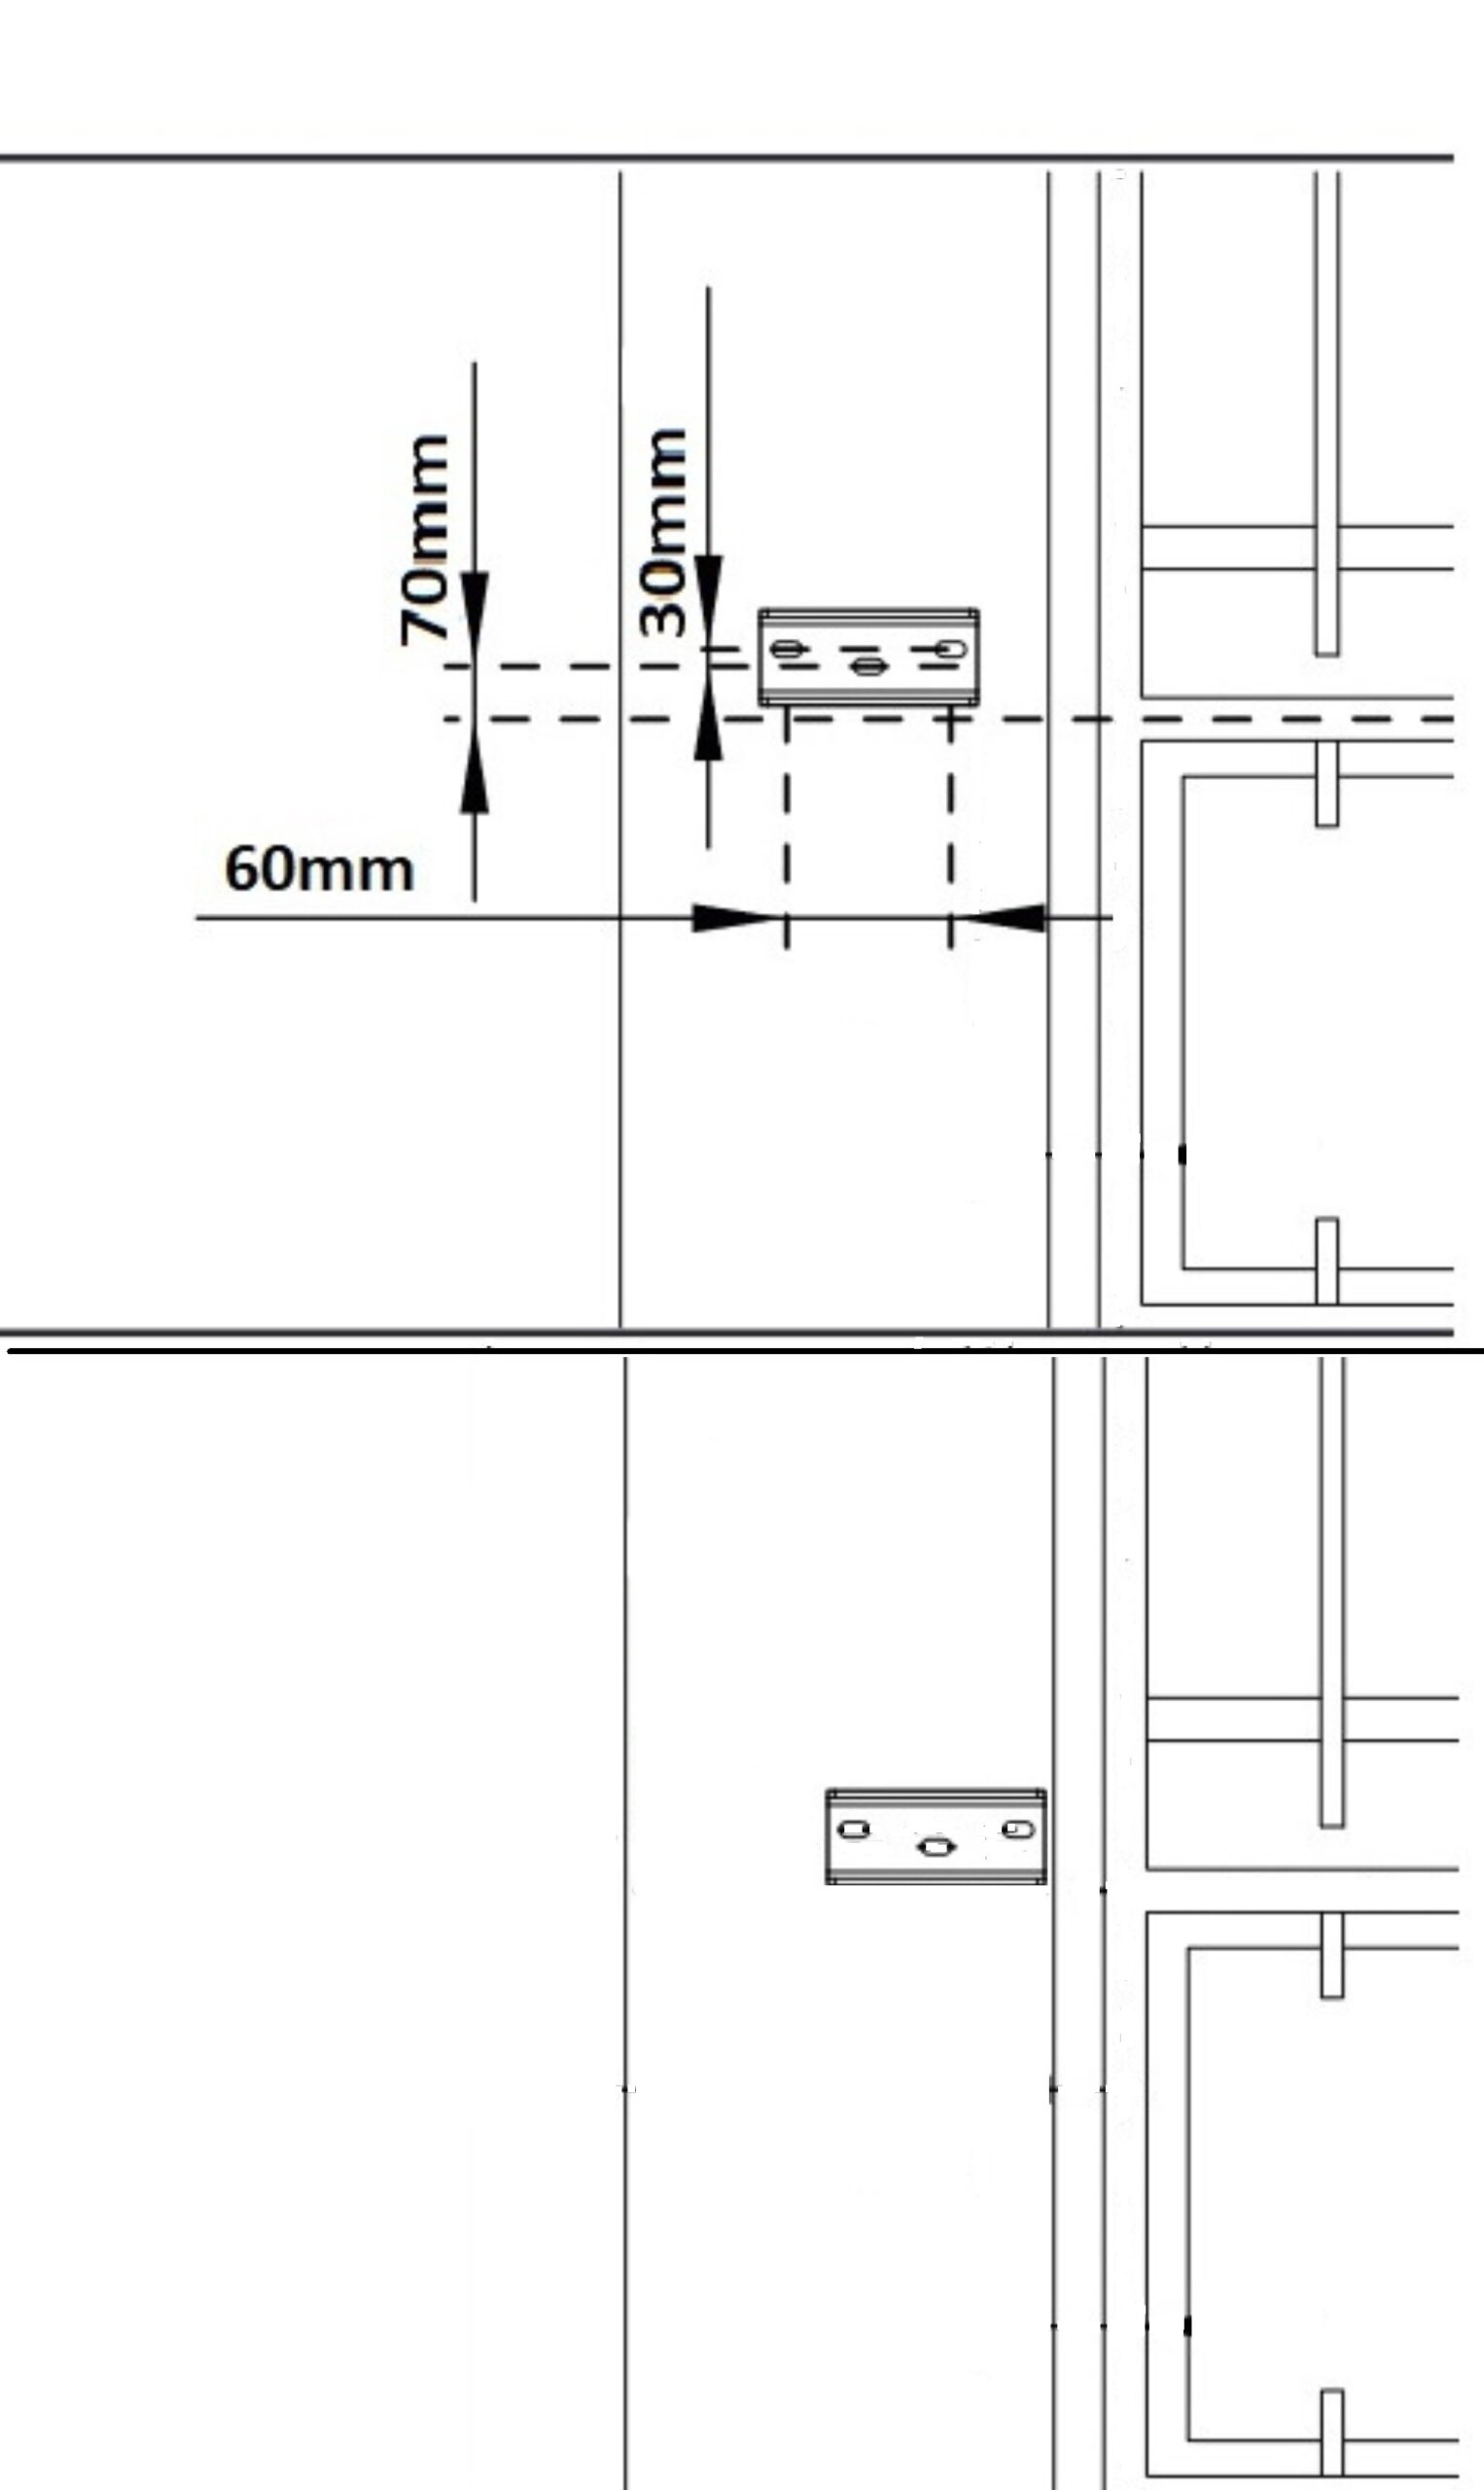
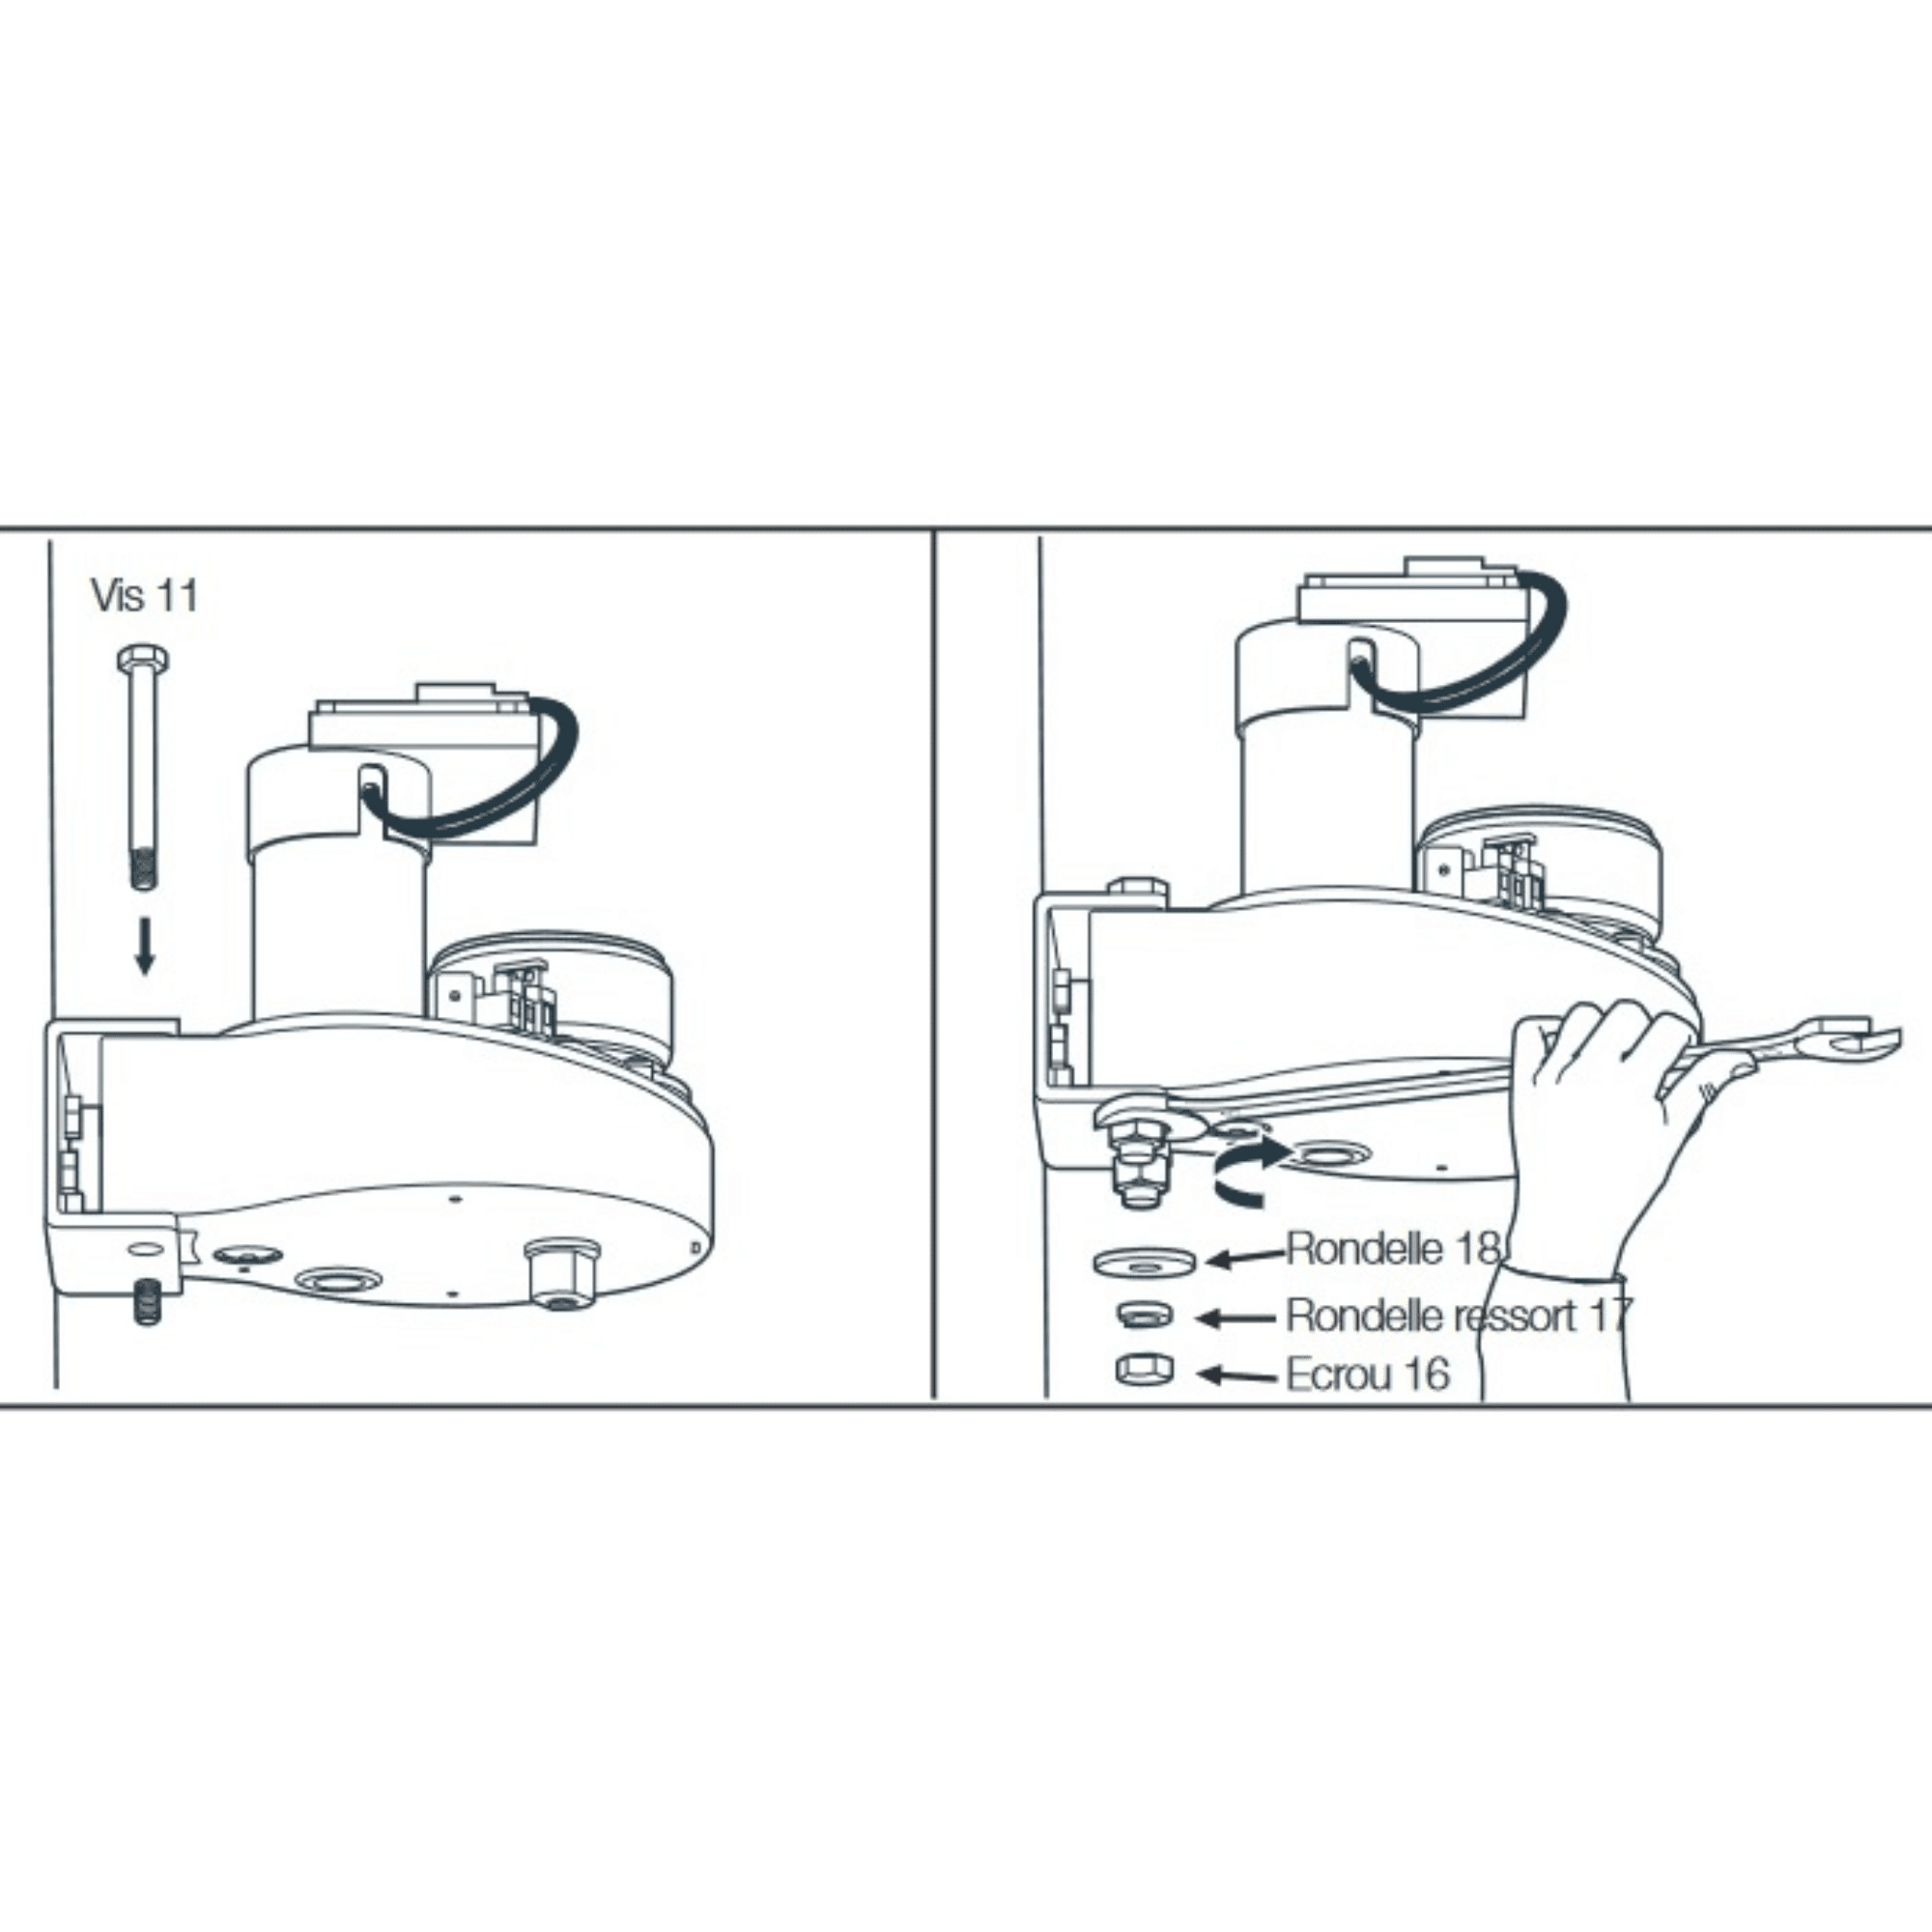
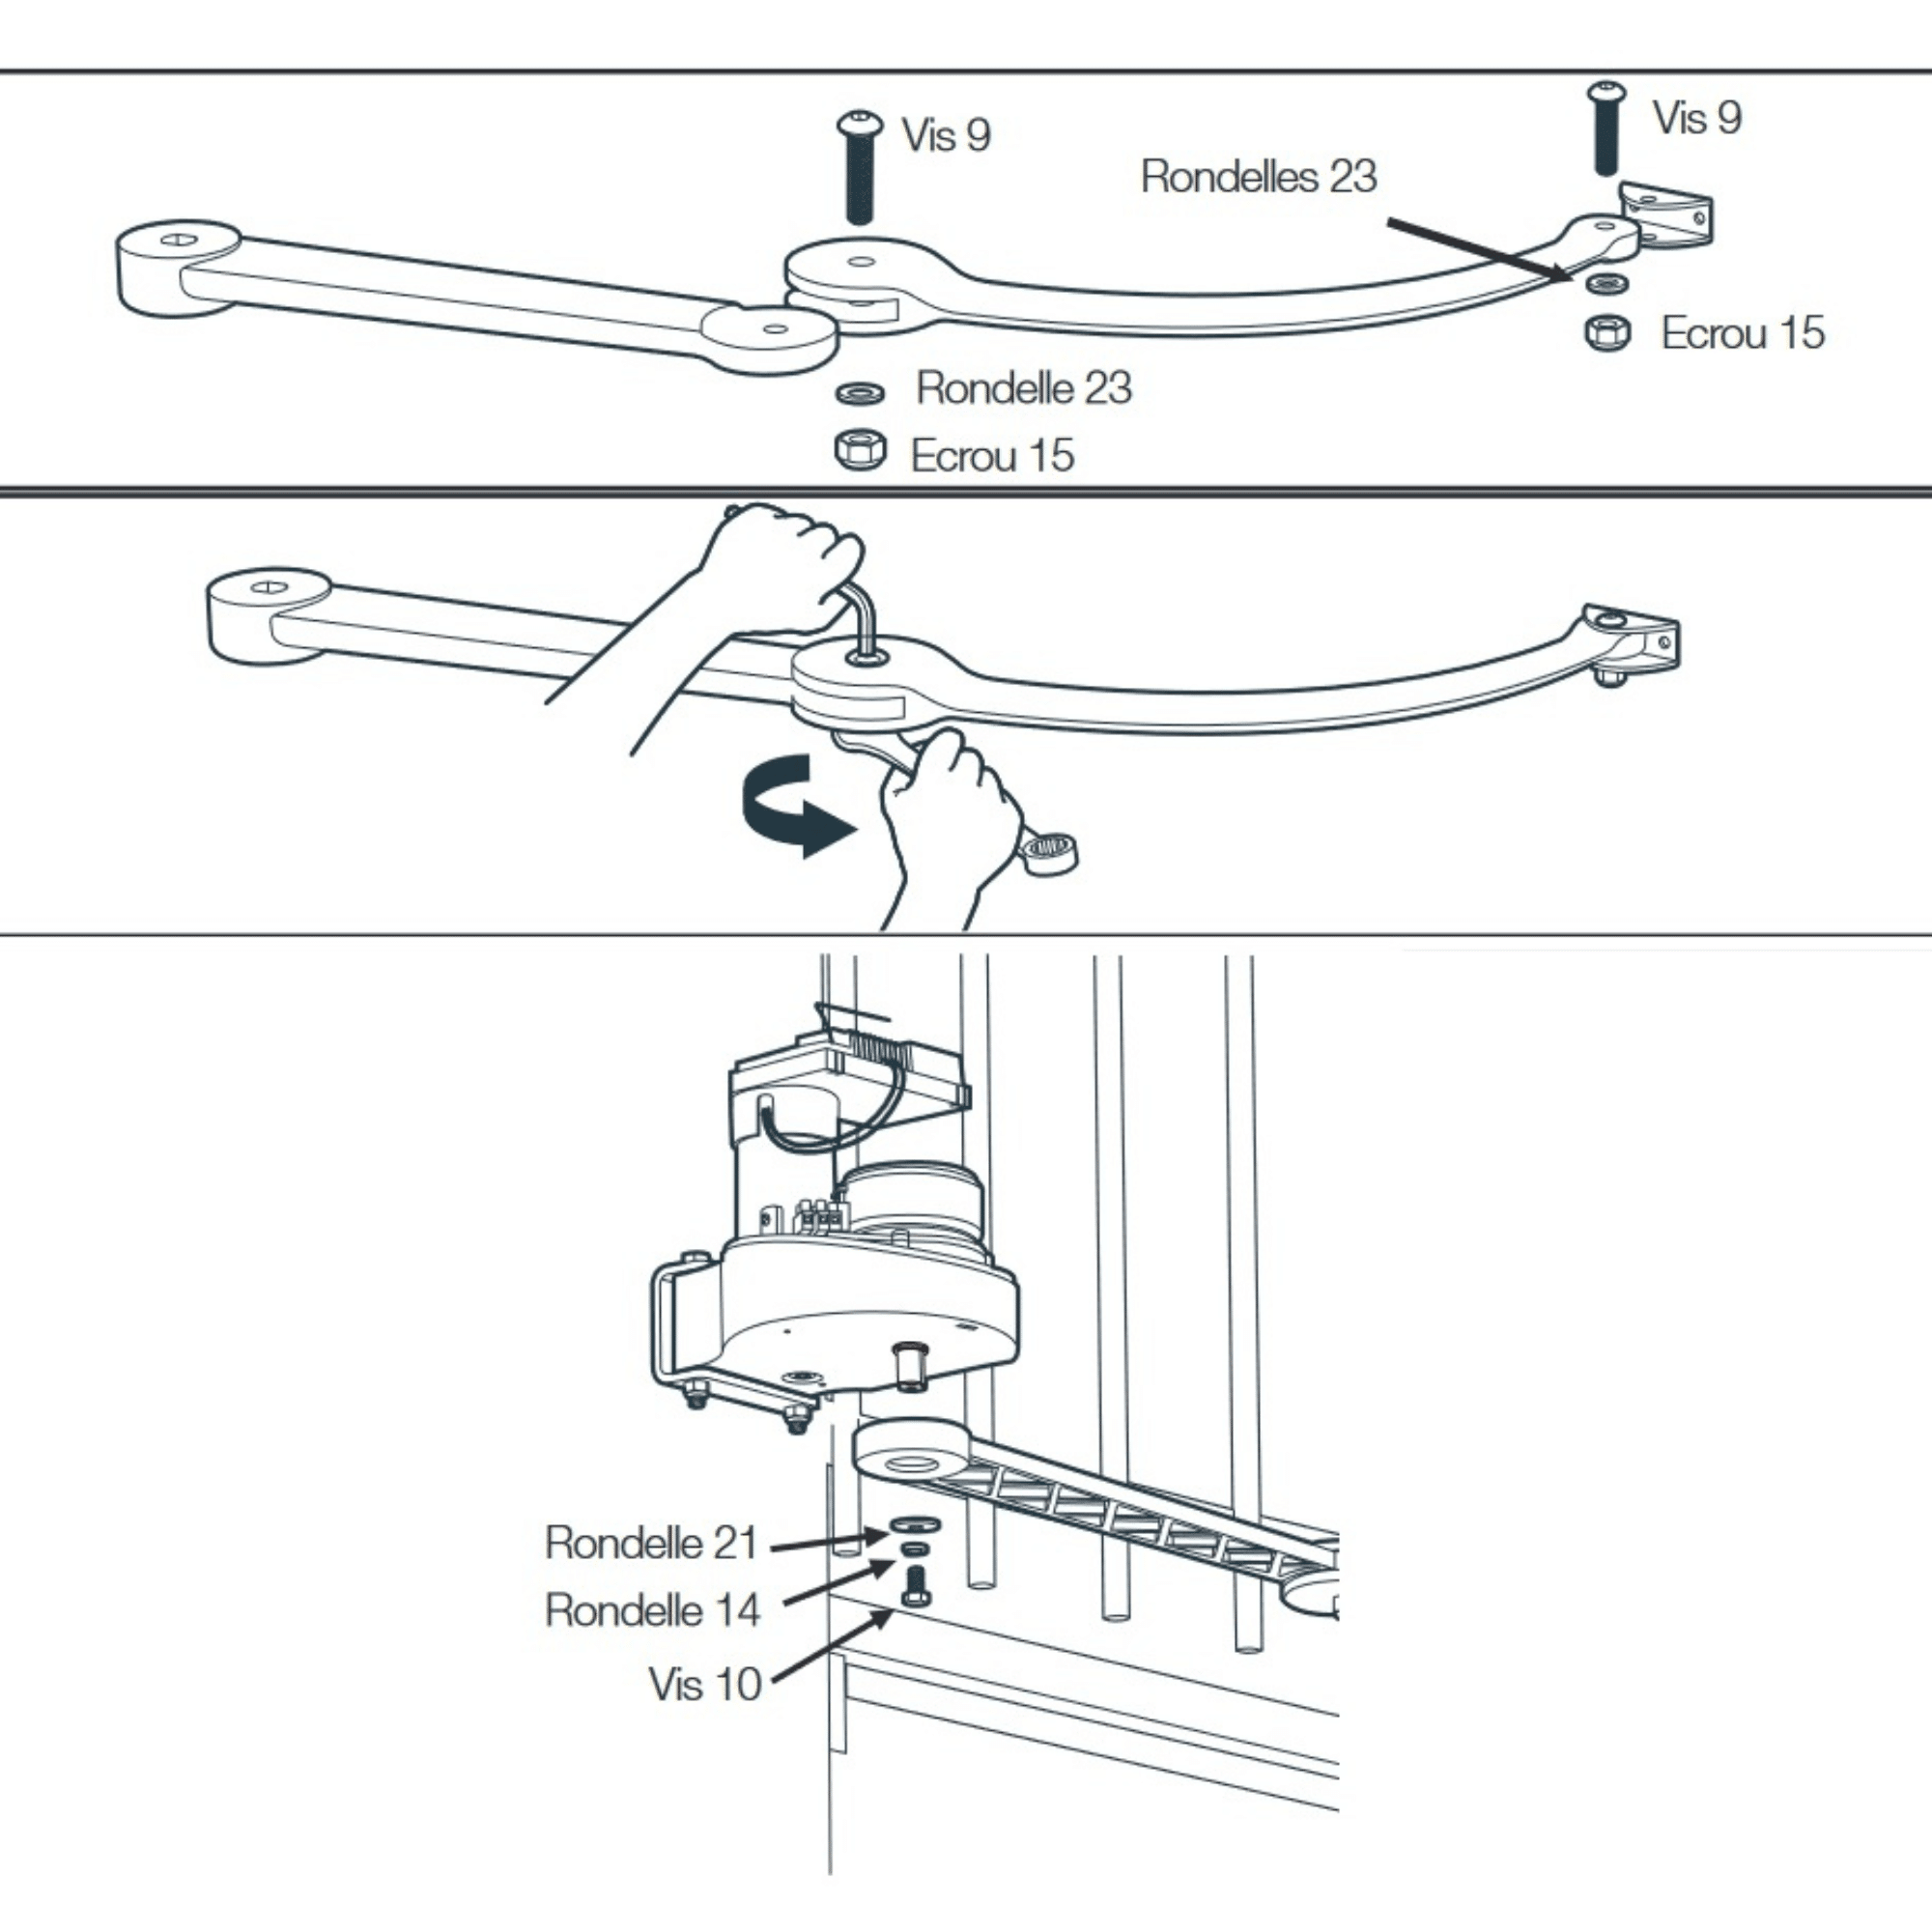
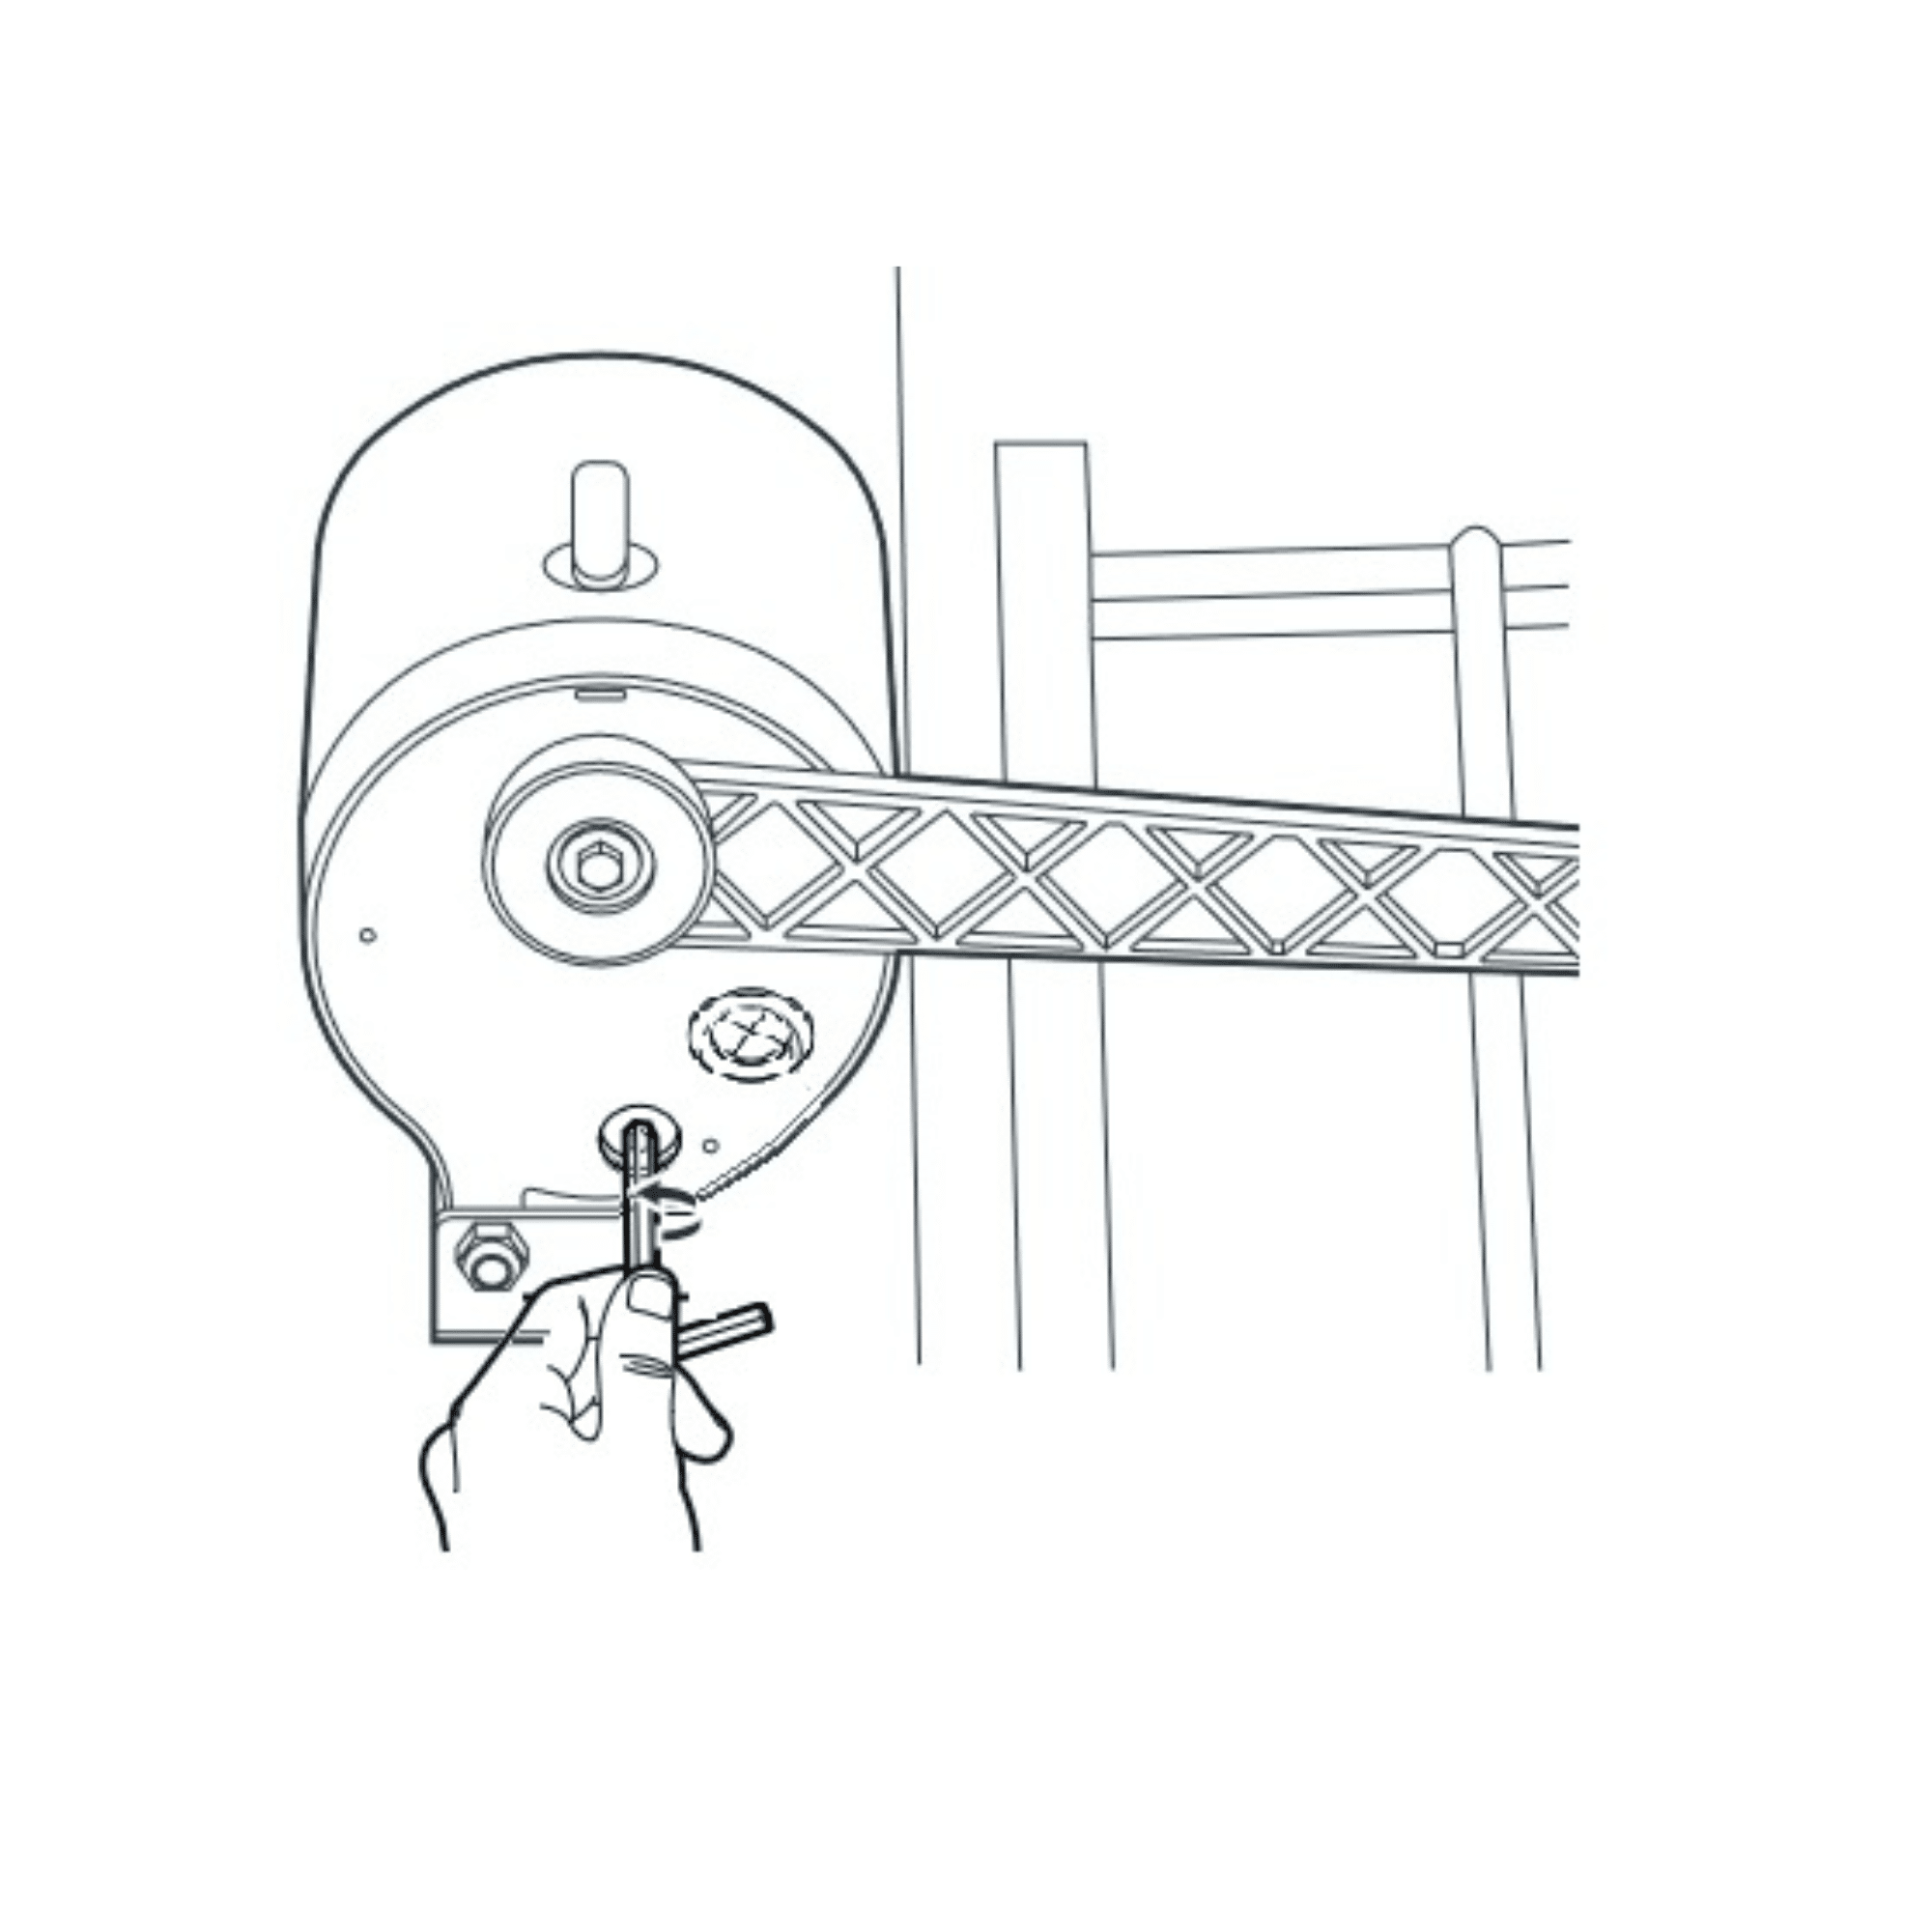
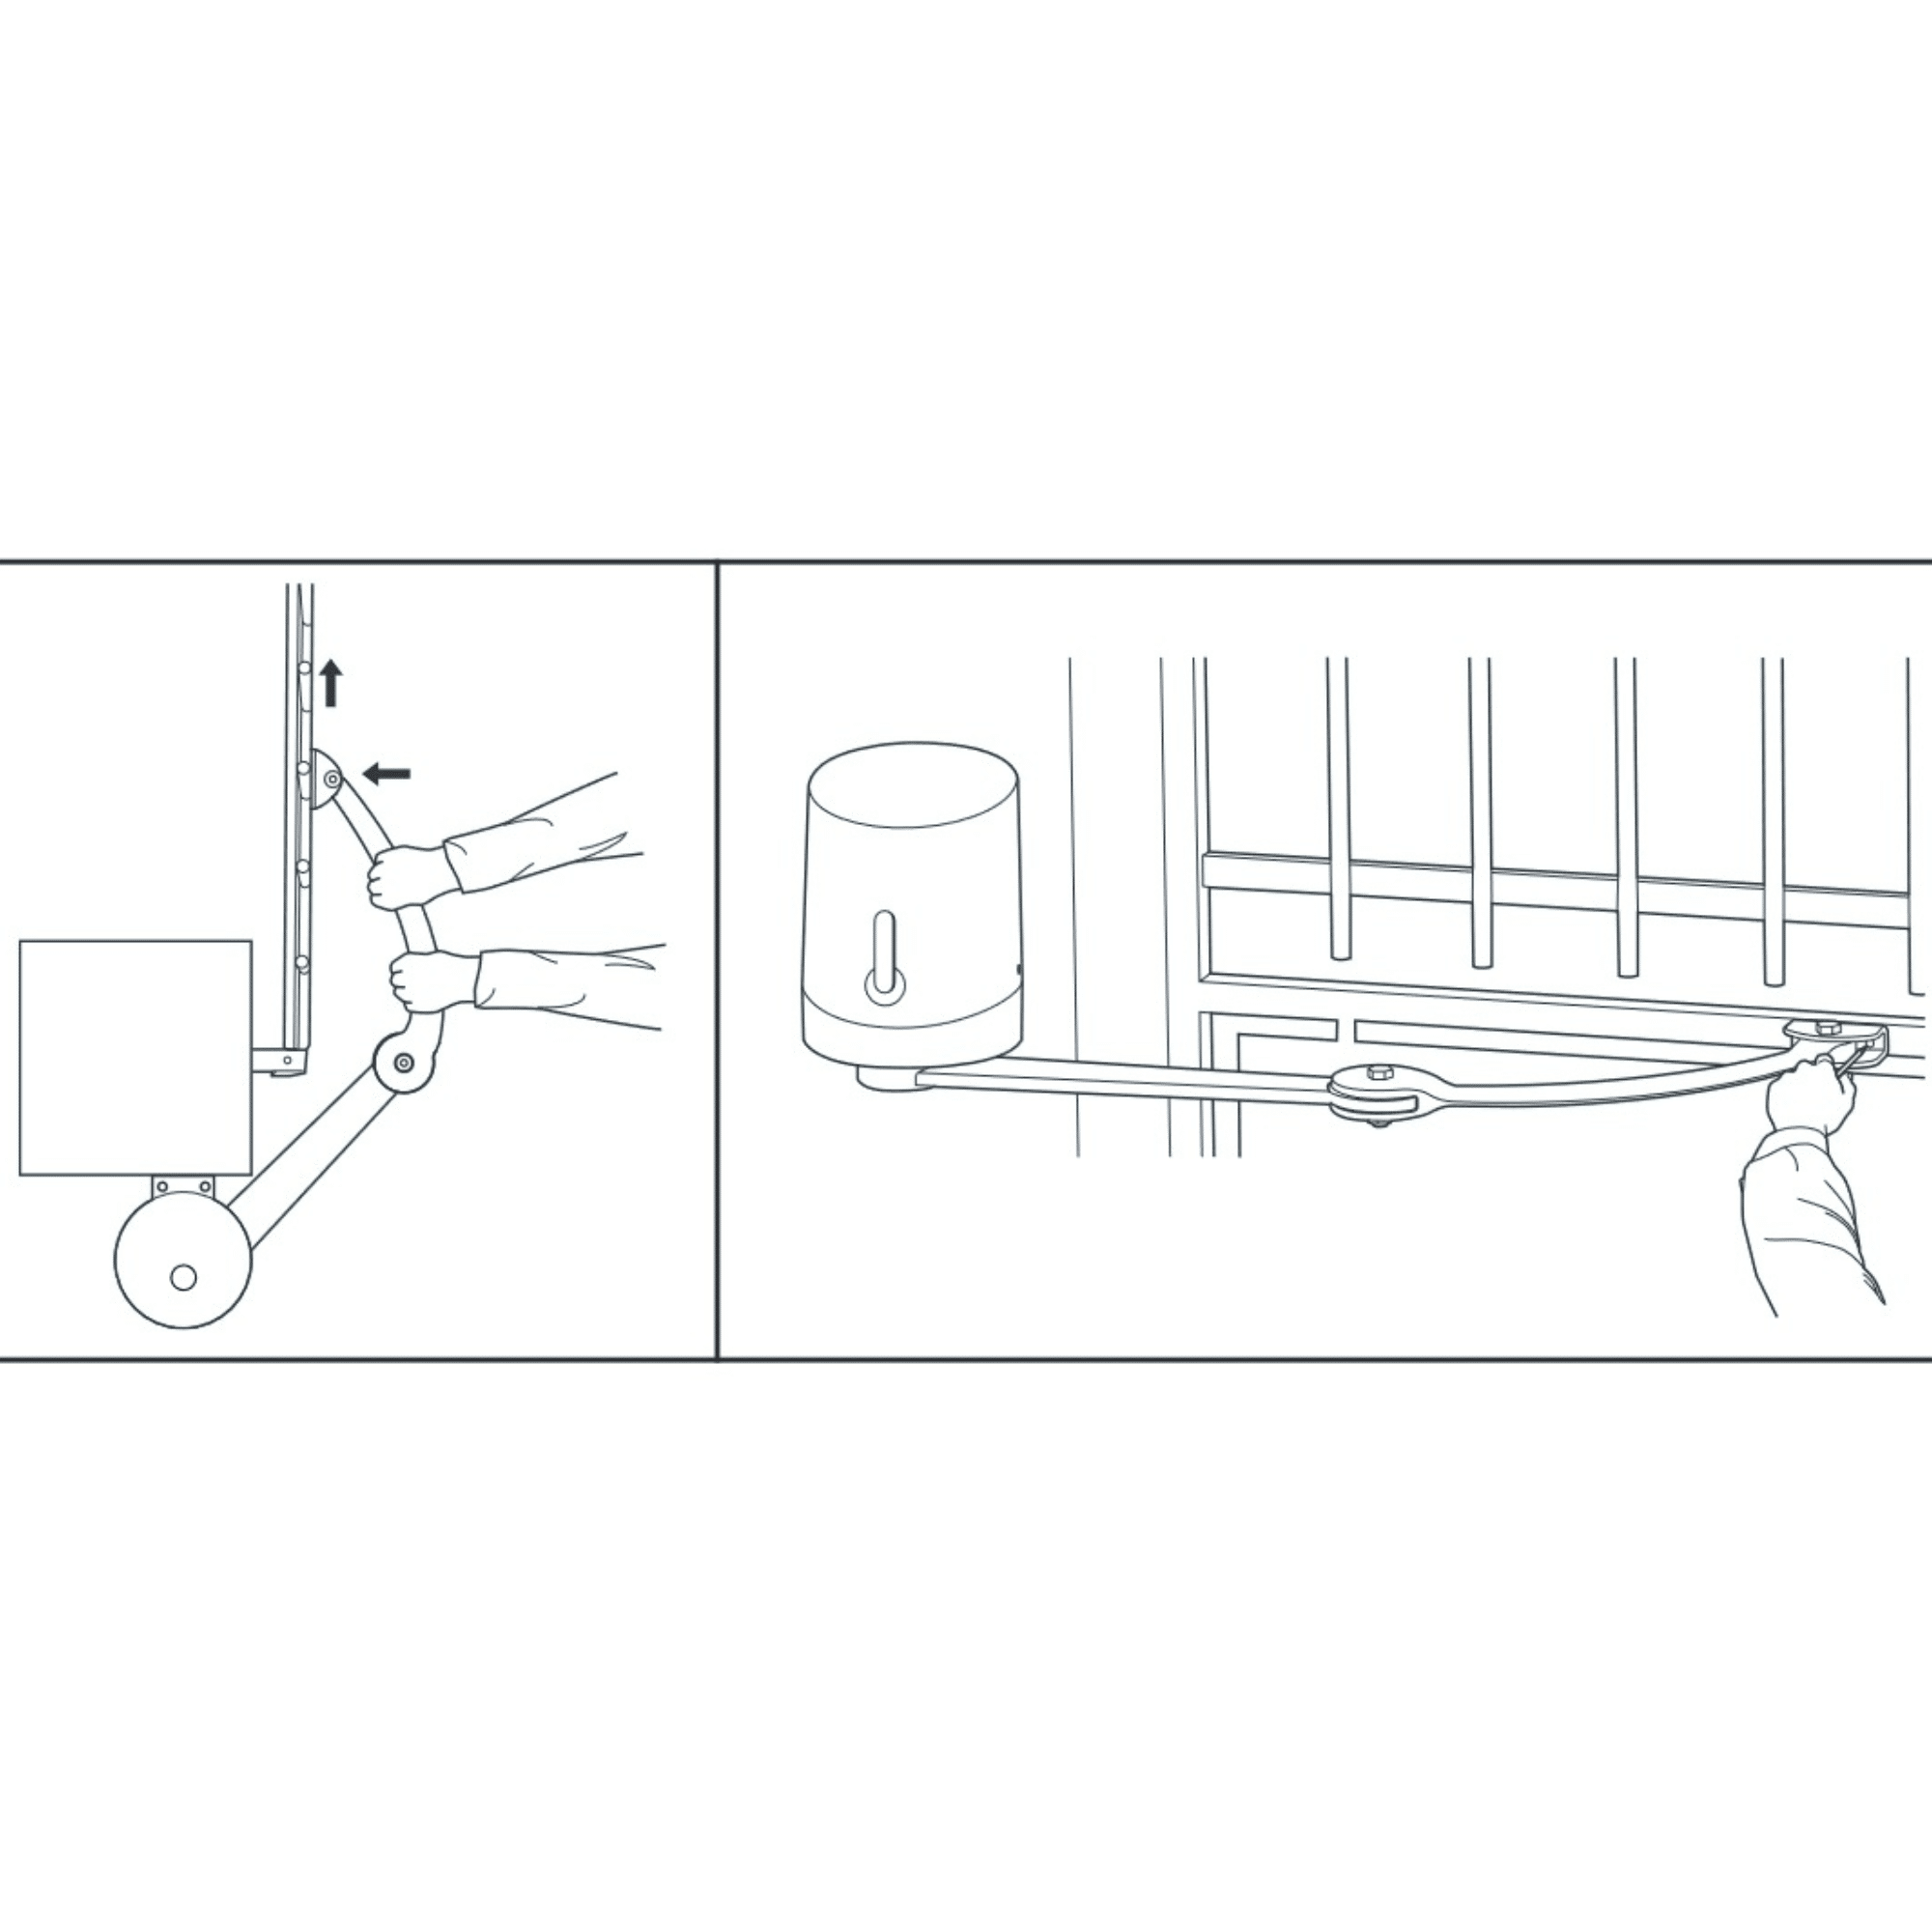
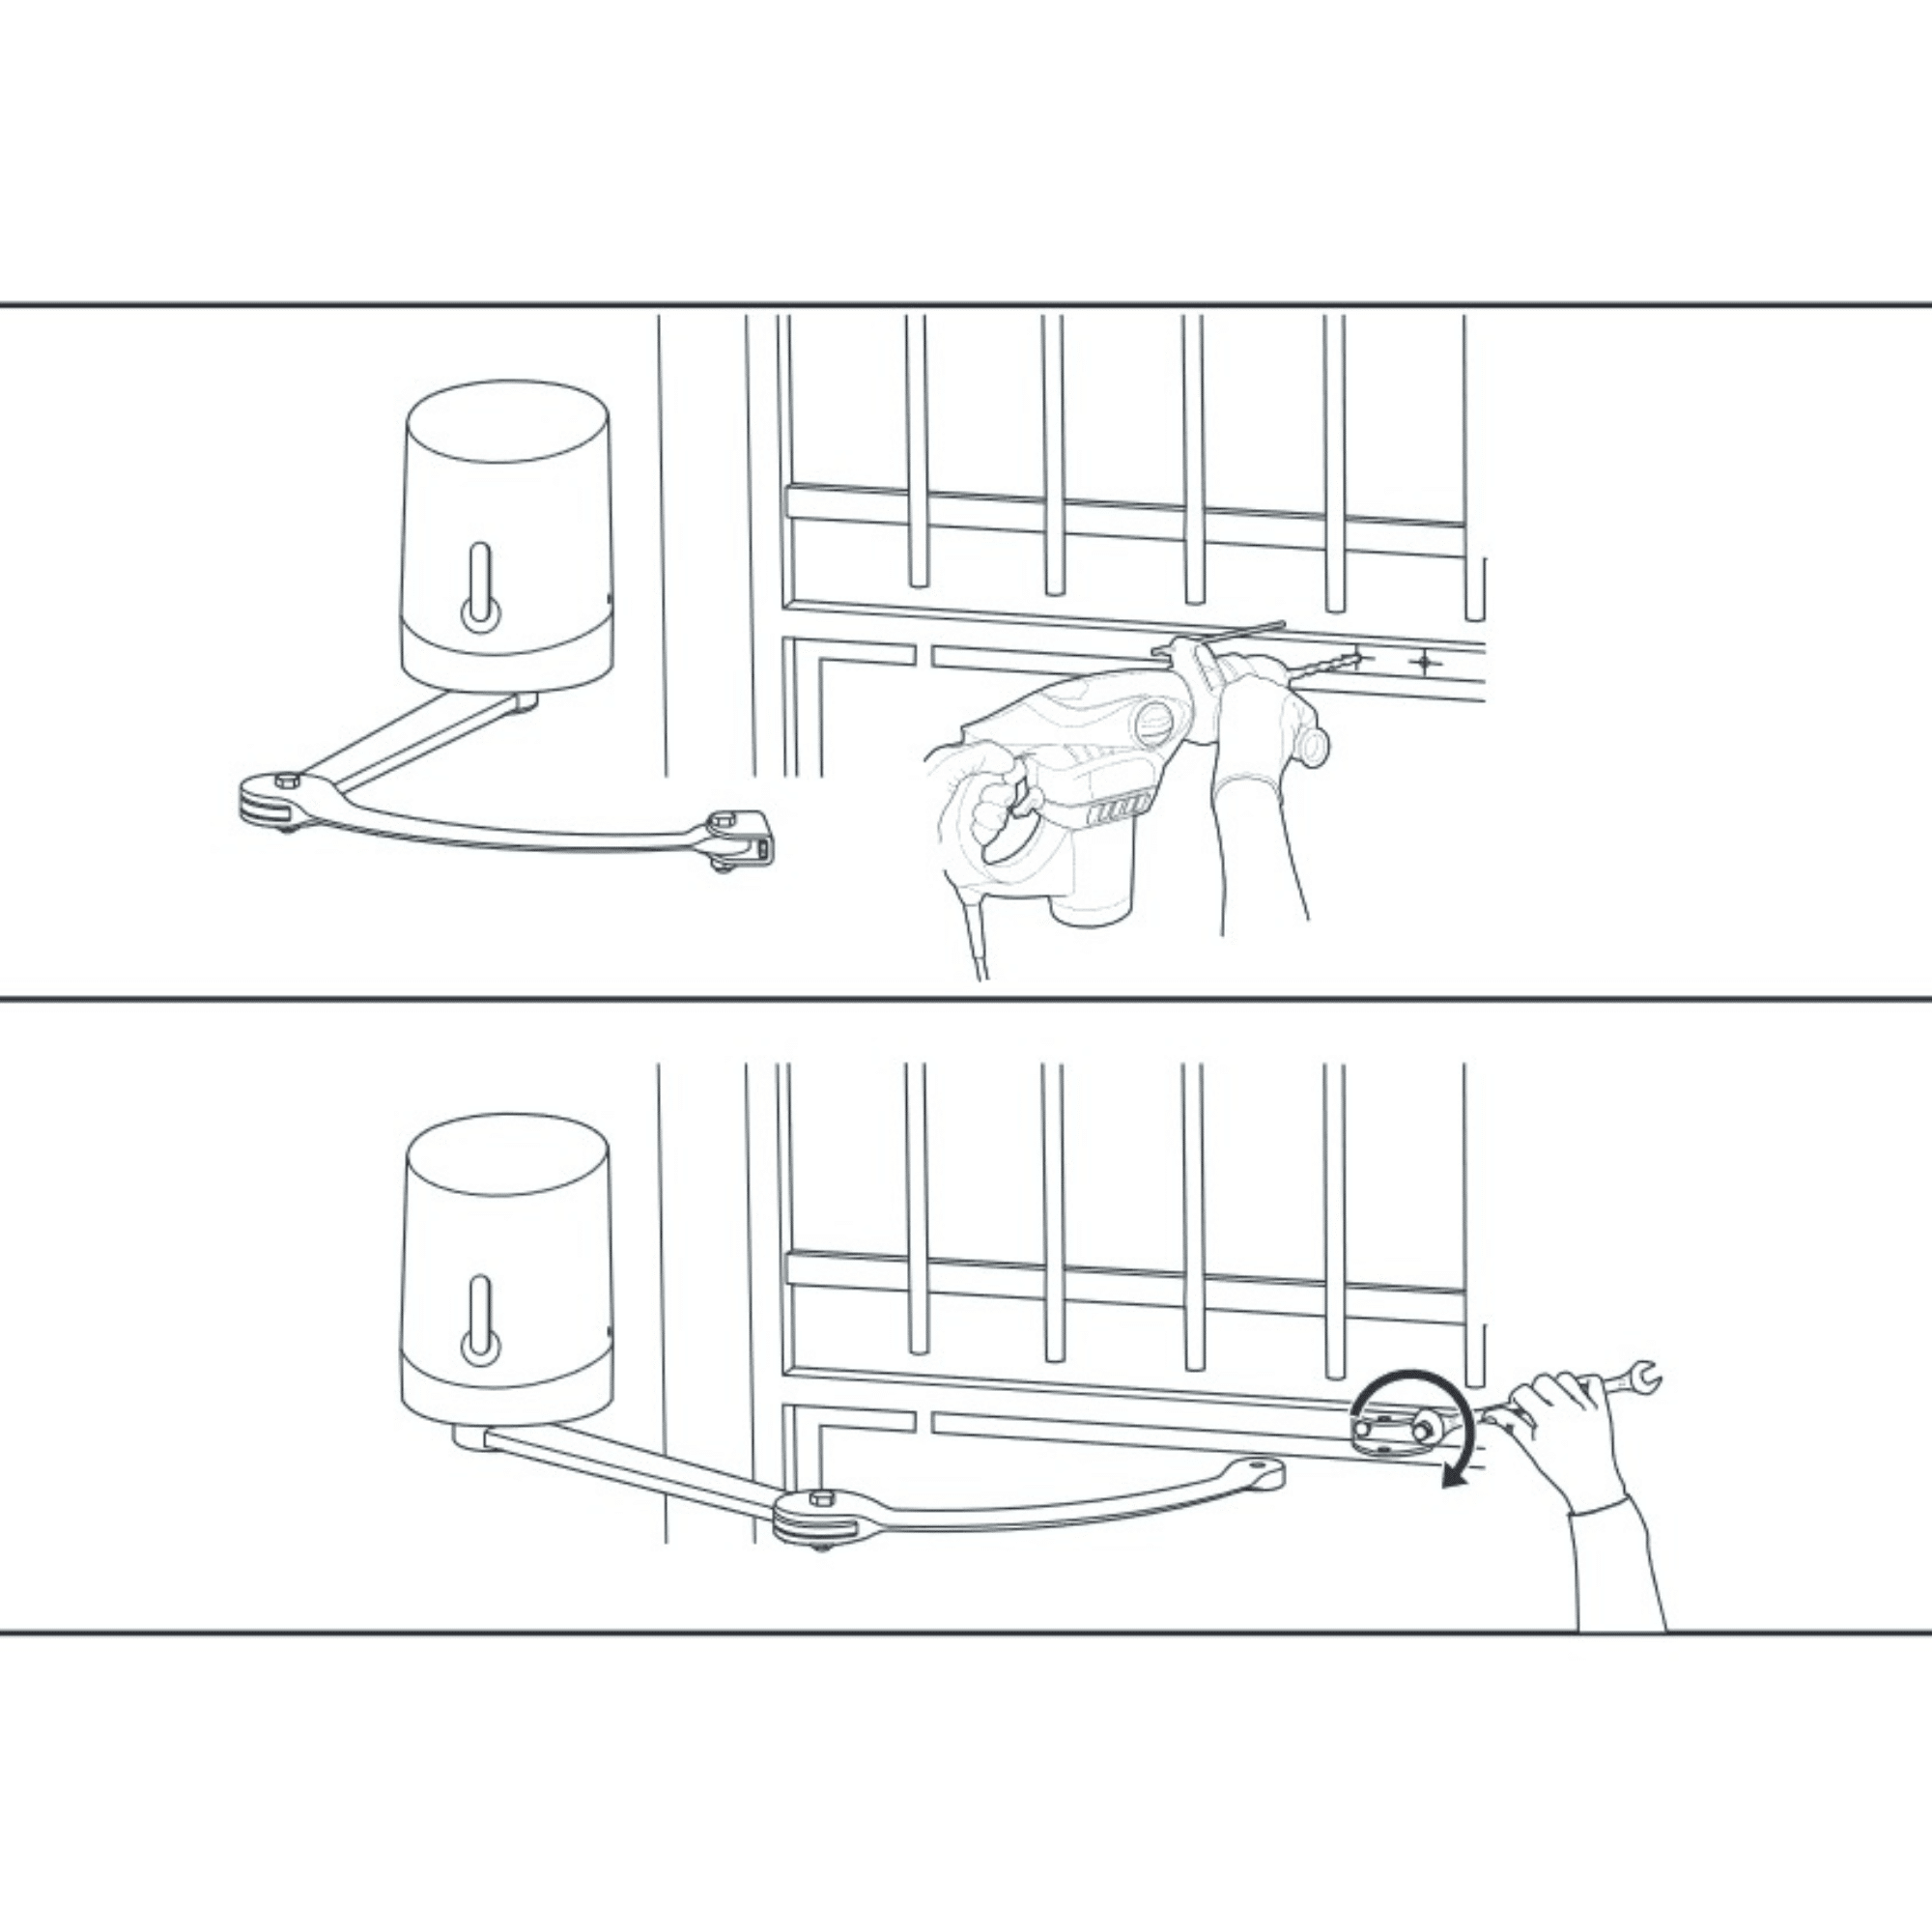
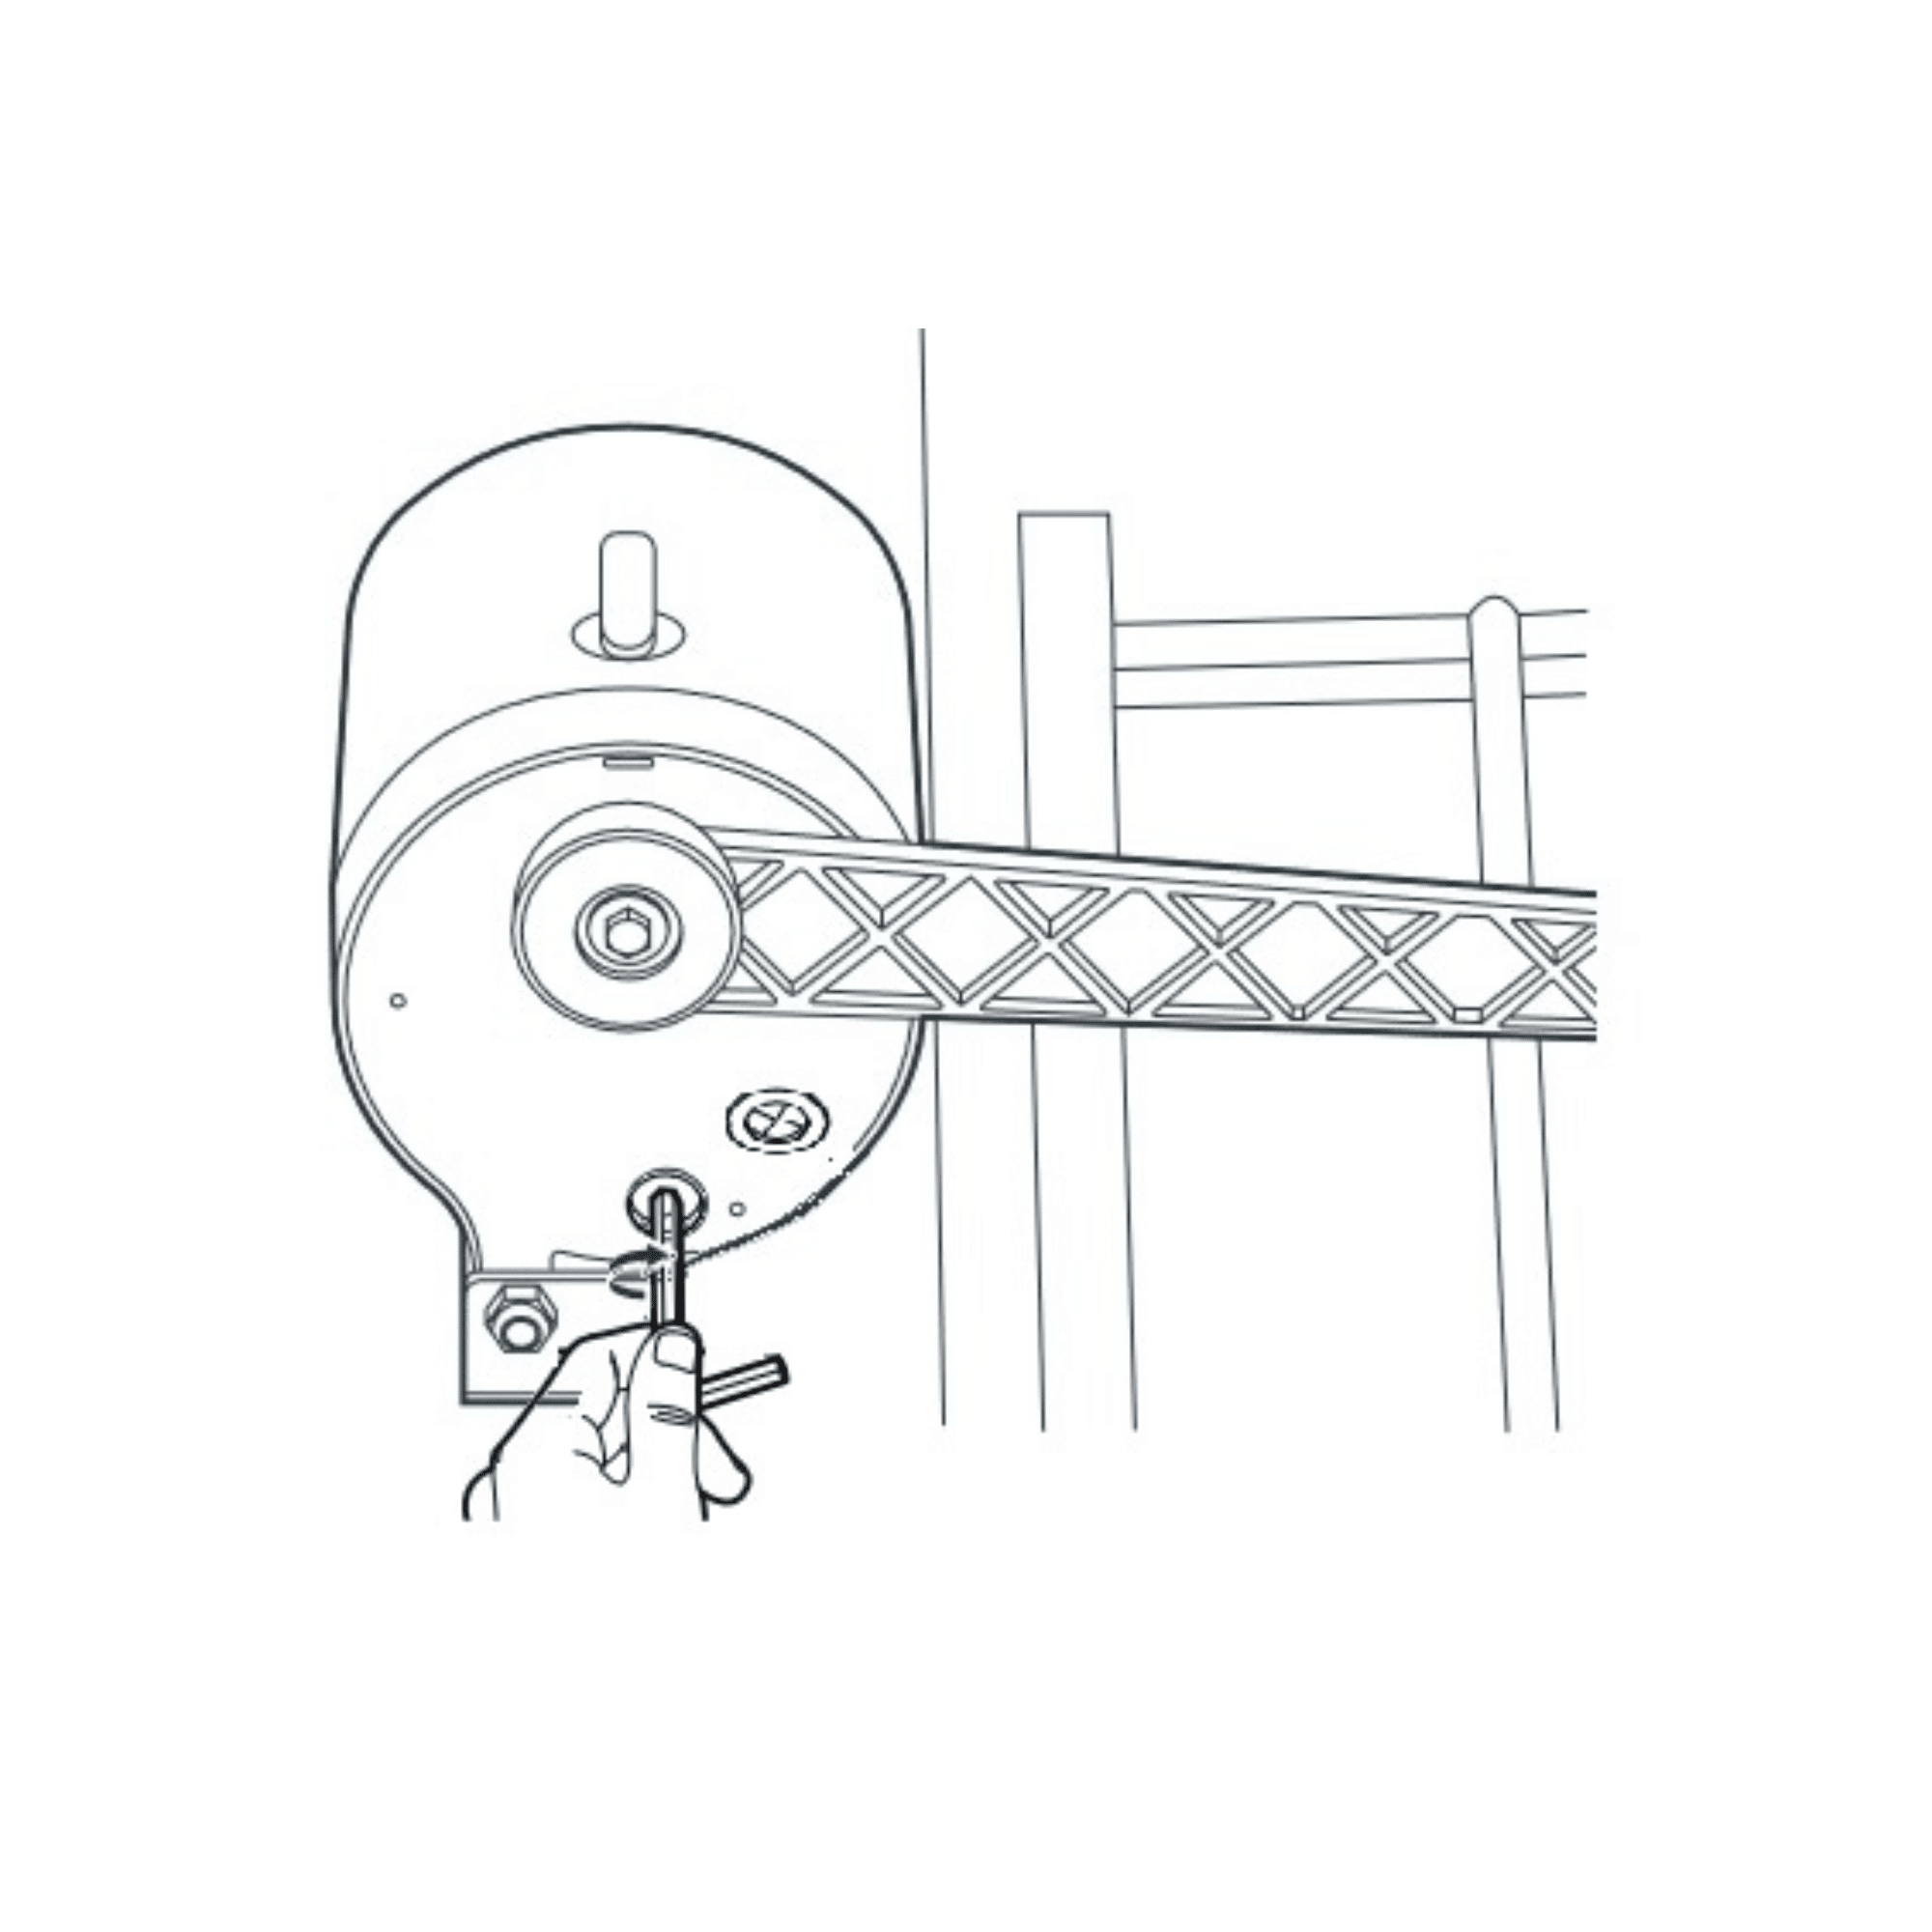
The gate must be fitted with a reinforcement point to which the operator can be attached.

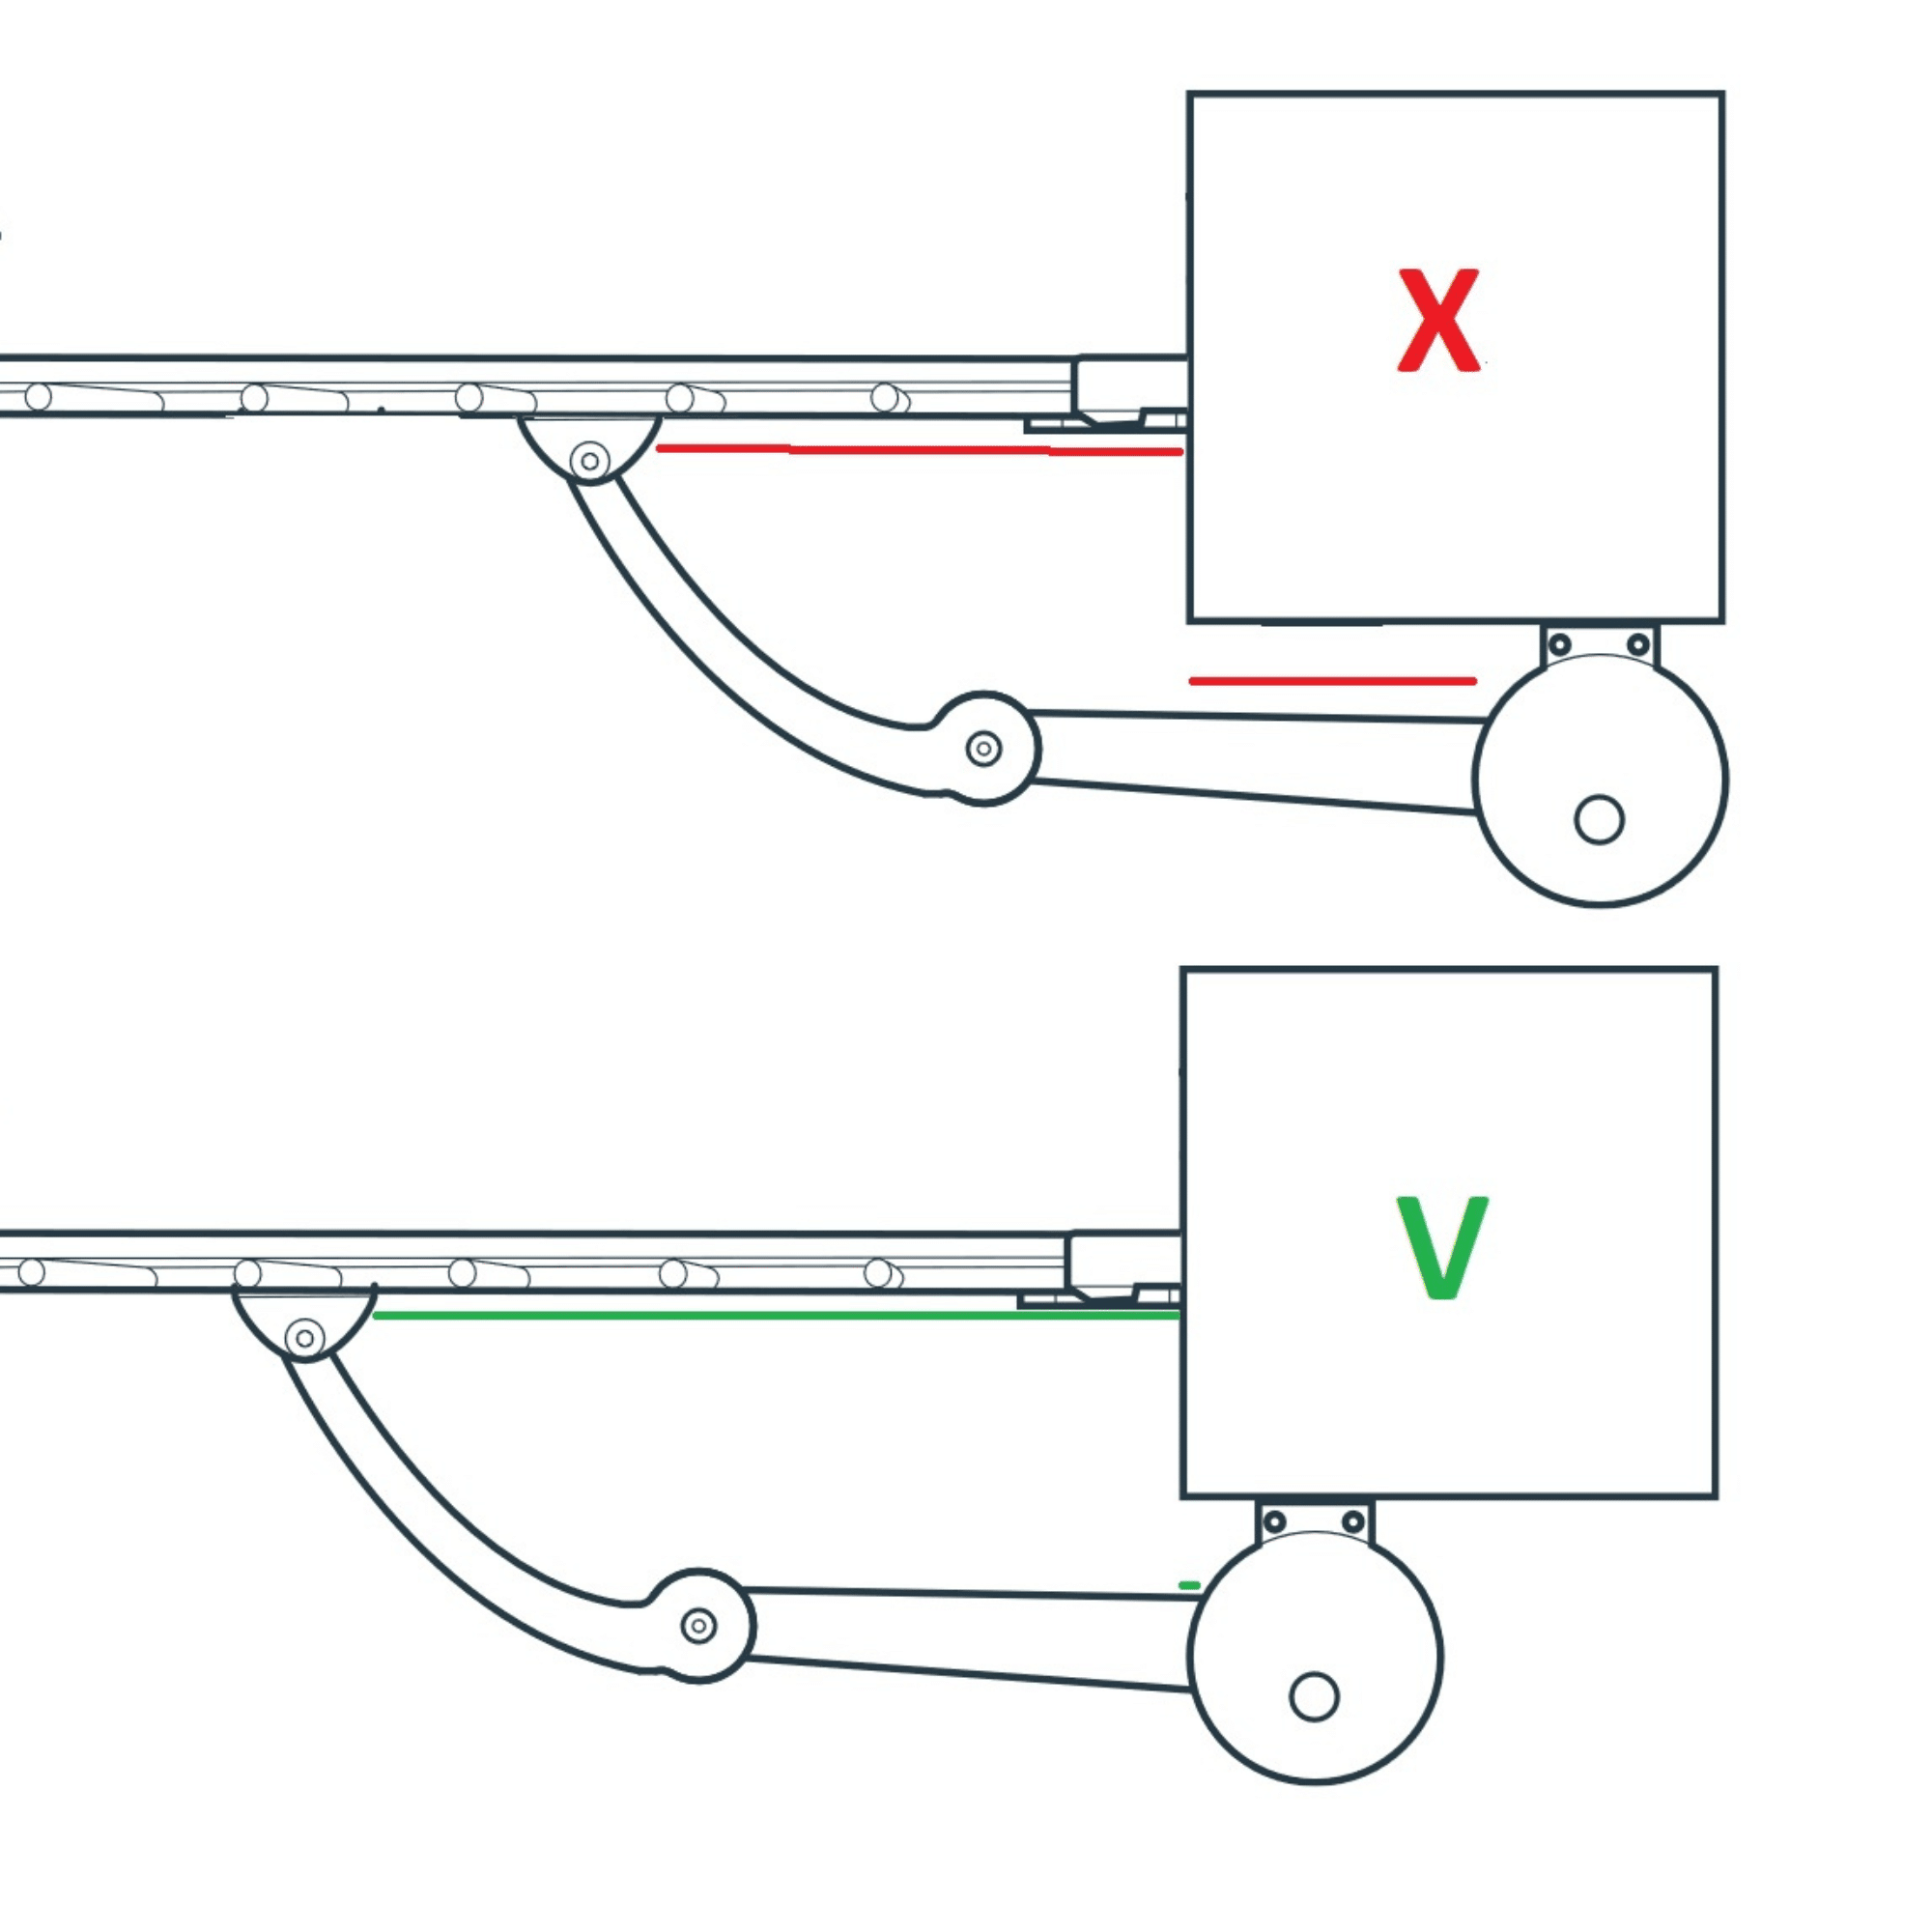
The gate must be stable and balanced (it must not open or close by itself without external action).

The gate must open and close smoothly.

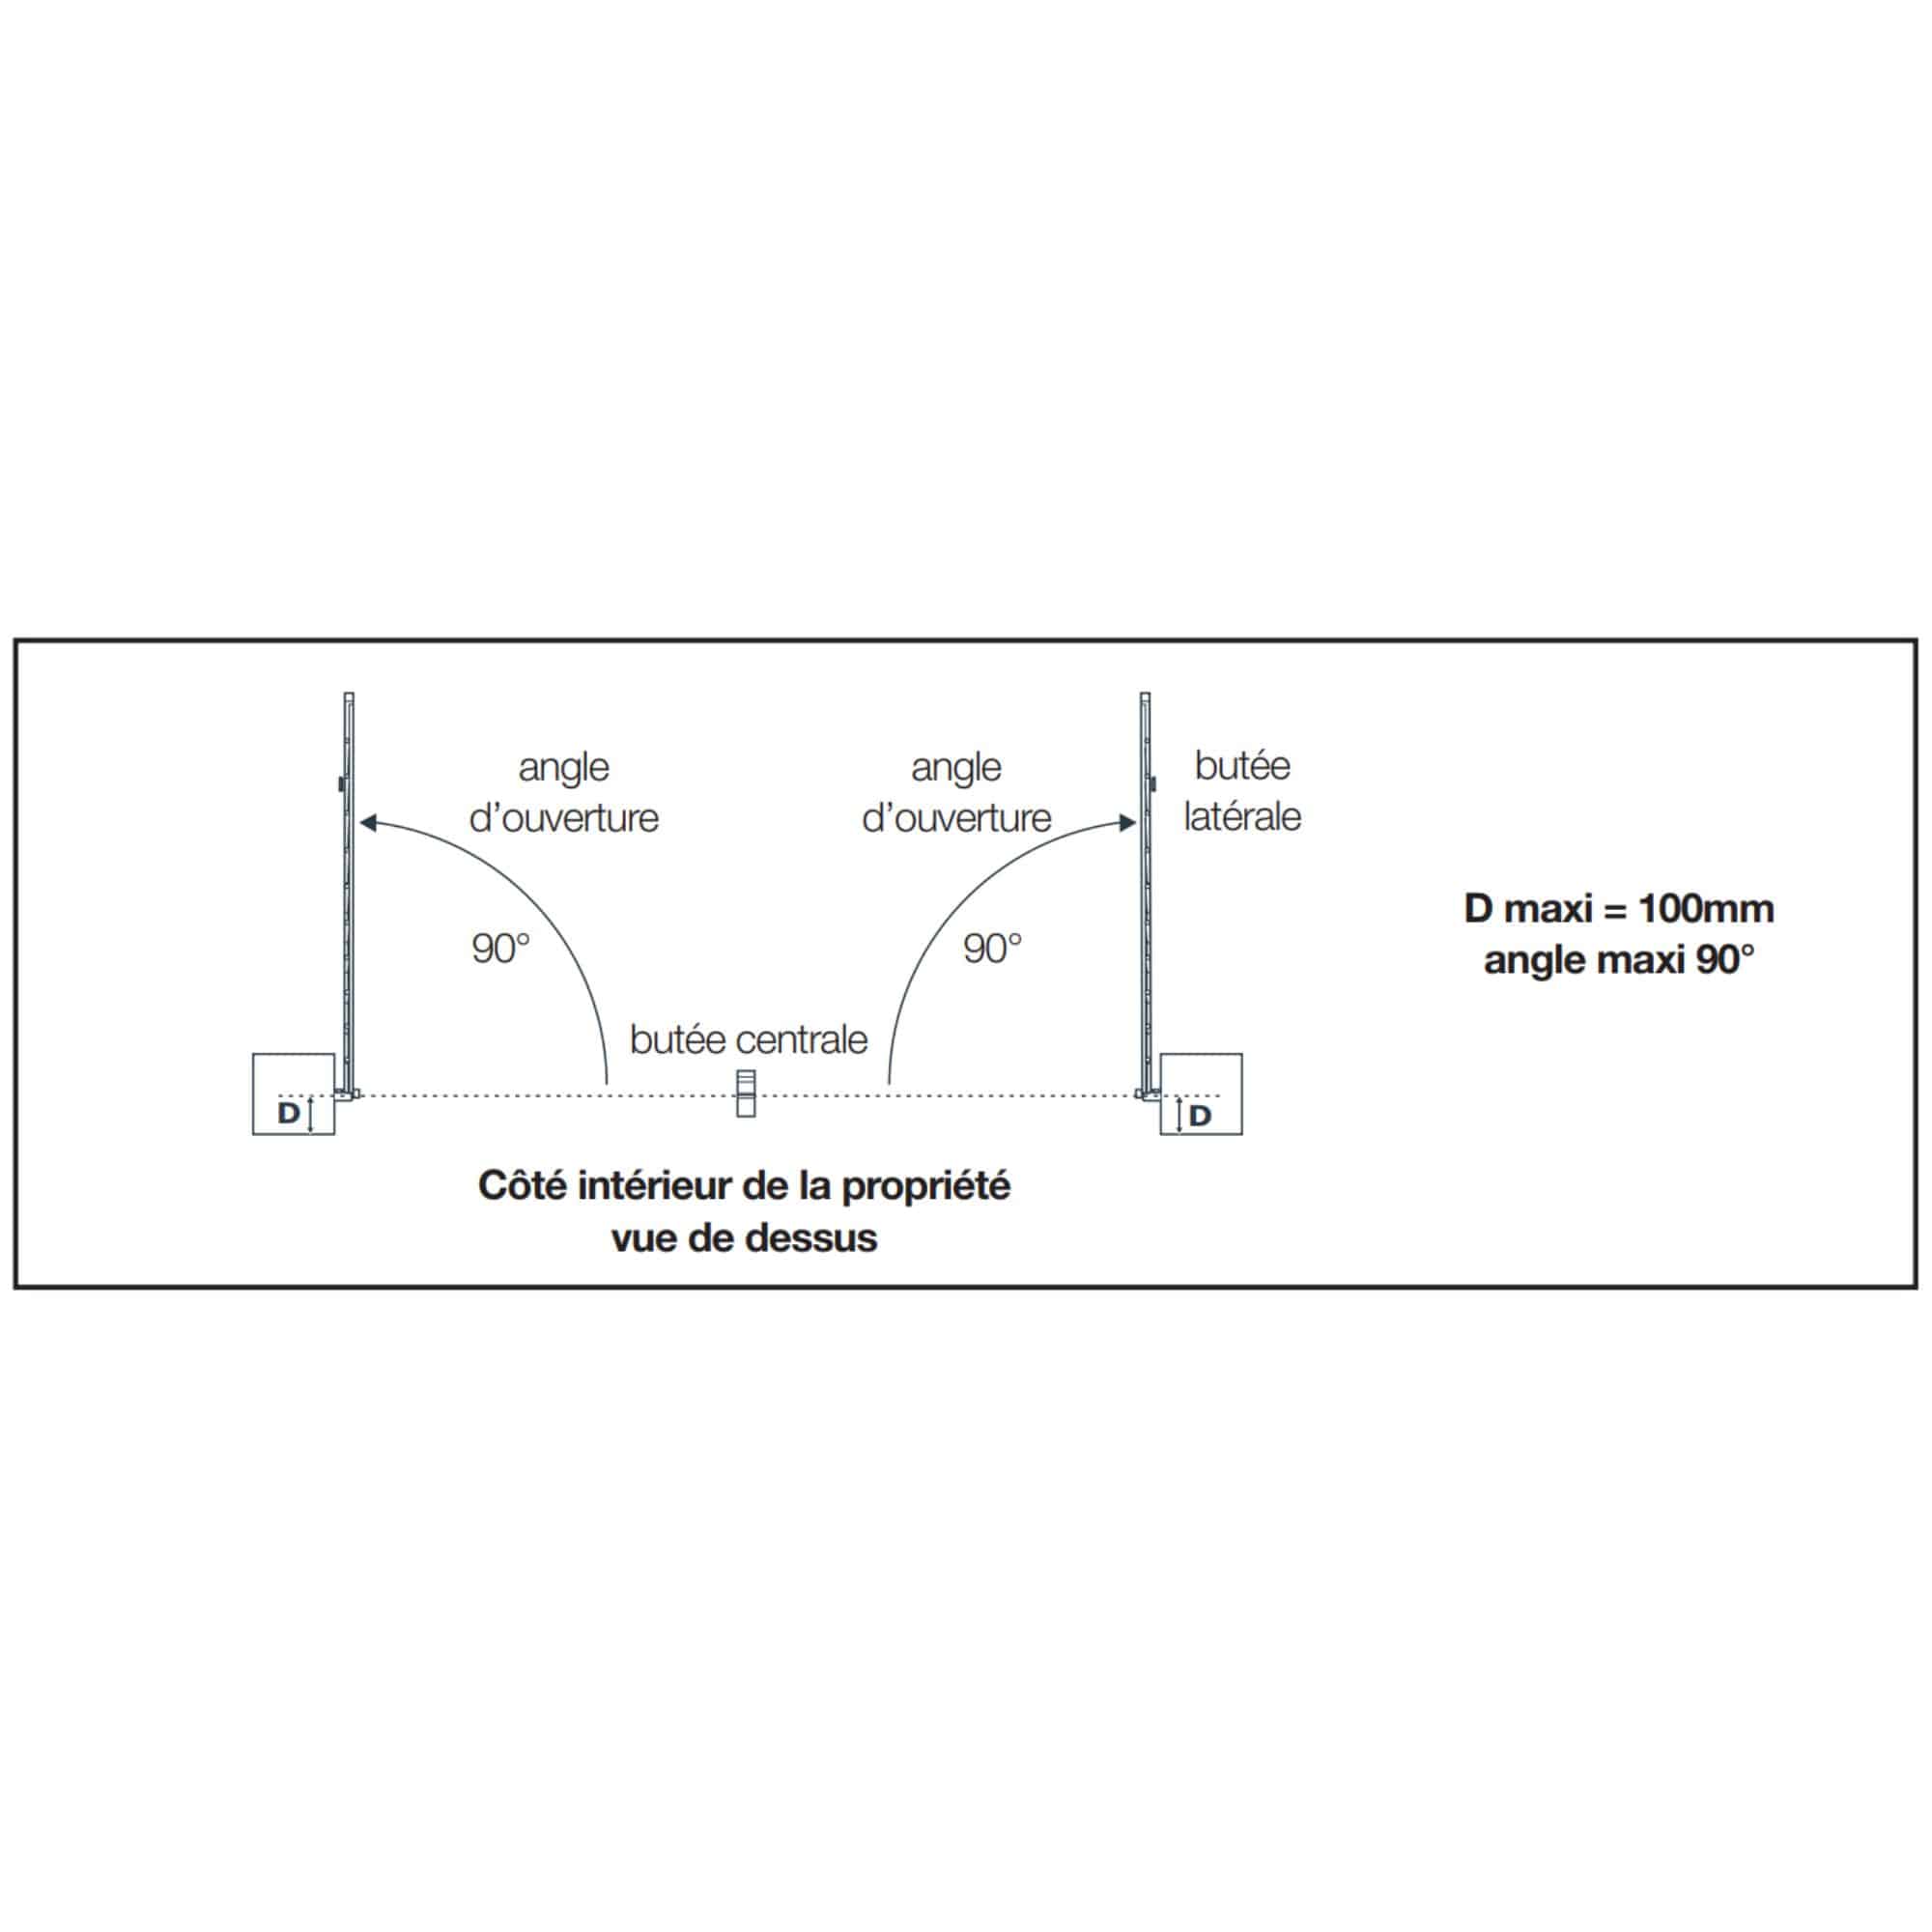
The gate can open to the inside or outside of the property

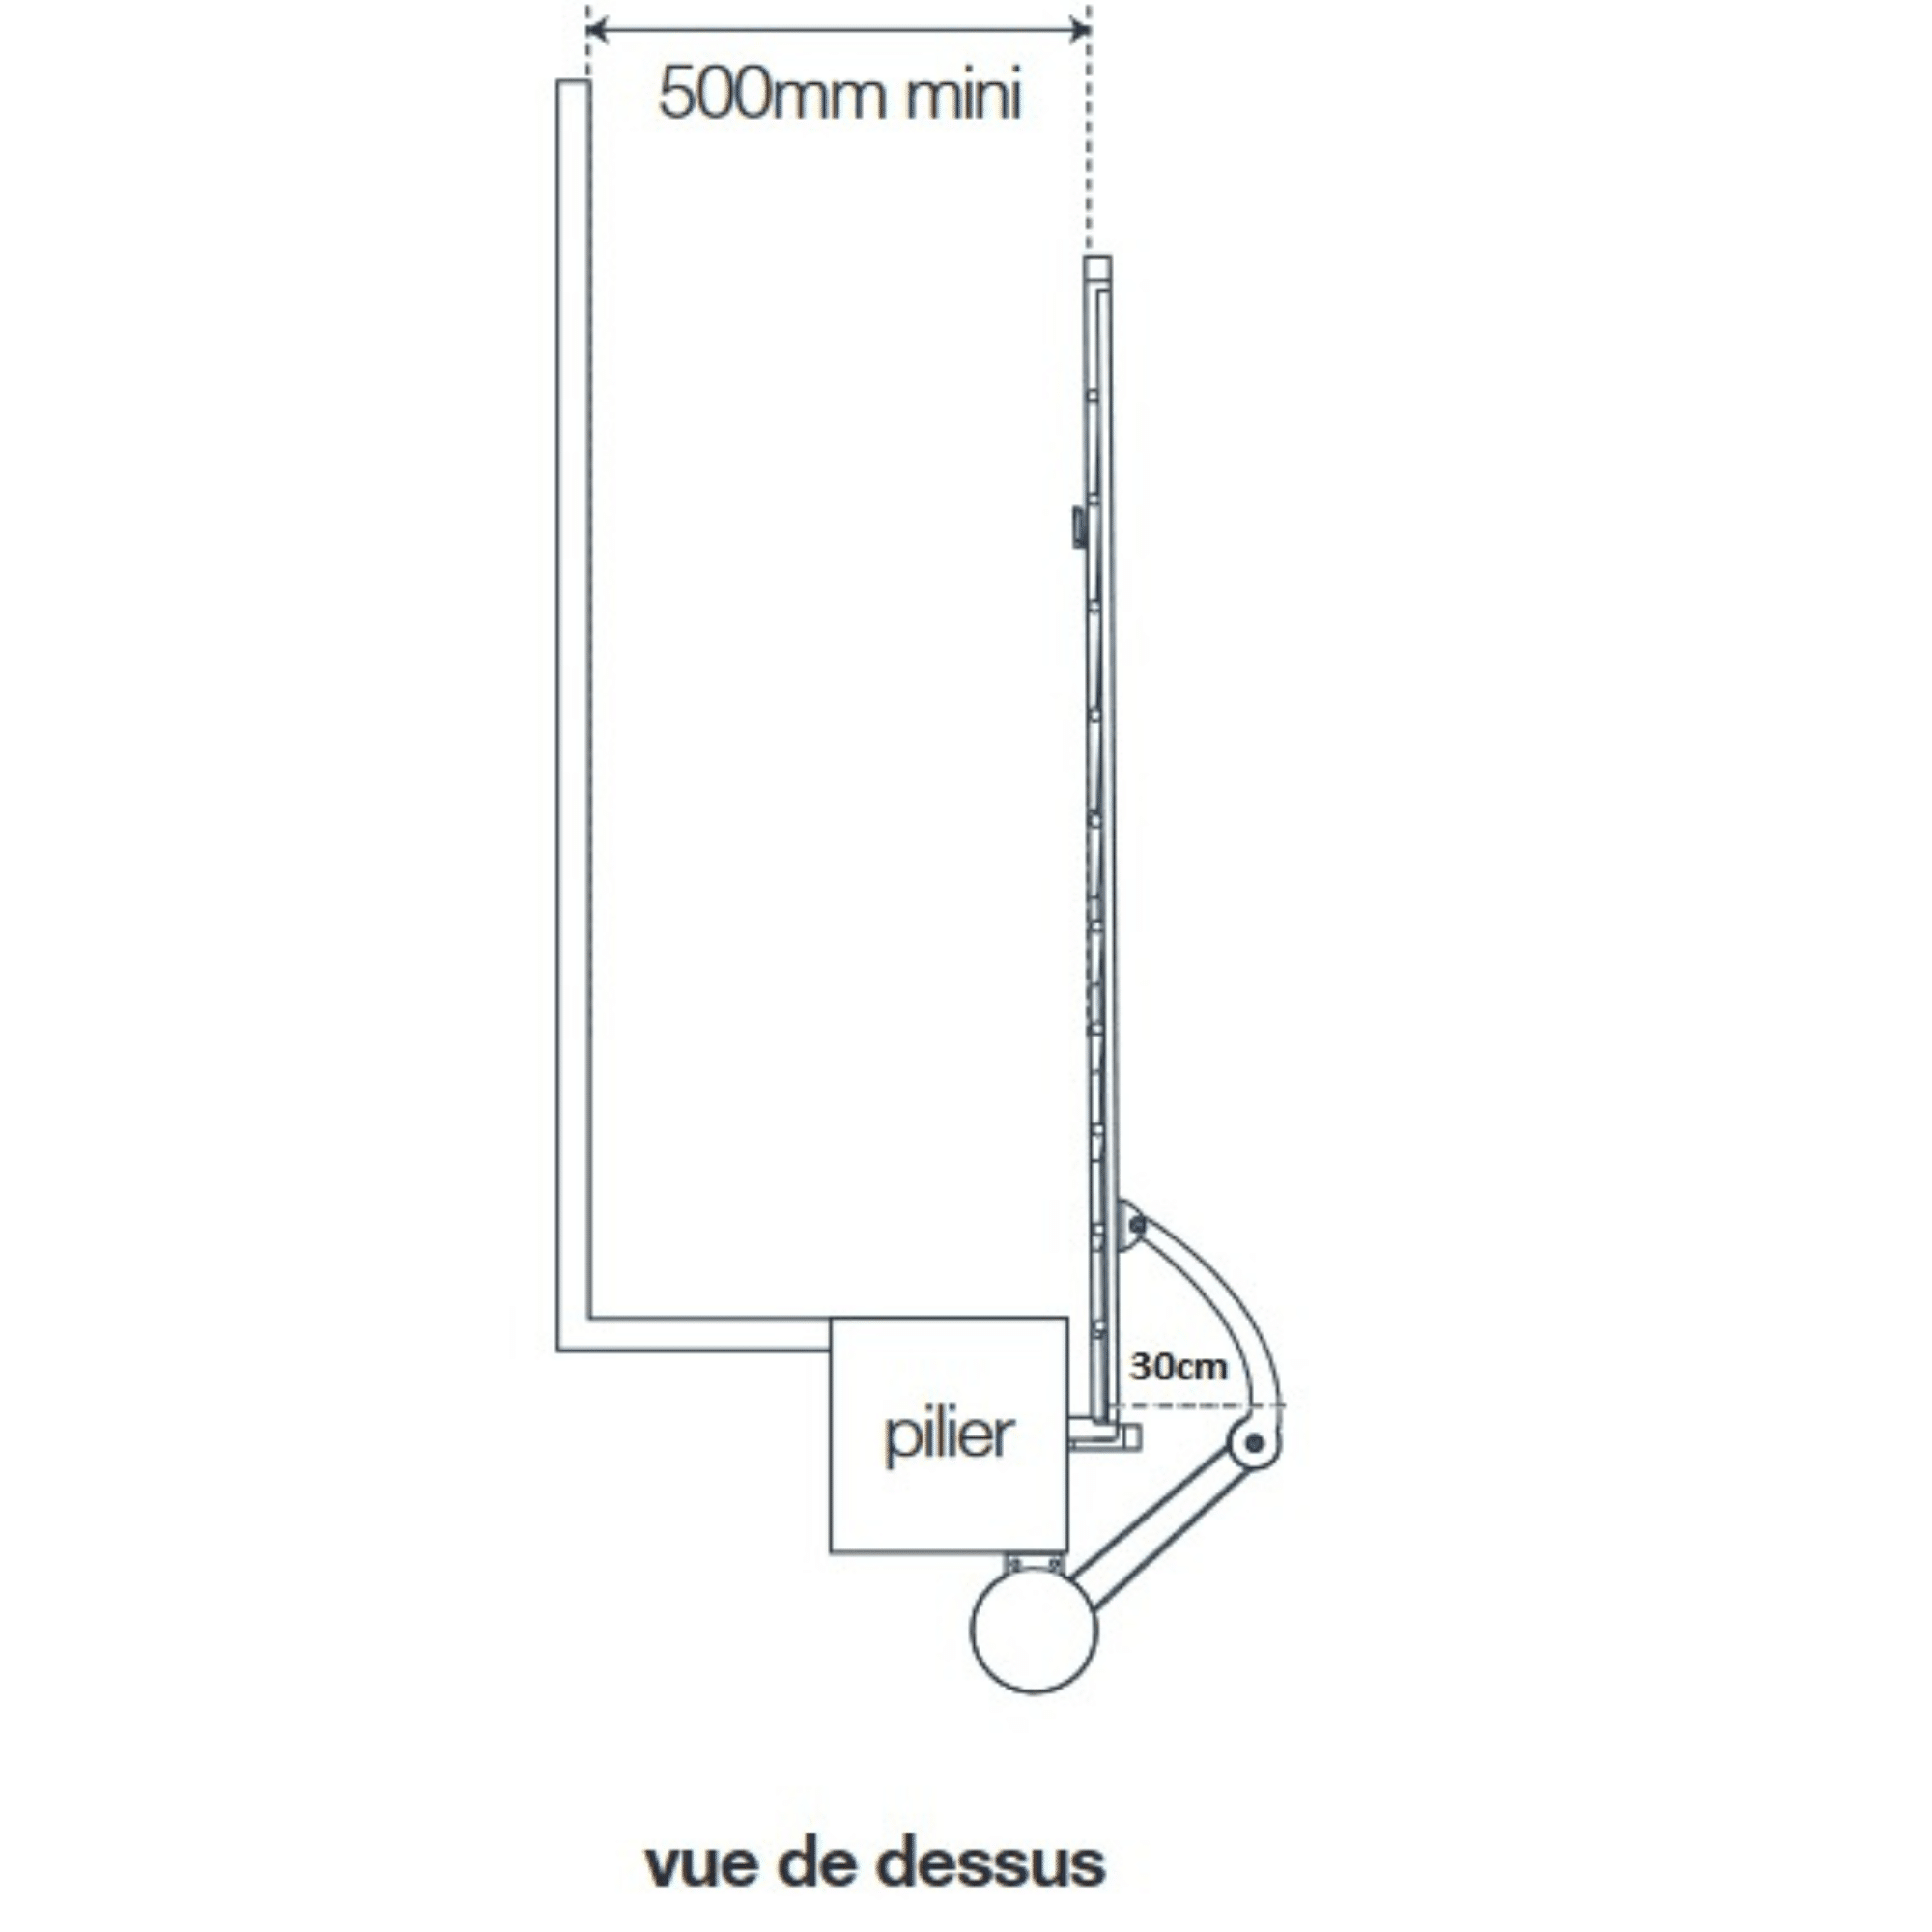
Its maximum opening angle must not be less than 40°.

Pillar prerequisites

The pillar must be large enough to correctly receive the actuator mounting bracket.

The pillar must not be rounded on the side receiving the actuator mounting bracket.

The image shows the minimum width of the pillar

The pillar must be clean and dry, and free of any old actuator mounting brackets.

Environment prerequisites

It is imperative to maintain a safe lateral clearance between the open gate and any fixed part of the environment.

The floor must be straight and even. The gate must not rub against the ground.

The drive unit is not compatible with sloping entrances, either upwards or downwards.

The installation of FIXED and PERMANENT floor stops is MANDATORY for opening and closing.

Prerequisites for installing the gate on the pillar

The installation depth of the gate in relation to the inner face of the pillar is important. We call it distance D.

For an opening to the outside, this distance must be between 0 cm and 10 cm maximum.

PROHIBITED installations

It is strictly forbidden to install the motors on the outside of the gate (street side).

It is strictly forbidden to install motors higher than 1.50 m.


To know more

An articulated-arm operator is positioned as close as possible to the gate’s point of rotation (hinge), so that the arms can be attached as far as possible to the gate.

Step 1: Determine bracket installation distance

Position the mounting bracket so that the motor unit is flush with the edge of the pillar.

If you have a gate with large leaves, you may consider fitting the bracket flush with the pillar, so that the motor protrudes slightly over the entrance.


Step 2: Install the pillar bracket

Mark the location of the holes in the pillar, ensuring that the pillar bracket is fitted horizontally at the end. Use lag bolts or any other fastening system suited to the pillar material.

Please note that the stresses on the mounting bracket will be considerable when the motorization is running. We recommend embedding threaded rods at least 15 cm long. If the pillar is made of metal, we recommend that the threaded rods be welded or passed through and secured with self-locking nuts.
If in doubt, consult a professional.

Step 3: Install and secure the motor to the bracket

Place the motor on the mounting bracket and assemble as shown in the adjacent image.

Step 4: Assemble and install the articulated arm

Assemble the arm and position it on the motor shaft as shown opposite.

Be careful not to overtighten the arm joints (elbow and wrist).

Step 5: Disengage the engine

Disengage the motor by turning the BTR key anticlockwise.

Step 6: Locate mounting holes

Open the gate as far as the side stops.
Turn the hinged arm to press the gate mount against the gate as far as possible from the hinges.


Step 7: Attach the arm

Remove the gate mount from the arm so that it can be attached to the gate.
Use screws and nuts suitable for the gate material.
Reassemble the end of the arm and the gate mount.

Step 8: Start the engine

Engage the motor by turning the key clockwise.

NOTE: For a first-time installation, we recommend leaving the leaves half-open before engaging them.

Step 9: Perform the same operation on the second motor

Perform exactly the same operation to install the second engine block.

Keep in touch
Youtube Linkedin

Follow us on social networks

About Avidsen
  • Who are we?
  • Contact
  • Who are we?
  • Contact
Support
  • Avidsen Technical Support
  • Extel brand technical support
  • Philips technical support
  • Thomson Technical Support
  • Avidsen Technical Support
  • Extel brand technical support
  • Philips technical support
  • Thomson Technical Support
Avidsen group brand
  • Avidsen Brand
  • Extel Brand
  • Philips Brand
  • Thomson Brand
  • Avidsen Brand
  • Extel Brand
  • Philips Brand
  • Thomson Brand
Copyright 2025 © All rights reserved Avidsen
  • Legal Notice
  • Personal data protection policy
  • Terms and Conditions of Use
  • Legal Notice
  • Personal data protection policy
  • Terms and Conditions of Use
Thank you for your rating!
Thank you for your rating and comment!
This page was translated from: French
Please rate this translation:
Your rating:
Change
Please give some examples of errors and how would you improve them: