Skip to content
  • English
    • French
    • Italian
    • Spanish
    • German
    • Dutch
    • Portuguese (Portugal)
    • Greek
    • Polish
  • English
    • French
    • Italian
    • Spanish
    • German
    • Dutch
    • Portuguese (Portugal)
    • Greek
    • Polish
Logo Avidsen
  • Products
    • Products
    • Avidsen Brand
    • Extel Brand
    • Philips Brand
    • Thomson Brand
  • Support
    • Tutorials on repair and use
    • Avidsen Technical Support
    • Extel brand technical support
    • Philips technical support
    • Thomson Technical Support
  • The Group
    • The Group
    • Contact
  • Ethic Company
  • Where to buy ?
\

Connecting motors to an AVLO board

  1. Home
  2. Connecting motors to an AVLO board

Connecting motors to an AVLO board

In this tutorial we will look at how to connect the motors to the AVLO electronic board.

This tutorial is applicable for:

Avidsen - 114170 - Stryrka 310 / Avidsen - 114173 - Teha 410 / Avidsen - 114174 - Teha Connect / Avidsen - 114200 - Orane 410 / Avidsen - 114201 - Orane 510 / Avidsen - 114202 - Orane Connect / Avidsen - 114300 - Teha 320 / Avidsen - 114301 - Stryrka 320T / Avidsen - 114302 - Orane 420
Difficulté : Easy
Temps nécessaire : 10 minutes
Nombre d’étapes : 1
Mise à jour : February 2025

Tutorial steps:

Foreword

The primary direction of rotation of the electric motor depends on the polarity of the connection motor on the board. The motors used in our drives are DC. The direction of current flowing through the commutator will determine its direction of rotation.

The card obeys a precise command to switch on its relays, so as to obtain the expected motor movement. However, the board does not know the exact movement of the motor (opening or closing). In some cases, therefore, you could end up with an open leaf instead of a closed one, without the card making a mistake.

1- For pistons and cylinders

For connection cylinders (TEHA) or pistons (STYRKA), simply observe the polarity (red wire to +, black wire to -)

Mark the motor which should open first, to connect it to M1

If using an extension lead, mark the color of the leads on the extension lead to match them when they arrive on the board.

2- For Articulated Arms

For connection articulated arm motors (ORANE) on the board, because they are factory-fitted, do not refer to the color of the motor output wires for connection.

To find the right connection, there are several solutions.


Etape

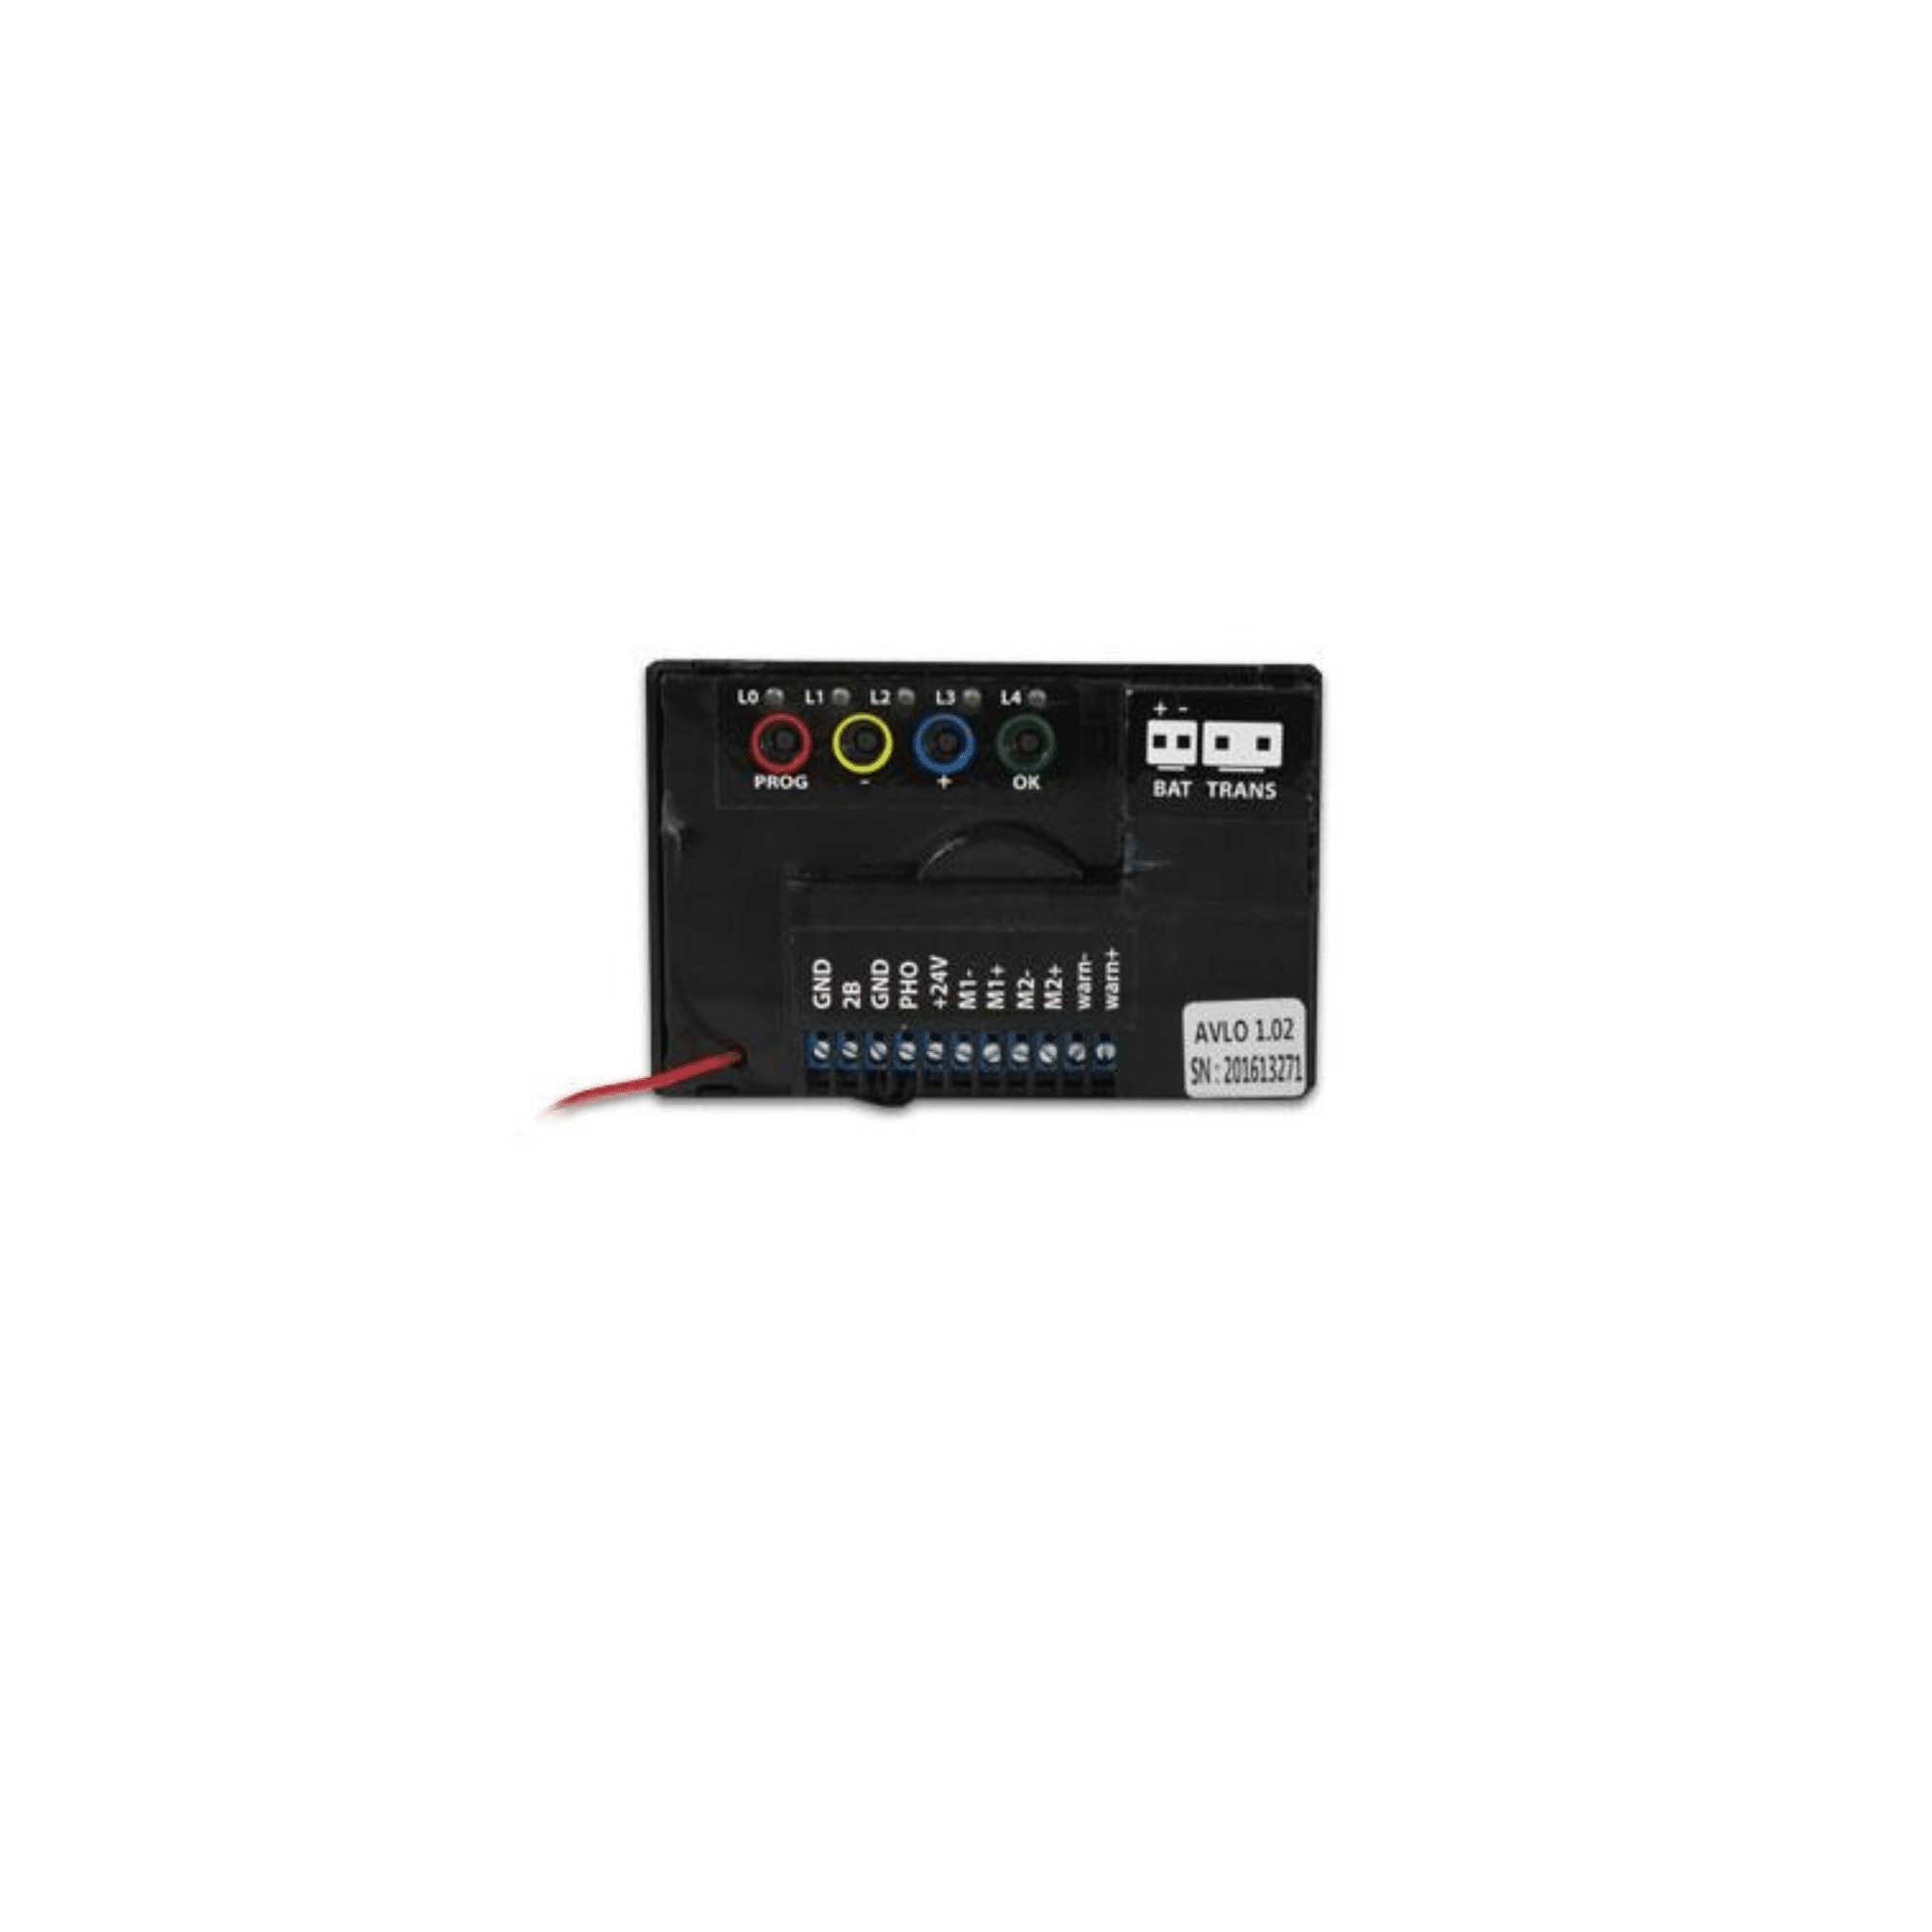
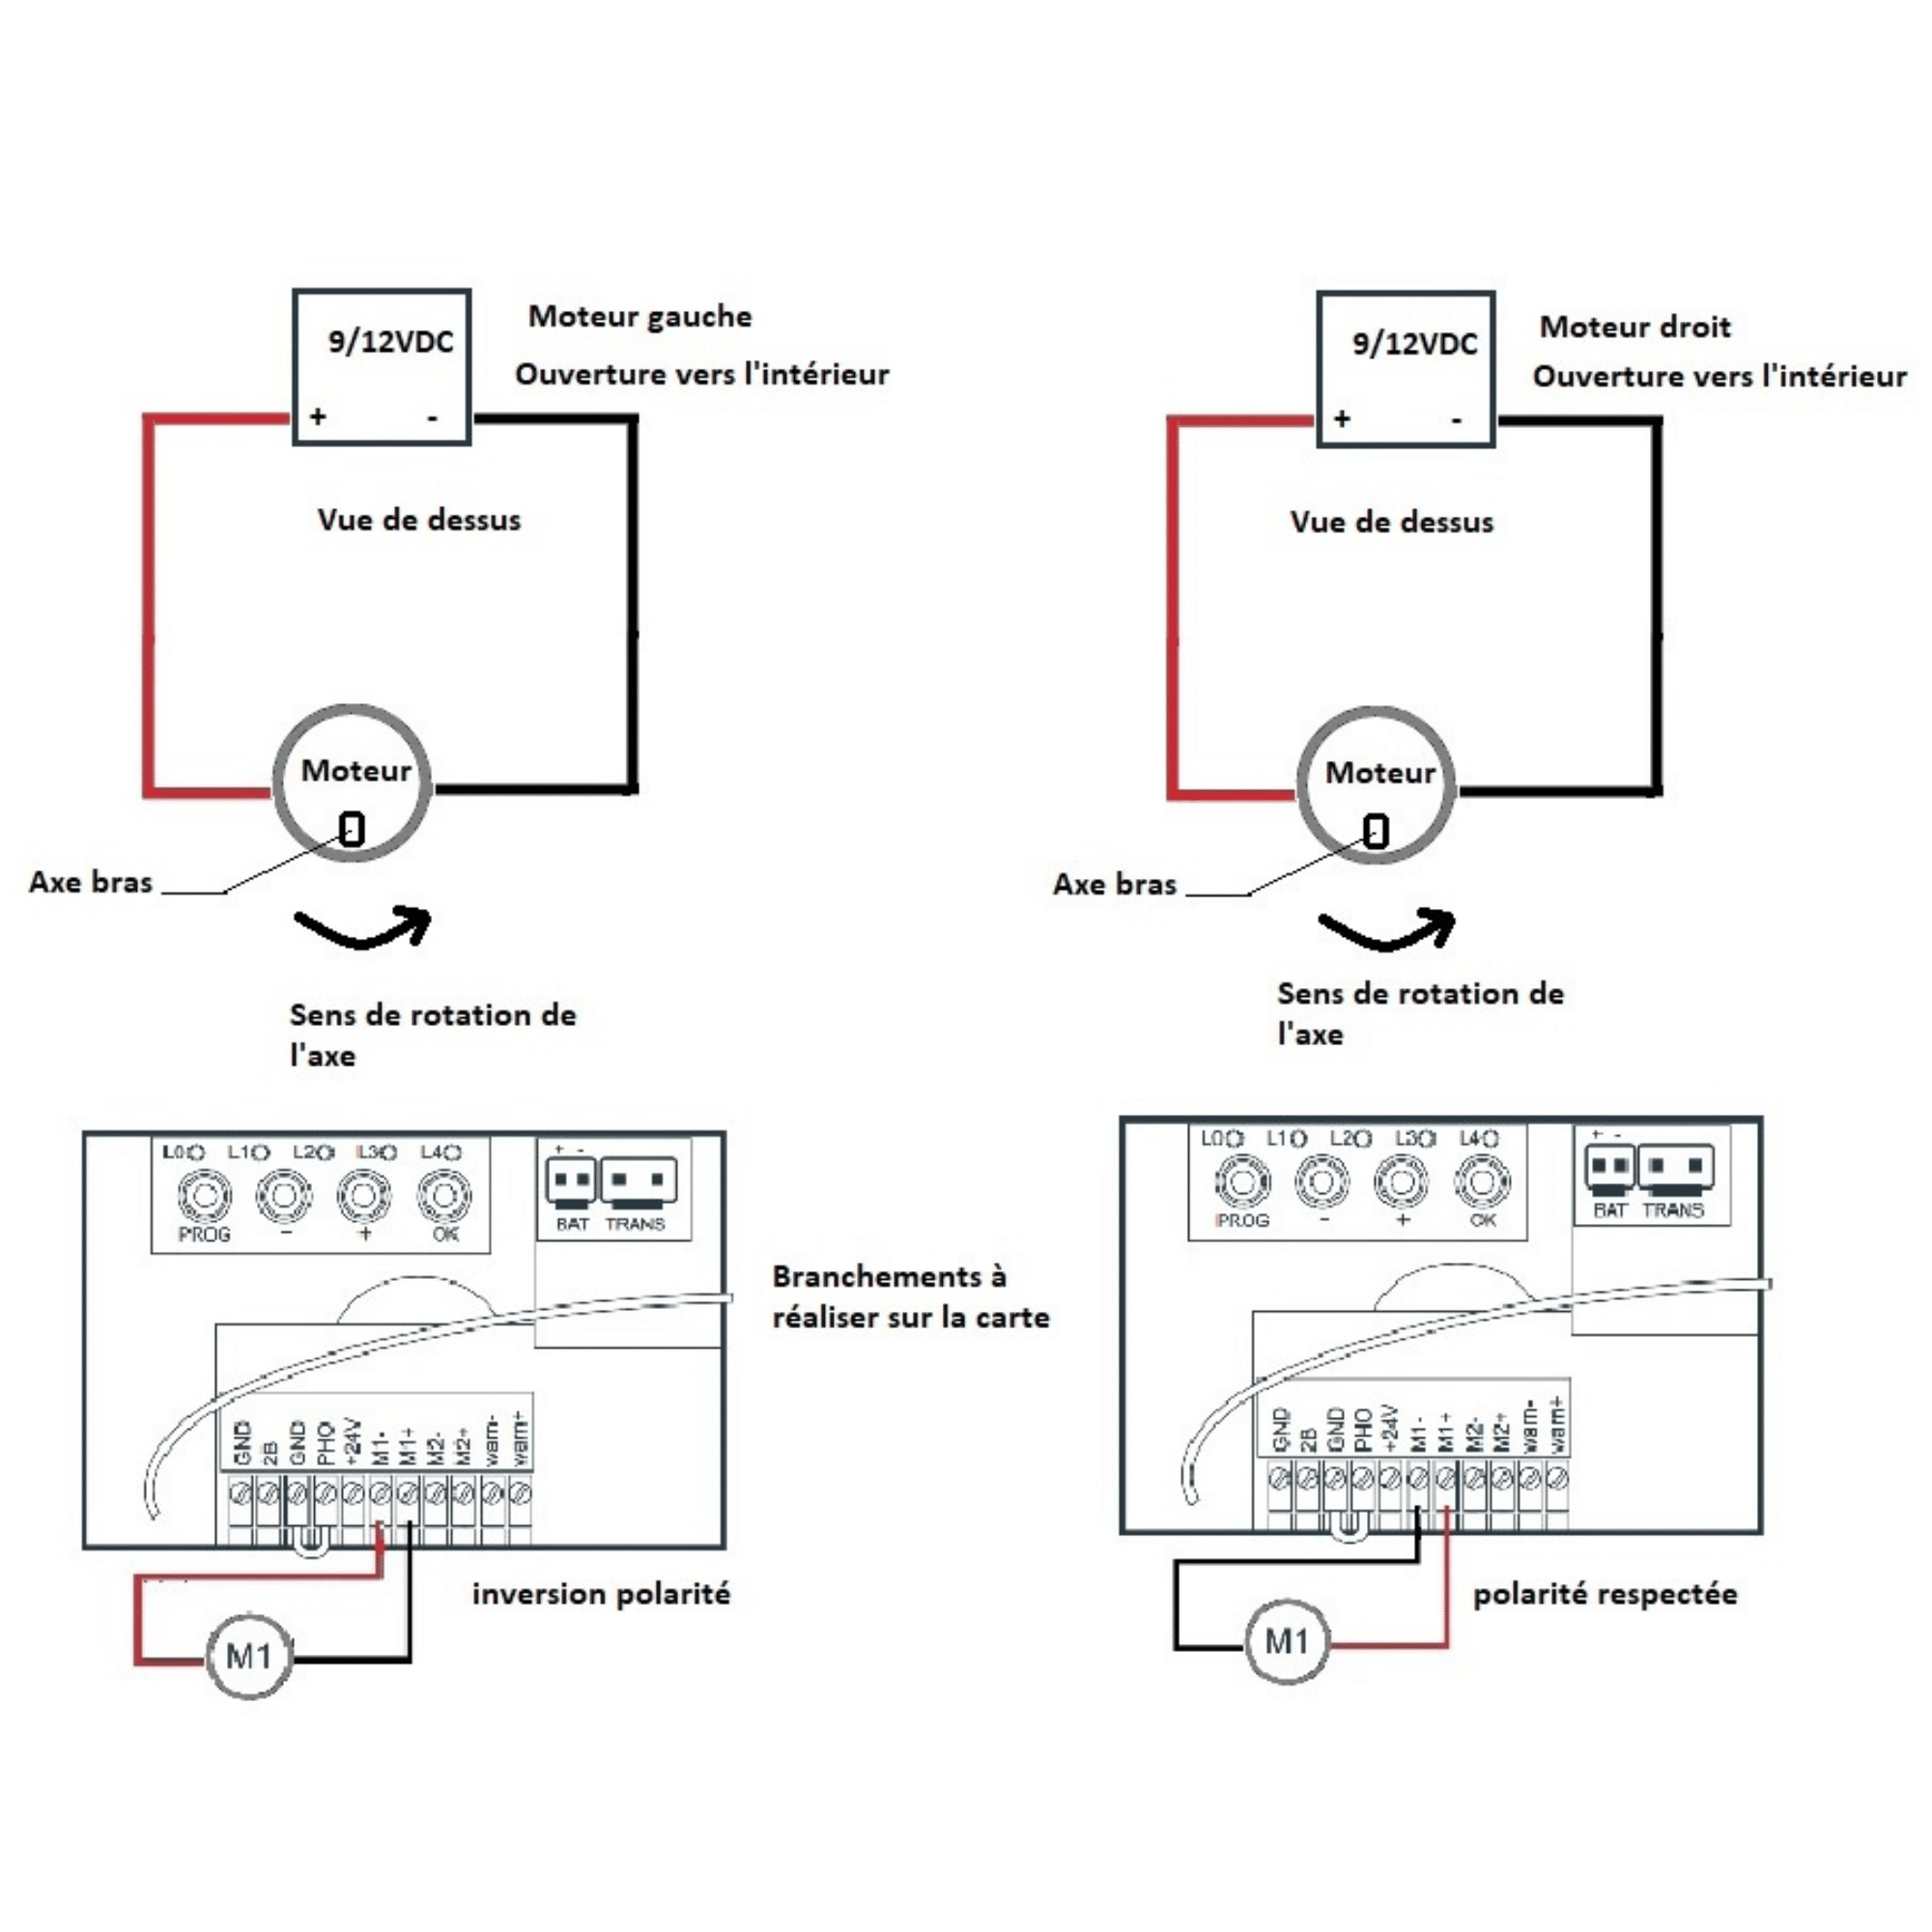
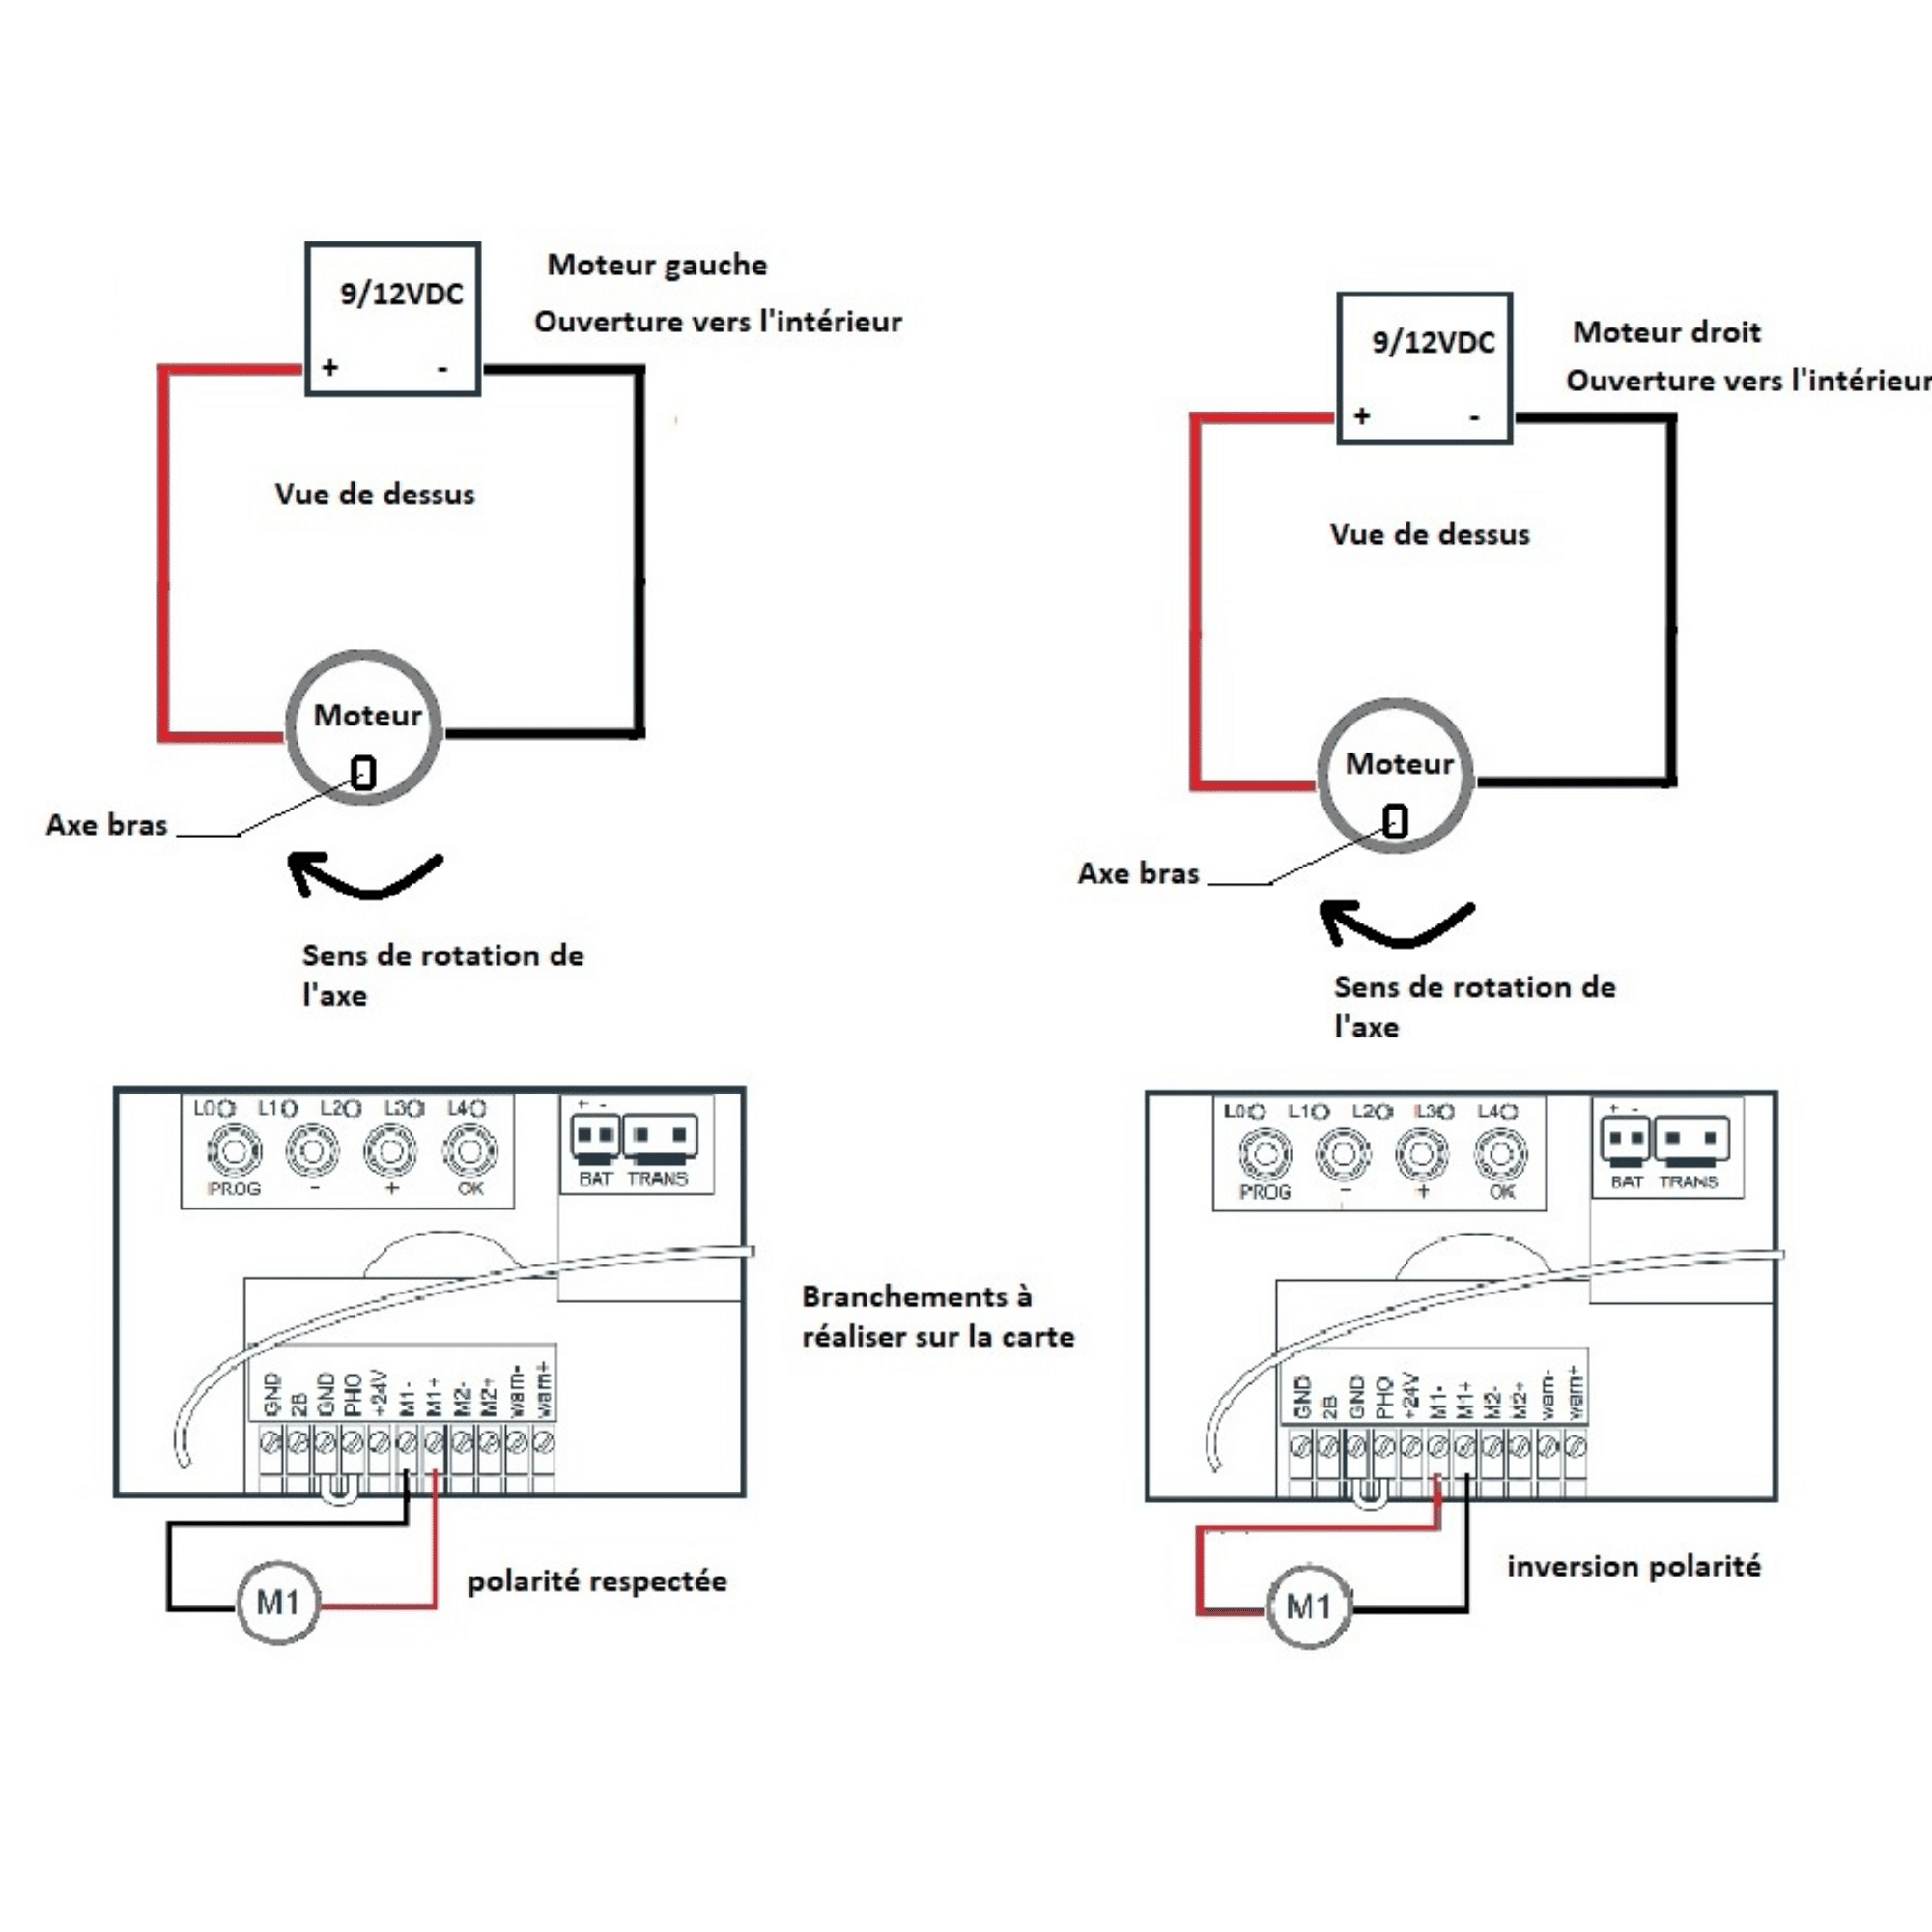
Before connection and installation on the pillar: use a 9V battery or a 12V battery to know the direction of rotation of the motor.

Connect the red motor lead to the battery +, and the black lead to the battery -.

  • If the motor shaft turns anti-clockwise :

If you position it on the left-hand side, reverse the polarity (red to -, black to +).

If positioned on the right-hand side : Maintain standard polarity (red to +, black to -)


Etape

Connect the red motor lead to the battery +, and the black lead to the battery -.

  • If the motor shaft turns clockwise :

If you position it on the left-hand side: Keep the standard polarity (red to +, black to -).

If positioned on the right-hand side : Reverse polarity (red to -, black to +)

3 - Manual control

Connect the motors to the board, paying no attention to polarity (always connect the leaf that opens first to M1)

Position the leaves halfway open, engaged.


Etape

Press the OK button on the card for 3s, then release the button (L4 flashes and L1 remains steady).

Hold down the PROG button for a few seconds; the M1 motor should open while this button is pressed. If it closes, reverse the polarity of M1.

Hold down the + button for a few seconds; the M2 motor should open when this button is pressed. If it closes, reverse the polarity of M2.

Exit manual control by briefly pressing the PROG and – keys simultaneously.


Keep in touch
Youtube Linkedin

Follow us on social networks

About Avidsen
  • Who are we?
  • Contact
  • Who are we?
  • Contact
Support
  • Avidsen Technical Support
  • Extel brand technical support
  • Philips technical support
  • Thomson Technical Support
  • Avidsen Technical Support
  • Extel brand technical support
  • Philips technical support
  • Thomson Technical Support
Avidsen group brand
  • Avidsen Brand
  • Extel Brand
  • Philips Brand
  • Thomson Brand
  • Avidsen Brand
  • Extel Brand
  • Philips Brand
  • Thomson Brand
Copyright 2025 © All rights reserved Avidsen
  • Legal Notice
  • Personal data protection policy
  • Terms and Conditions of Use
  • Legal Notice
  • Personal data protection policy
  • Terms and Conditions of Use
Thank you for your rating!
Thank you for your rating and comment!
This page was translated from: French
Please rate this translation:
Your rating:
Change
Please give some examples of errors and how would you improve them: