In this tutorial, we'll explain how to connect a 127153 camera via Bluetooth.
For simplicity's sake, the procedure should be carried out close to your Internet box ( recommended ).
Before connecting, please check that the camera is powered by its AC adapter and that it indicates every 10 seconds: “Please configure Wifi”.
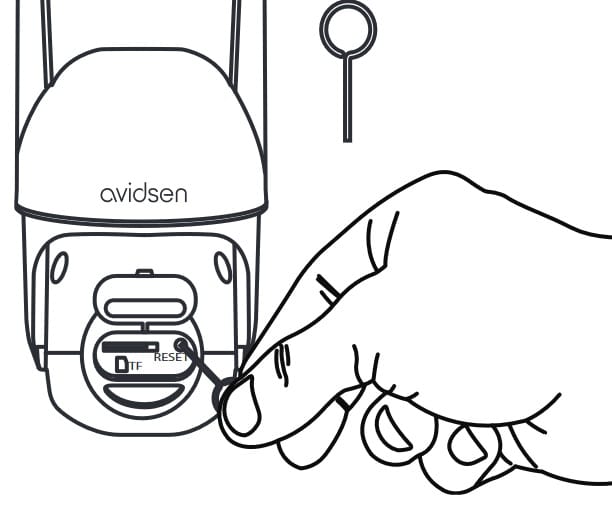
If this is not the case, please press the RESET button for 10 seconds until you hear “Reset camera successfully”.
Step 2: Bluetooth recognition
Open the AvidsenHome application
Click on then on “Add a device”.
The camera appears at the top of the addition banner.
Sf the camera is not seen by the application, reset it. If the camera still doesn’t appear, go to your smartphone’s authorizations and check that “Nearby devices” or “Visible to other devices” is enabled.
Click on “Add
Step 3: Enter the WIFI key
Check for a network name (SSID) to the right of the symbol
If the network name doesn’t appear, go to your smartphone’s authorizations and check that the “Position” or “Location information” authorization is granted.
Enter your Internet box’s WIFI key.
Click on “Next
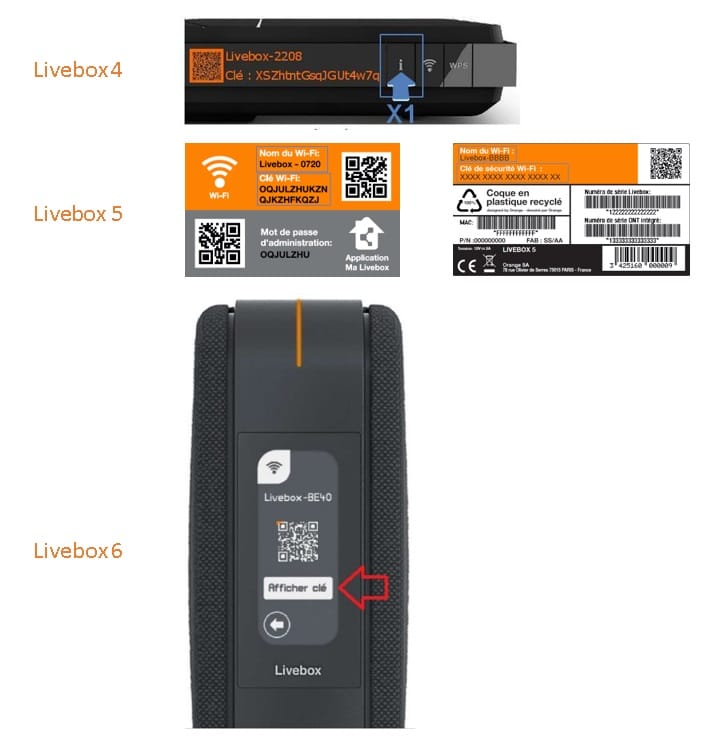
Step 3.1: Where to find the ORANGE operator WiFi key
LiveBox 4 = The wifi key is visible by clicking on the i on the front of your Livebox.
LiveBox 5 = The wifi key is located on the identification card and also on the label on the back of your Livebox.
LiveBox 6 = The wifi key is visible in the Wifi settings accessible from the front screen.
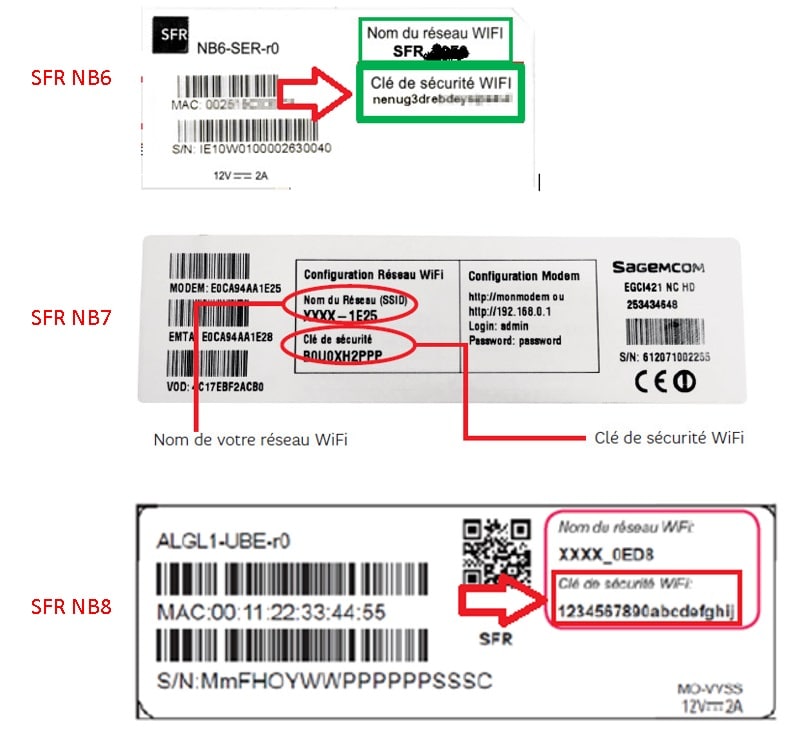
Step 3.2: Where to find the SFR operator Wifi key
SFR NB6/NB7/NB8 = The wifi key is located on the label on the back of your SFRBox.
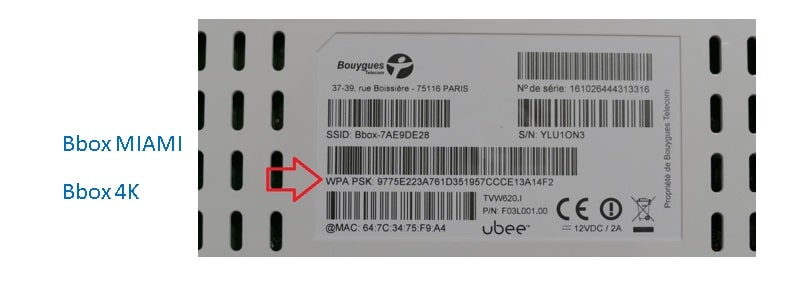
Step 3.3: Where to find the Bouygues operator Wifi key
Bbox Miami/ 4K = The wifi key is located on the label on the back of your Bbox. It’s the code on the WPA line.
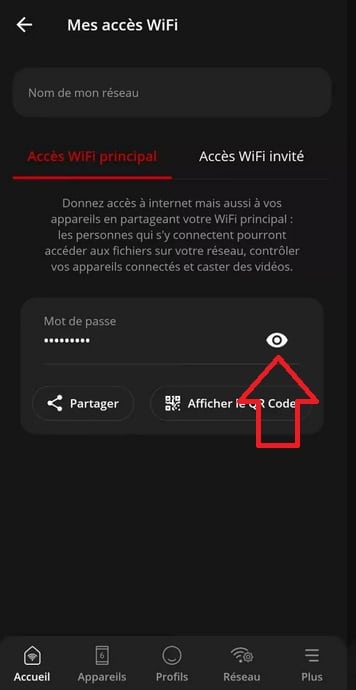
Step 3.4: Where to find the Freebox operator Wifi key
Valid for Freebox Delta/Pop/Révolution/mini/One/4G+/Crystal
Please download the “Freebox Connect” application available on the AppStore and Google Playstore.
Select your Freebox model and log in.
The wifi key for your Freebox is located in the “My Wifi Access” menu.
Step 4: Connecting the camera
Wait for the camera to come online.Ѕі lа саmérа а rеçu dеѕ іnfоrmаtіоnѕ, еllе аrrеrа dе раrlеrЕnсаѕ dе еrrеur dе ѕаіѕіе dе lа сlé wіfі оu dе wіfі іnсоmраtіblе, lа саmérа rеdémаrrеrа еt vоuѕ іndіquеrа “рlеаѕе соnfіg уоur Wіfі” Еn саѕ d’іnfоrmаtіоn vаlіdе, lе vоуаnt blеu ѕеrа fіхе еtа саmérа vоuѕ іndіquеrа “Wіfі соnnесtеd”
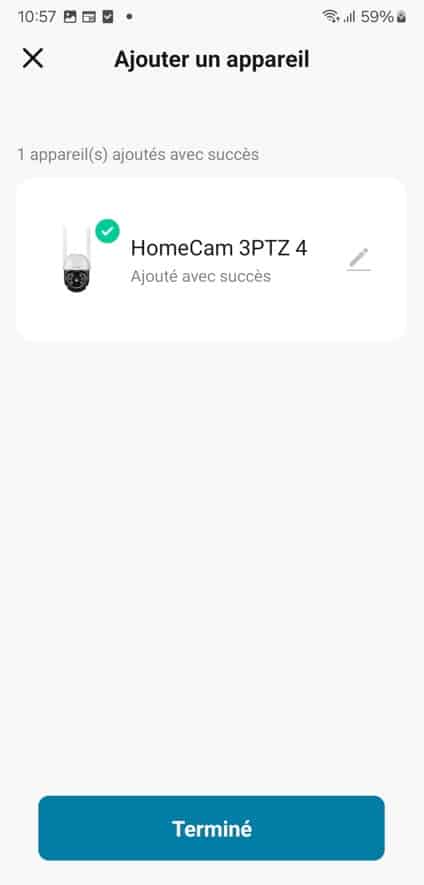
Step 5: Adding the camera
Once the camera is connected, this page appears on the application.
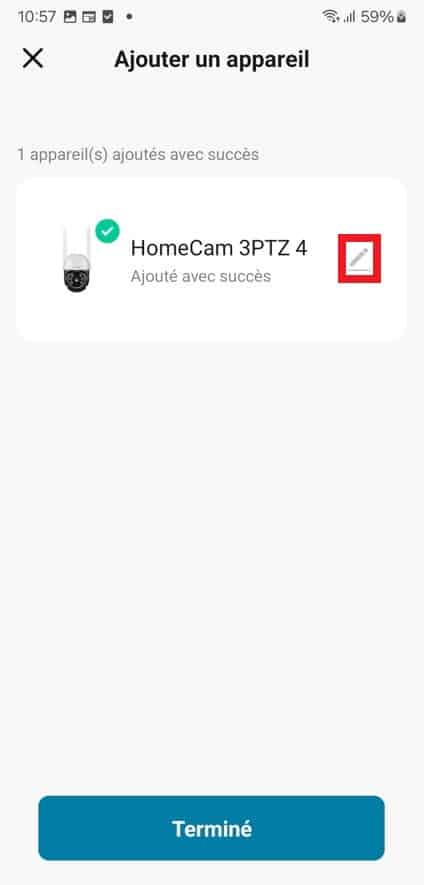
If you wish to rename the camera, click on the symbol
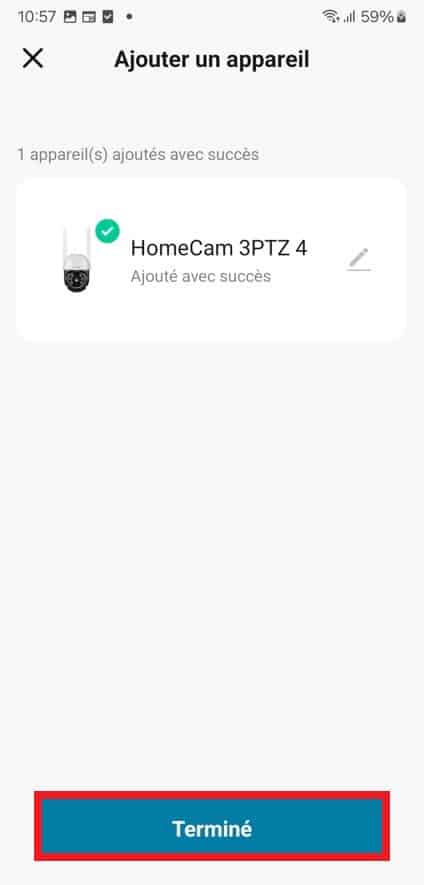
If you do not wish to rename the camera, click on “Done”.
1
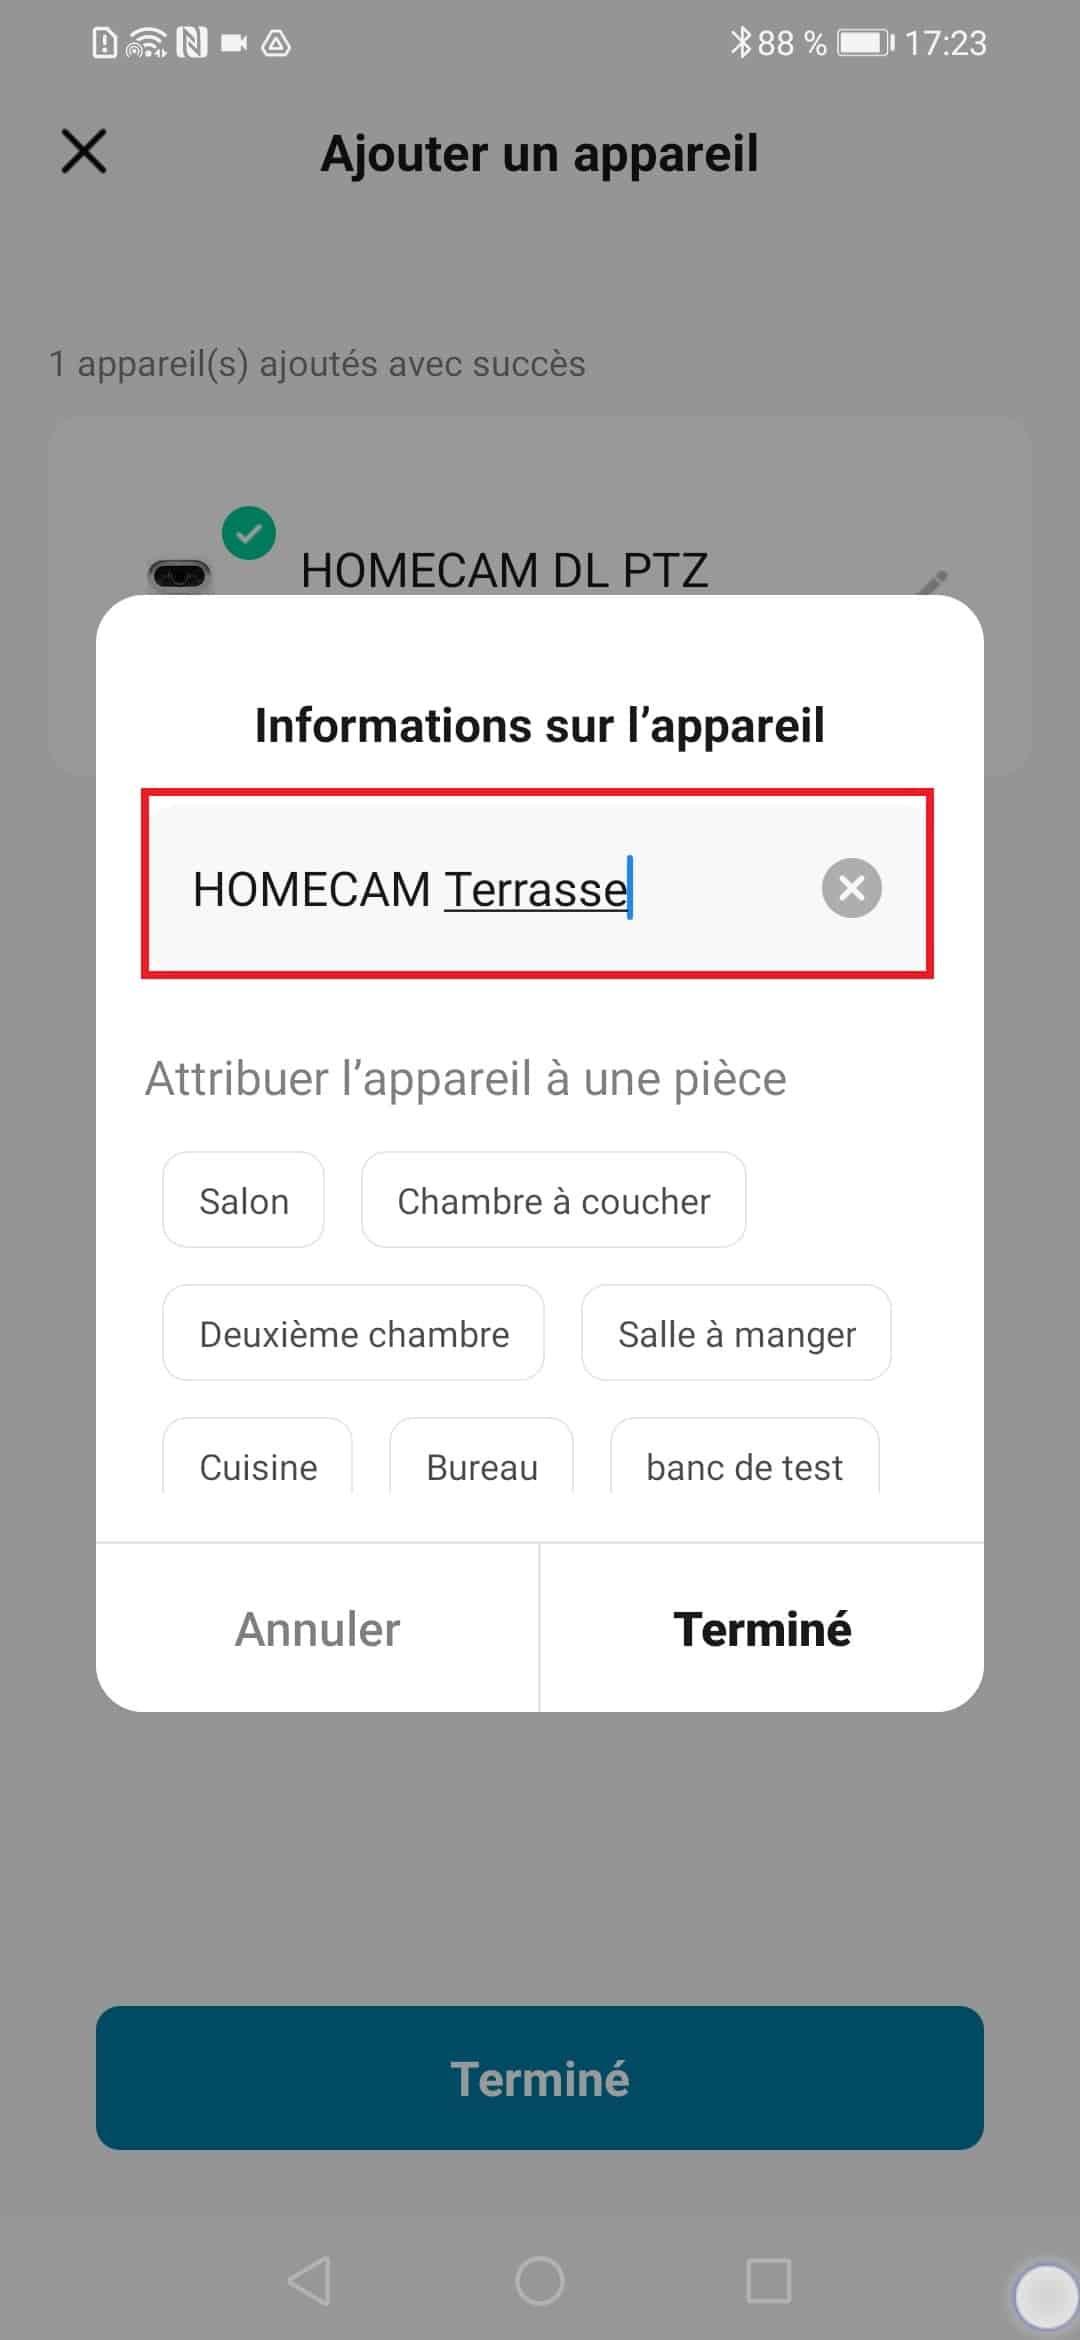
Rename the camera with the desired name.
1
Click on Done to finalize the camera’s upload to the application.
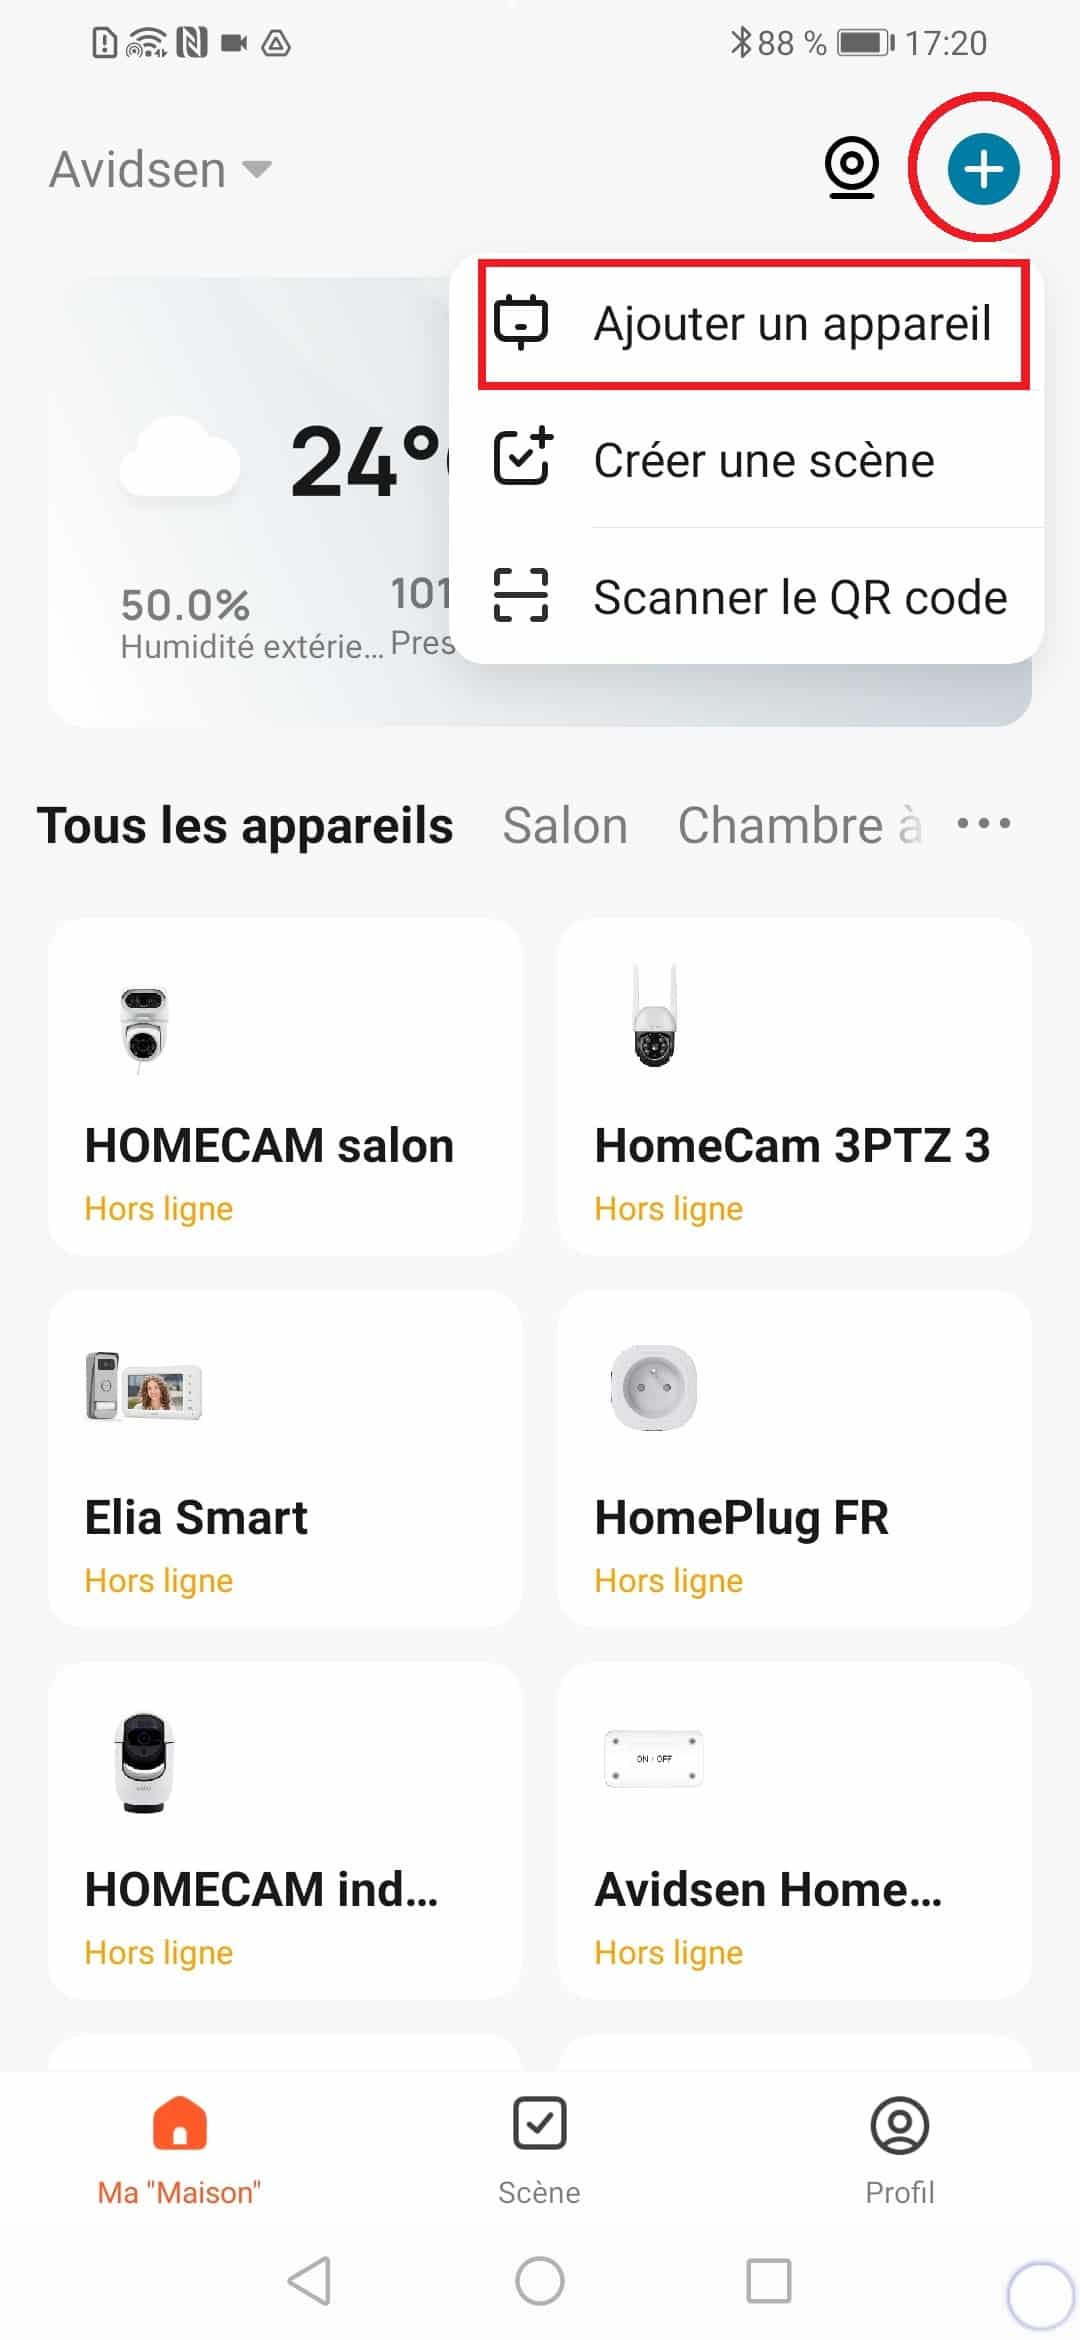
 then on “Add a device”.