Skip to content
  • English
    • French
    • Italian
    • Spanish
    • German
    • Dutch
    • Portuguese (Portugal)
    • Greek
    • Polish
  • English
    • French
    • Italian
    • Spanish
    • German
    • Dutch
    • Portuguese (Portugal)
    • Greek
    • Polish
Logo Avidsen
  • Products
    • Products
    • Avidsen Brand
    • Extel Brand
    • Philips Brand
    • Thomson Brand
  • Support
    • Tutorials on repair and use
    • Avidsen Technical Support
    • Extel brand technical support
    • Philips technical support
    • Thomson Technical Support
  • The Group
    • The Group
    • Contact
  • Ethic Company
  • Where to buy ?
\

Connecting a solar kit

  1. Home
  2. Connecting a solar kit

Connecting a solar kit

In this tutorial, we'll look at how to connect a solar kit

This tutorial is applicable for:

Avidsen - 114375 - Universal solar kit for gate motorisation
Difficulté : Good handyman
Temps nécessaire : 10 minutes
Nombre d’étapes : 4
Mise à jour : February 2025

Tutorial steps:

Foreword

The solar kit uses two 12V 7Ah lead-acid batteries.

Before using the motorization for the first time, allow the batteries to charge for at least 24 hours.

Pay close attention to connections. Always observe the correct polarity, otherwise you risk damaging the device.

Take care to avoid short circuits. Insulate wires when working at connection.

Step 1 Connecting the panel

Connect two wires to panel. Mark the + and – wires.

Then connect solar panel to the MPPT card in the solar kit cabinet, observing the correct polarity.

Battery connection

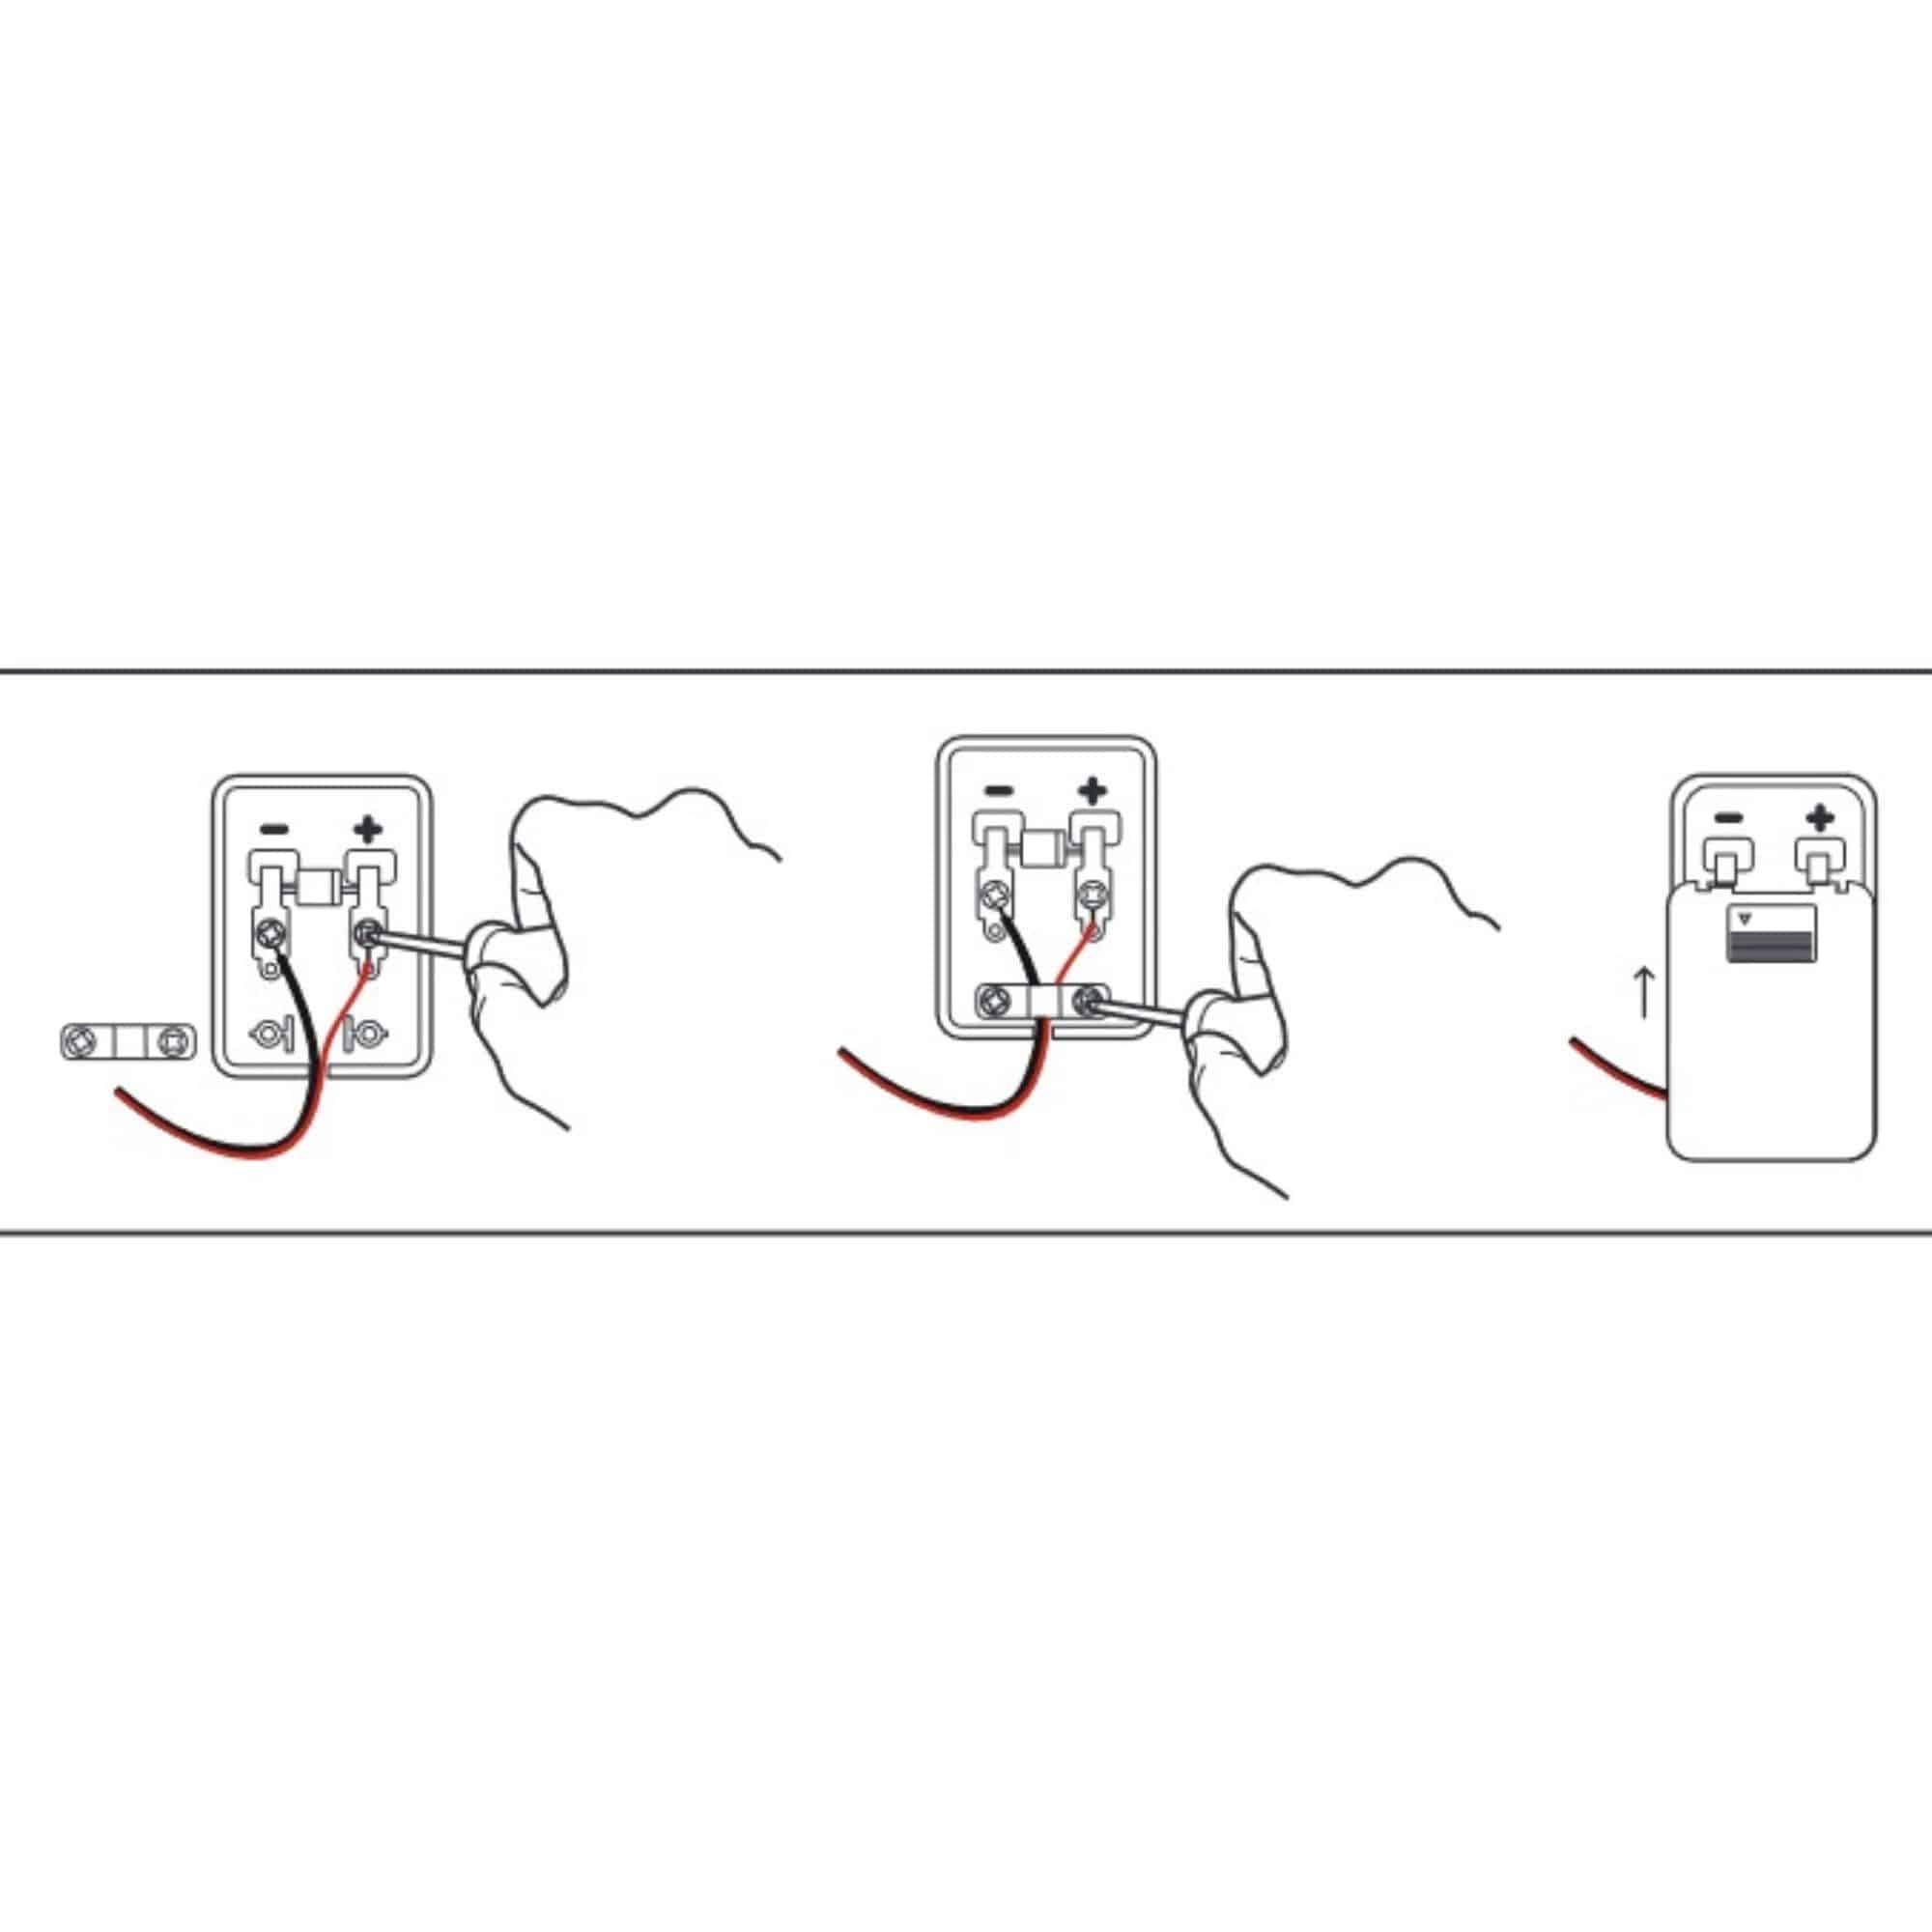
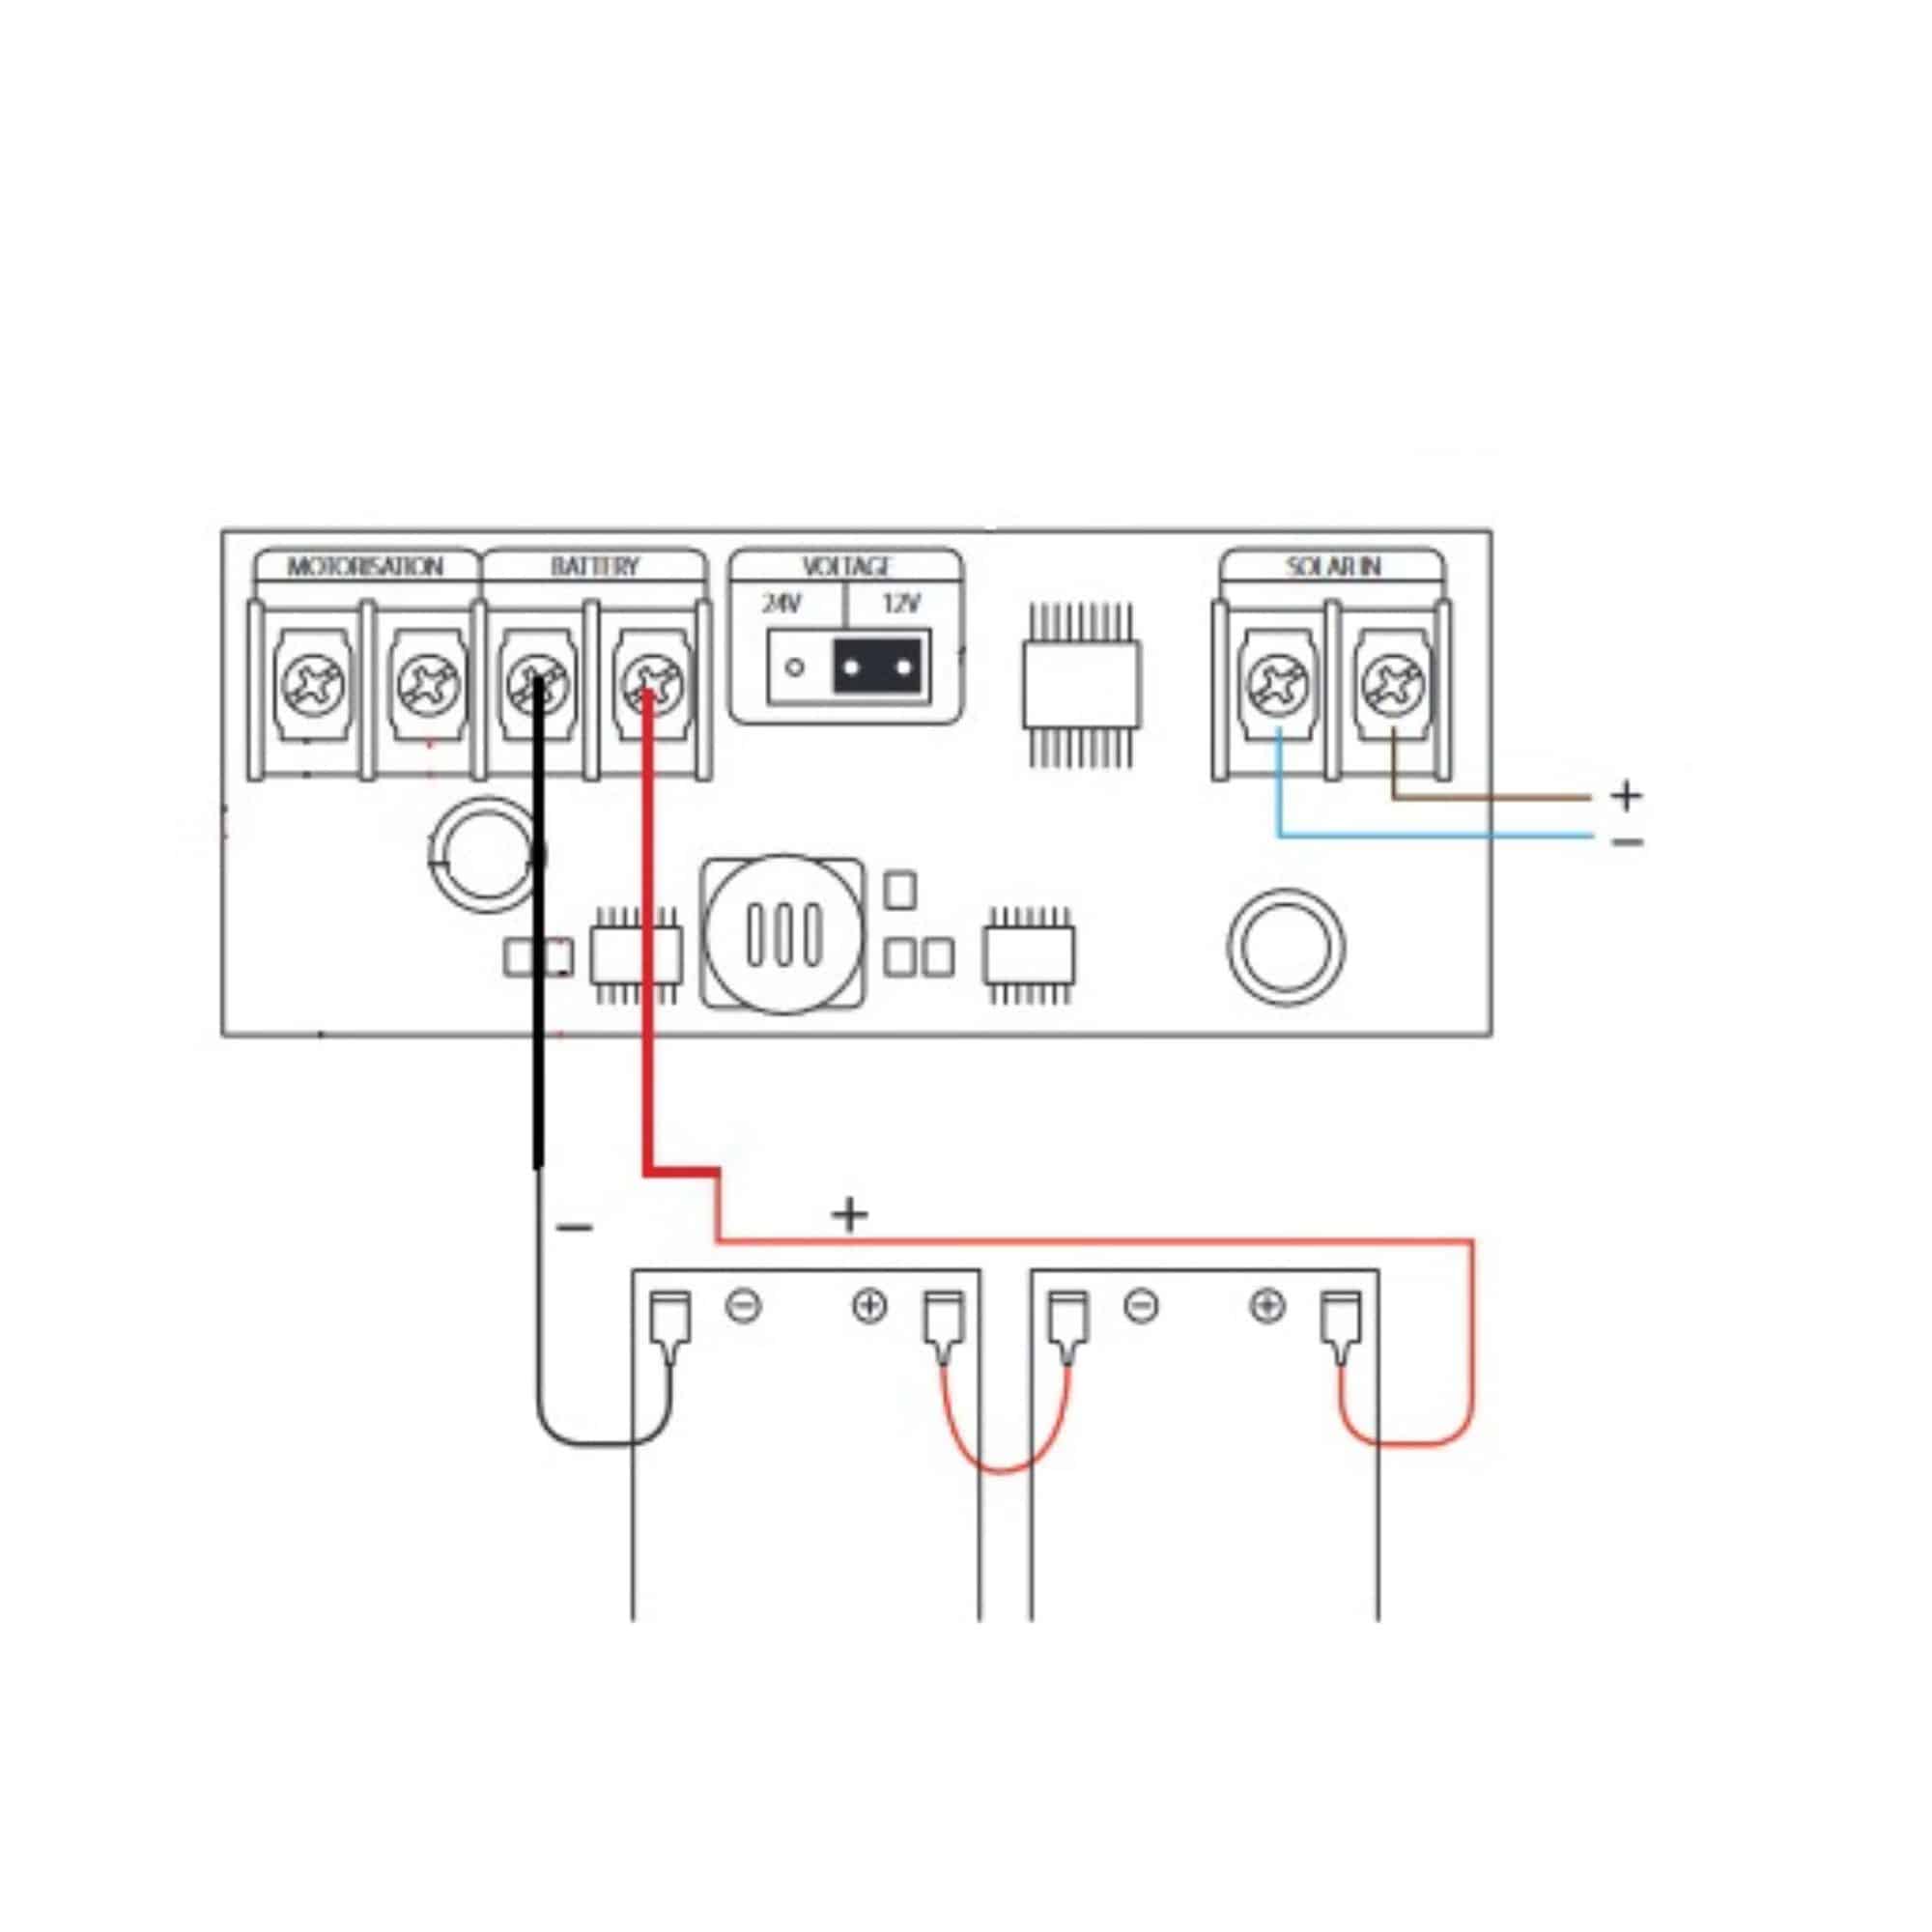
Please note that the batteries must be connected according to the supply voltage of your motorization.

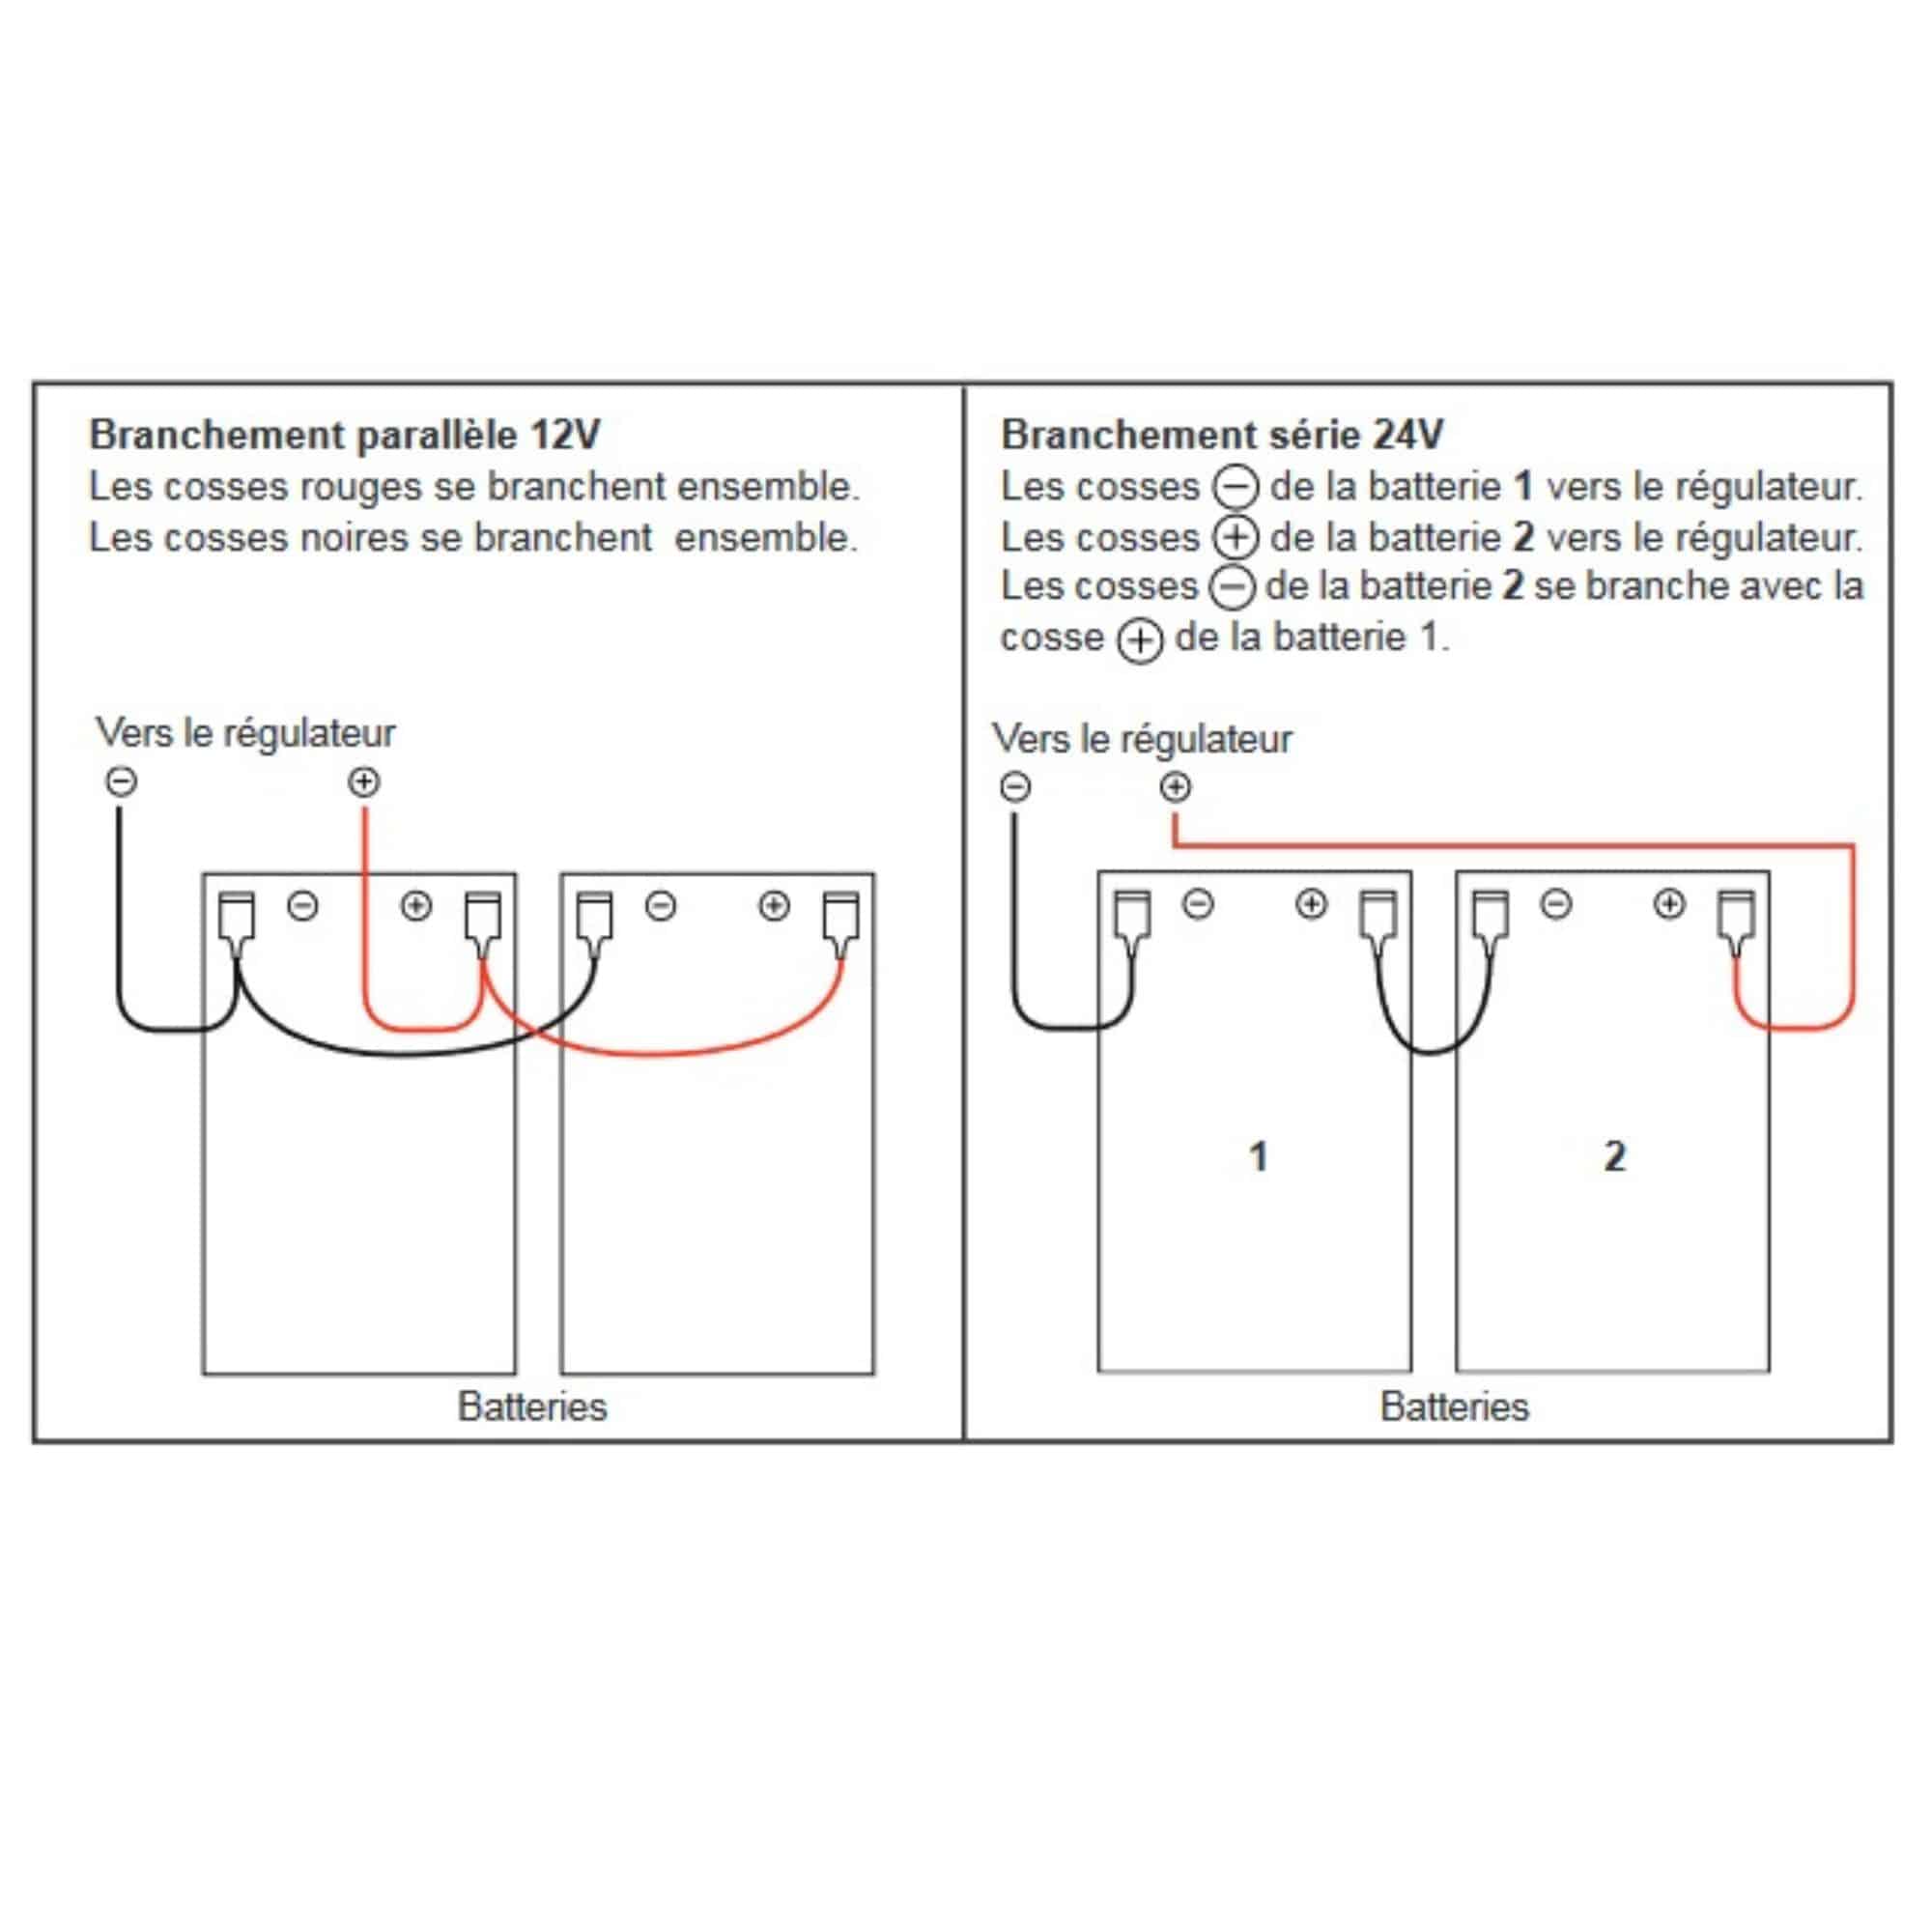
If the motorization is 12V, the batteries must be connected in parallel.

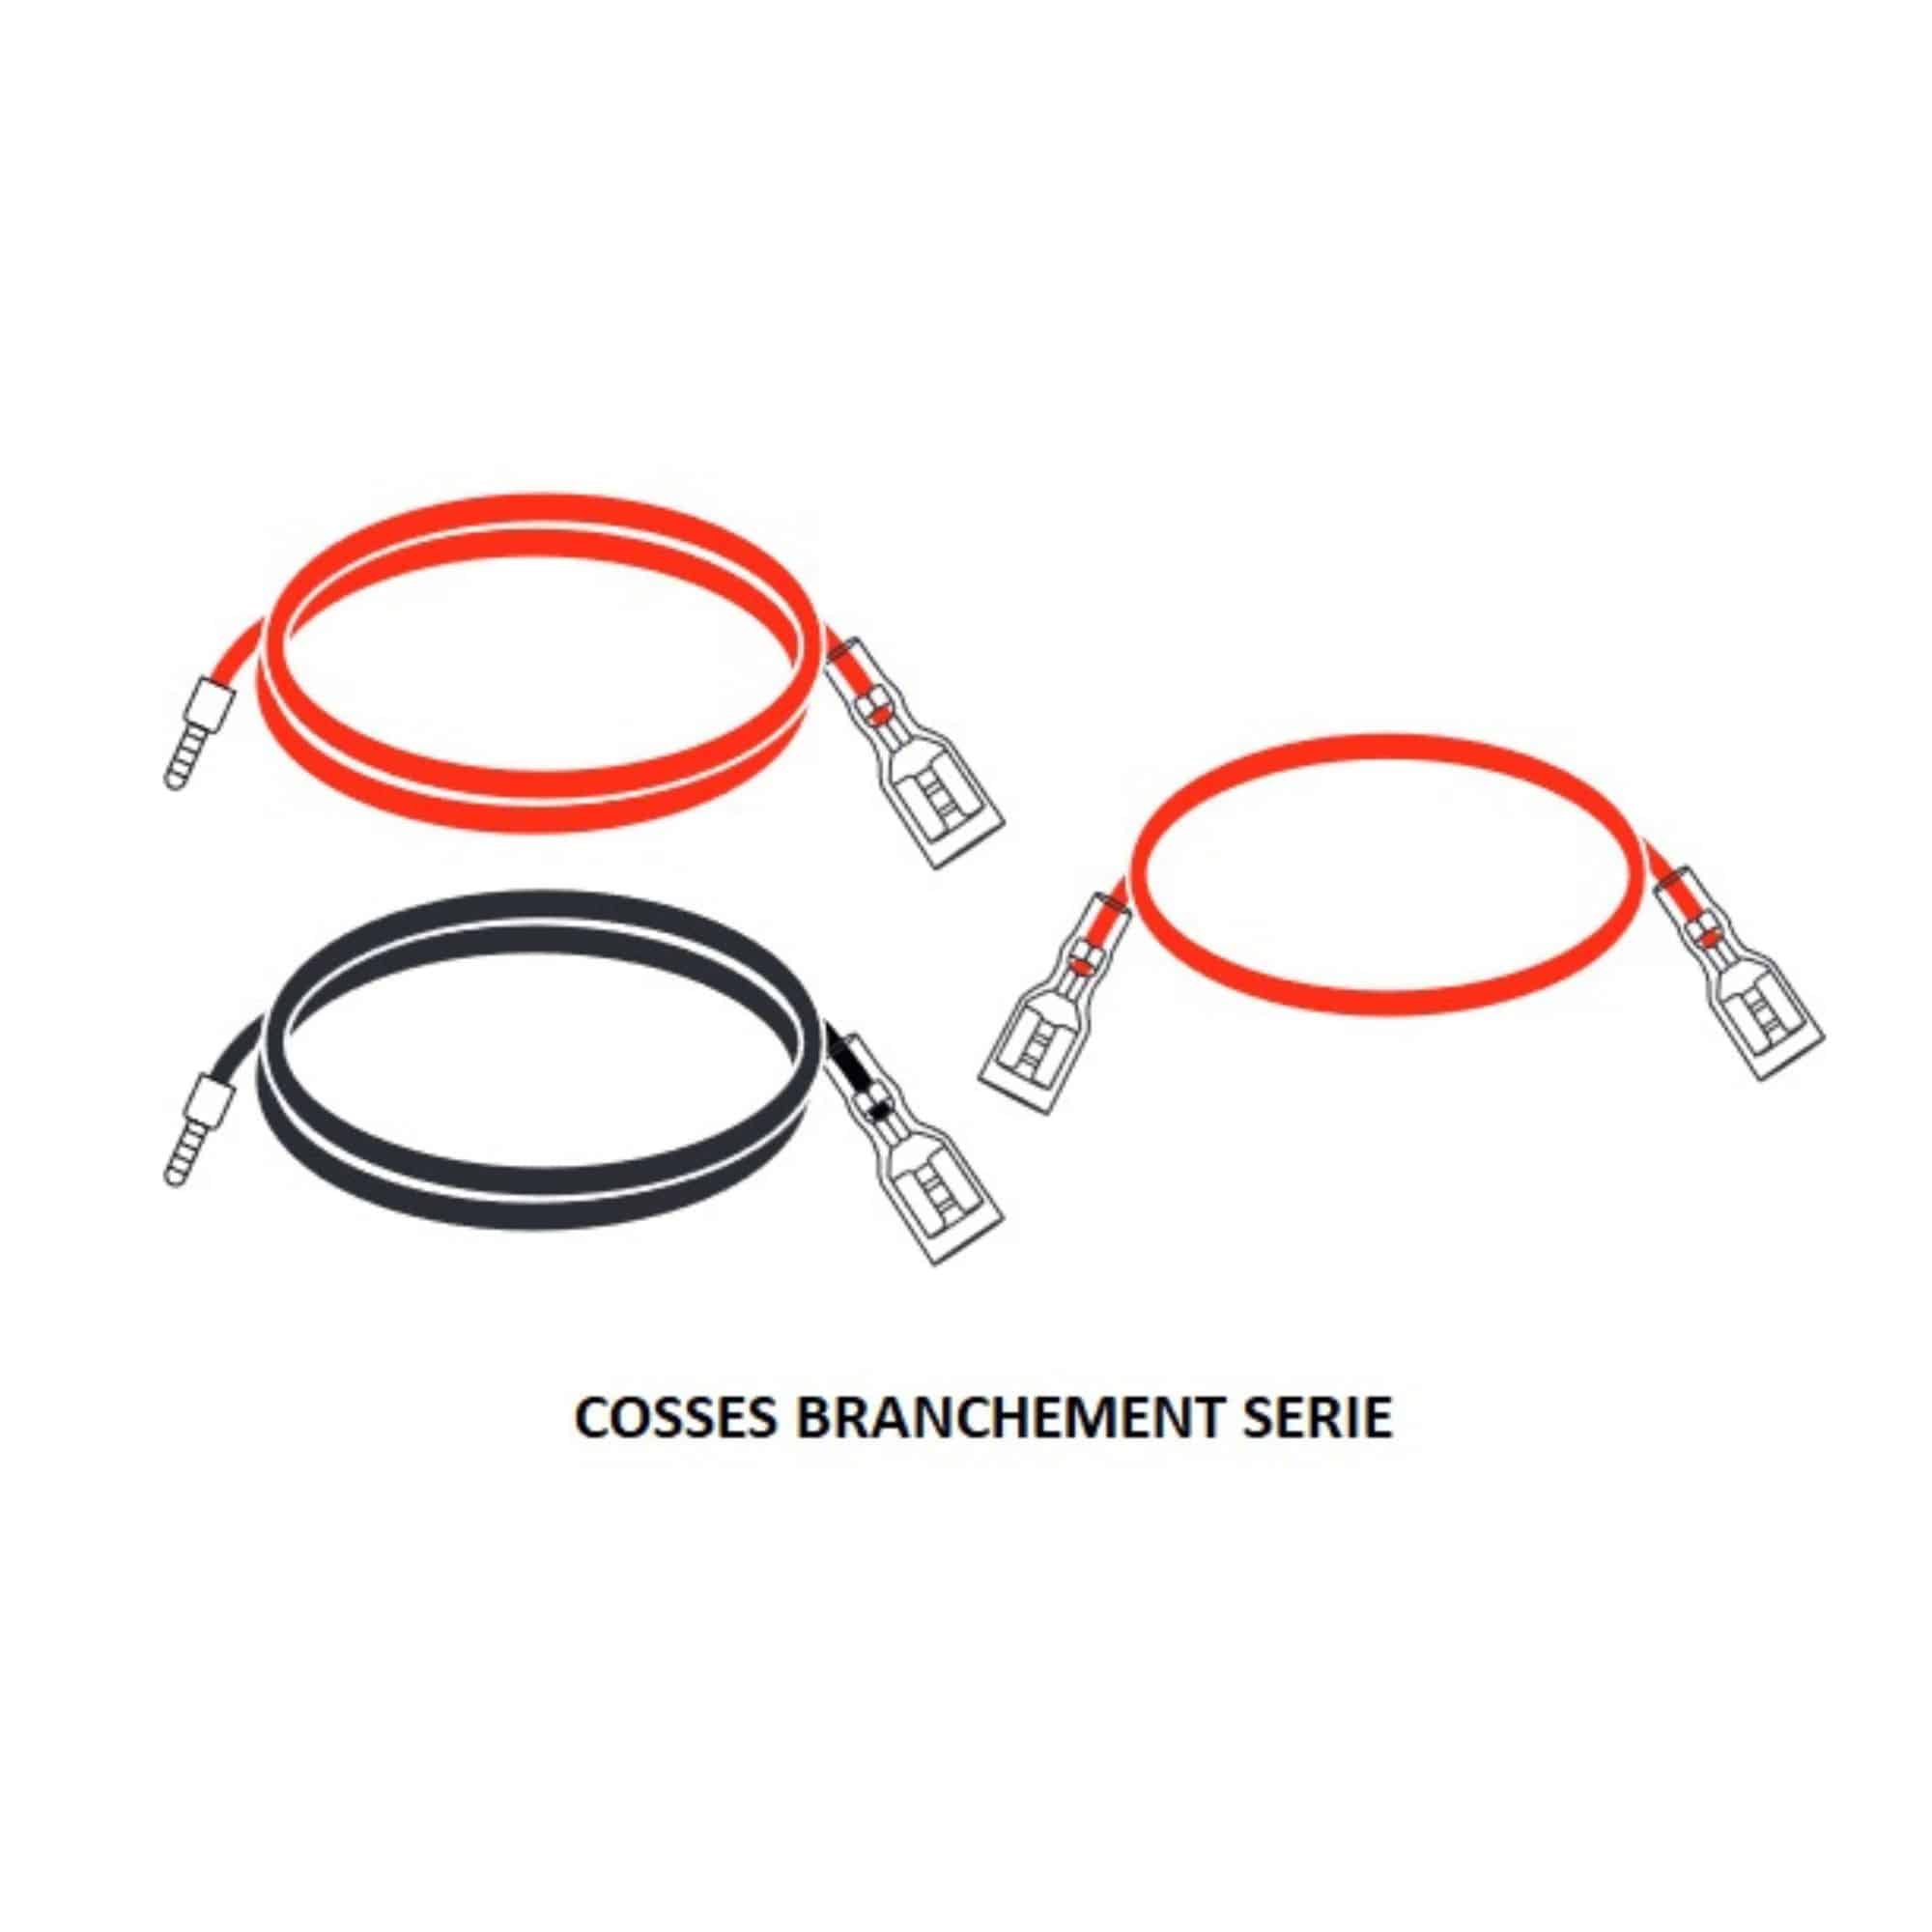
If the motorization is 24V, the batteries must be connected in series.

Today, all our motorizations are 24V.

connection 12V only concerns older motorizations.
This connection will not be covered in this tutorial.

Reminder

connection parallel 12V connectors opposite.

Reminder

connection 24V series terminals opposite.

Step 2 Connection to MPPT board

Once you have identified the type of connection, connect the + and – wires to the MPPT board.

Step 3 Connecting the supply wires

Connect two wires to the Motorization output on the MPPT board.

Connection to a CA2B9 24V board

For sliding motorization boards, connect the two “Motorization” output wires of the MPPT board directly to the SOL + SOL – input, observing the correct polarity.

Connection to an AVLO 24V card

For 24V swing gate operators, use the connector supplied with the operator.

It comes in a craft bag.


Use a domino to make a connection between the “Motorization” output cables of the MPPT board and the connector.

ATTENTION: Do not use the transformer’s terminal block 230V to make the connection.

Step 4 Connecting the batteries

Then connect the terminals to the batteries.

When the circuit is closed, at connection the last terminal, a spark may appear at the terminal. This is a normal phenomenon.

Keep in touch
Youtube Linkedin

Follow us on social networks

About Avidsen
  • Who are we?
  • Contact
  • Who are we?
  • Contact
Support
  • Avidsen Technical Support
  • Extel brand technical support
  • Philips technical support
  • Thomson Technical Support
  • Avidsen Technical Support
  • Extel brand technical support
  • Philips technical support
  • Thomson Technical Support
Avidsen group brand
  • Avidsen Brand
  • Extel Brand
  • Philips Brand
  • Thomson Brand
  • Avidsen Brand
  • Extel Brand
  • Philips Brand
  • Thomson Brand
Copyright 2025 © All rights reserved Avidsen
  • Legal Notice
  • Personal data protection policy
  • Terms and Conditions of Use
  • Legal Notice
  • Personal data protection policy
  • Terms and Conditions of Use
Thank you for your rating!
Thank you for your rating and comment!
This page was translated from: French
Please rate this translation:
Your rating:
Change
Please give some examples of errors and how would you improve them: